Creating Positive Affirmation Artist Trading Cards with Trailblazer
Hi All,
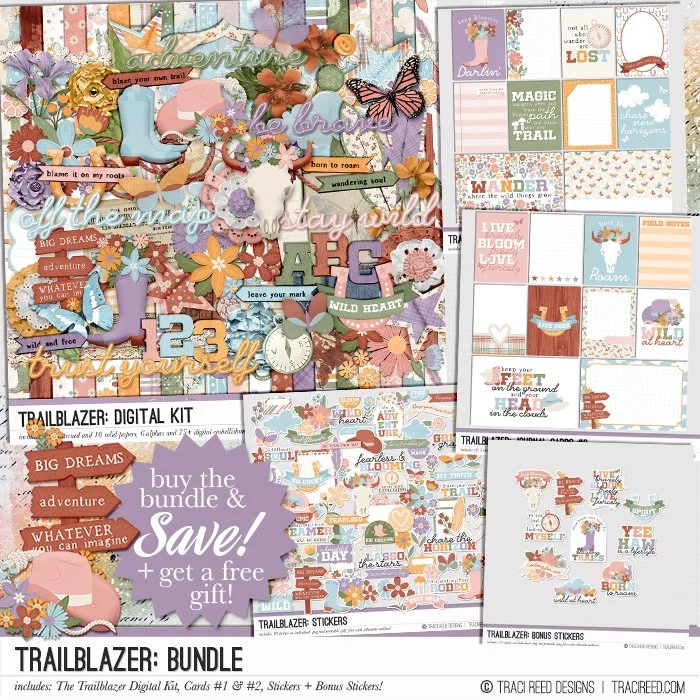
I was super excited when I first saw the “Trailblazer” collection… the colour palette, the distressing and the motifs … oh yes! I also love the sentiments in this collection … in fact all of Traci’s collections have sentiments on the cards & die cuts that are incredibly meaningful and empowering.
I am due to have surgery this week and wanted something beautiful, meaningful and inspirational to take into the hospital with me. The wild-hearted sentiments in “Trailblazer” inspired me to create something for myself… Positive Affirmation cards. Let me show you how in case you would like to do something similar…
Step One - Create Card Blanks
I decided I wanted my cards to have a white border around the patterned paper so cut 13 card blanks first. These are 3.5” wide & 5” tall. I rounded the edges with a ¼” corner rounder.
I wanted to embrace the distressed look of the collection so inked the edges of these blanks with Antique Linen Distress Ink.
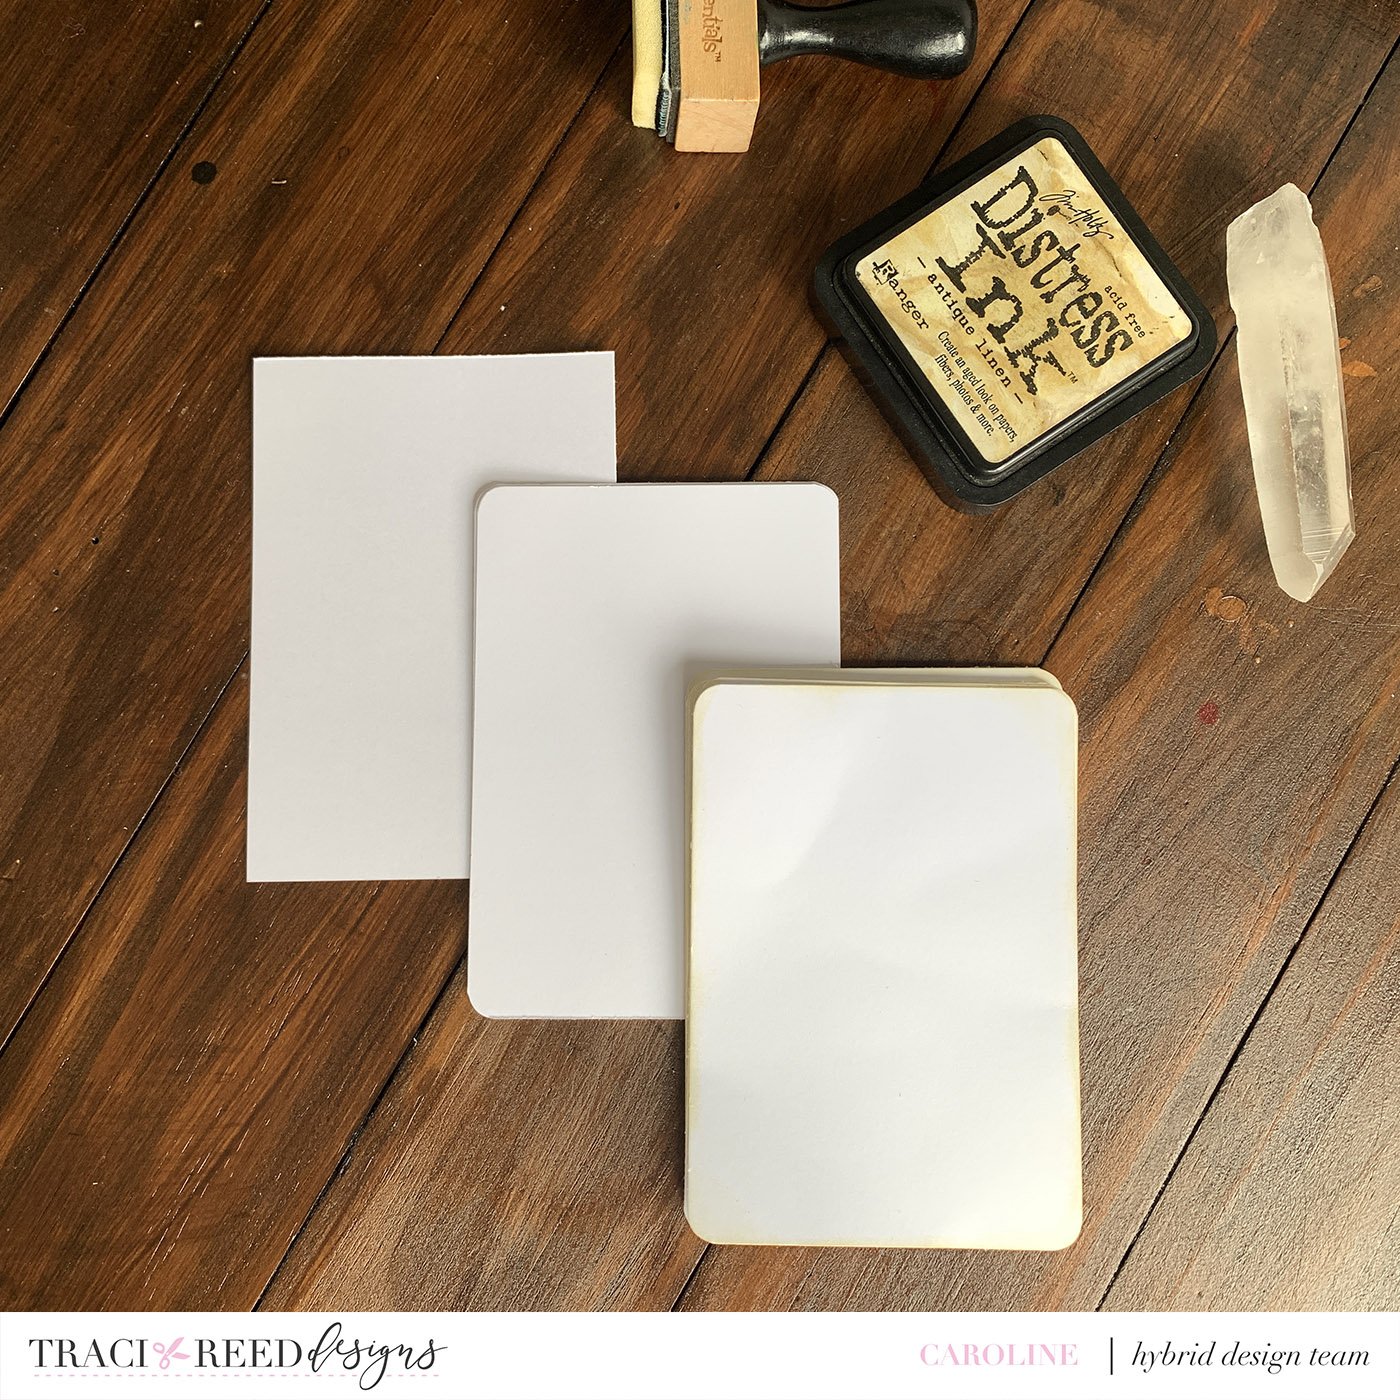
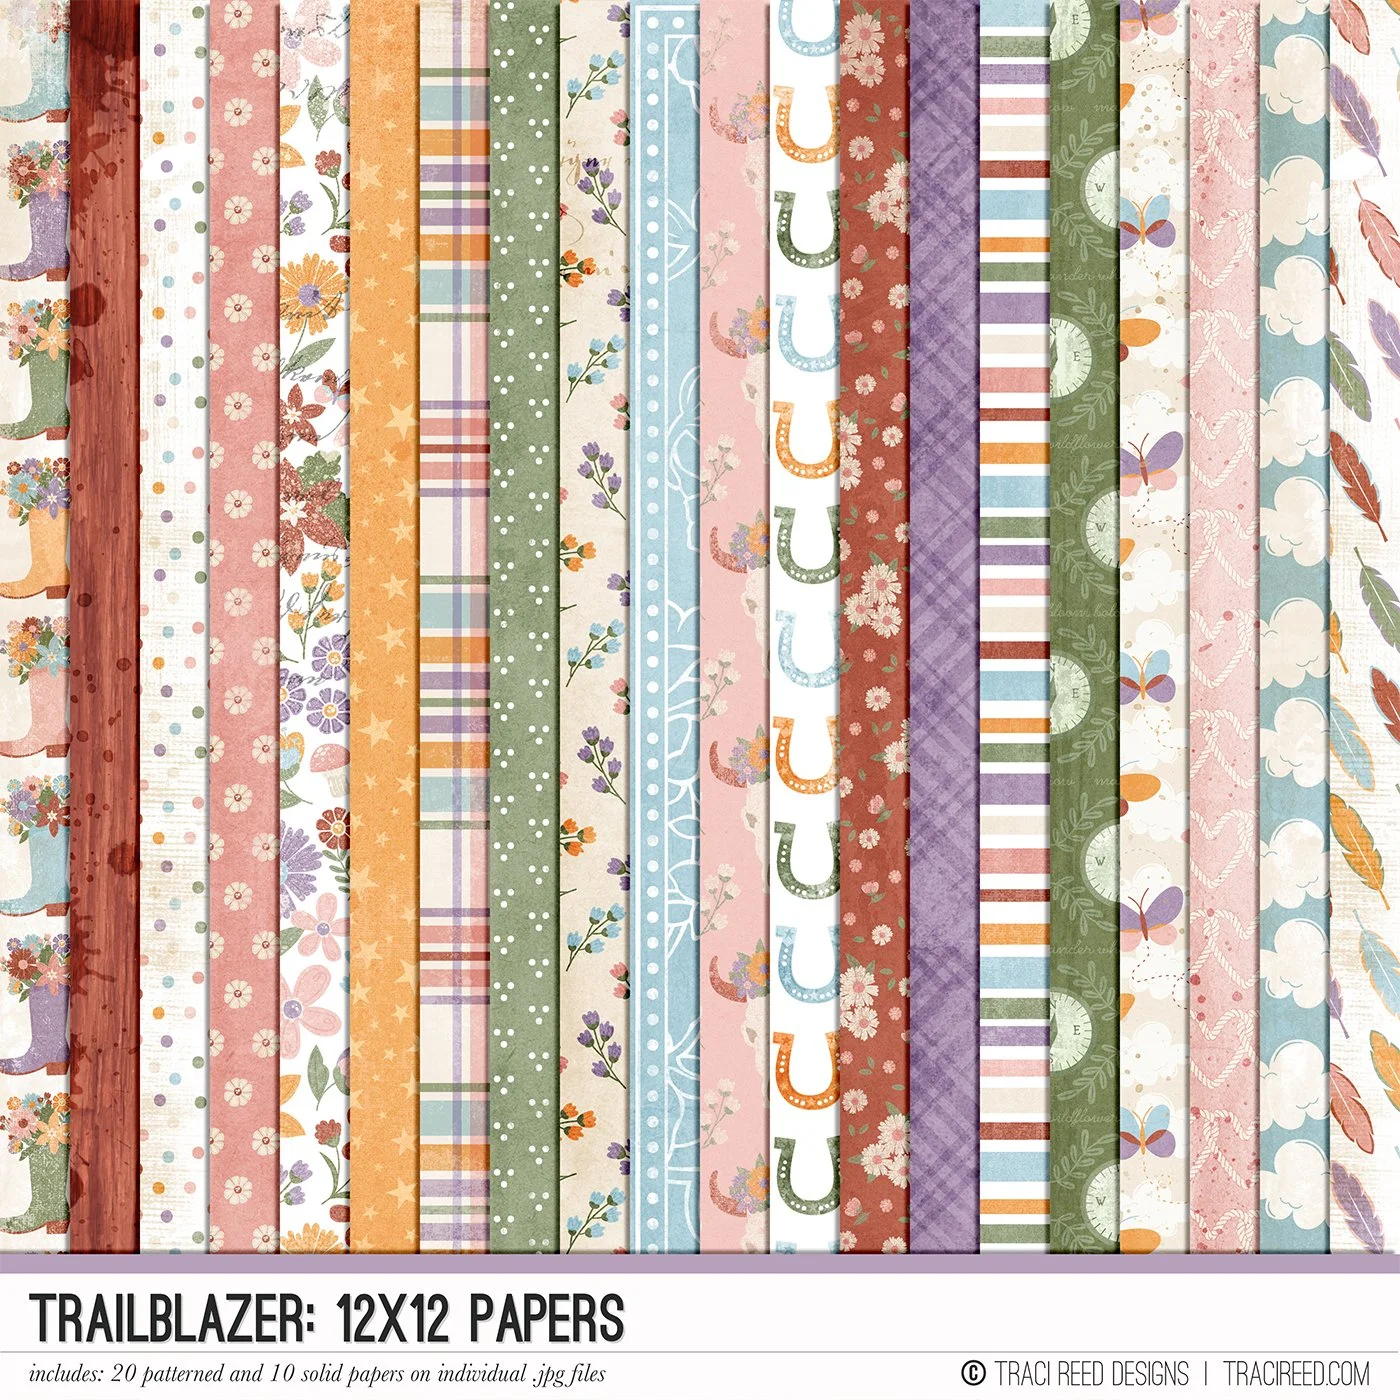
I then chose my patterns from the papers in the collection, cut these to be 3.25” x 4.75” & again inked the edges.
I decided I wanted to enhance the gorgeous distressing that is part of this collection so added some additional ink splatters and light background stamping here and there. You can completely miss this step if you want a faster method, “Trailblazer” has incredible textures built into the papers for you.
Step Two - Plan the Process
At this stage I knew that I wanted each of my cards to have lots of layers, a sentiment from the collection to expand the depth of my affirmation and at least one floral or other icon from the die cut pack.
I went through the journal spots and journal cards first to choose a foundation to bridge my background pattern and all of that goodness.
Next I added one sentiment, motifs and ribbons to each of the card piles to limit my choices when I started the creative play. This stage really helps me to drop in to my heart and enjoy the creative process without having to get into my head and make too many decisions!

Step Three - Prepare my Affirmations
I created a PDF of my affirmations using a cute Typewriter font.
The words were printed at font size 14 and I left a double space between the lines so I could cut thin strips for my focal words.

Step Four - Creative Play
Now for the fun part - I moved the piles aside and brought one at a time on to my desk.
I started with the next largest layer (the journal card or spot that will hold my affirmation) and simply layered up from there.
At this point I only used my normal adhesive as things are going to get VERY messy in a short while when I add my affirmations to the cards!

Step Five - Bring the pieces together
First I adhered my creative cards to those white card blanks. This gave them that white border I wanted and made them sturdier.
Now…this is the messy part!! I work with Mod Podge for this technique as I love how thick it is and the finish it gives my cards. If you don’t have that you could work with PVA glue, or simply use your normal adhesive too.
I cover the WHOLE card with alot of mod podge … alot! The fabric especially if I am using ribbons as it secures it down and also makes it harden like card itself)
Then I added the affirmation strips to the focal area on each card, and made sure to cover those with mod podge too.
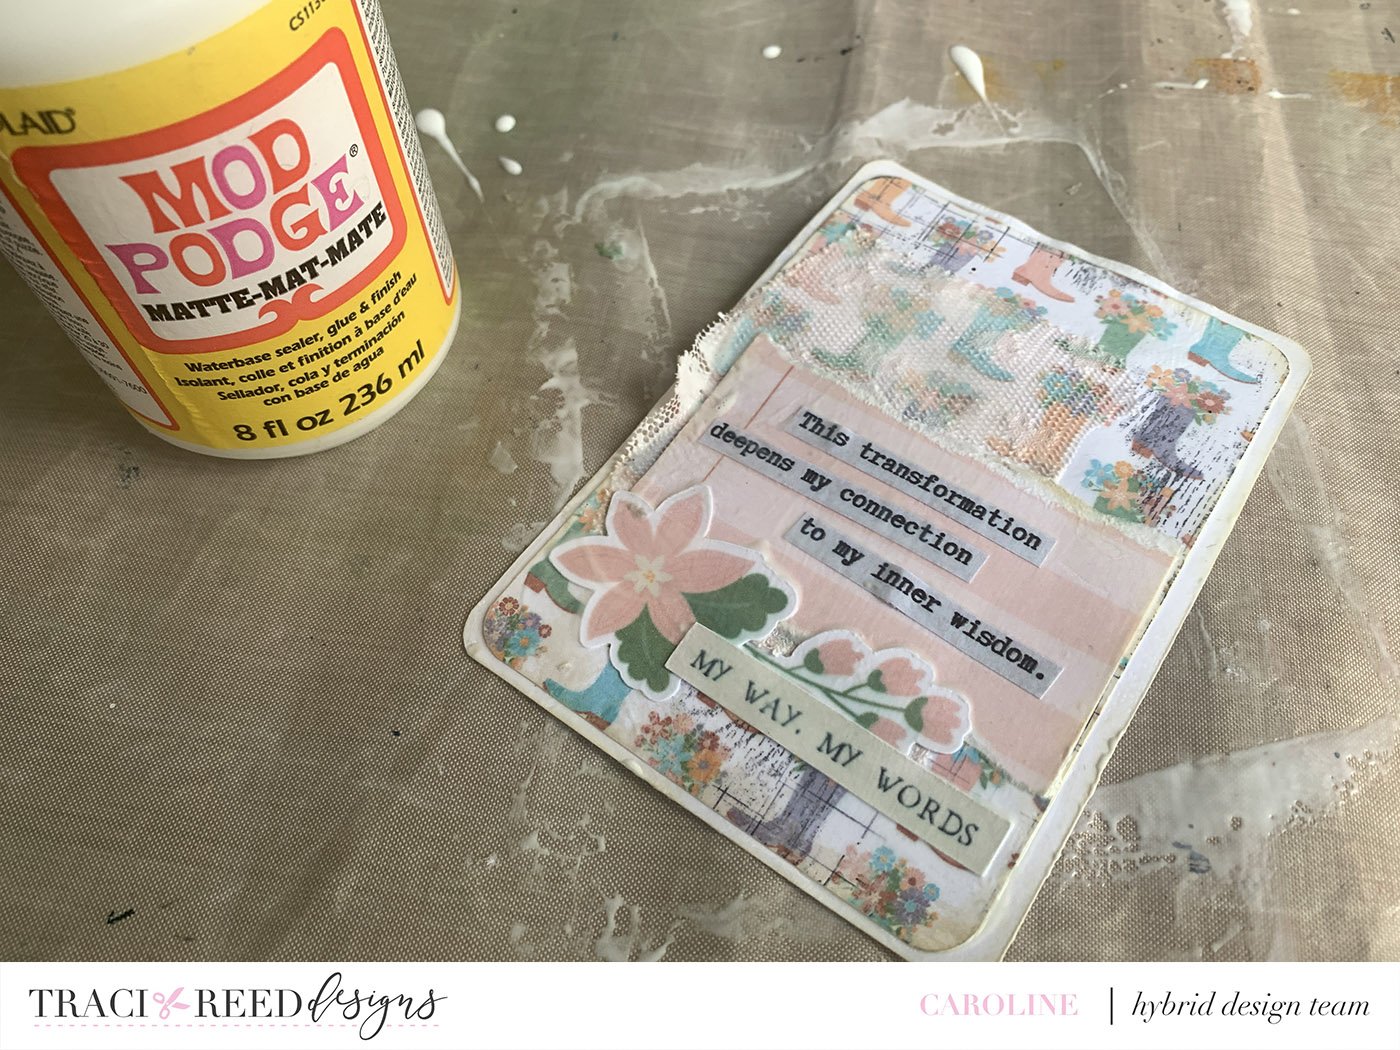
I had stamped my background stamping with Archival Ink so that didn’t run. My papers are home printed but the ink didn’t lift with the mod podge either. The only thing that did smoosh abit was the Distress Ink from the edges, but I had expected that and I liked the look.
Finally … to practice patience and wait for these to dry!

Step Six - More Creative Play
When the cards were dry that could certainly have been it, they looked so pretty and were nice and sturdy.
I decided I wanted to add in another mixed media layer and some additional distressing and so brought in the white gesso to add touches here and there.
I only smudged it on with my finger here and there - my intention with this stage was to highlight any textures in my ribbons and also soften any stamping that was looking a little stark.
I’m so happy I added this extra step in, but you could miss this out if you don’t like the additional distressed look

Step Seven - Add sparkle
Finally, I decided to add in a bit of sparkle to each of the cards with a gold mist.
The fine droplets give a general shimmer to the cards that only turns gold in certain lights .
I love the addition of this sparkle that brings a little extra magic into some very meaningful cards!
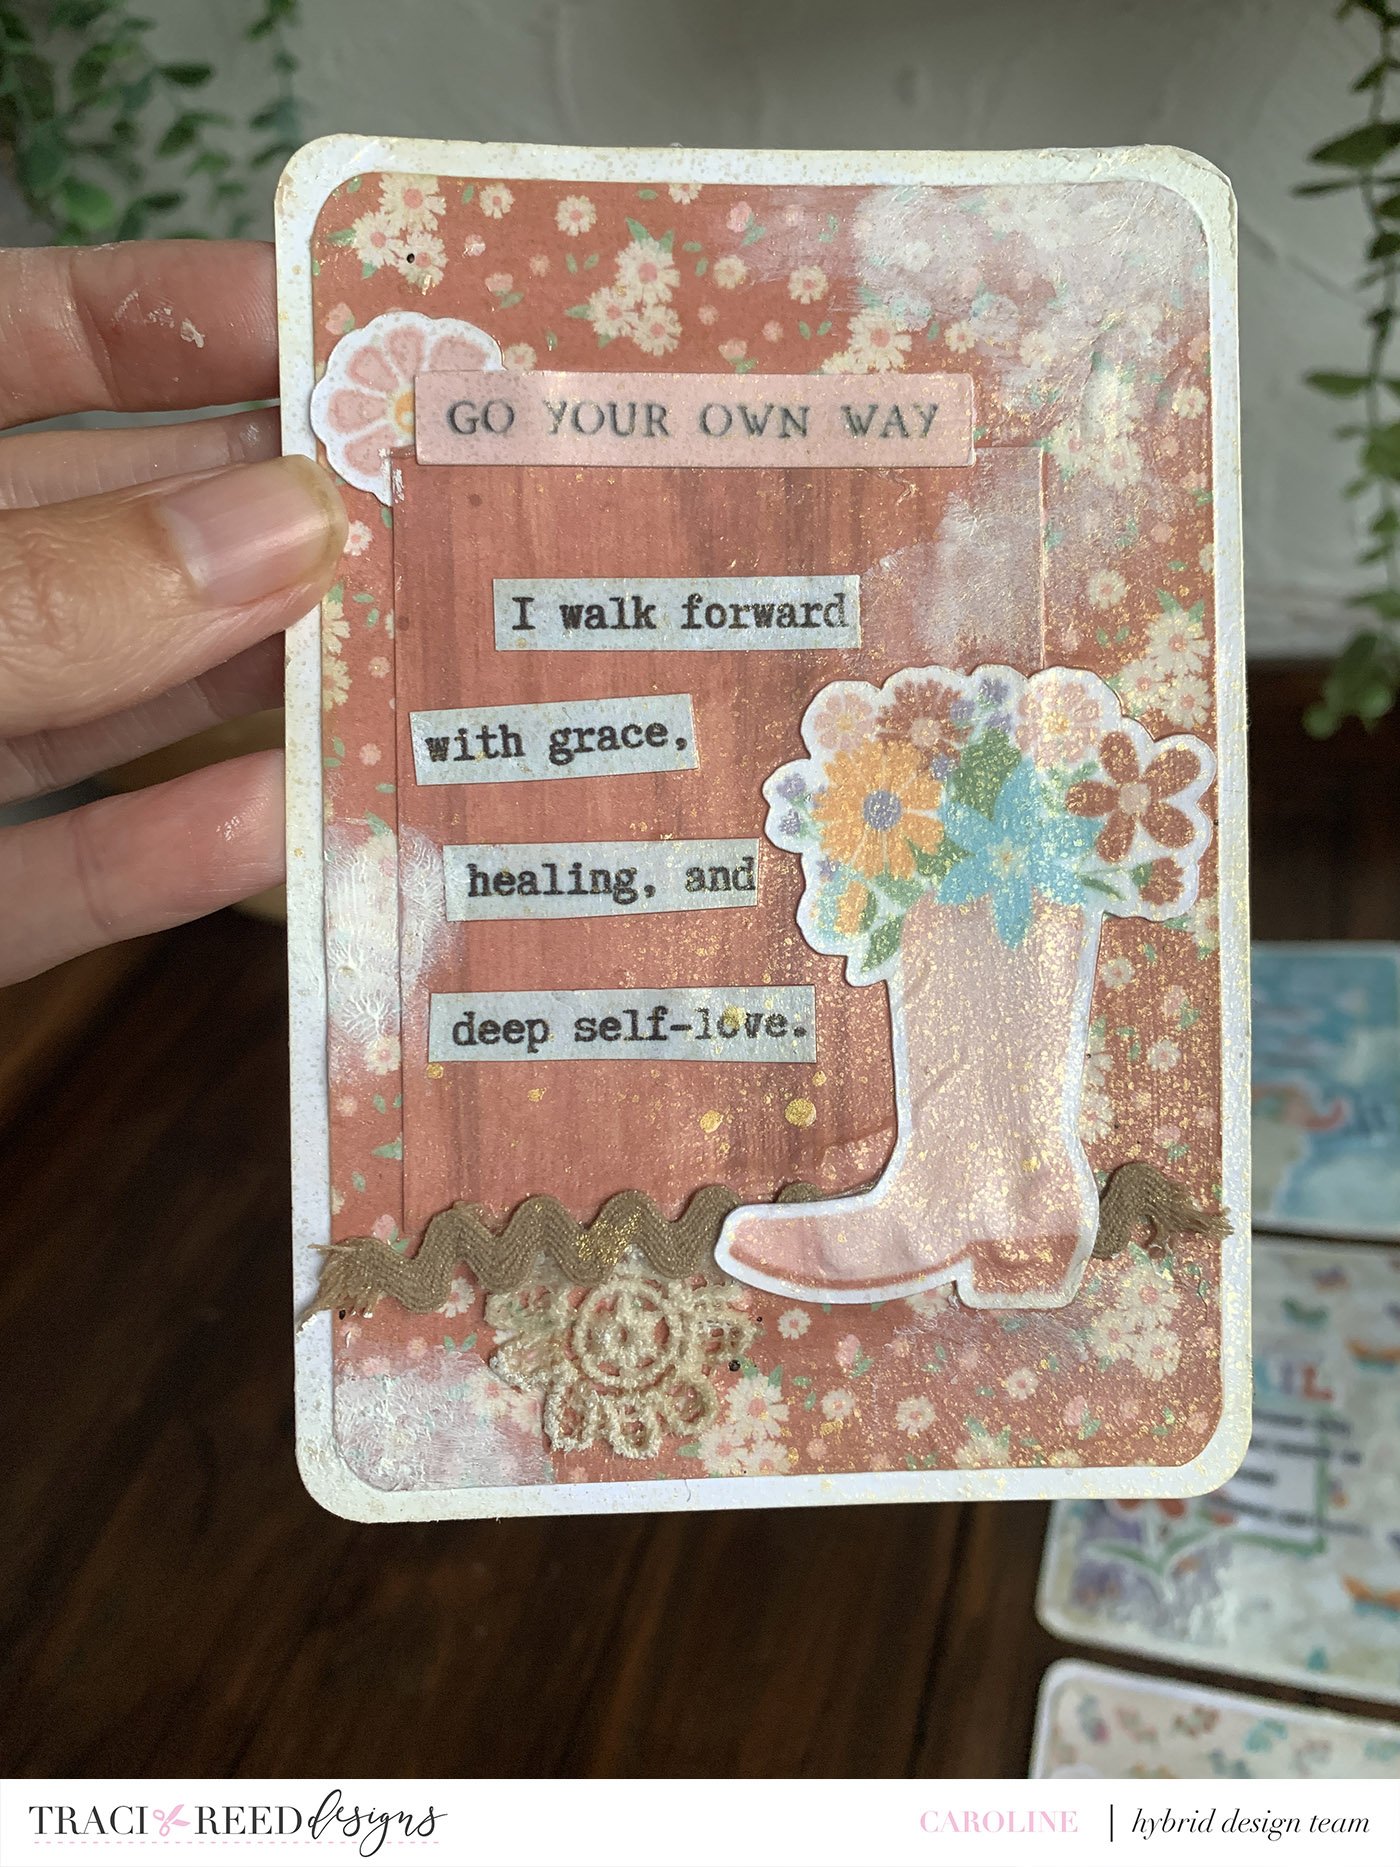
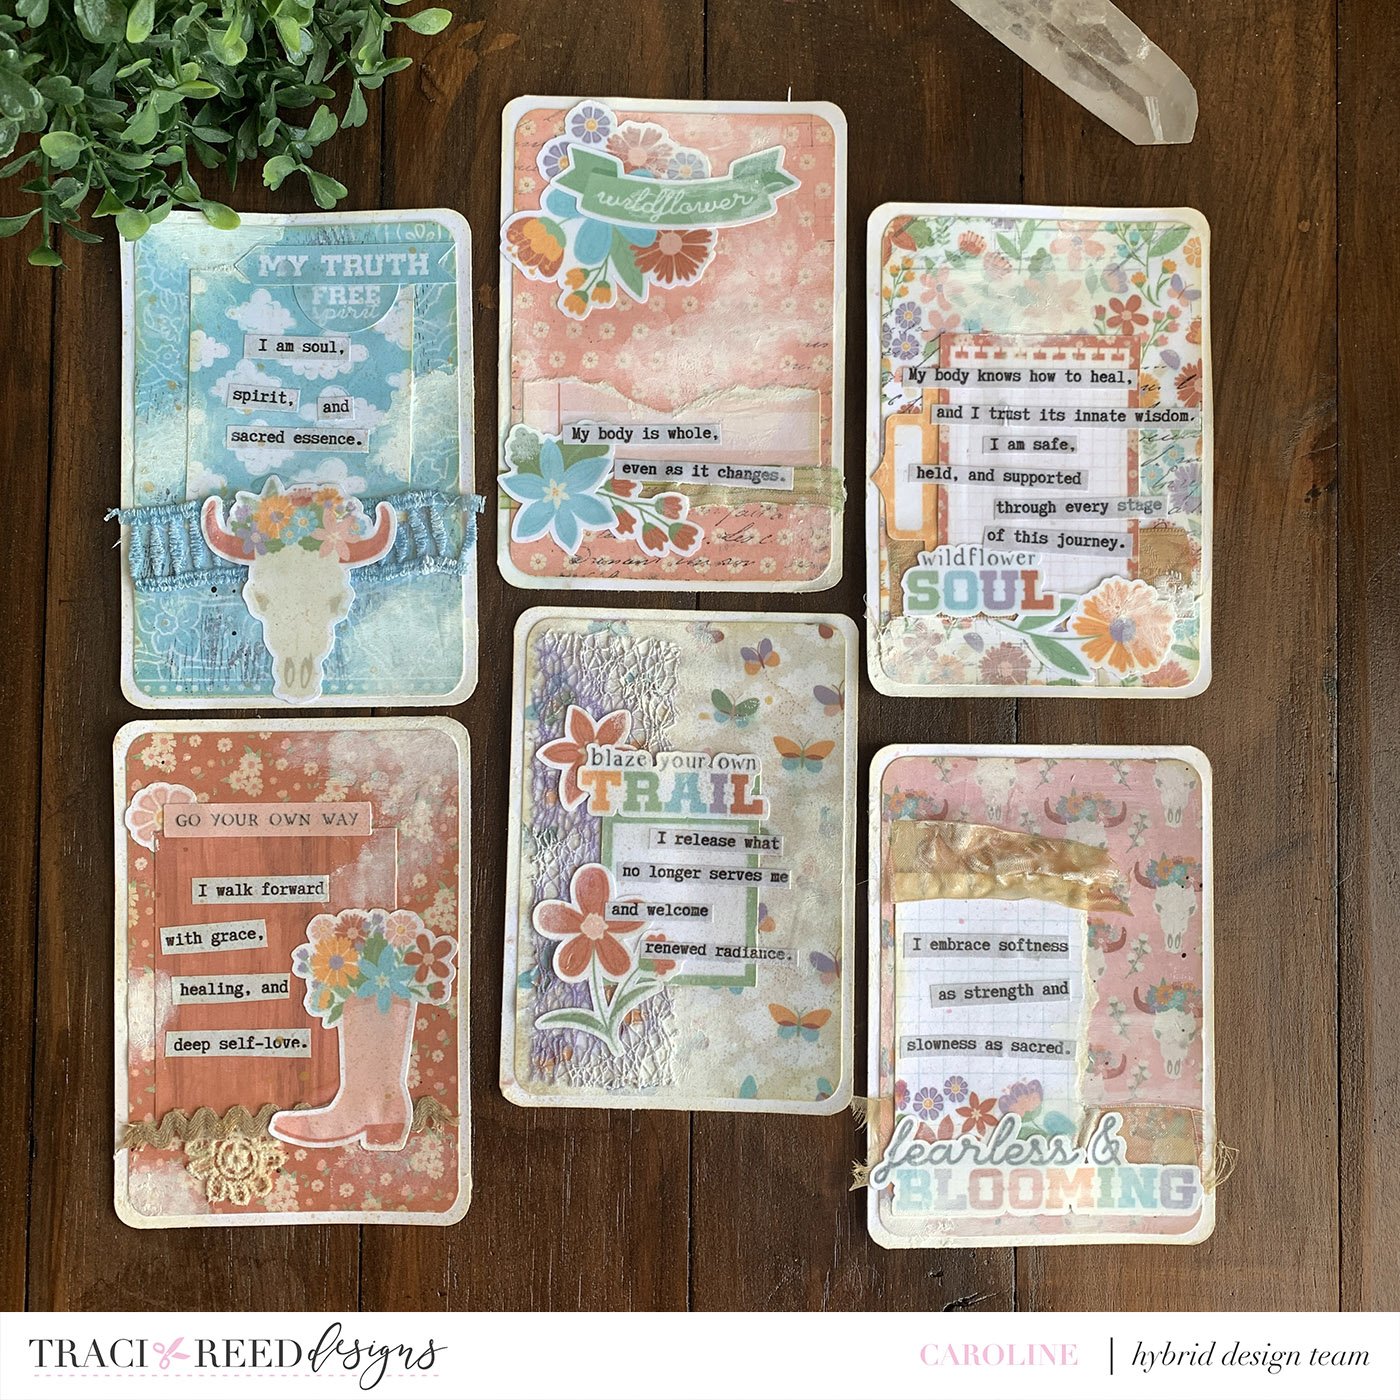
And here is a look at the finished product …
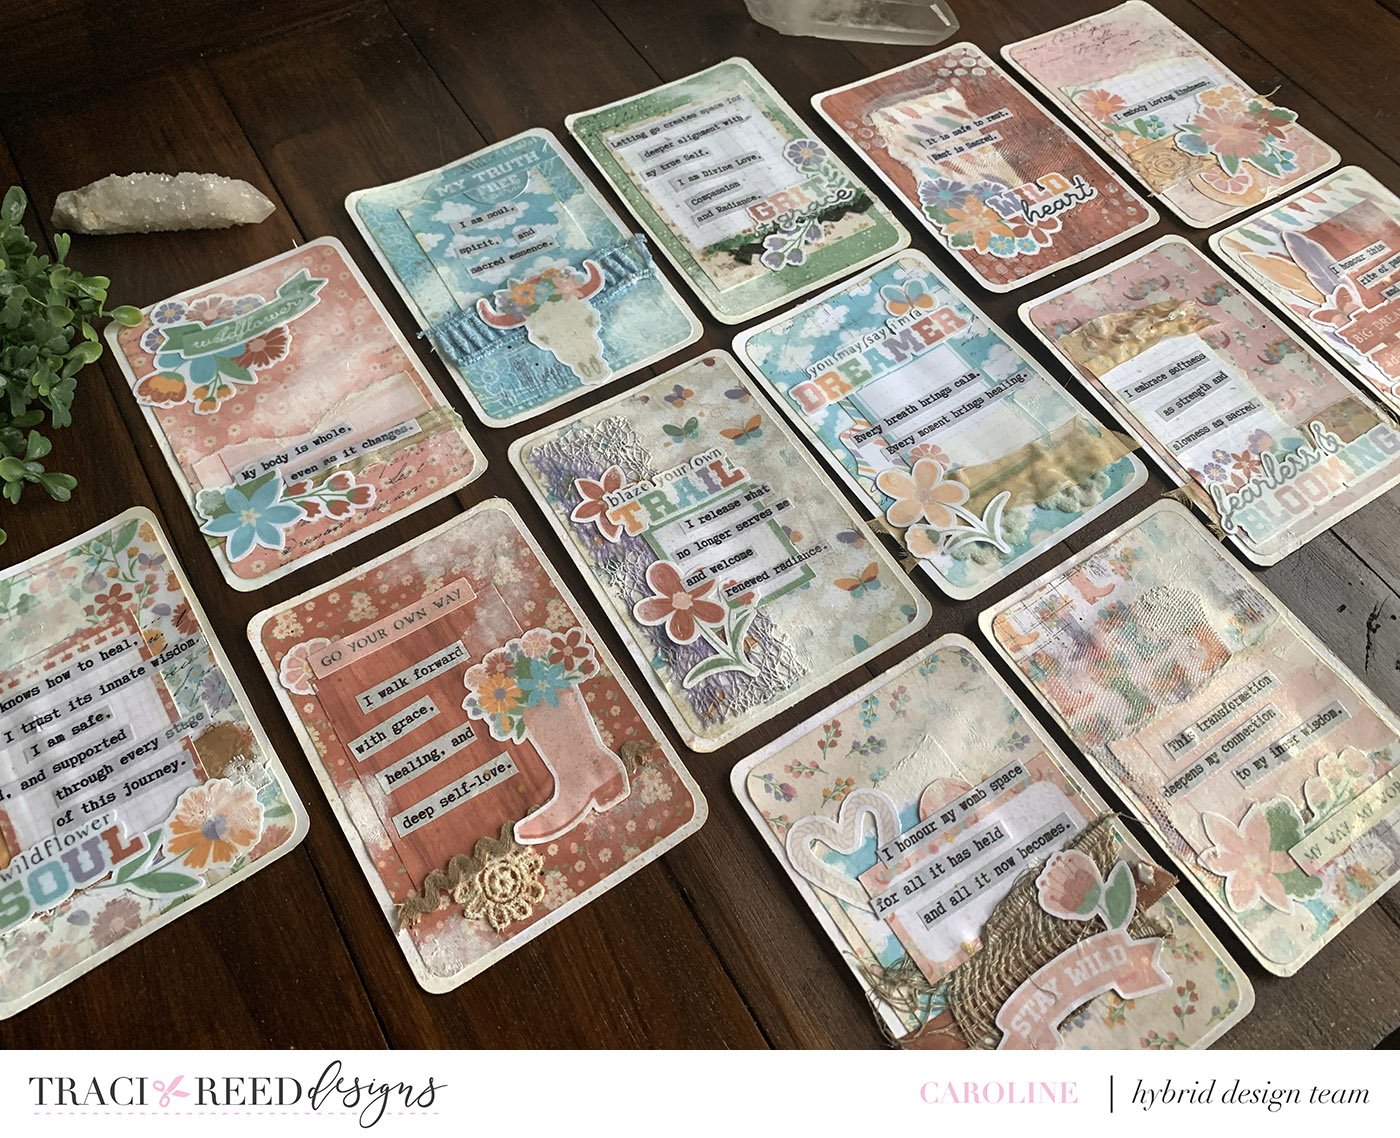
I am really happy with how these cards turned out and they are going straight into my hospital bag to keep my spirits high.


I hope I have inspired you to have a go at creating your own cards with “Trailblazer” or another of Traci’s collections.
The affirmations I am working with were created by me and are also available for you as a PDF. You can find that HERE.
Process Video:
Take care and bye for now,
Caroline