Think Outside The 12x12: Scrapbooking 12x12 Layouts with 8.5x11 (or smaller!) Printables: Lesson Five!
No 12x12 Printer? No Problem! In our “Think Outside the 12x12” series, we’re showing you how to scrap 12x12 layouts with TRD printables, even if you don’t have a 12x12 printer!
When it comes to scrapbooking, using smaller pieces of paper can present a creative challenge, and one bar to printables I often see presented by my customers. But fear not! In this blog series, we'll explore an techniques for using non-12x12 papers on your 12x12 layouts that still have that POP that you want for your large layouts!
Lesson Five: Turn your Paper Strips into Something Magical!
Utilizing small paper strips created from your hybrid printables on your 12x12 layout is an excellent strategy to make the most of your scraps and minimize unnecessary printing. Instead of discarding leftover bits of patterned paper, you can repurpose them by cutting them into strips of various widths. These strips add a delightful burst of color, texture, and pattern to your layout, making it visually captivating while reducing waste.
By incorporating these small paper strips, you not only stretch your supplies further but also contribute to a sustainable scrapbooking practice by printing less and maximizing the use of your existing materials. It's a win-win situation that allows you to create beautiful, eco-friendly layouts that are both resourceful and visually stunning.

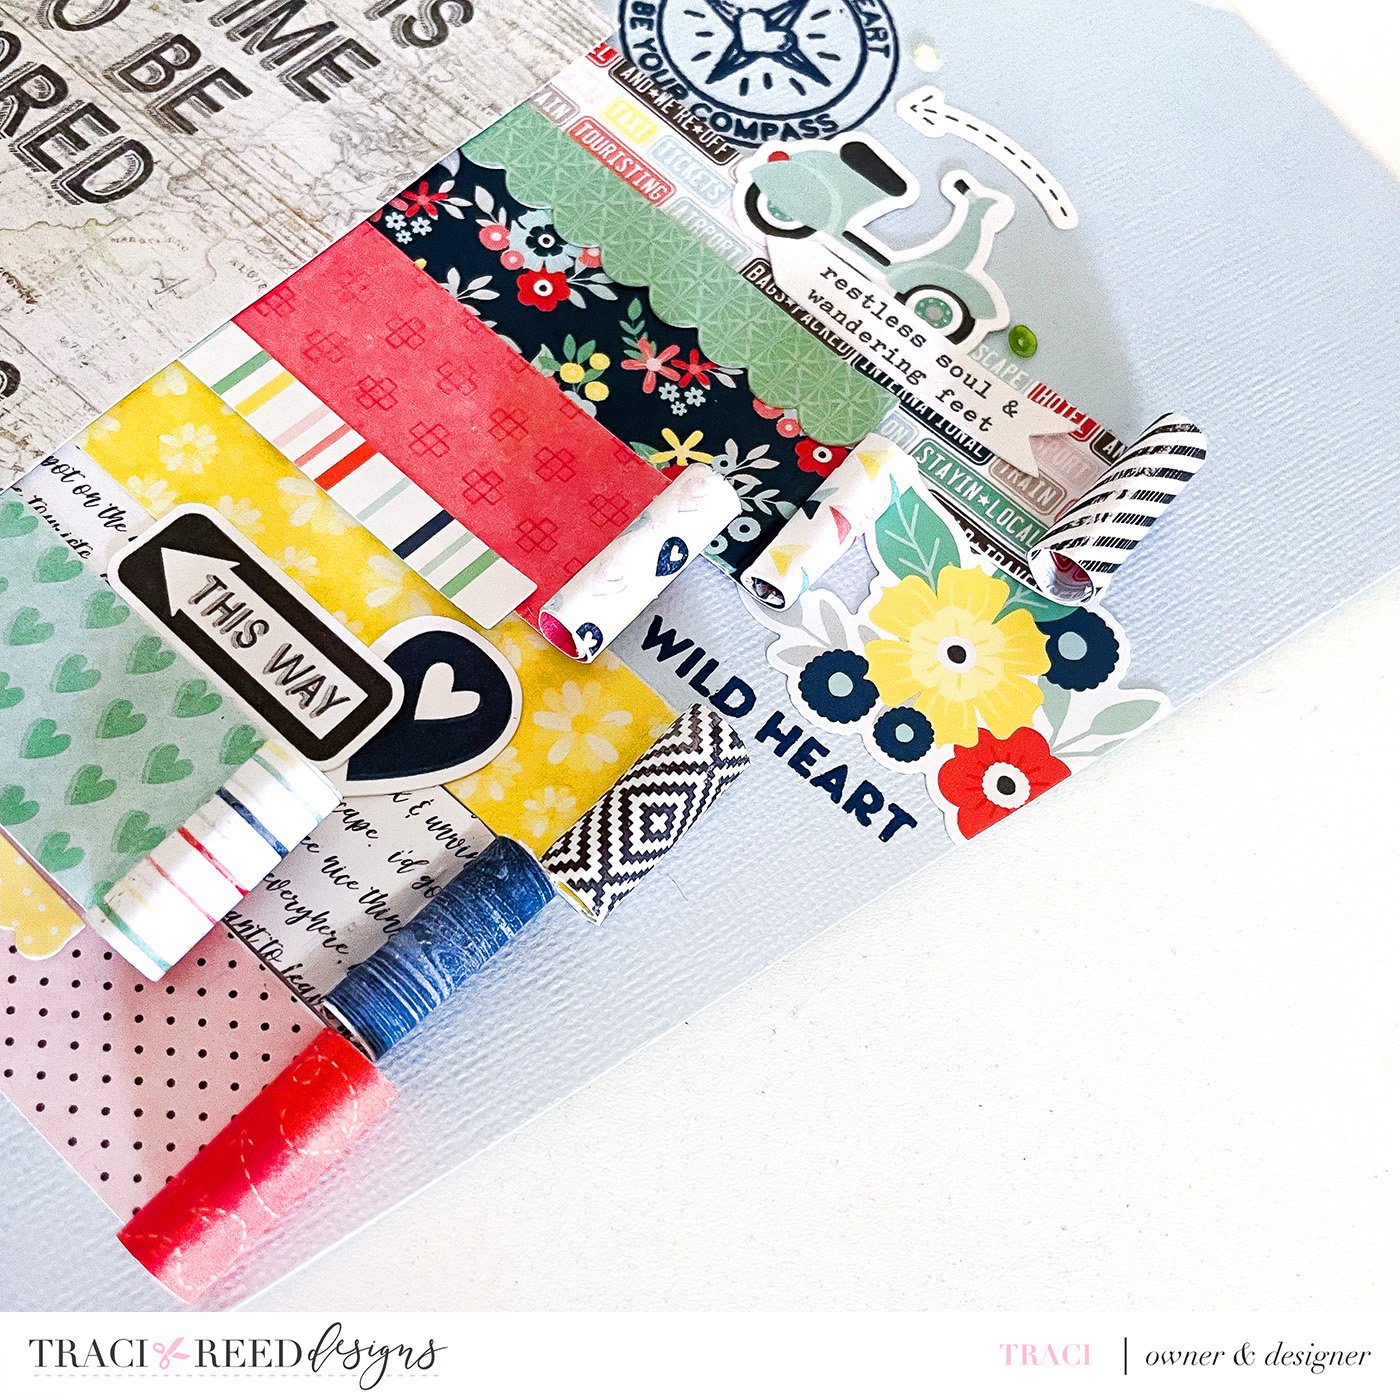
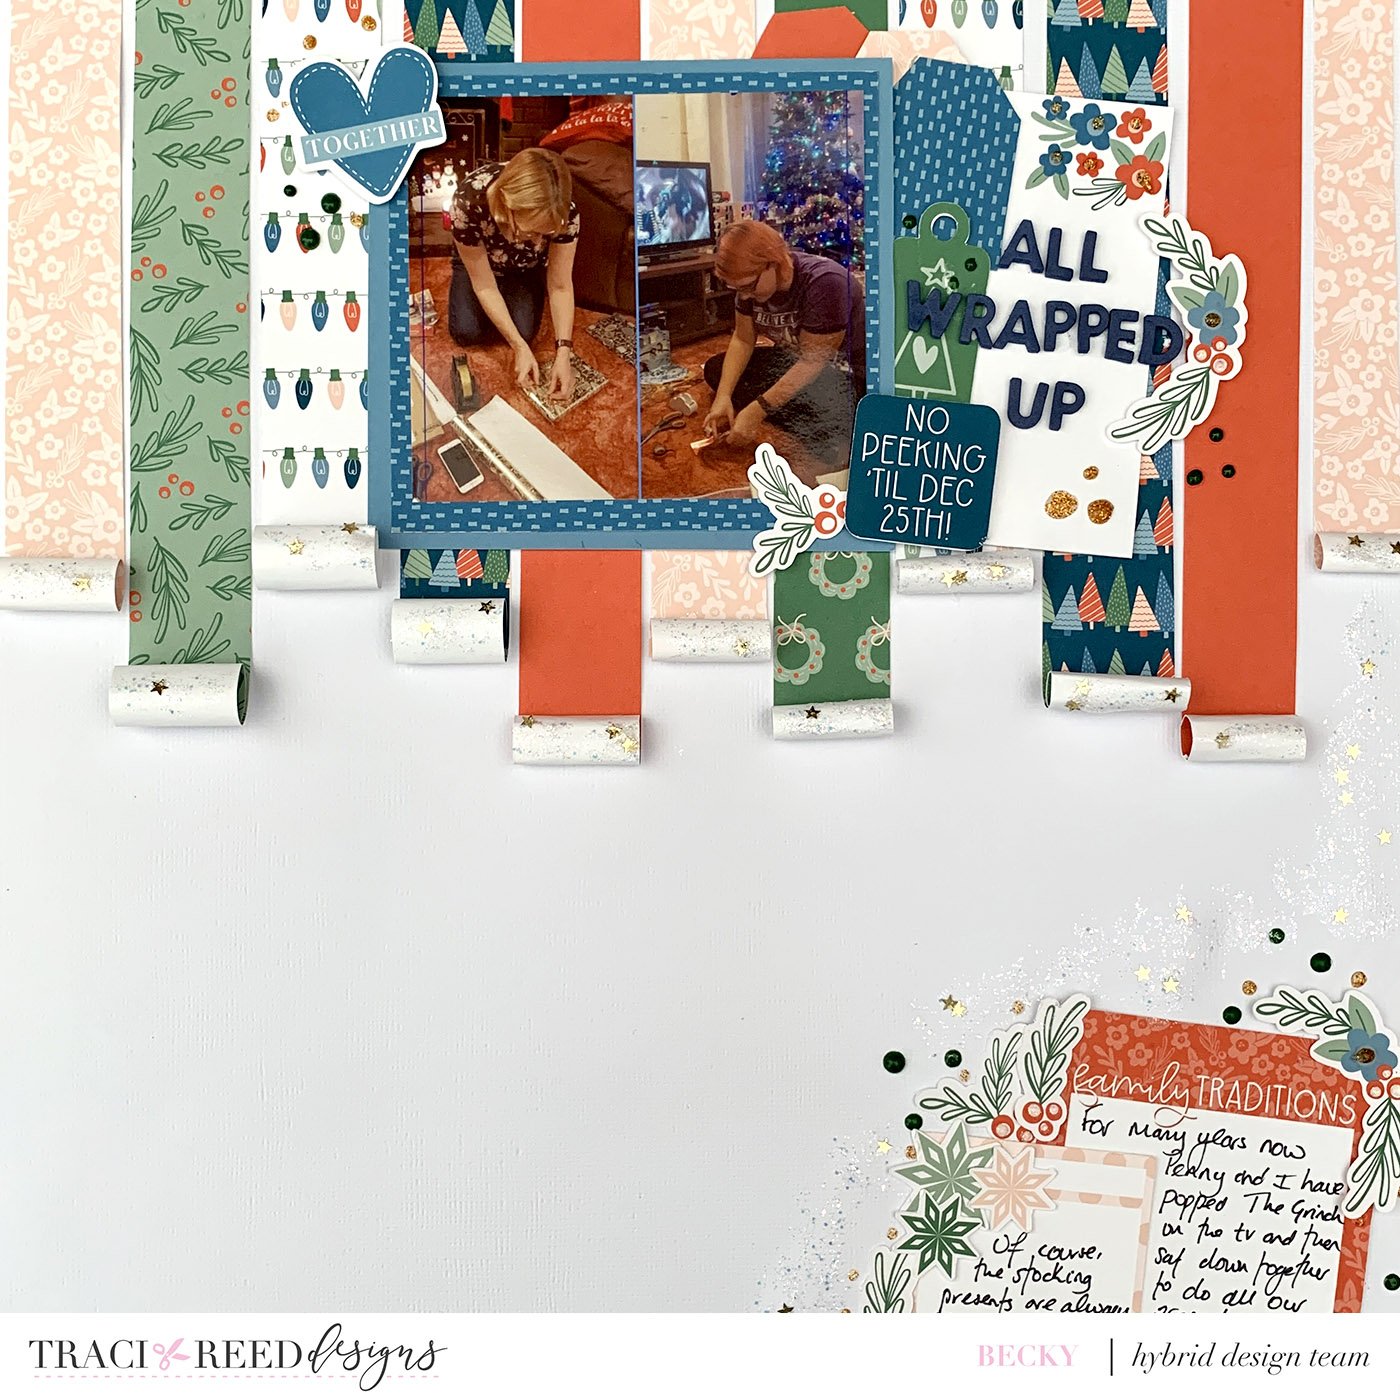
I’ve included 10 ways to utilize paper strips on your 12x12 pages below, but for this layout, we'll explore a technique that involves rolling the ends of paper strips to create long strips with rolled ends as the basis for your scrapbook page. By angling these strips diagonally on the page and adding torn cardstock and traveler's notebook-sized papers, you'll achieve a dynamic and captivating design. Let's dive into the world of rolled-end strips and unleash your creativity!

Start by selecting a variety of paper strips in different colors, patterns, and widths. Since these are printables, the backside of the paper is white, so I adhered two patterns back to back before using a pen to roll the ends of the paper strips tightly to create a rolled effect. Experiment with rolling one or both ends of the strips to achieve different visual effects and textures. Use liquid glue to adhere the roll so it doesn’t unroll.
Arrange the rolled-end paper strips diagonally on your 12x12 scrapbook page. Position them in a way that intersects with each other or with your focal point, such as photos or journaling. The angled placement adds movement and energy to your layout, creating a visually captivating composition.

To enhance the design further, tear the top and bottom edges of your 12x12 cardstock at the same angle as the rolled-end paper strips. This torn effect adds an organic and textured look to your page. Align and adhere a traveler’s notebook-sized patterned paper to the edges of your layout, creating a visually cohesive backdrop for your design.
Once your foundation is in place, it's time to add the finishing touches. Incorporate a title that complements your theme and arrange it within the design. Experiment with different fonts, colors, and placements to make it stand out. Embellish the layout with stickers, die cuts, or other decorative elements that enhance the overall look and add personal touches.
For my page, I incorporated stamps from Citrus Twist Kits into my composition and title as well as a few stickers from the paper line I designed from the Anywhere But Here collection for Echo Park: Away We Go!

10 Interesting Ways to Use Paper Strips:
Woven Background: Create a woven background by cutting paper strips of different widths and weaving them together horizontally or vertically on your layout. This adds texture and visual interest to your design.
Layered Borders: Use paper strips as layered borders around your photos or page edges. Experiment with different lengths, patterns, and angles to add depth and framing to your layout.
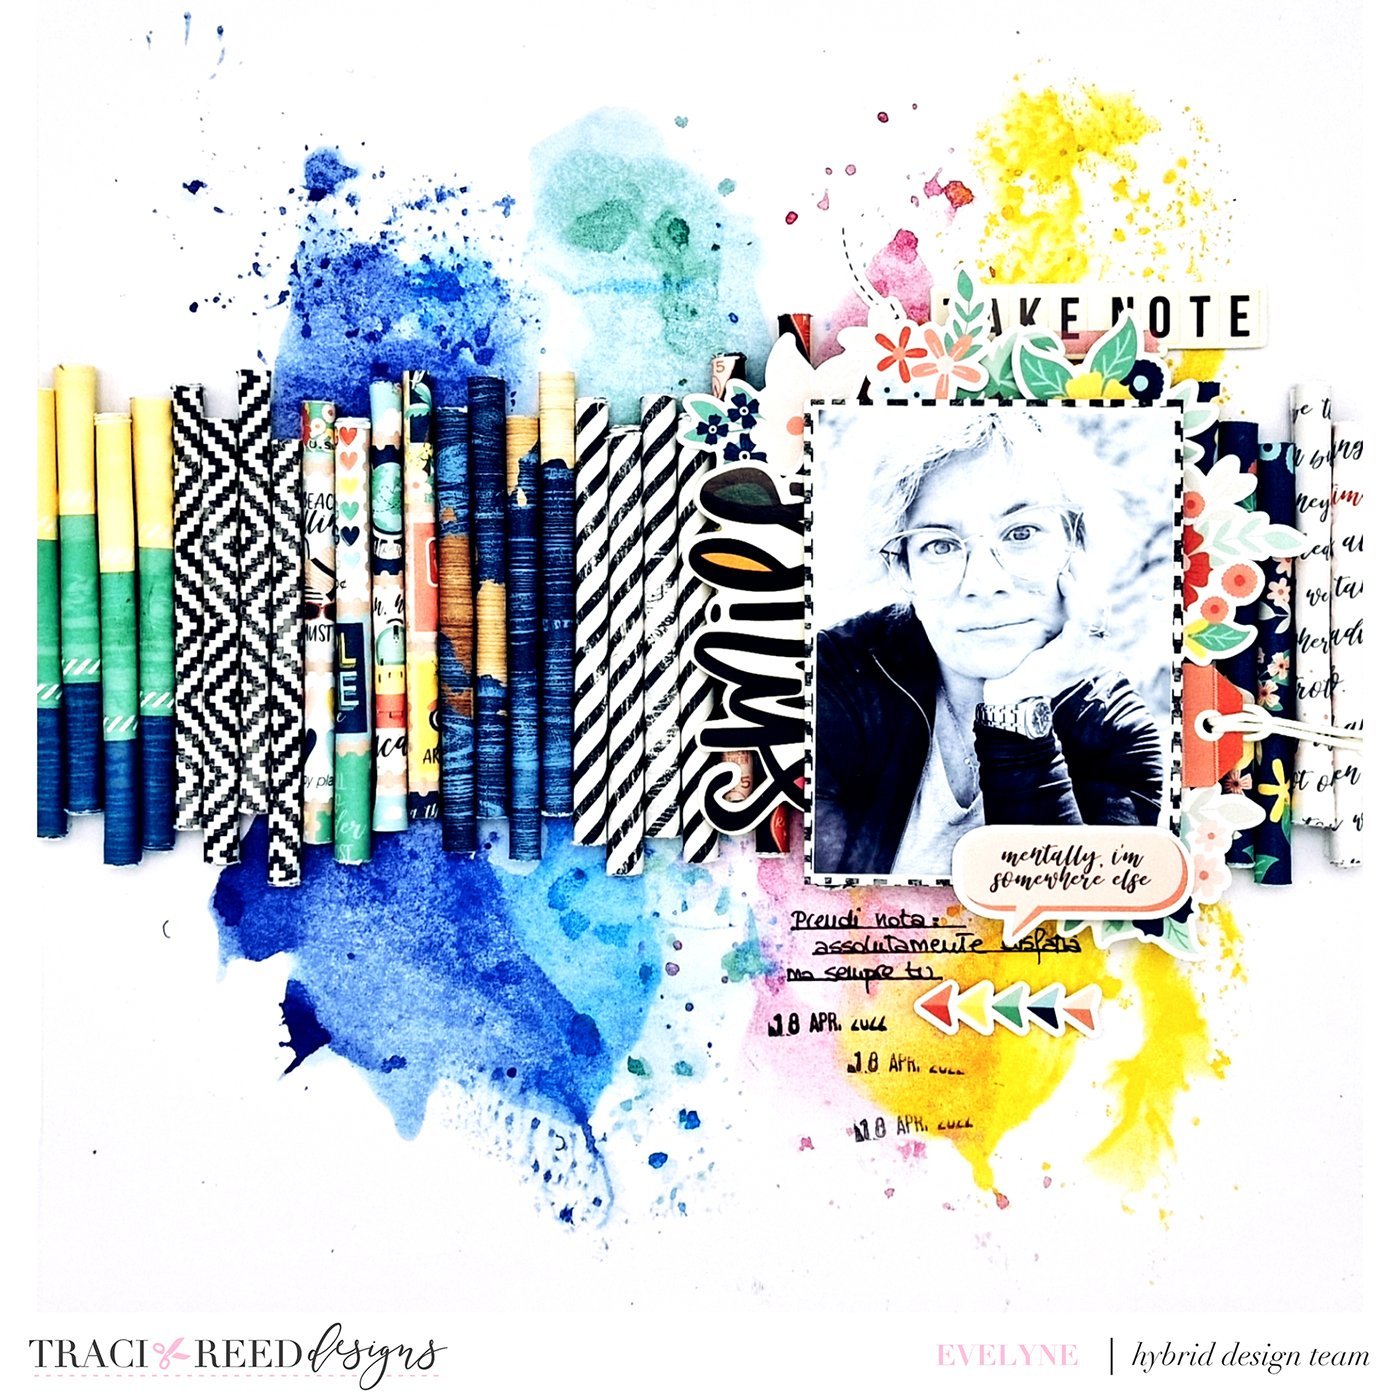
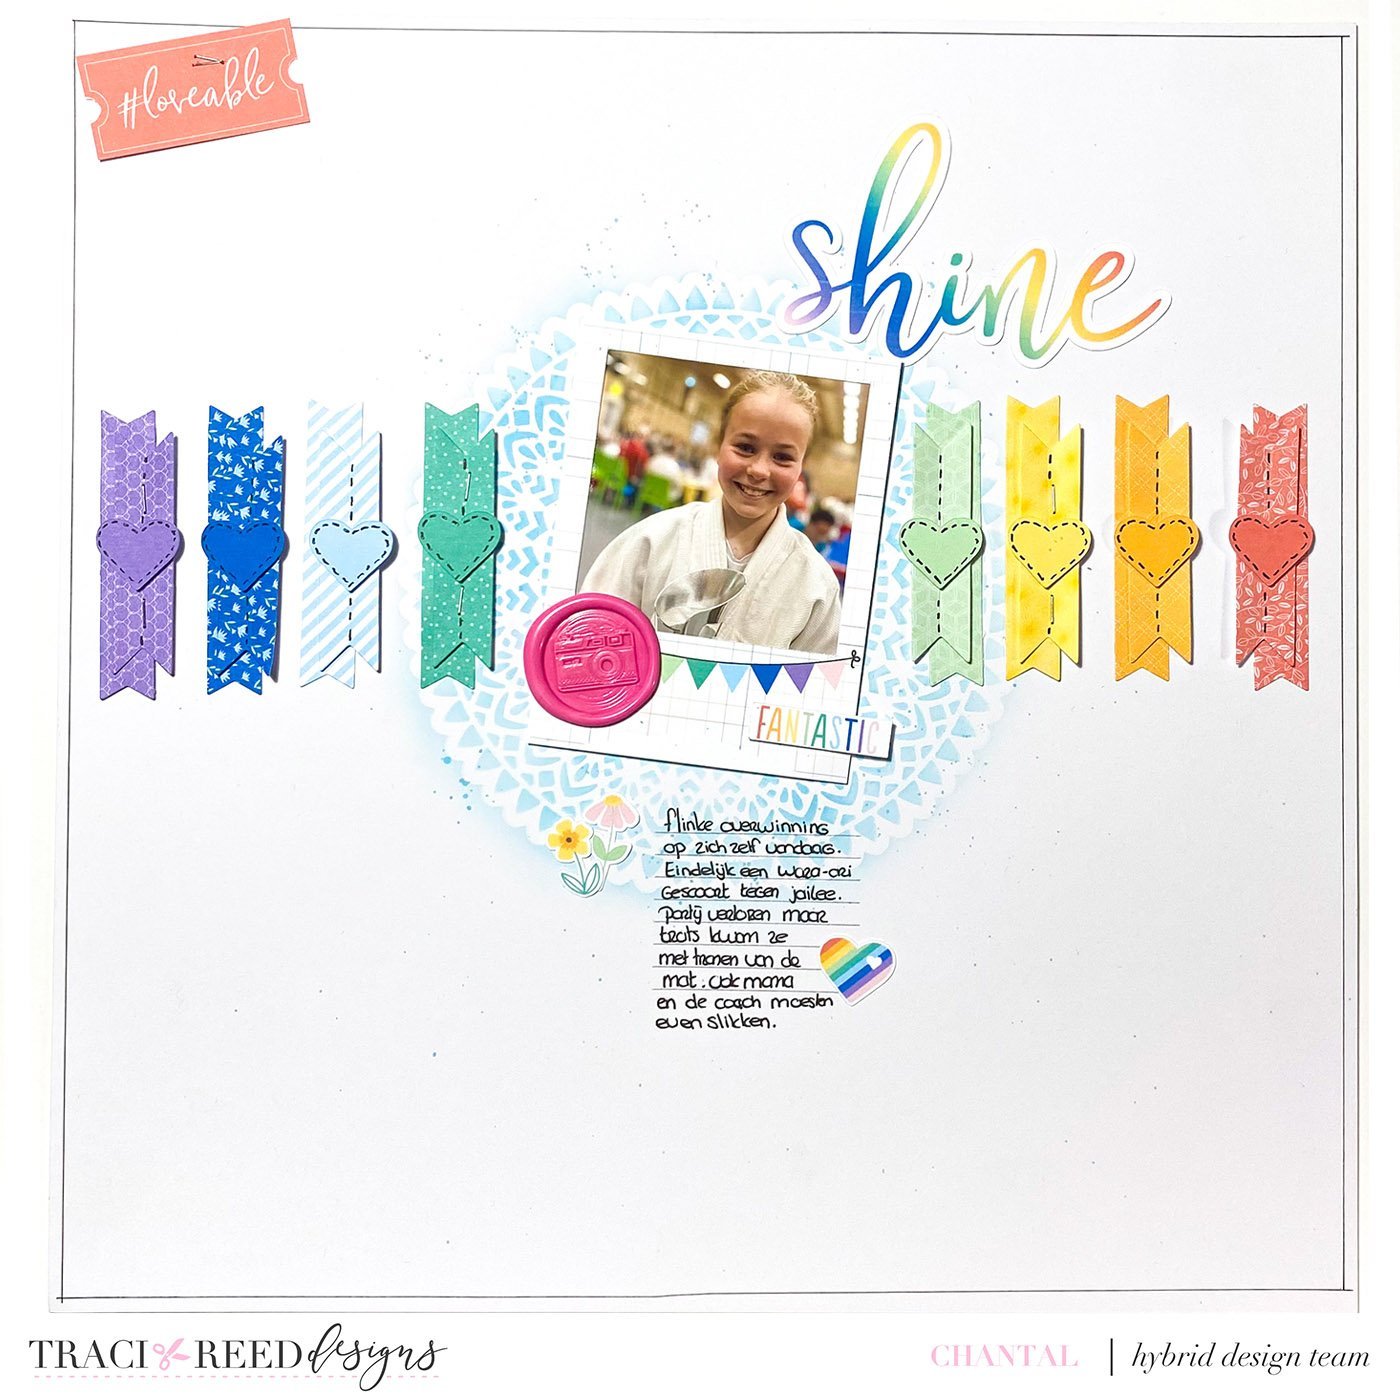
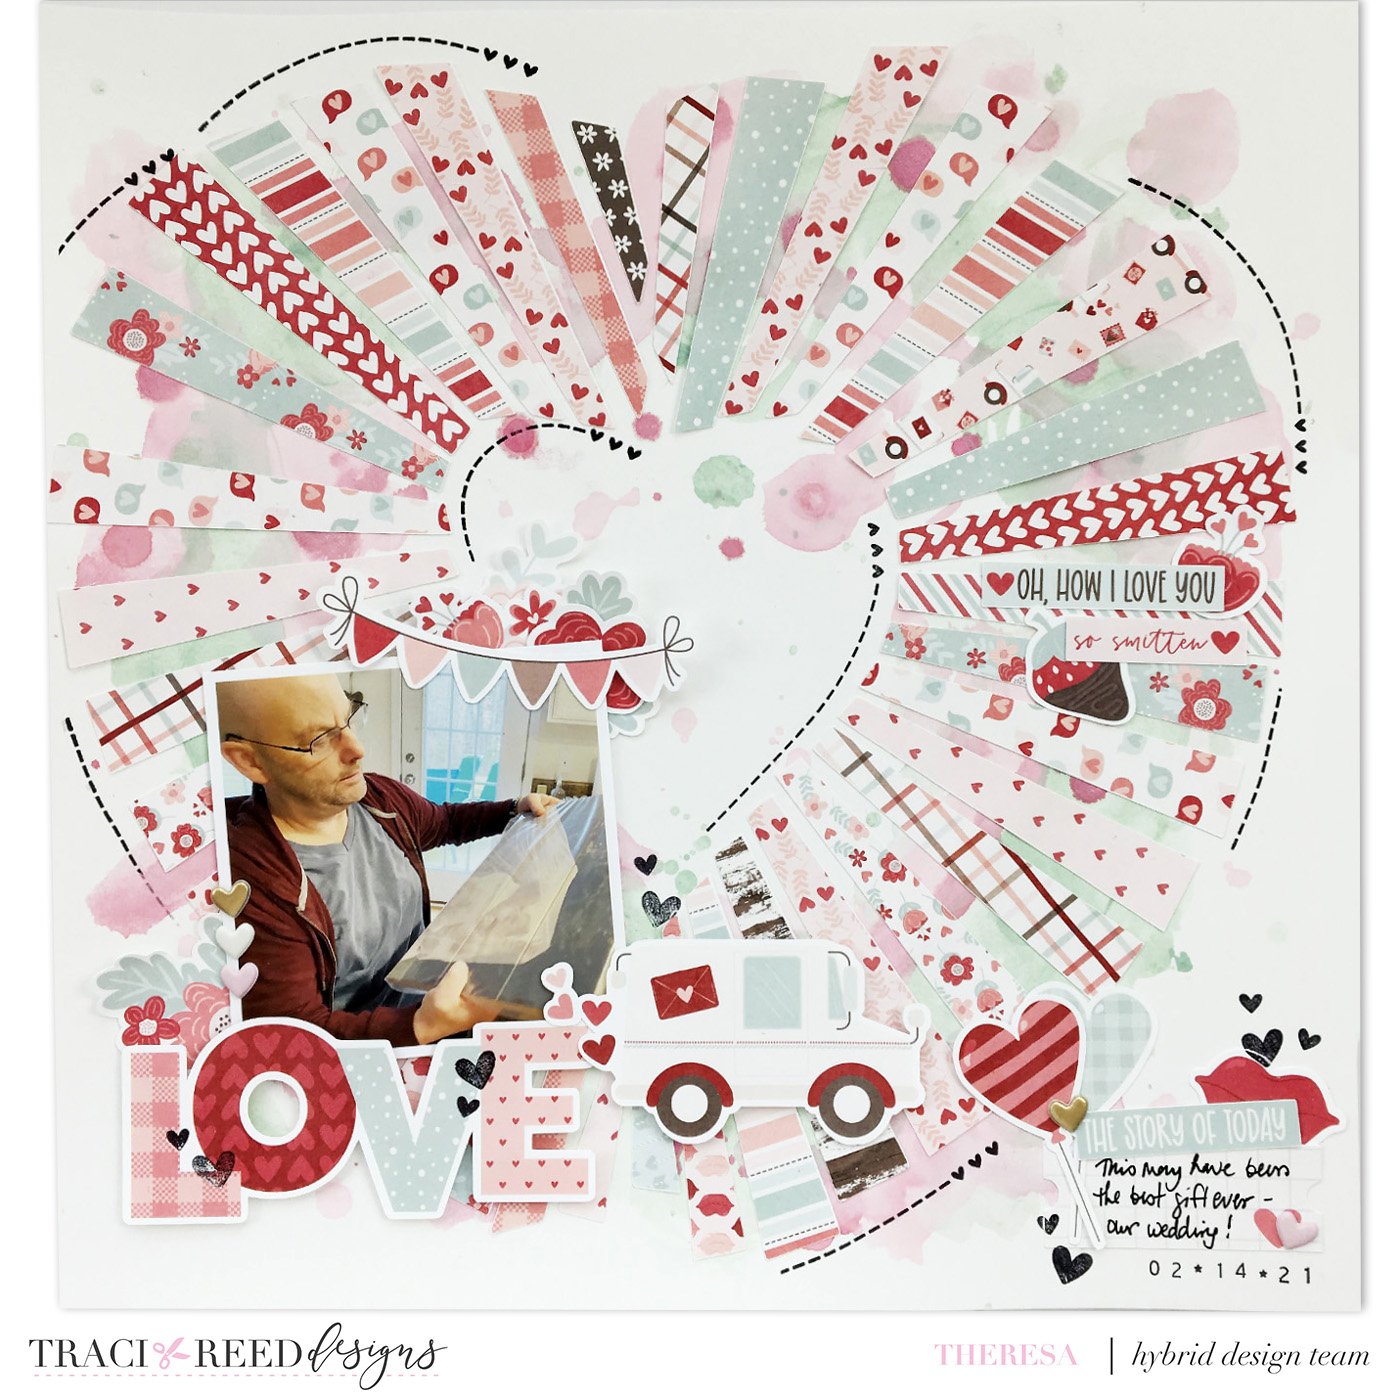
Diagonal Accents: Cut paper strips diagonally and arrange them across your layout in a diagonal pattern. This adds a dynamic and energetic feel to your design.
Quilling Effects: Roll paper strips into tight coils and shape them into unique designs, such as flowers, butterflies, or intricate patterns. Attach these quilled elements as decorative accents on your layout.
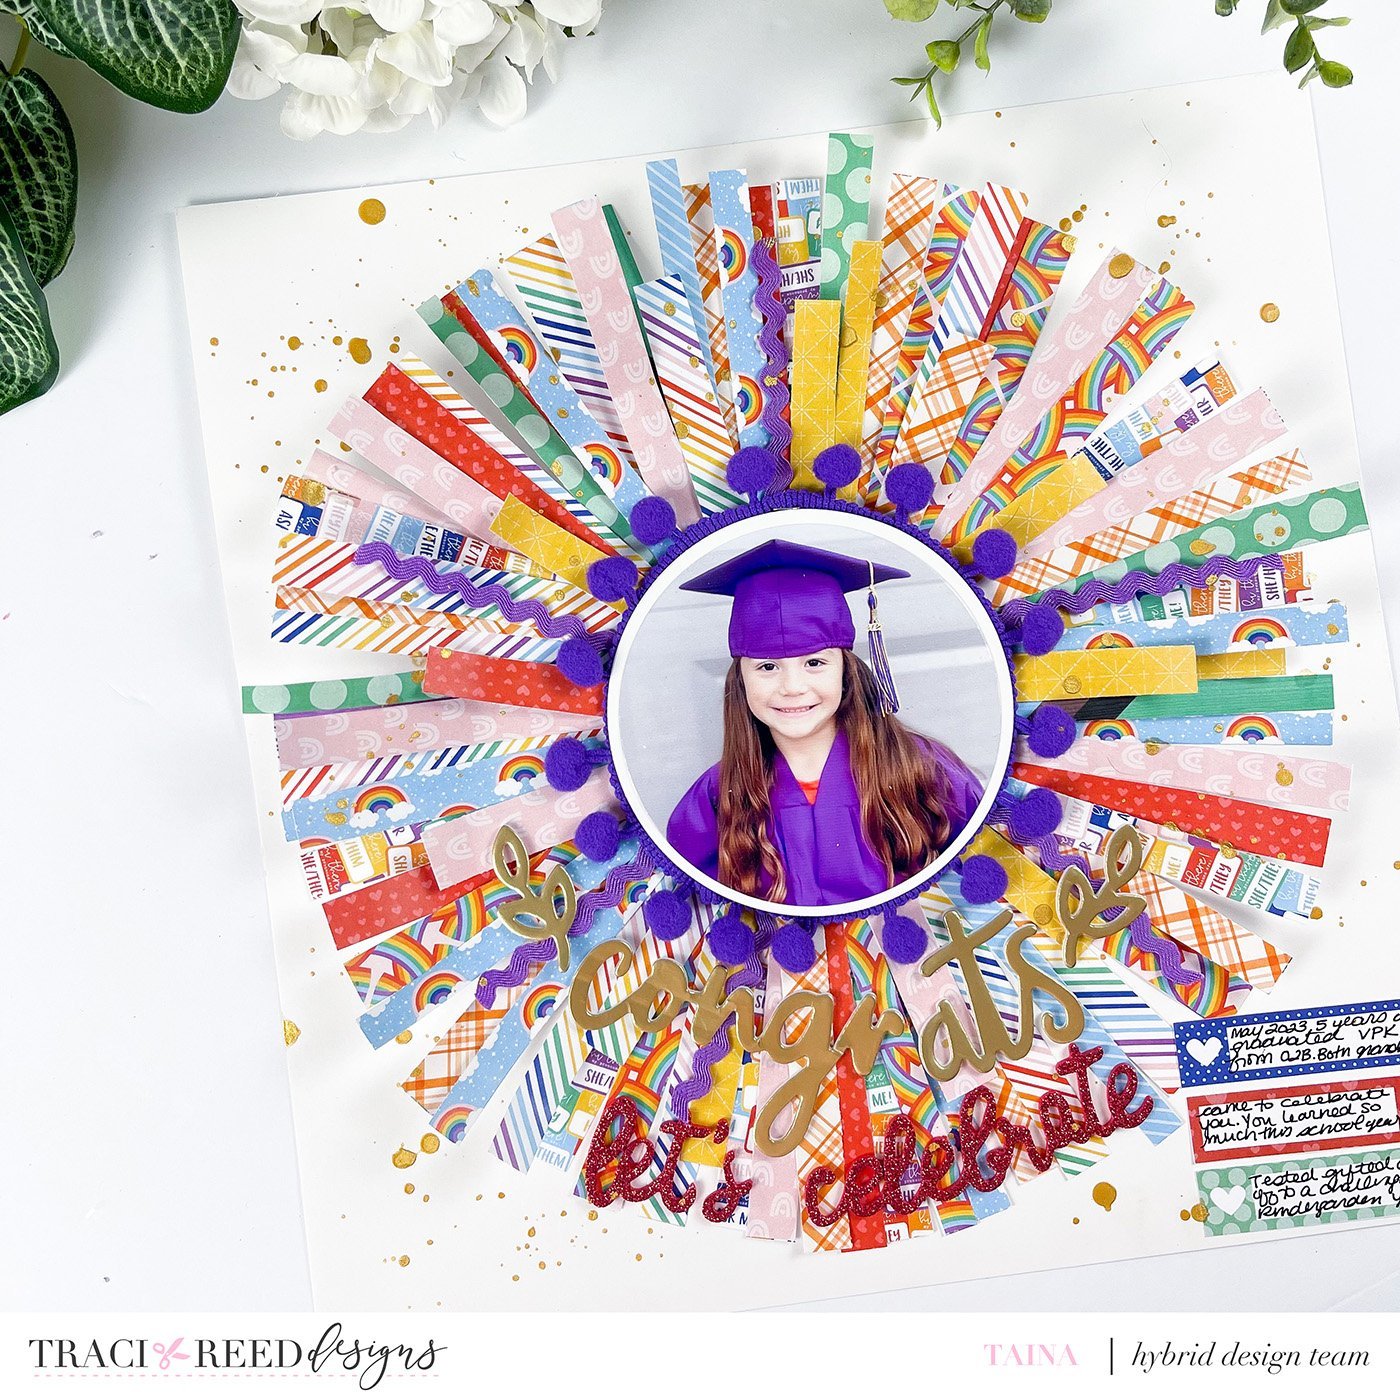
Cascading Strips: Arrange paper strips in a cascading or waterfall effect, flowing from one side of the layout to another. Vary the lengths and widths for an eye-catching visual impact.
Ombre Strips: Create an ombre effect by using paper strips in different shades of the same color. Gradually transition the colors from light to dark or vice versa to achieve a beautiful gradient.
Shaped Pieces: Cut paper strips into thin strips and arrange them to form shapes like stars, hearts or circles. The multiple patterns in each shape creates an eye-catching design!
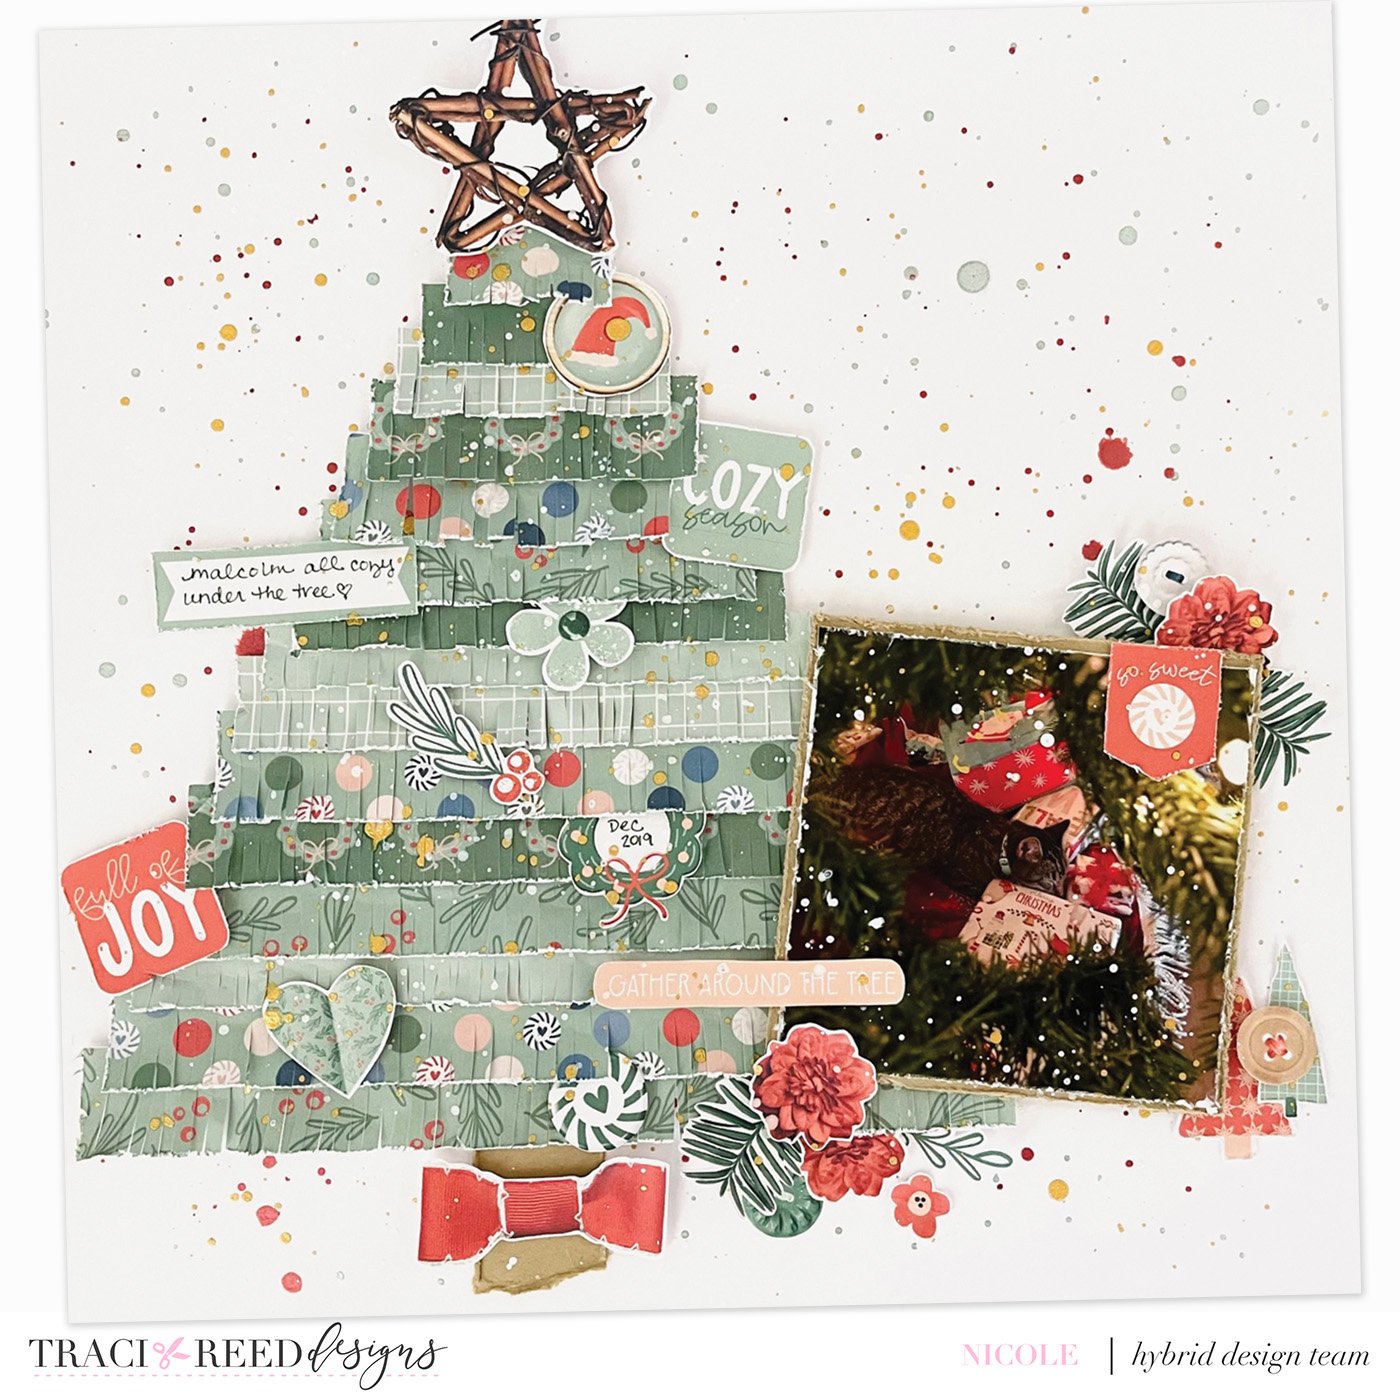
Fringed Accents: Use Fringing scissors (or regular scissors) to turn your paper strips into fringe. This technique adds a whimsical and playful touch to your design.
Curved Borders: Cut paper strips into curved or scalloped shapes and use them as decorative borders around your photos or focal points. This softens the edges and adds a fun twist to your layout.
Typography Effects: Cut paper strips into thin strips and arrange them to form letters or words. Use them to create titles, subtitles, or meaningful quotes on your layout. This adds a personalized and artistic touch.
By embracing the your paper strips, you can bring a sense of whimsy and creativity to your scrapbook pages to not only create a dynamic and visually captivating design, but use up your scraps as well! With this foundation, you can seamlessly incorporate photos, journaling, and embellishments to complete your layout. Unleash your imagination and experiment with colors, patterns, and textures to craft unique and visually stunning scrapbook pages. Happy crafting!
Process Video

TRD Products Used In This Post


Other Products Used In This Post:
Echo Park Away We Go Collection (designed by Traci Reed from the Anywhere But Here Collection)