Re-Introducing the Clip It To Me Textured Clipping Masks + Alphabitties Stamps!
Sometimes I love to re-open the vault and put some of my most popular retired products back on the shelves and this weekend, I’m bringing back some of my favorite TOOLS!
The Alphabitties are some AMAZING alpha stamps that you can add to any page that come in 2 different versions each (clean + messy OR stamped + outlined.). They’re the perfect authentic stamped addition to any page without all the mess.
The Clip it To Me packs are some FANTASTIC photoshop/procreate tools that you can use to easily add fun textures to your digital and hybrid pages.
Don’t know to use these? No problem! I created a tutorial/process video for the layout below that demonstrates how to get the most out of these templates (using nearly all of them!) in photoshop!

Process Video & Tutorial for Photoshop/Photoshop Elements
I used 3/4 of the Clip It To Me packs + the Alphabitties in Photoshop on this page and walked you through how to recreate the same effect!
Trish was so kind to show how you can also use these clipping masks in Procreate on your iPad if you don’t want to use your computer or need a lower-entry tech tool! She used the Aflutter collection for this layout.

Process Video & Tutorial for Procreate
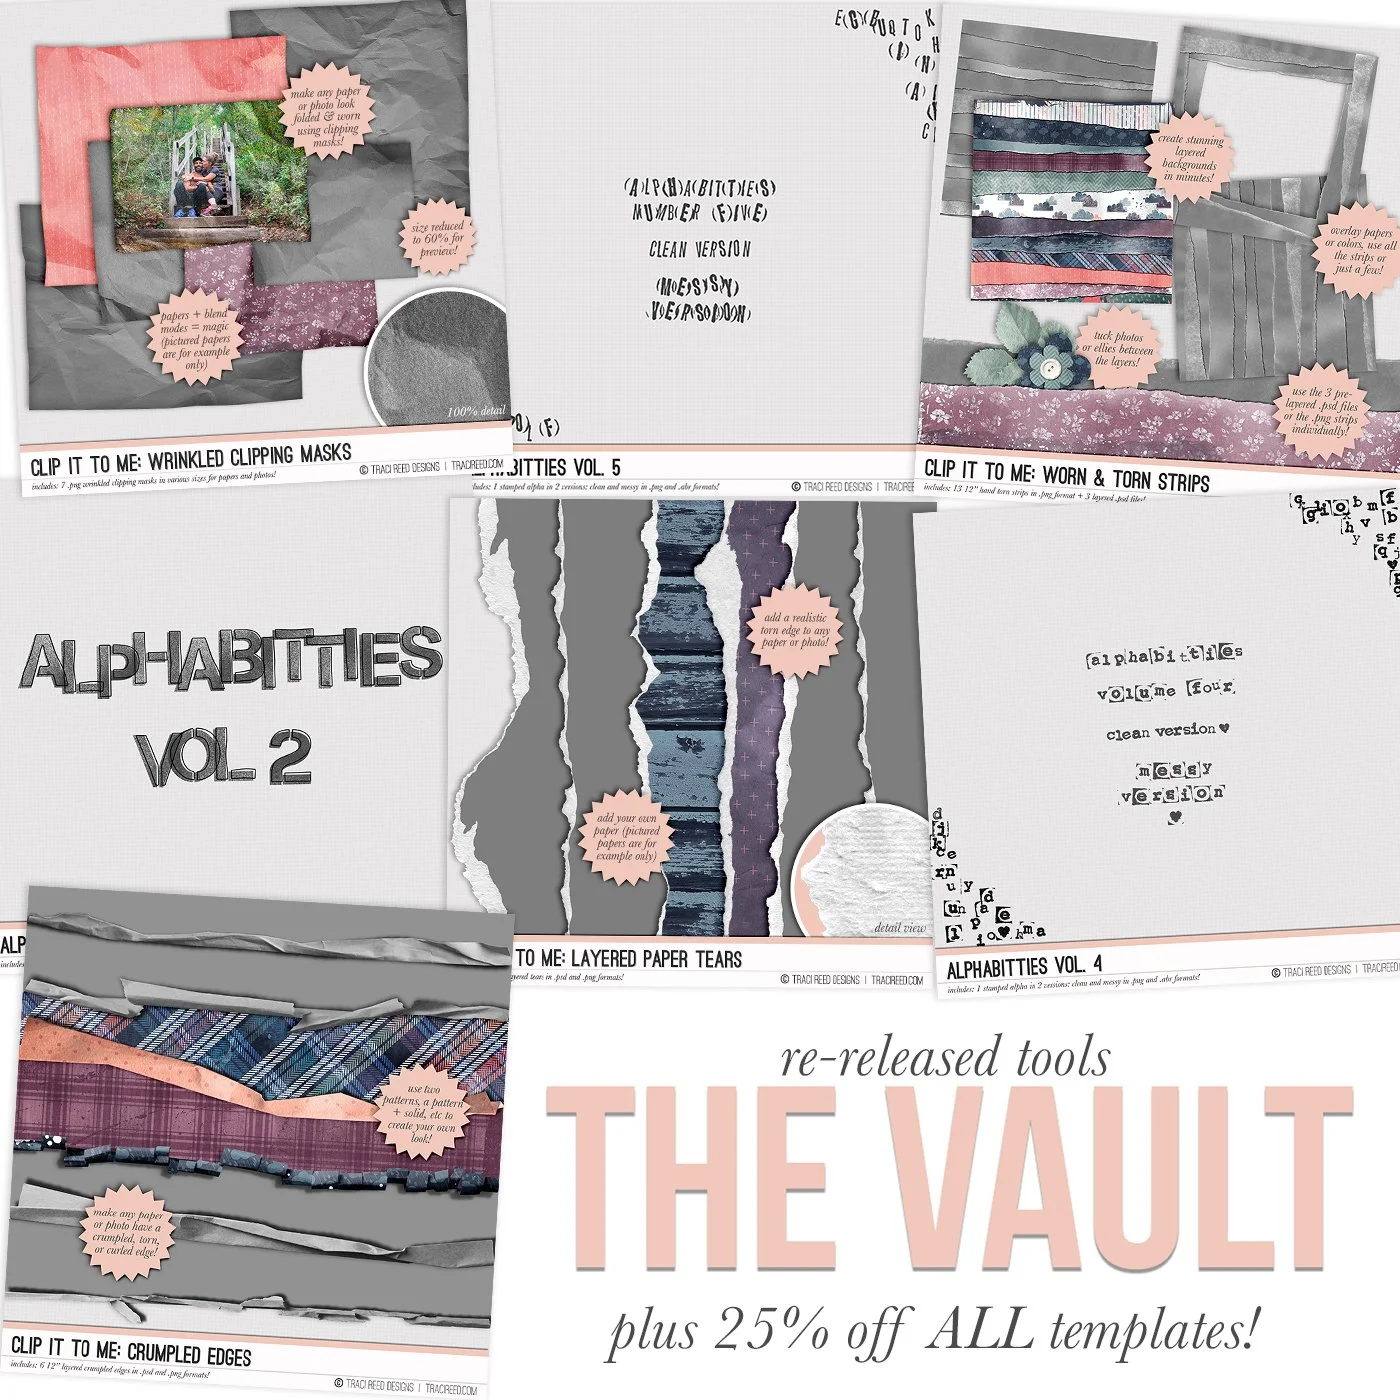
Clip It To Me Clipping Masks

Looking to add some texture and fun to your layouts? The Clip It To Me: Wrinkled Clipping Masks contains various torn, wrinkled and curled masks that you can use with any digital paper or photo to create a fun texture on your page!
Simply clip your paper or photo to the mask and edge and play with blending modes in photoshop (I suggest overlay, soft light, and hard light as starting points) to get the delightful texture to shine through!
Learn how to use these in Photoshop or Procreate HERE!
Clip It To Me: Wrinkled Photo Masks Includes:
7 torn and wrinkled clipping masks in .png files!
Please Note: These templates were previously released at SSD in the early 2010s - check your files before purchase!

Looking to add some texture and fun to your layouts? The Clip It To Me: Worn & Torn Strips will add a slightly rumpled, lightly torn paper strip vibe to any paper you use it with!
Simple clip your paper to the paper strip and play with blending modes in photoshop (I suggest overlay, soft light, and hard light as starting points) to get the delightful texture to shine through!
Learn how to use these in Photoshop or Procreate HERE!
Clip It To Me: Worn & Torn Strips Includes:
13 torn and worn paper strips in .png files + 3 layered .psd templates in various configurations!
Please Note: These templates were previously released at SSD in the early 2010s - check your files before purchase!

Looking to add some texture and fun to your layouts? The Clip It To Me: Crumpled Edges contains various torn, wrinkled and curled edges that you can use with any digital paper to create a fun texture on your page!
Simply clip your paper to the mask and edge and play with blending modes in photoshop (I suggest overlay, soft light, and hard light as starting points) to get the delightful texture to shine through!
Learn how to use these in Photoshop or Procreate HERE!
Clip It To Me: Crumpled Edges Includes:
6 torn, folded, curled and crumpled edges in .png files and layered .psd templates!
Please Note: These templates were previously released at SSD in the early 2010s - check your files before purchase!

Looking to add some texture and fun to your layouts? The Clip It To Me: Layered Paper Tears contains 6 torn edge templates to add a realistic torn look to your papers!
Simply clip your paper to the mask and voila! Torn Edge!
Learn how to use these in Photoshop or Procreate HERE!
Clip It To Me: Layered Paper Tears Includes:
6 torn torn edges in .png files and layered .psd templates!
Please Note: These templates were previously released at SSD in the early 2010s - check your files before purchase!
Leah Used the Clip It To Me: Paper Tears and Crumpled Edges for this layout with the Renewal Collection

And on this one with the Aflutter collection, she used the paper tears again! I love the “reveal” technique!

Ophelia also used the layered paper tears on this adorable layout!

Alphabitties
I also have a tutorial from a while back on how to use and recolor digital stamps in silhouette studio, photoshop and Letterglow below! They really are very useful tools!
Sara used Canva to add the Alphabitties Vol. 5 to her photos on this TN spread before printing!
(note: as of my knowledge right now, there is no option to recolor them in Canva so they would stay their black color)


I love a great stamped alpha and this messy (and clean!) alpha from the alphabitties series is a versatile one to add to your collection!
Alphabitties Vol. 4 Includes:
1 alpha in both clean and messy versions on .png and .abr files!
Please Note: These alphas were previously released at SSD in the early 2010s - check your files before purchase!

I love a great stamped alpha and this messy (and clean!) alpha from the alphabitties series is a versatile one to add to your collection!
Alphabitties Vol. 5 Includes:
1 alpha in both clean and messy versions on .png and .abr files!
Please Note: These alphas were previously released at SSD in the early 2010s - check your files before purchase!

I love a great stamped alpha and this stenciled alpha from the alphabitties series is a great stenciled and stamped alpha to add to your collection!
Alphabitties Vol. 2 Includes:
1 complete alpha with numbers and punctuation in both stamped and sketchy outline styles on .png and .abr files!
Please Note: These alphas were previously released at SSD in the early 2010s - check your files before purchase!