Pixels 2 Paper with Tai - Leveling Up with Paper Strips!

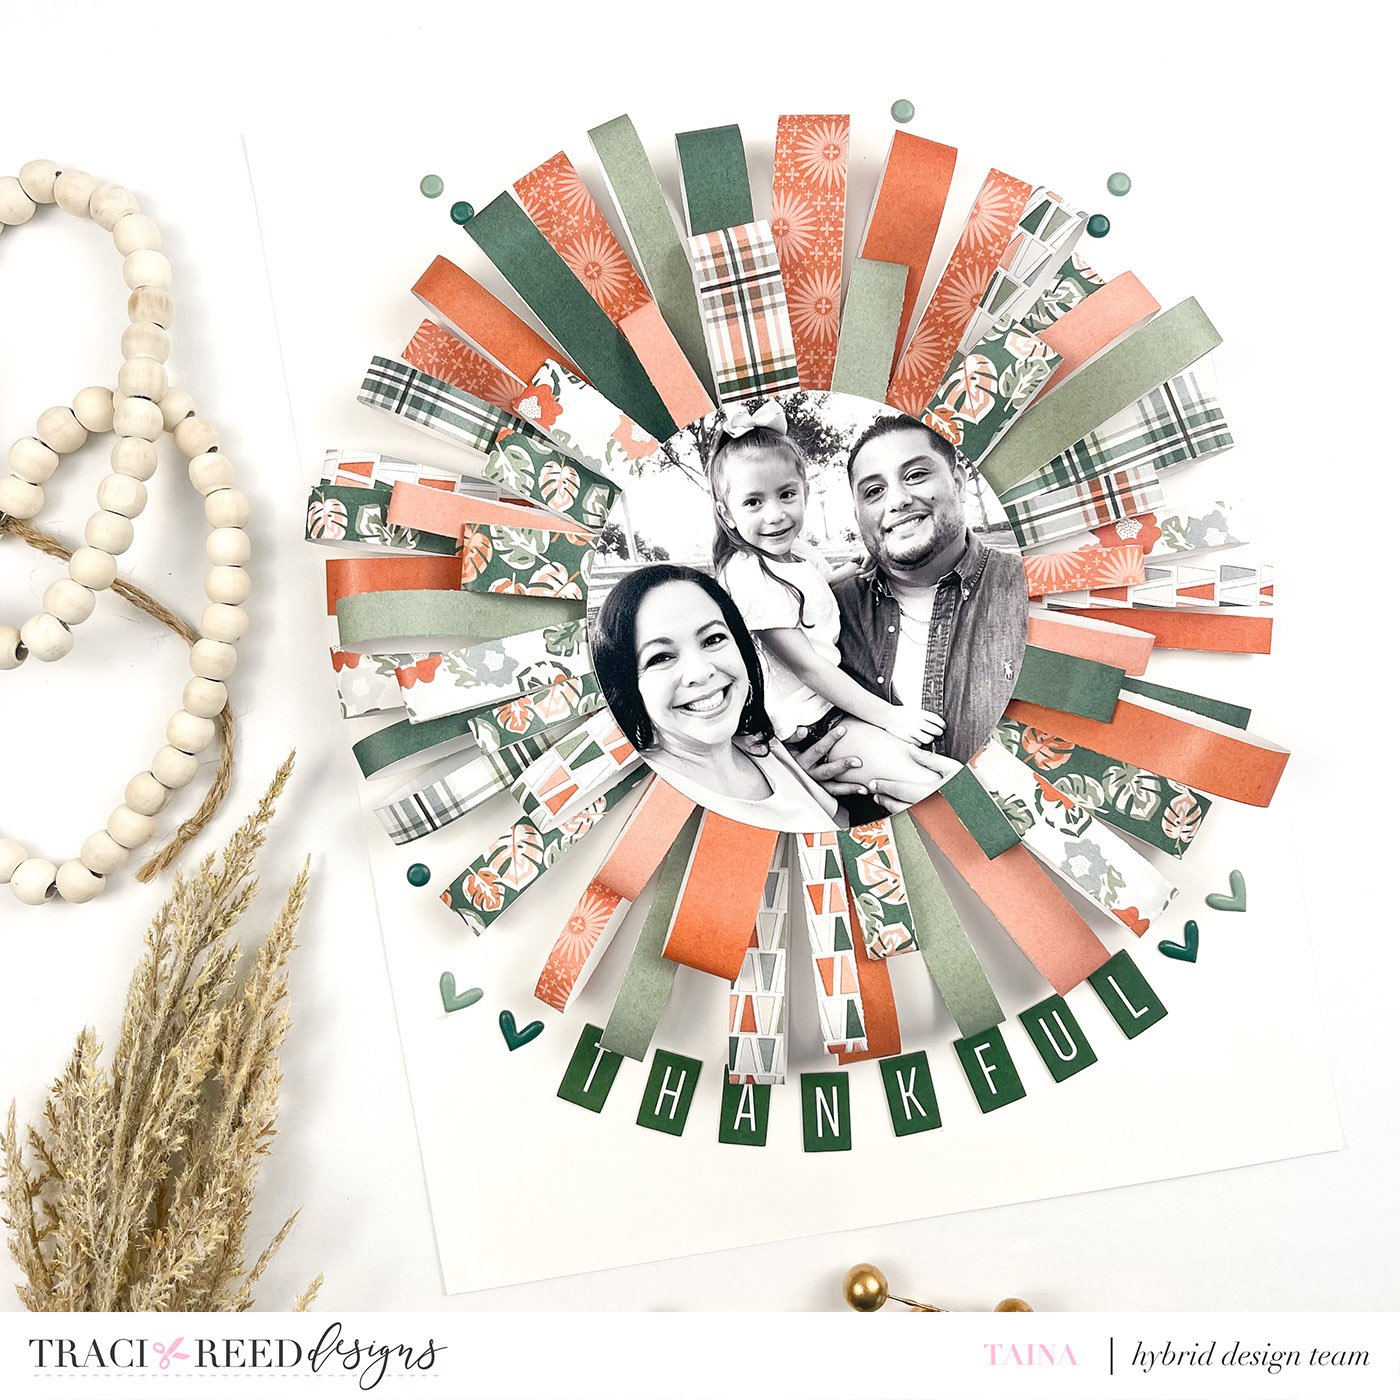
Hello scrappy friends! Today I will be showing you how create tons of dimension with an easy “flower” or “sunburst” design around a circle photo. The final result of this layout is amazing and definitely should be displayed before putting into a page protector.

This project I used the Rooted collection and used all the Traveler’s Notebook designs. I used about 9 different patterned papers to achieve the look. But, feel free to many patterned papers that you are comfortable with. When working with a collection, the papers usually work effortlessly together so using 9 in this example simply works. I sliced them into .25, .5., .75 thick strips.


Once that step was done, I added some adhesive to the ends and pinched them together to make loops. After making all the loops I was able to start attaching them to my card stock. I decided to make it an 8x10 layout.


I did the initial layer and then added a second layer. I made sure the same patterns never touched each other. I attached them at random. The texture and dimension is amazing with the layout. I hope you give this technique a try.

If you would like to see the process video, I have it linked below.
If you would like to see my process video it is linked below. My thought is to constantly add to this mini album with each collection Traci designs and it can be a nice collection of this I was loving this year.