Feeling Stuck? Start Small with Cassie
We’ve all been there: life gets busy, and you find yourself stuck when it comes time to start a scrapbook layout. It can feel overwhelming to even know where to begin. If you’ve ever faced a creative block like this, you're not alone. Luckily, I’ve found that when I’m feeling stuck, one of the easiest ways to reignite my creativity is by starting with something small.
In this instance, I decided to focus on creating 3x4 and 3x3 embellished cards to use on a scrapbook layout. It was a simple, yet rewarding way to ease into a larger project without feeling overwhelmed by the scale of it.
A Perfect Starting Point
This project is also a perfect opportunity to dip your toes into hybrid scrapping. For me, the key to success with this project was printing everything on regular letter-size paper.
I started by selecting a dozen different 3x4 patterned cards from The Manuscript Collection—a beautiful set of designs that fit my style perfectly. Along with these cards, I also printed and cut out the three pages of coordinating stickers from the collection, as well as a few digital embellishments. I wanted to make sure I had plenty of options to play around with!
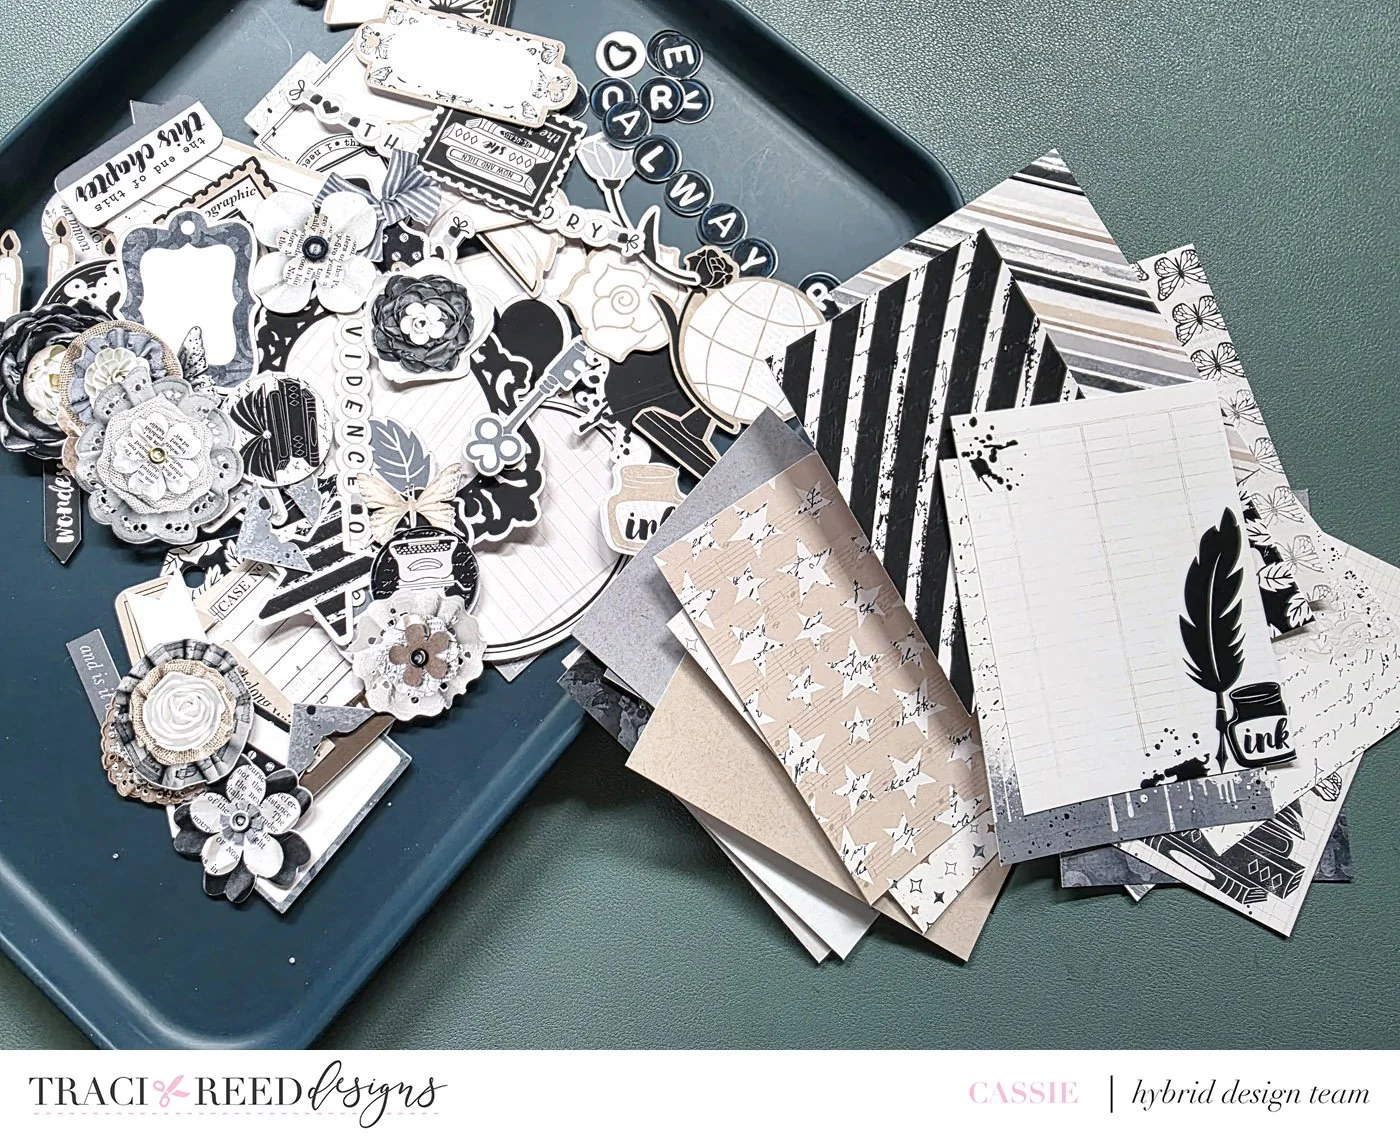
Creating the Foundation
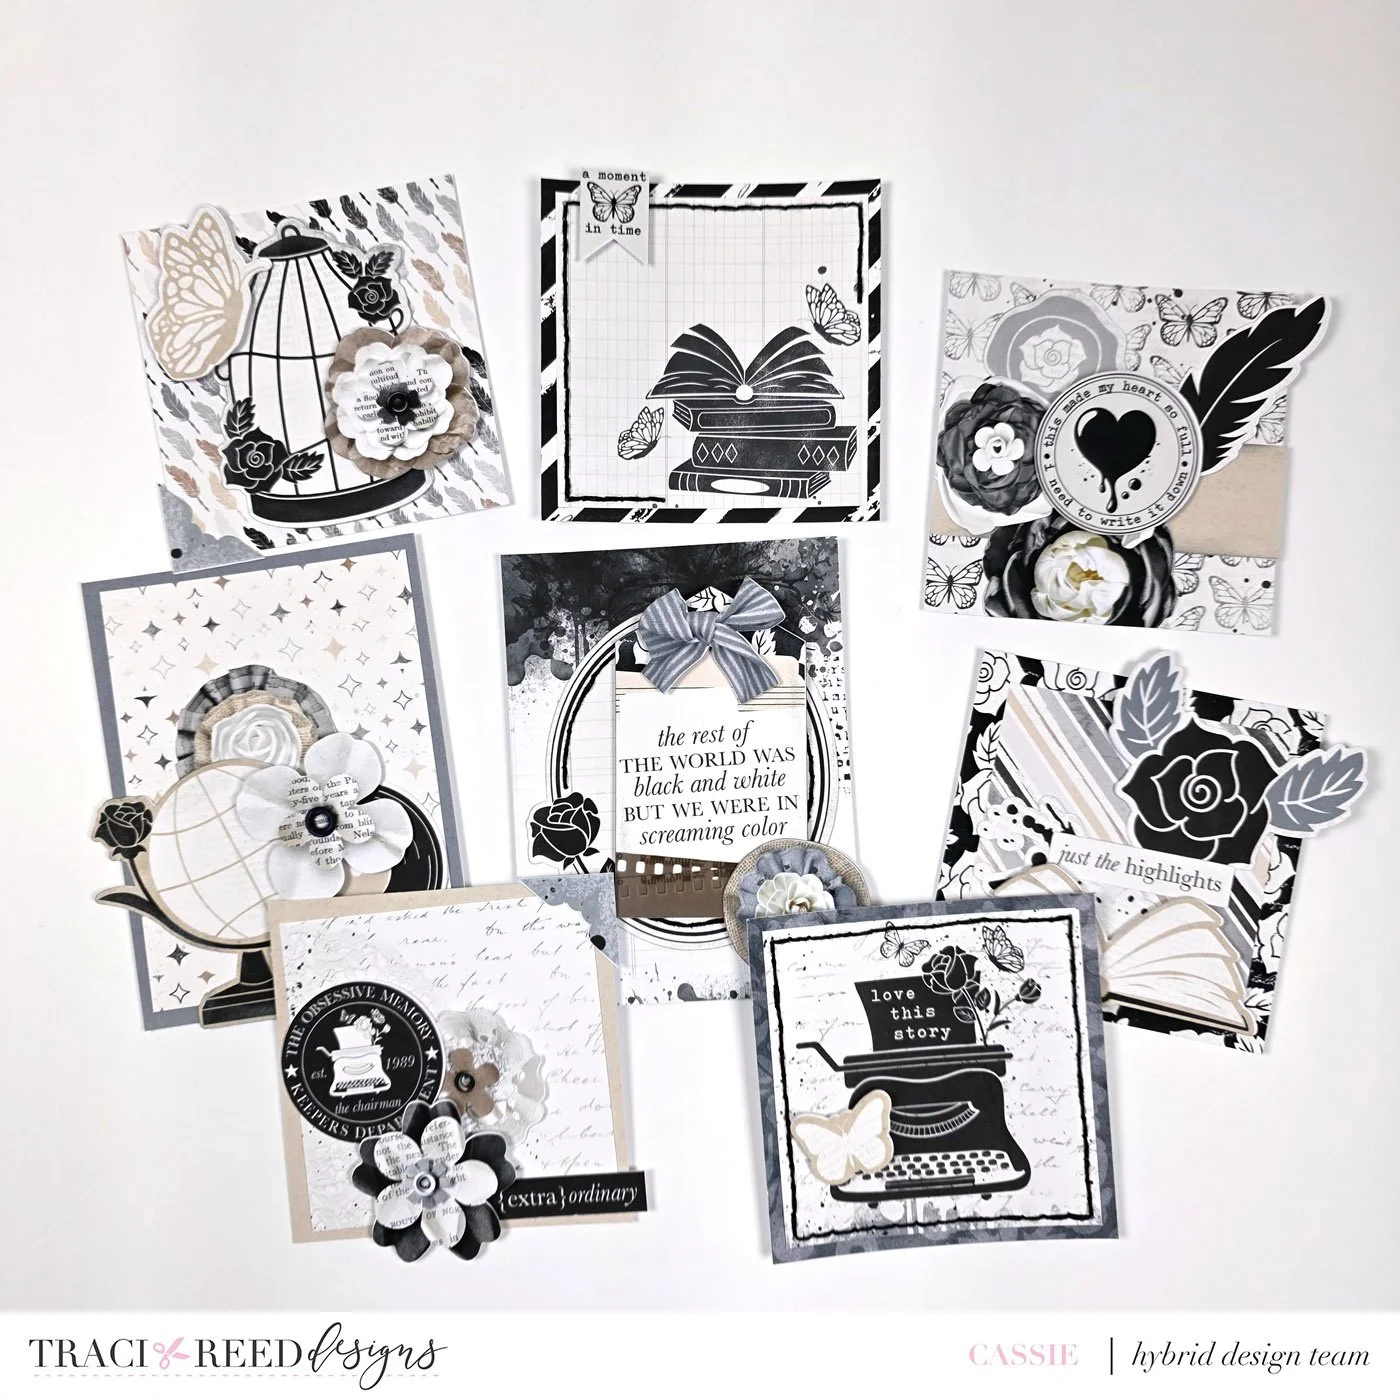
After selecting my favorite 9 cards, I laid them out in a grid pattern on my workspace. I love the versatility of a grid layout; it’s an easy way to keep things organized while leaving room for creative freedom. I then started adding die cuts and layered elements from the remaining cards. The goal was to create a harmonious balance and ensure that each card had its own unique flair.
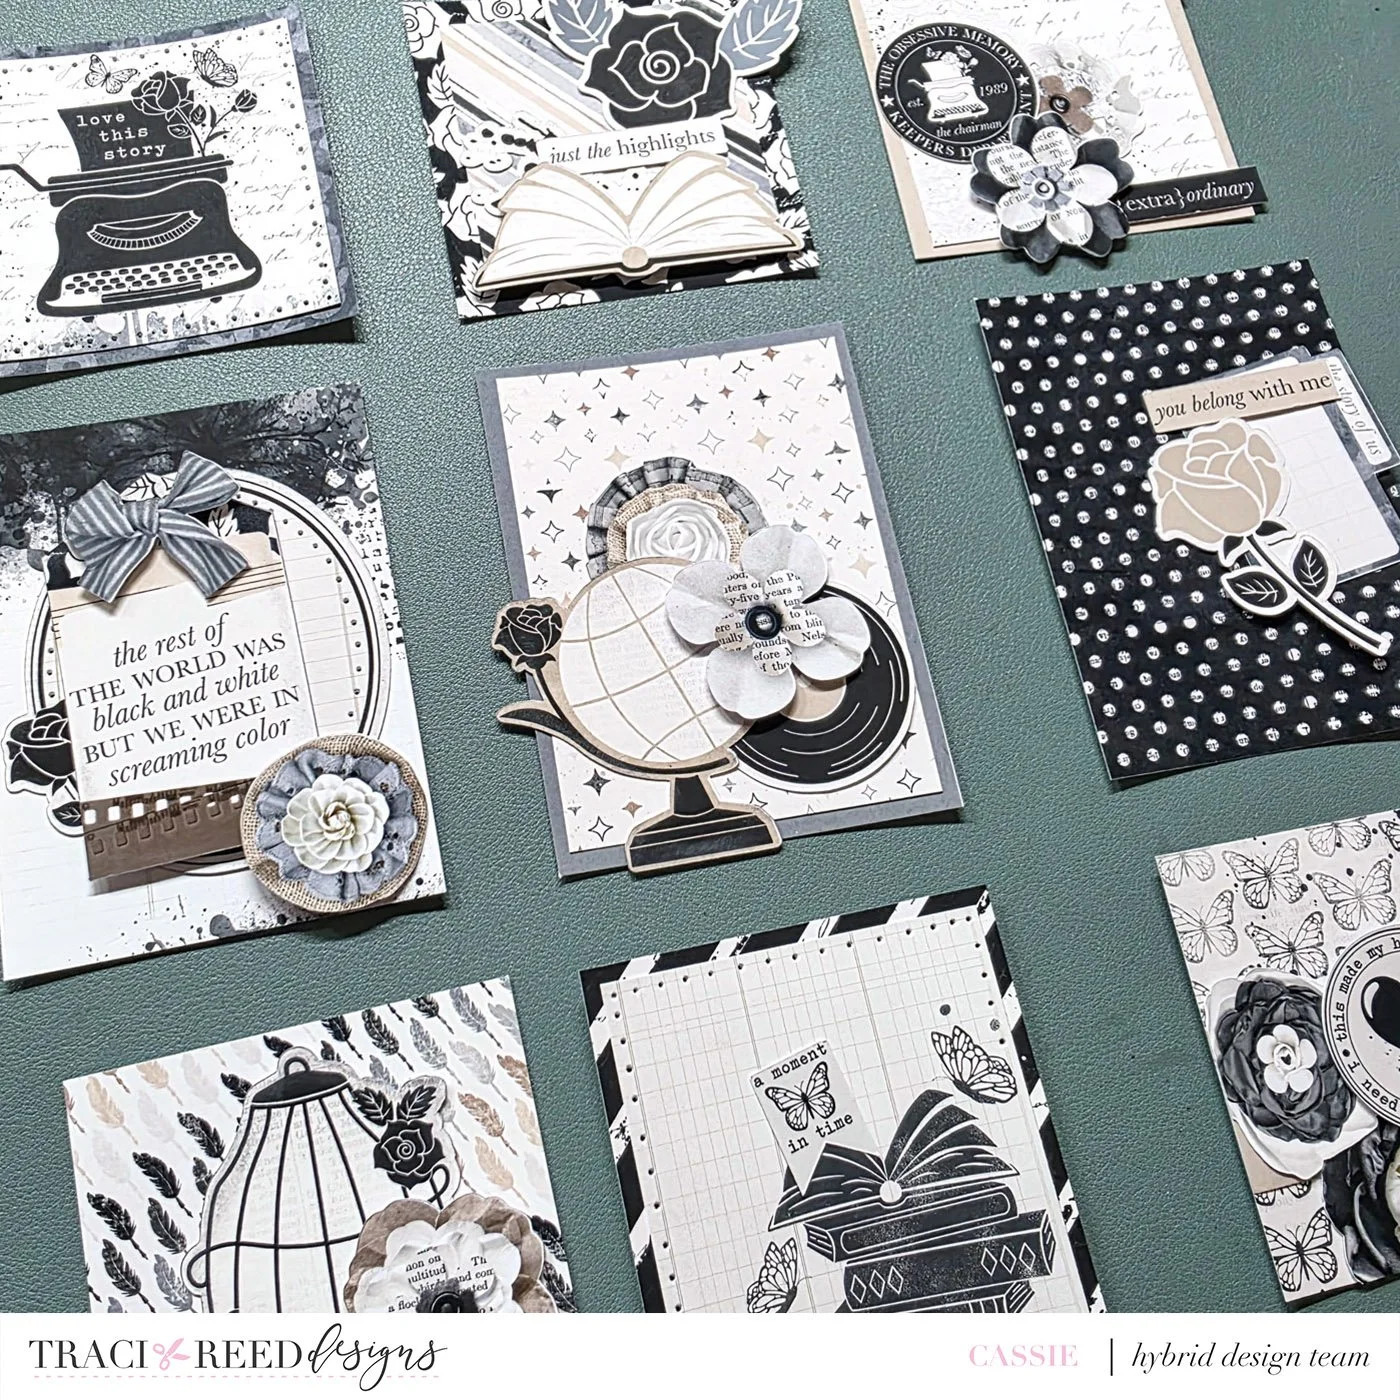
Once I was happy with the placement of everything, it was time to get down to business. I tackled each card individually, adding embellishments one at a time. To give the cards some extra depth and dimension, I used foam tape behind some of the layers. Foam tape is one of my favorite tools for adding a 3D effect without being too bulky. For a bit of texture, I also incorporated some hand stitching on a few of the cards. It’s a subtle detail that really brings everything together and adds that personal touch.


Putting It All Together
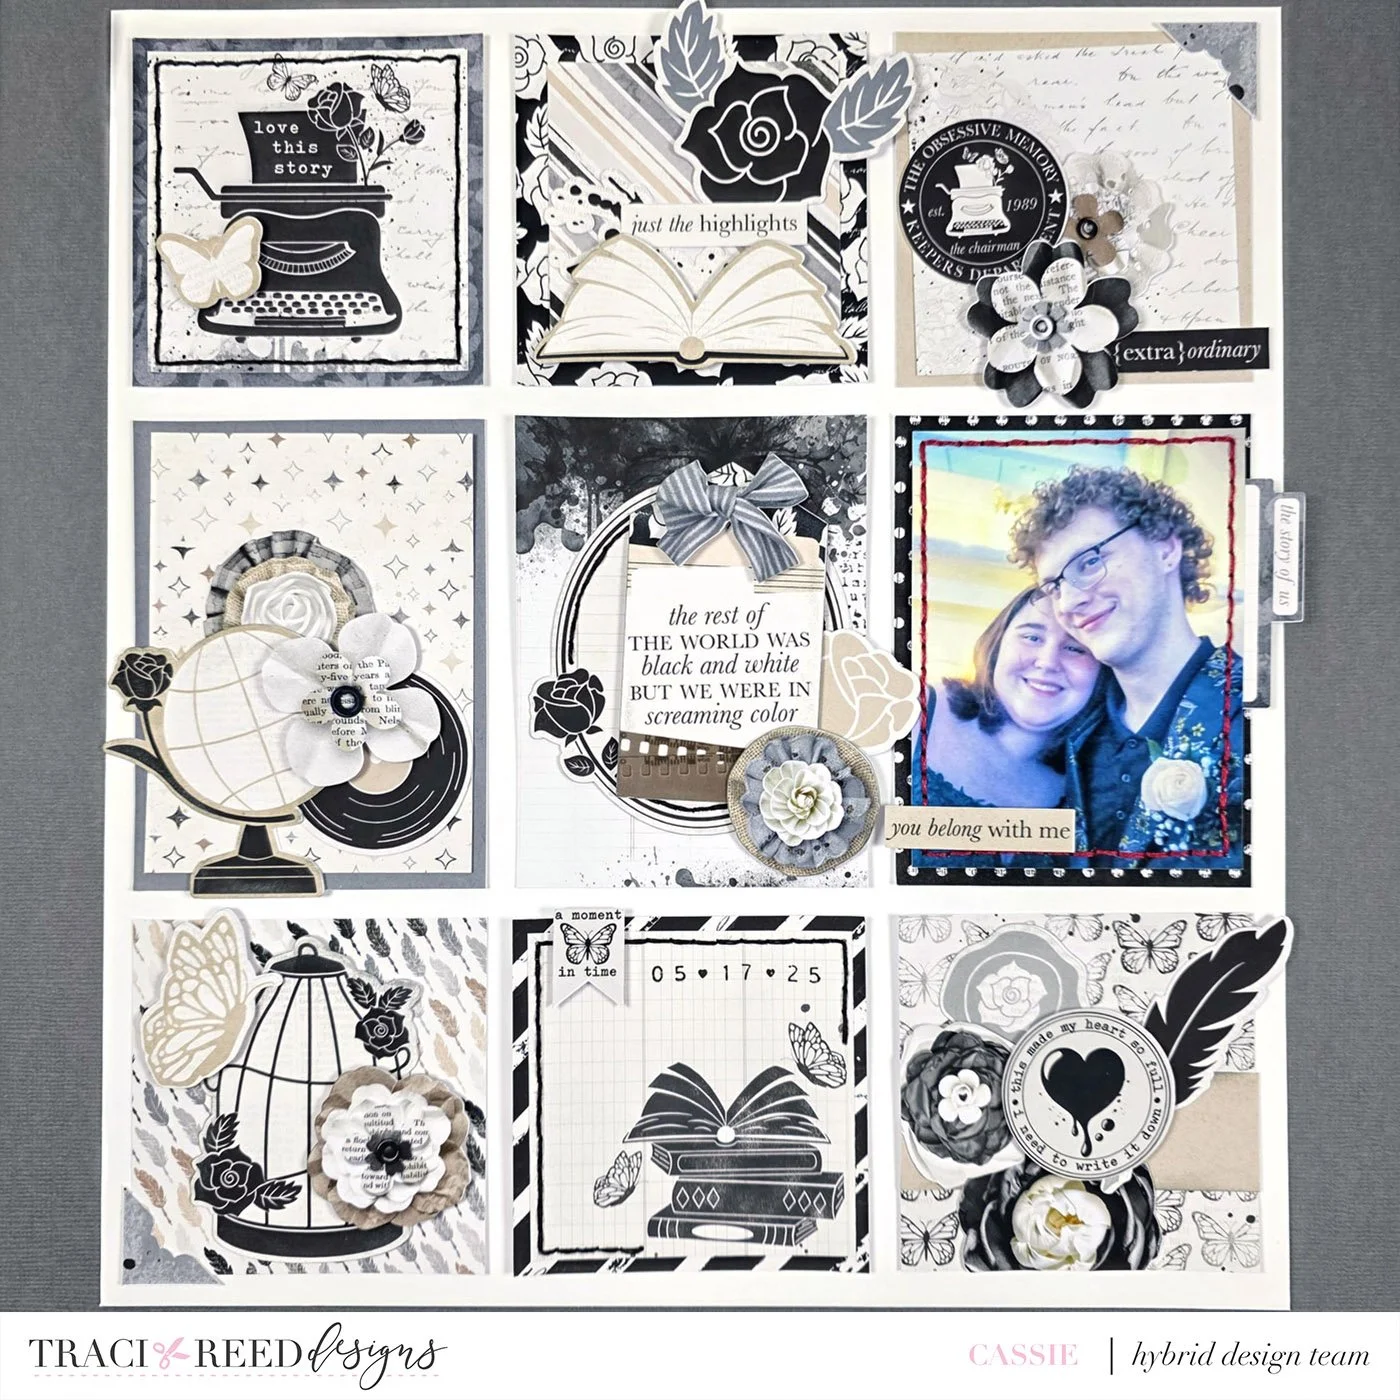
With all the cards decorated, it was time to bring the whole layout to life. I decided to add a photo to one of the remaining 3x4 cards, which would serve as the focal point of my layout. From there, I began arranging all the cards in a grid format on a piece of white cardstock.
I chose to use a piece of white cardstock that was slightly larger than the grid itself. This gave me just enough room to create a visual border. For the background, I decided to use a darker piece of cardstock to make the grid of cards pop, while also helping the elements stand out more.
Why Small Projects Can Lead to Big Results
Starting with something small, like these embellished cards, was the perfect way to ease into the creative process when I didn’t have a lot of time or energy to invest. Throughout the process, I was able to sneak in little pockets of creativity whenever I had a few free moments. And before I knew it, the entire set of cards was finished, and I had enough inspiration to complete the full layout quickly and efficiently.
What I love most about this approach is that it takes the pressure off. Sometimes, all we need is a little momentum to get our creative juices flowing again. By breaking down a large project into smaller tasks, it becomes less daunting—and more enjoyable!
If you’re feeling stuck or overwhelmed in your own scrapbooking journey, I encourage you to try something smaller next time. Whether it’s creating embellished cards, tags, or even simple journaling spots, starting small can help unlock your creativity and bring you back into the flow.
So, take it from me: when you’re stuck, start small, and before you know it, your creative mojo will be back in full swing. Happy scrapping!


