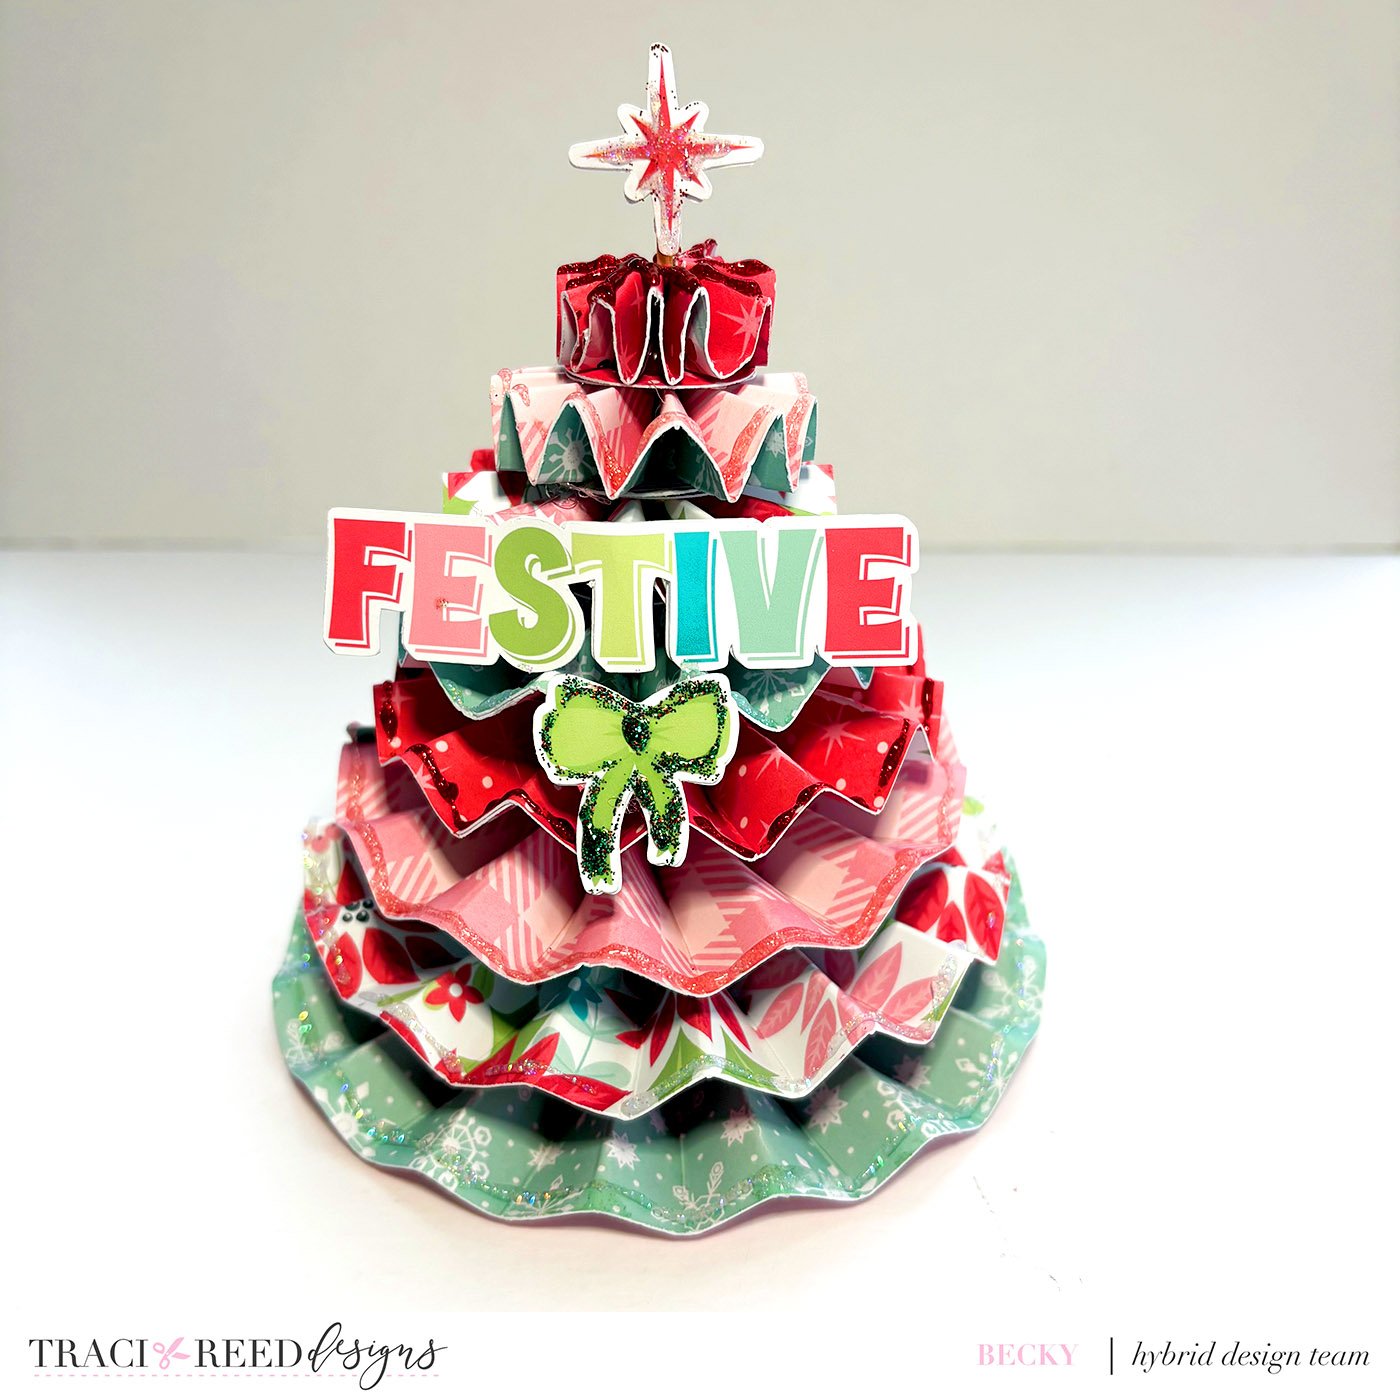
Get Creative with this Make Merry Rosette Christmas Tree Tutorial from Becky!
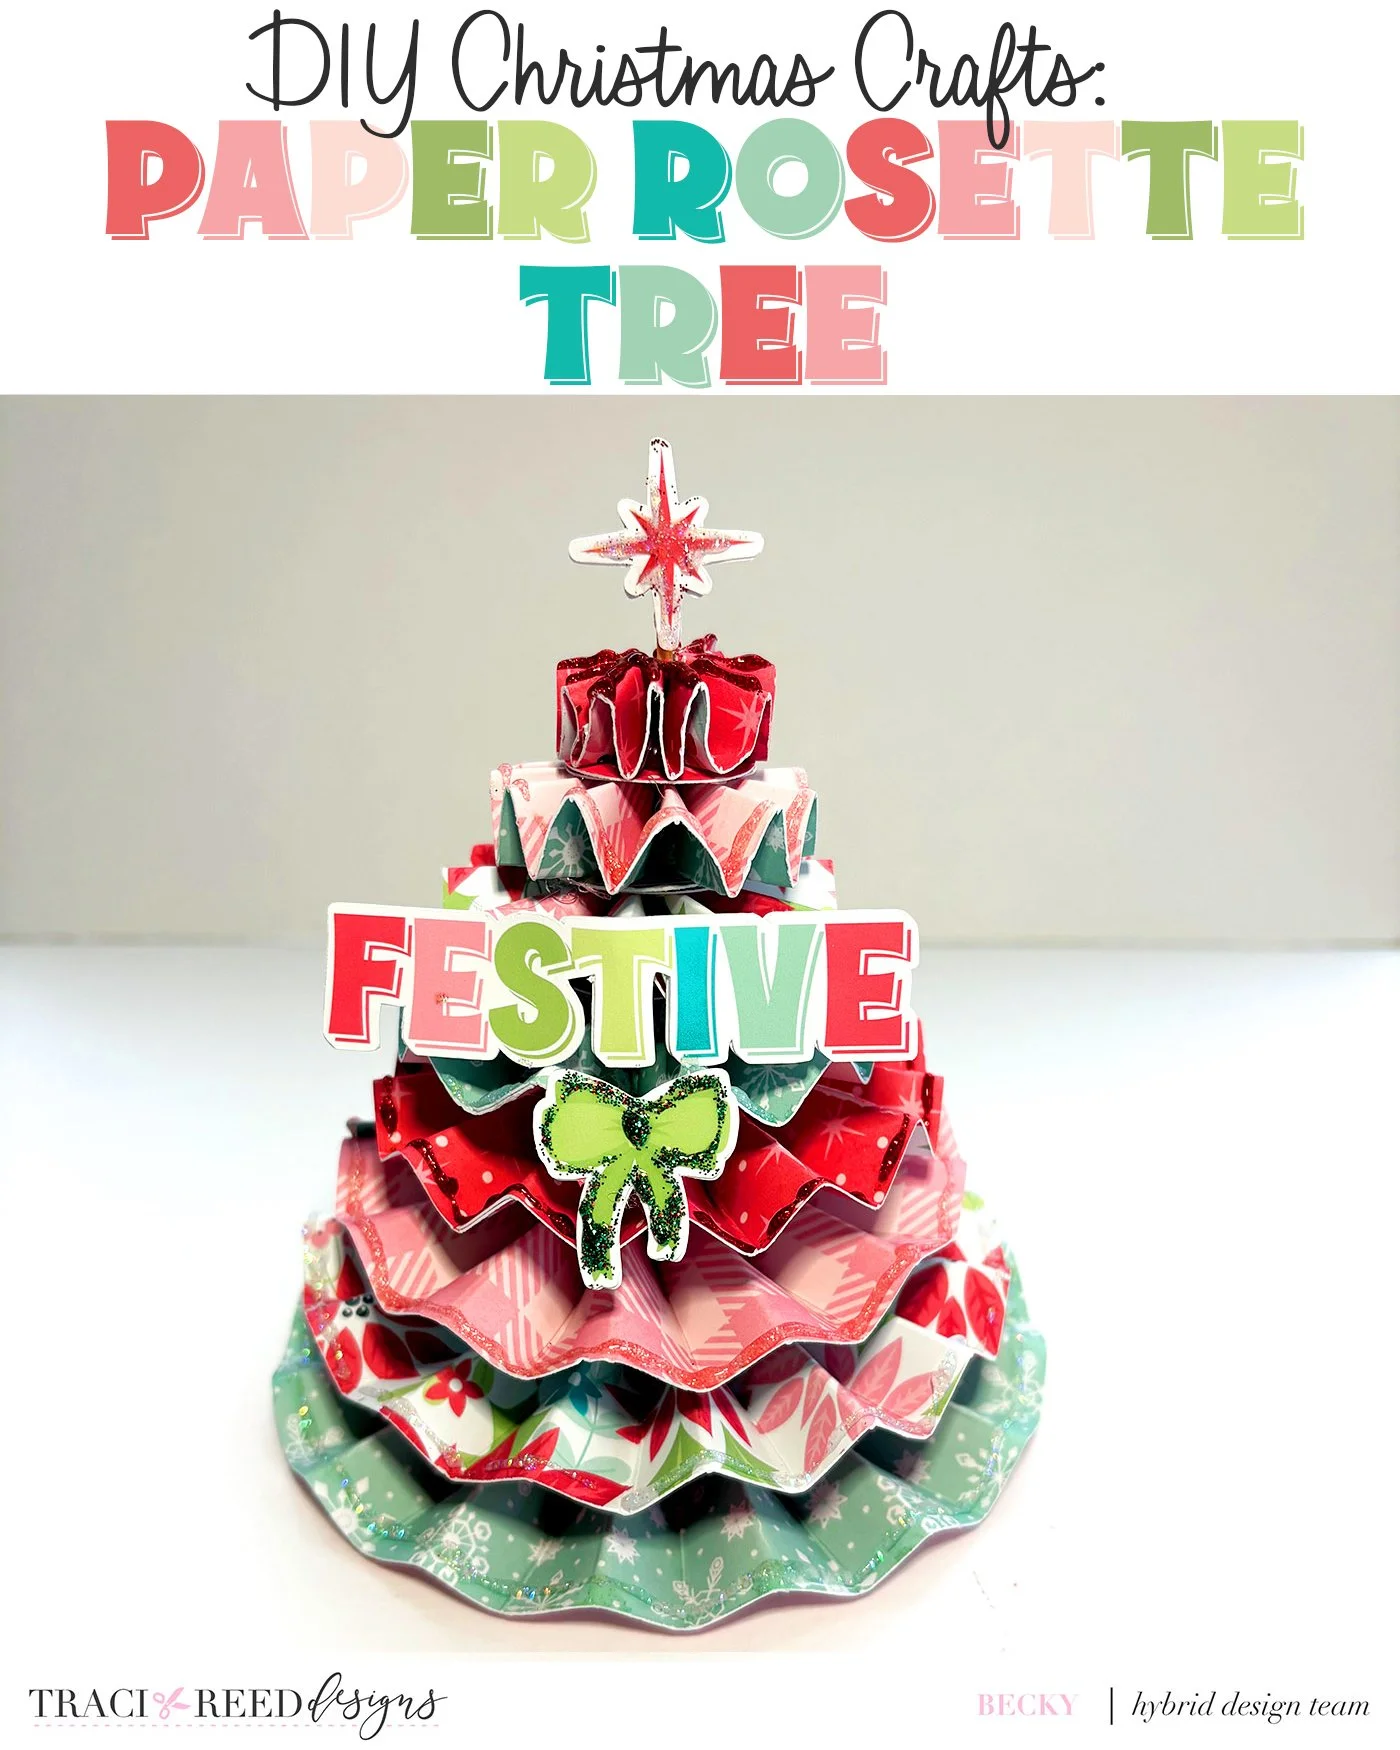
When I showed my fellow teamies the Christmas tree I had made for the launch of Make Merry I was asked to do a blog post with instructions on how I made it, so here we go! (side note from Traci, I did indeed BEG and Becky is the BEST!)
The first thing I did was print two sheets of the paper, double sided. It was a revelation to me when I I bought double sided matte photo paper as I now can print double sided papers if I want to which is great for some projects, especially ones like this.
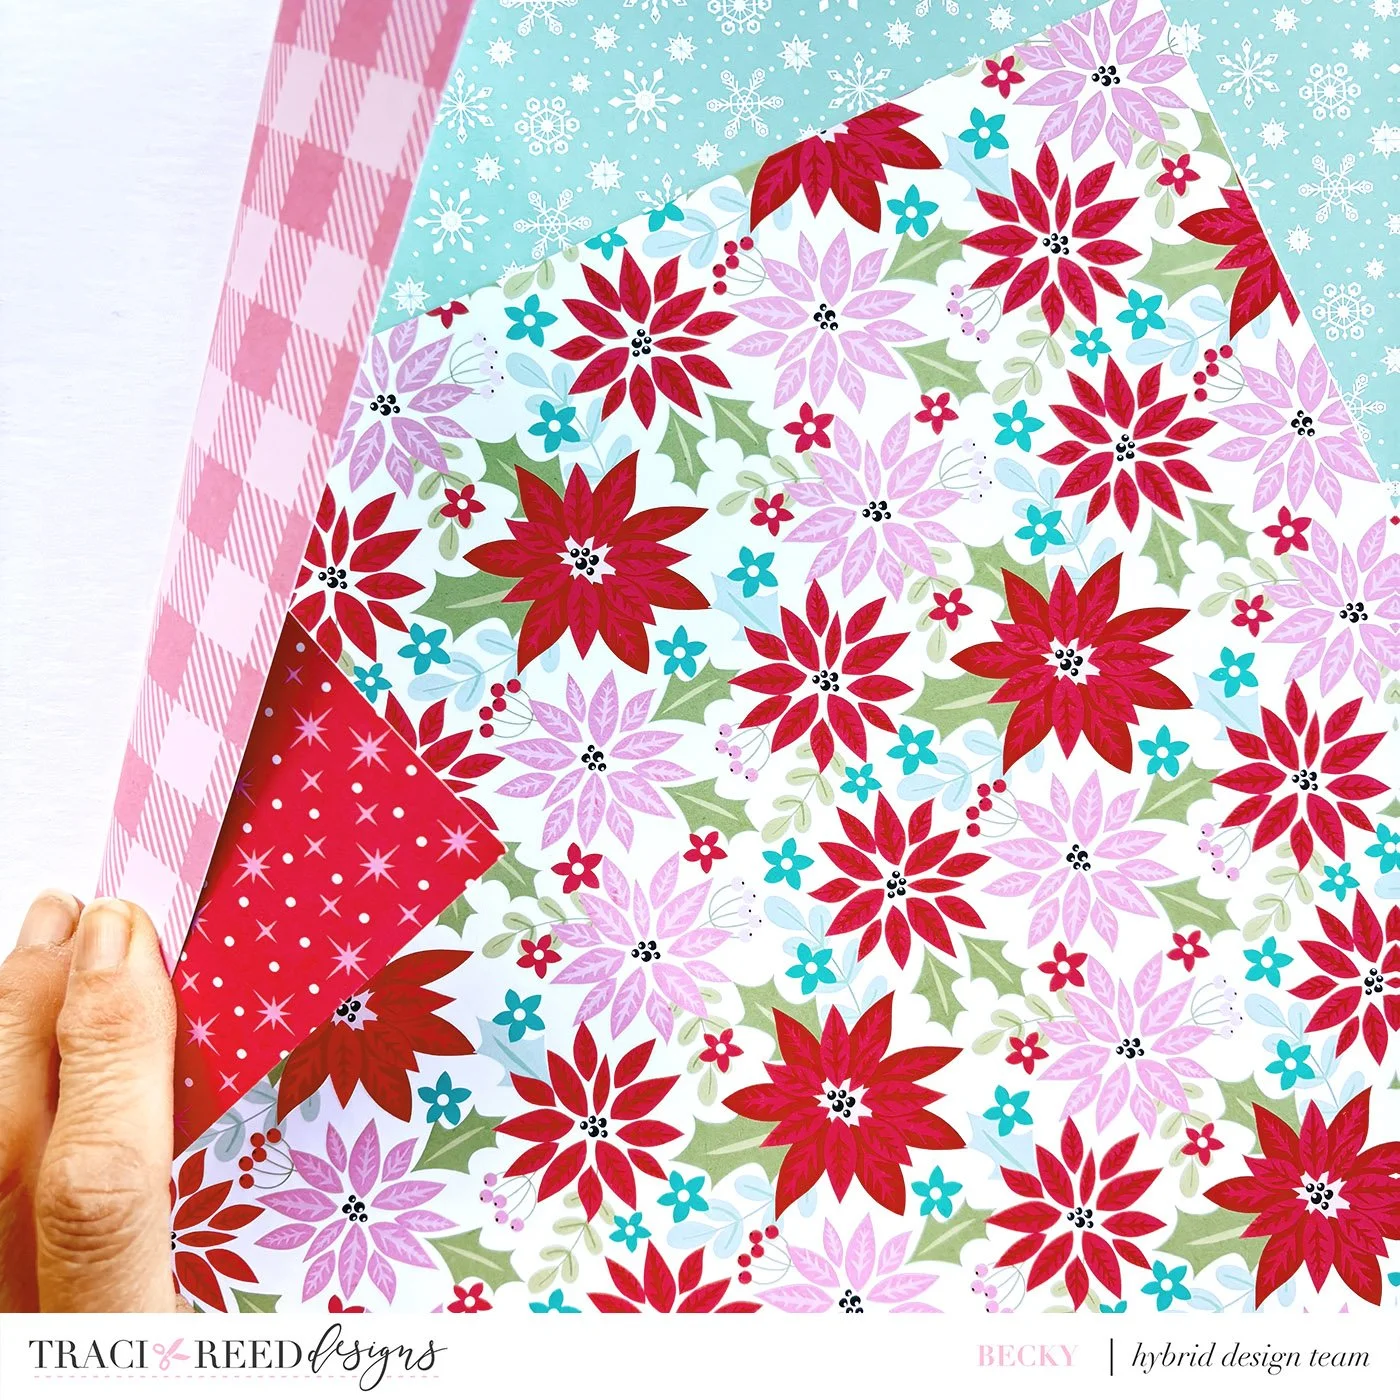
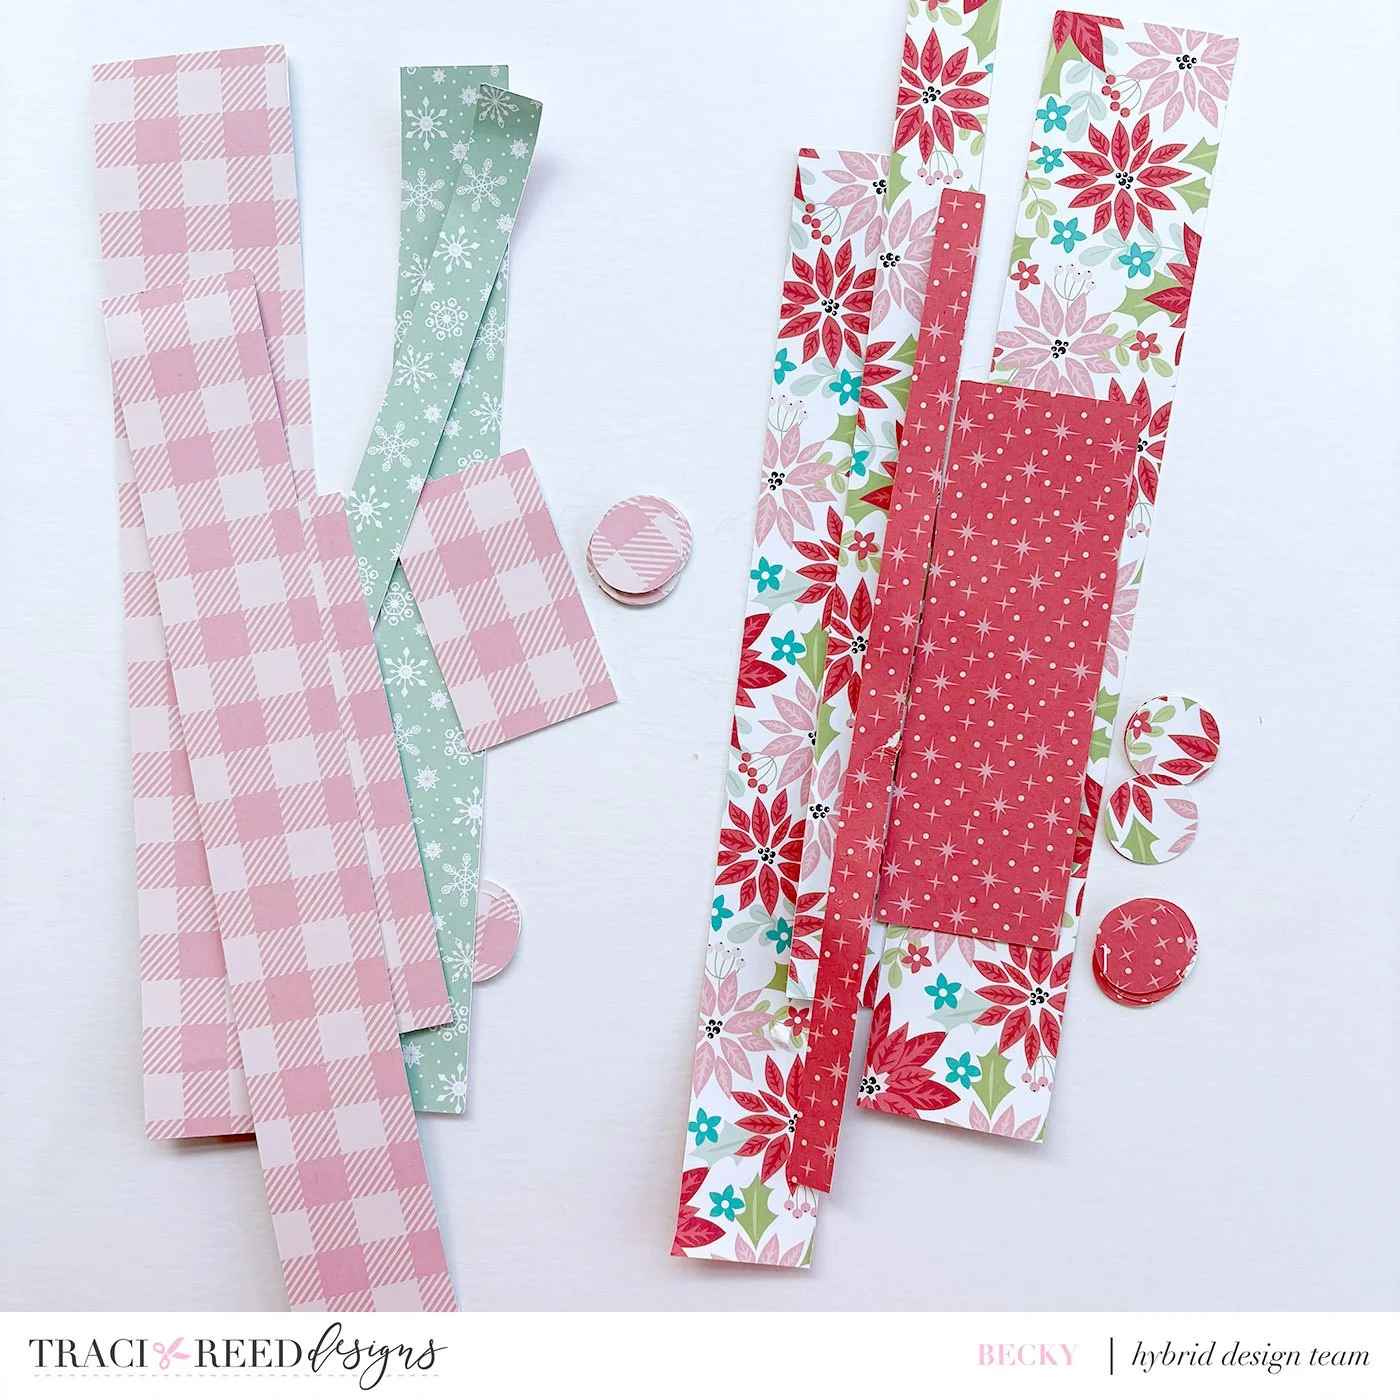
I then decided which pattern I wanted for each layer and then cut the papers to size. These are the sizes I used for the whole tree:
1/2” x 11”
3/4” x 11.5”
1” x 11.5”
1.25” x 11.5”
1.5” x 12” and a strip 1.5” x 3” (you will stick these two together)
1.75” x 12” and a strip 1.75 x 3” (you will stick these two together)
2” x 12” and a strip 2” x 6” (you will stick these two together)
2.25” x 12” and a strip 2.25” x 6” (you will stick these two together)
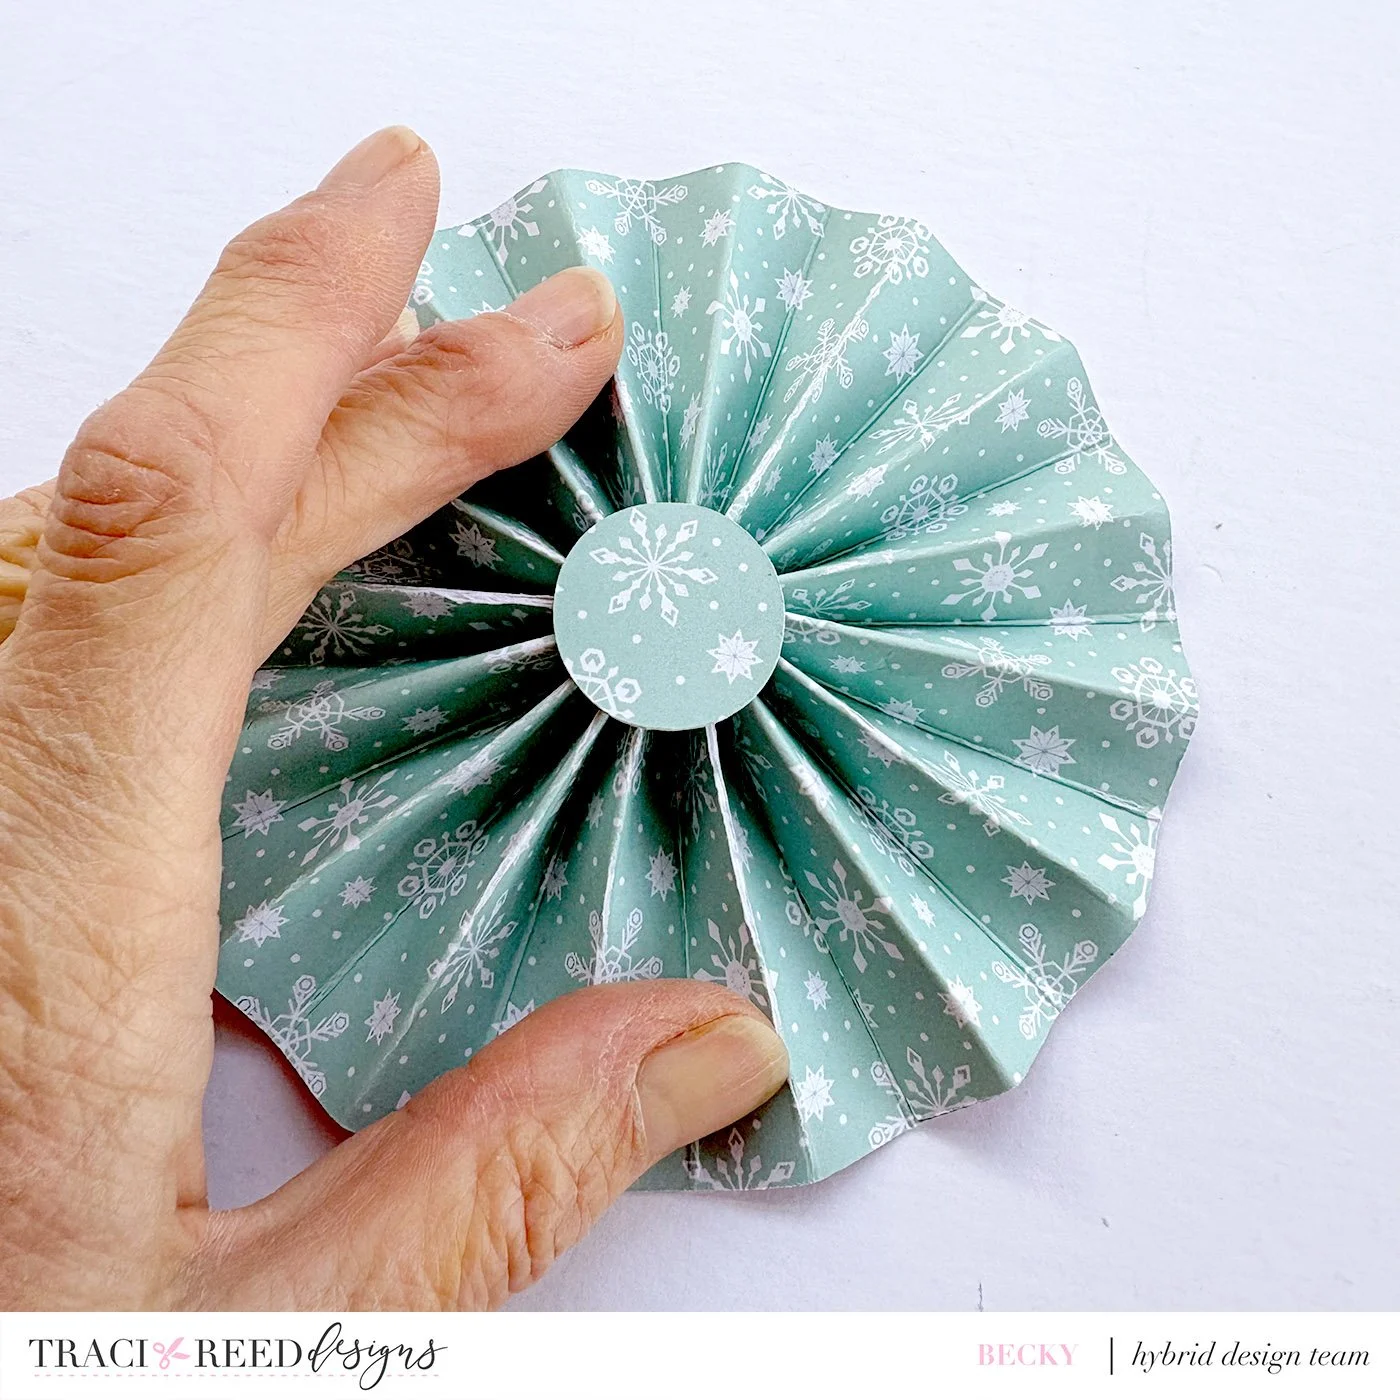
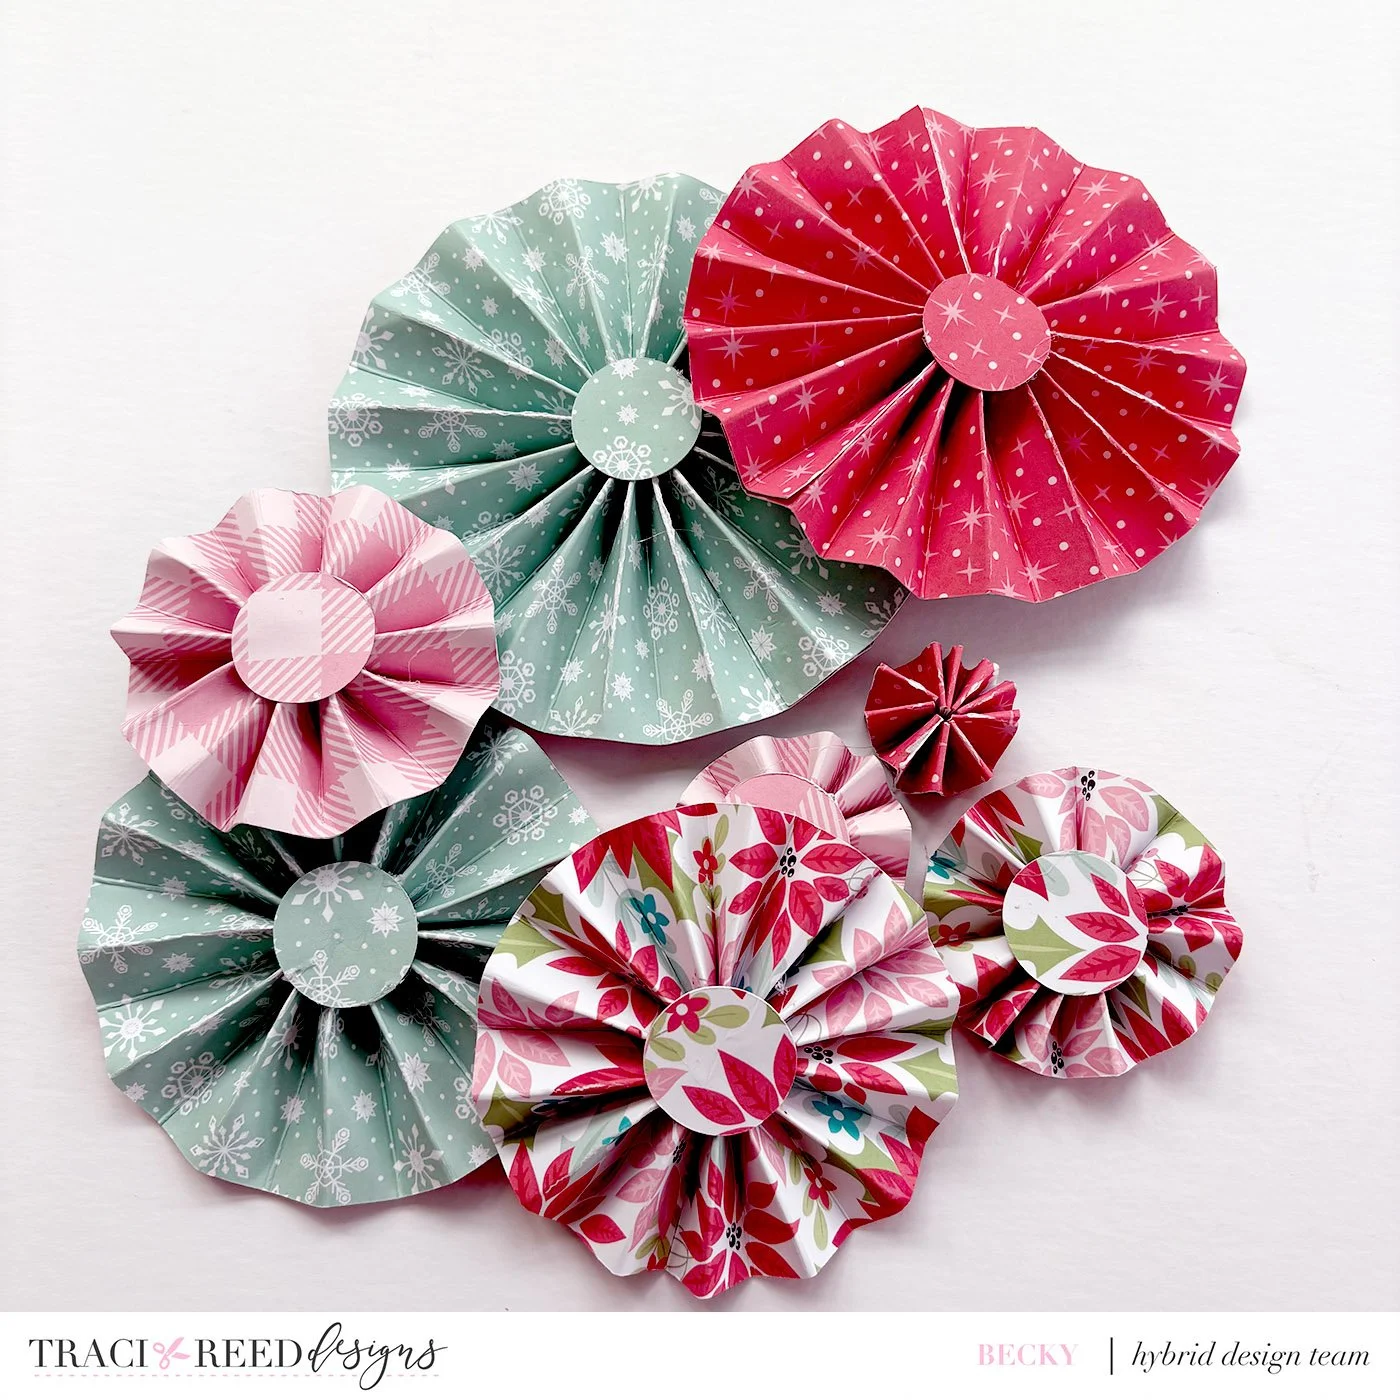
I also cut out 15 1” diameter circles
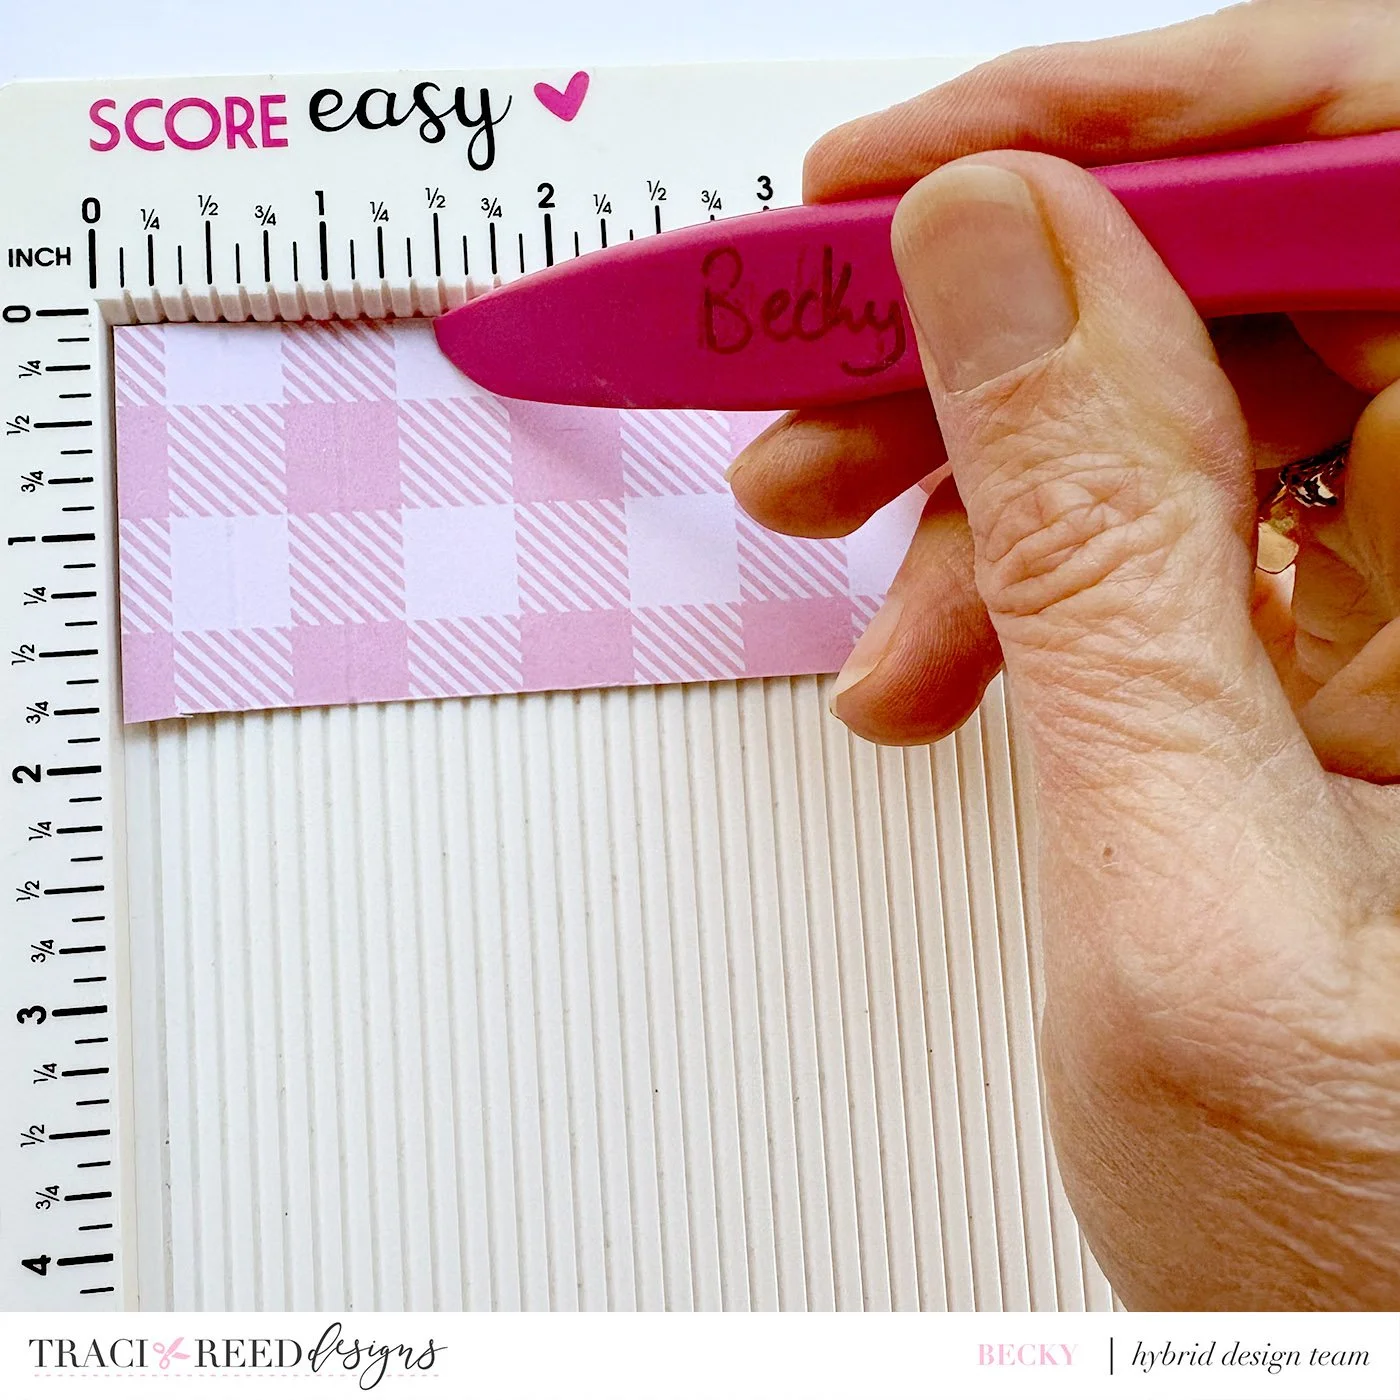
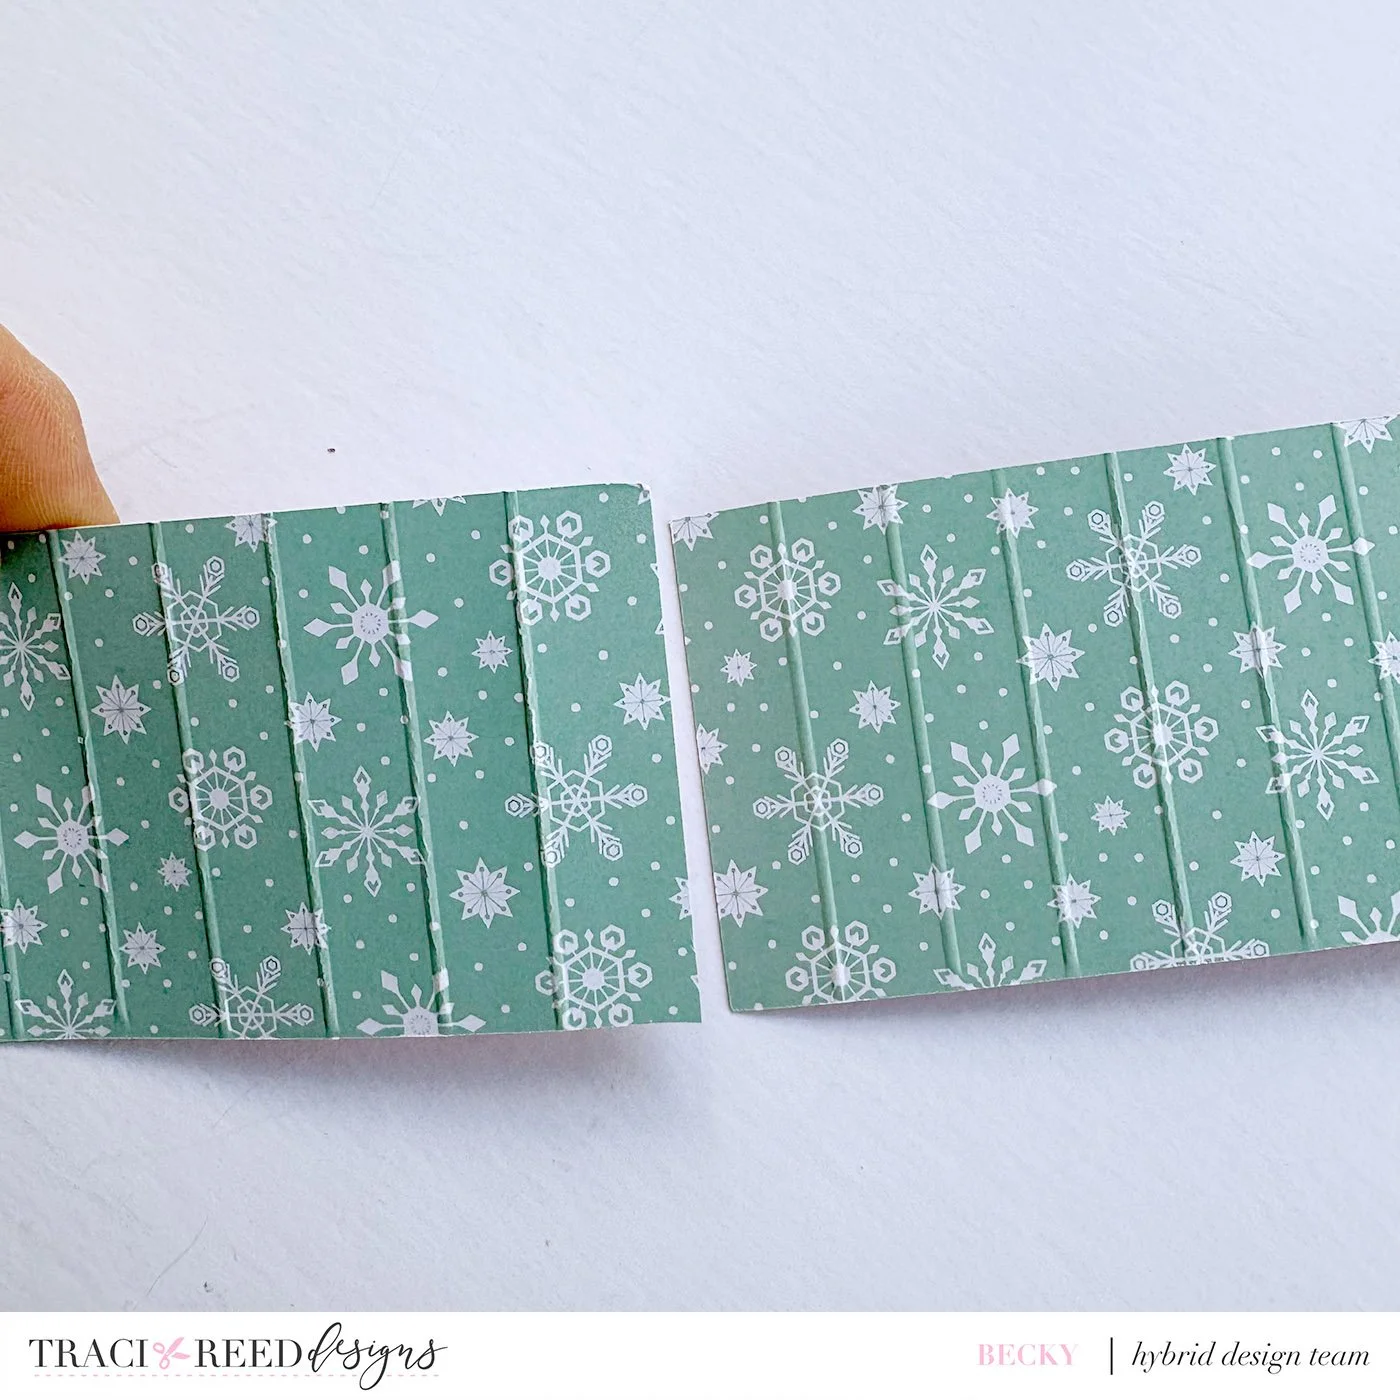
Each strip is then scored at every half inch mark on the long side.
Accordion fold the strips so you have hills and valleys. For a strips which is made of two strips stick them end to end ensuring you still have hills and valleys.
Join the two ends of the strip to make a ring.
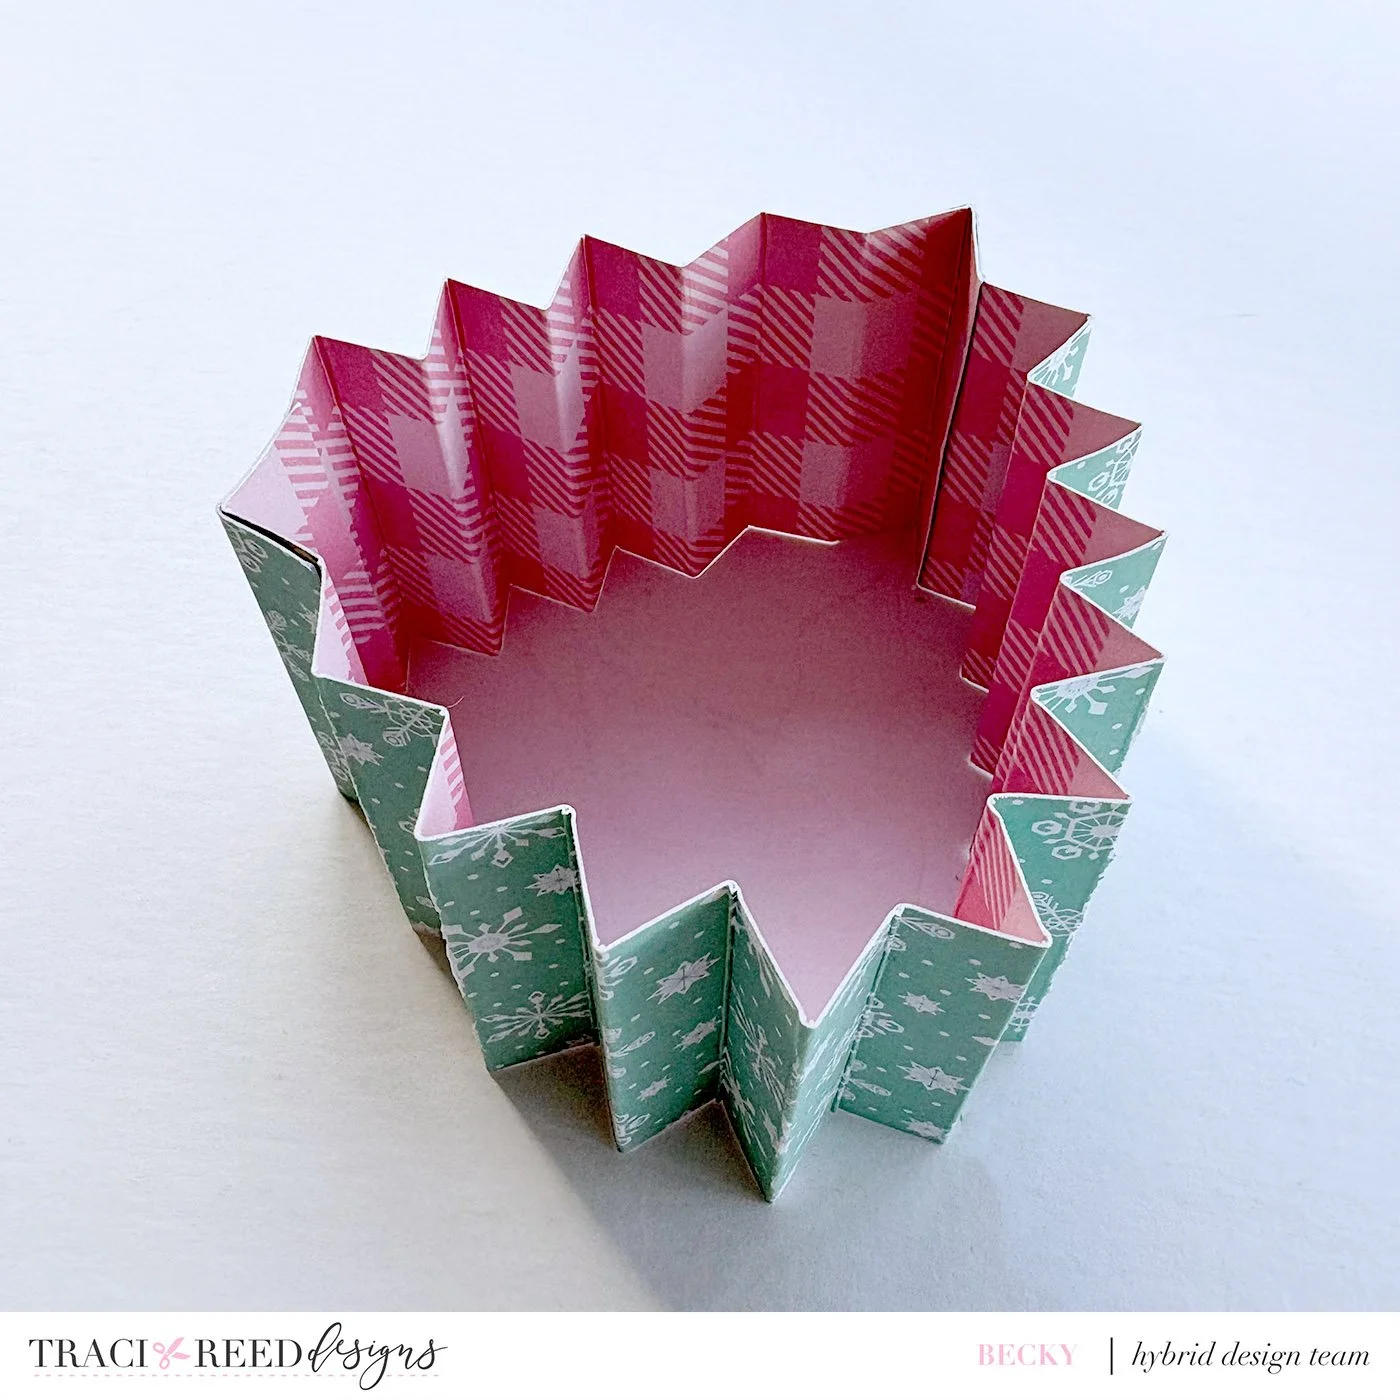
The next bit is the hardest bit! You have to now squash the ring down to form the rosette, hold the rosette down and stick one of the circles in the middle on both sides to hold it all together.
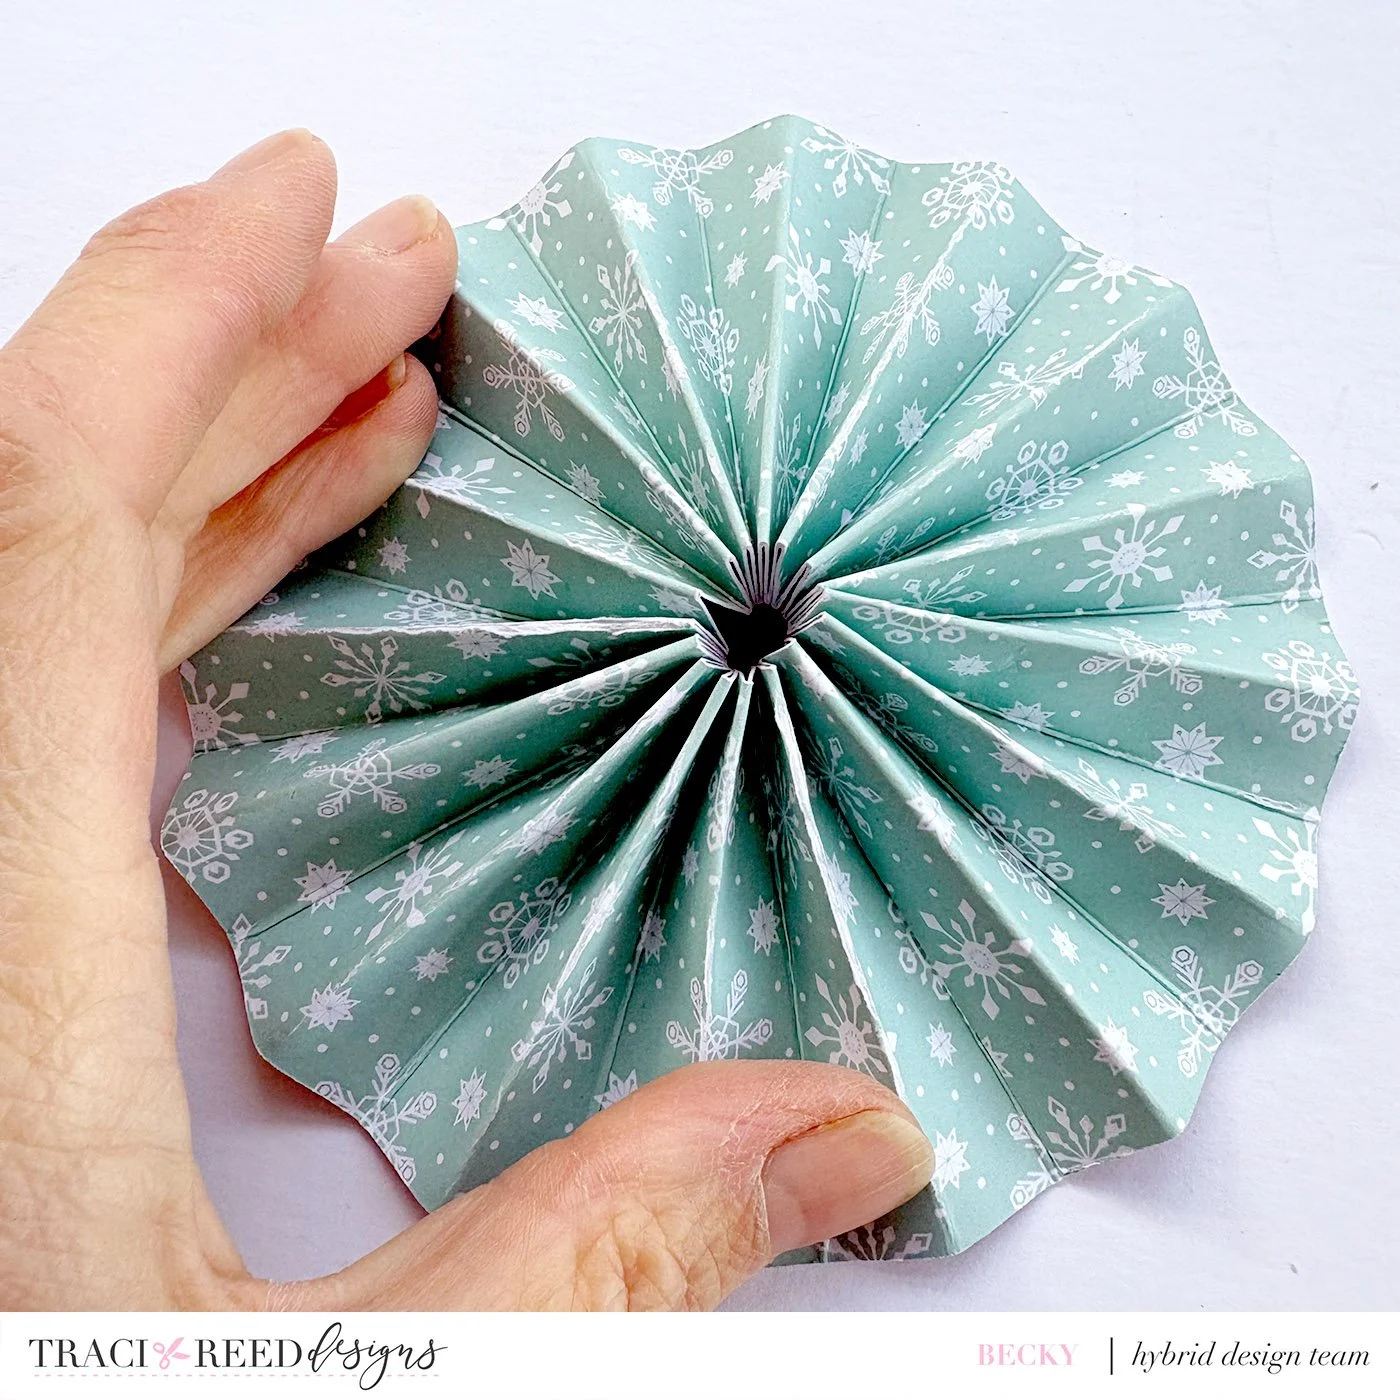
I found hot glue worked best for this. Do not glue a circle to the top of your smallest rosette - you’ll see why shortly!
Do this to all the strips. It looks really pretty!
It is then just a matter of sticking the circles together to form the tree, starting with the largest at the bottom.
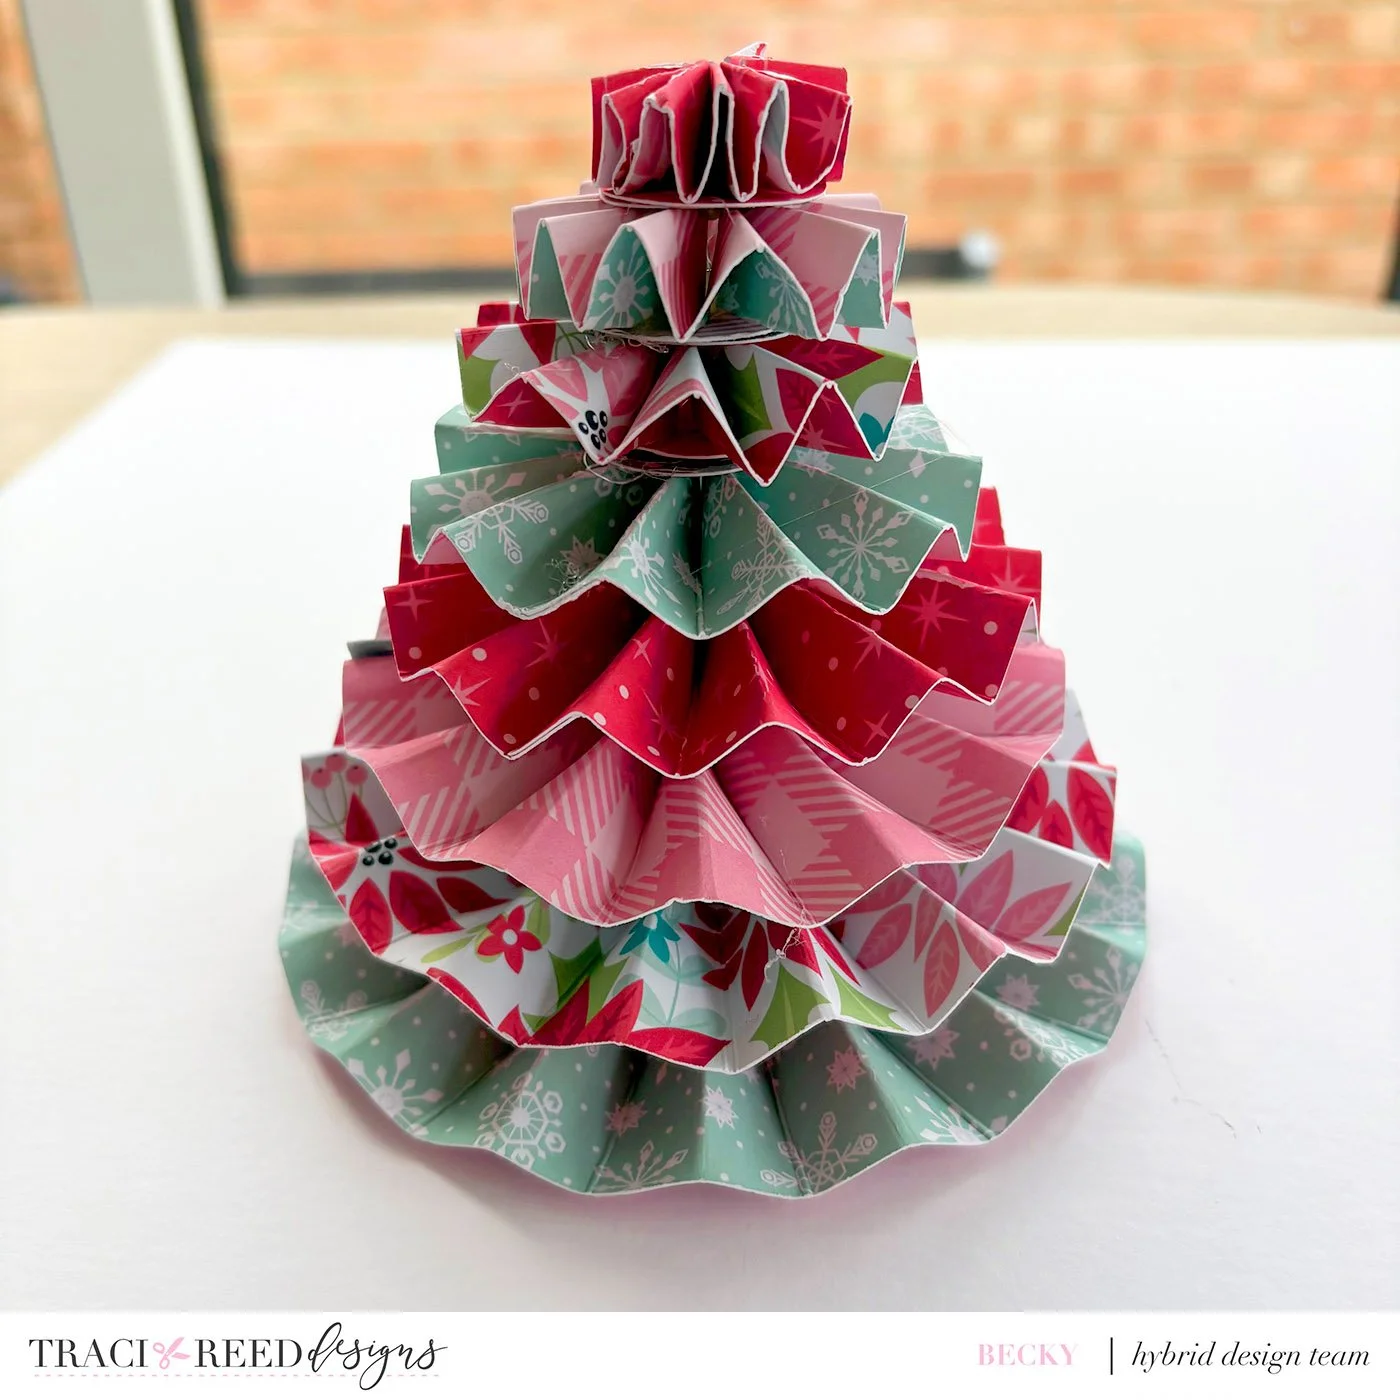
I then cut out a word phrase three times and stuck them together to give them a bit of sturdiness. I also cut out a bow, mirroring one image so I could stick them back to back and two stars.
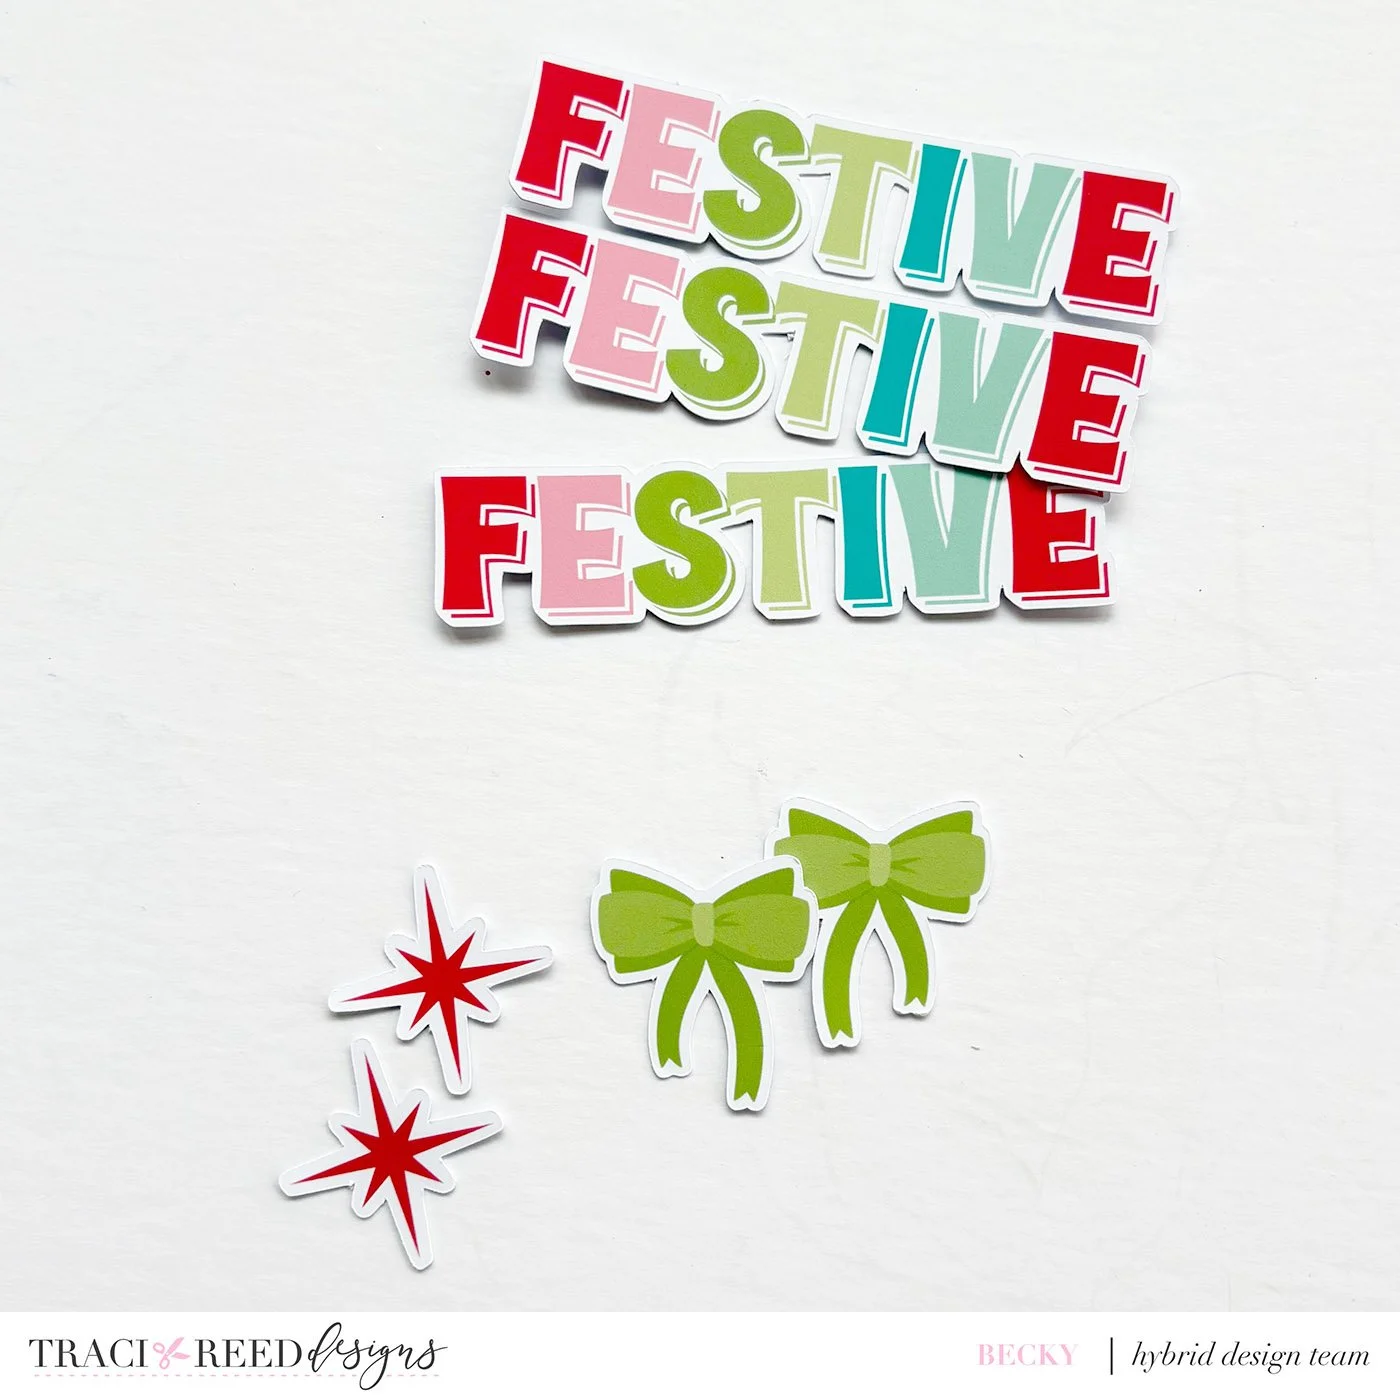
I stuck the stars back to back with a cocktail stick in the middle and glued the cocktail stick into the hole in the smallest rosette. I stuck the word and the bow to the front of the tree. To finish off I grabbed some Stickles in different colours and used them to edge the tree, the bow and the star. And there you have it! A festive tree which I am going to use to decorate my craft space, well I now have two of them which is fun!