Flower Power: Three Ways to Use Florals to Make Your Pages Bloom!
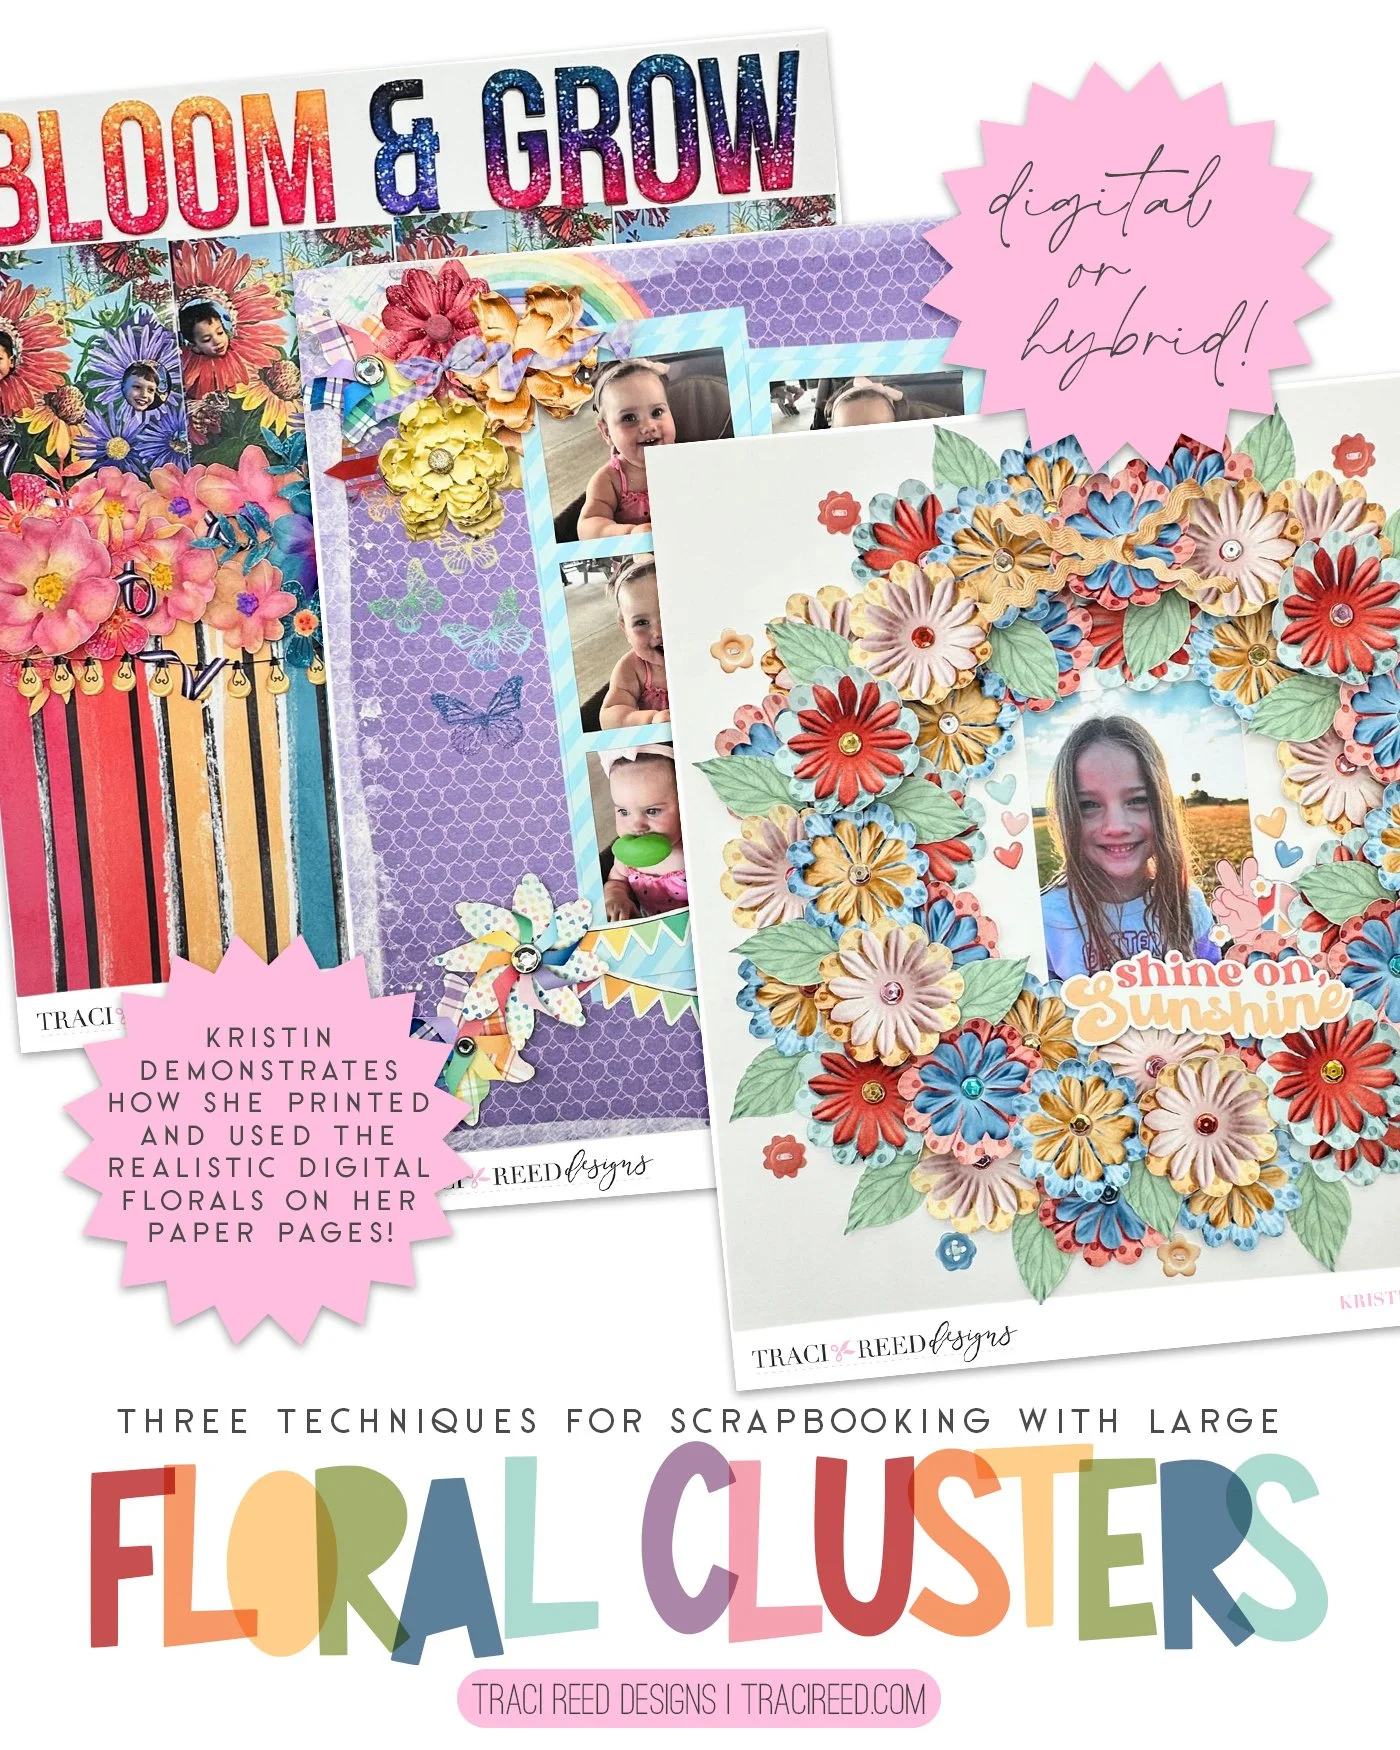
Traci’s digital florals are absolutely stunning and gorgeous! I really wanted to shine a spotlight on those beautiful blooms and create several layouts using florals from 3 different collections in 3 different ways!
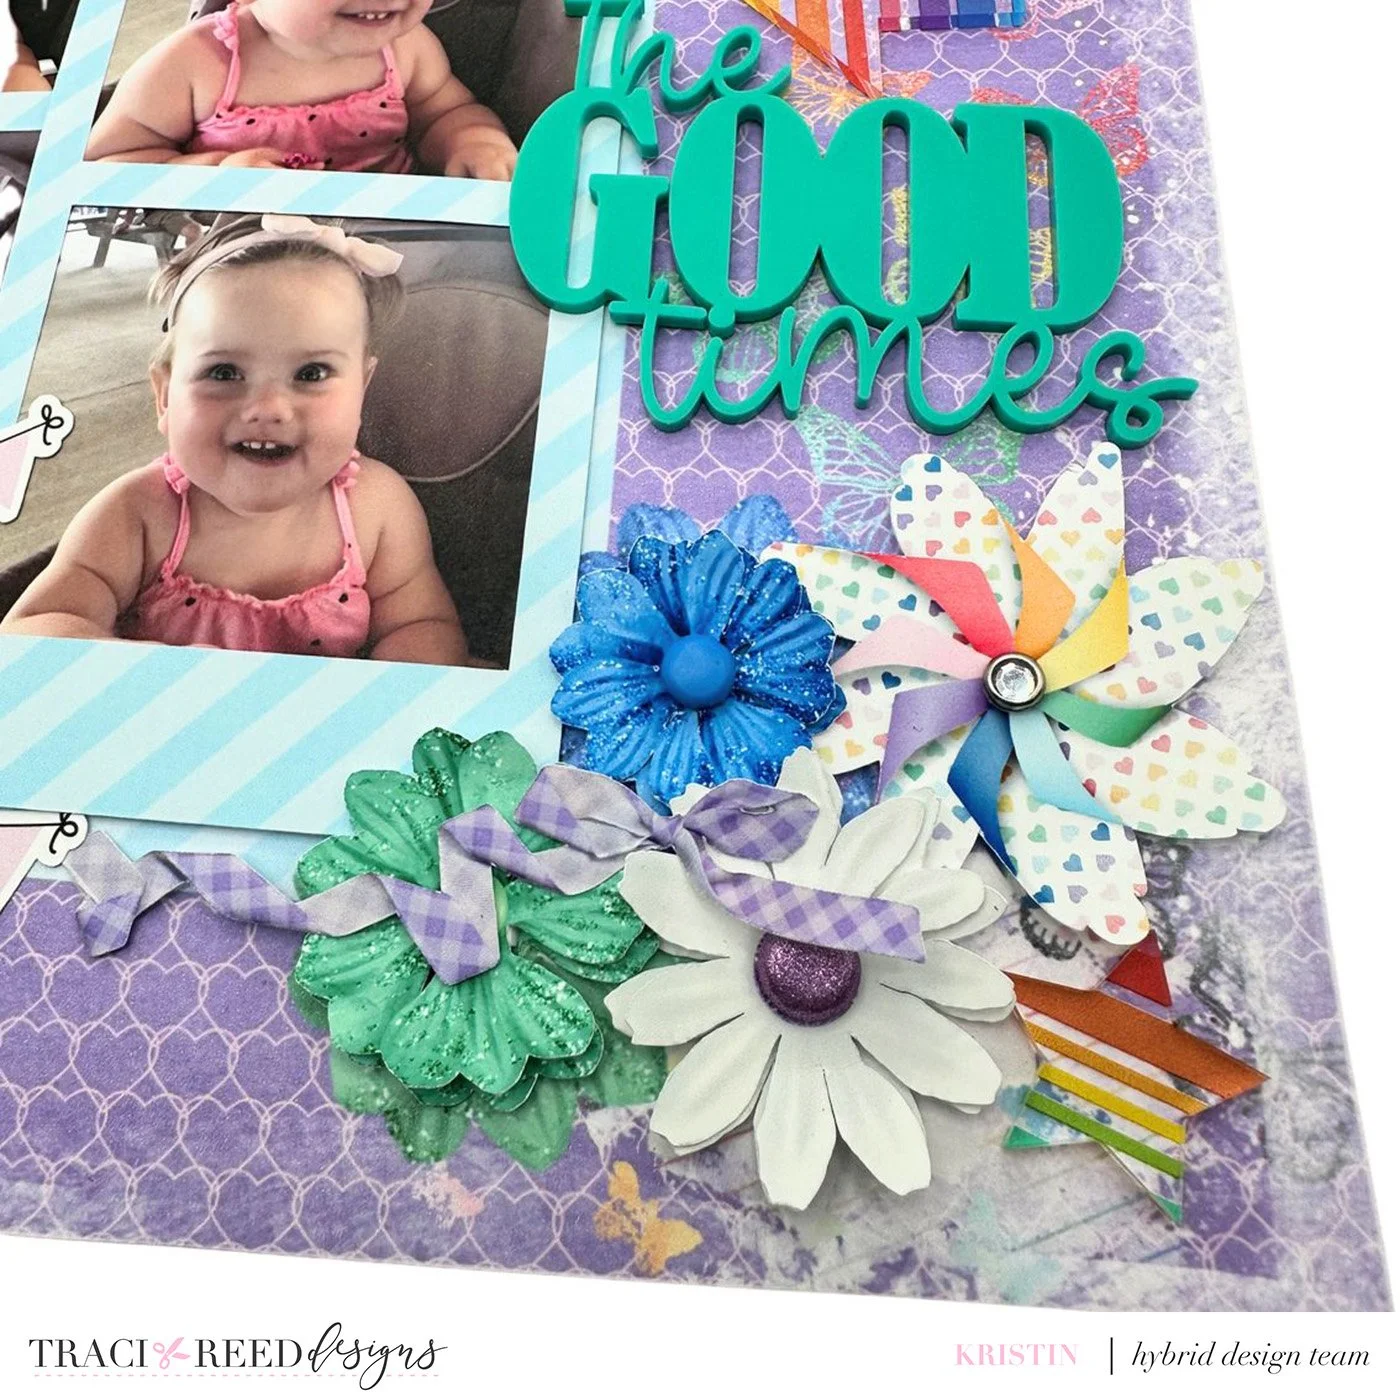
The first way I use florals is to use them in my clusters! They add softness and are great for tucking in and filling in gaps in your clusters. In the first layout, using the Keep Chasing Rainbows collection, I created a digital background with the florals tucked into the upper left and lower right portions of where the photographs would be.
I printed and cut 2 of each of the digital flowers on my Cricut Maker so that I could layer them on top of each other to create a 3D effect. I bent the petals of each of the flowers to give them more movement.
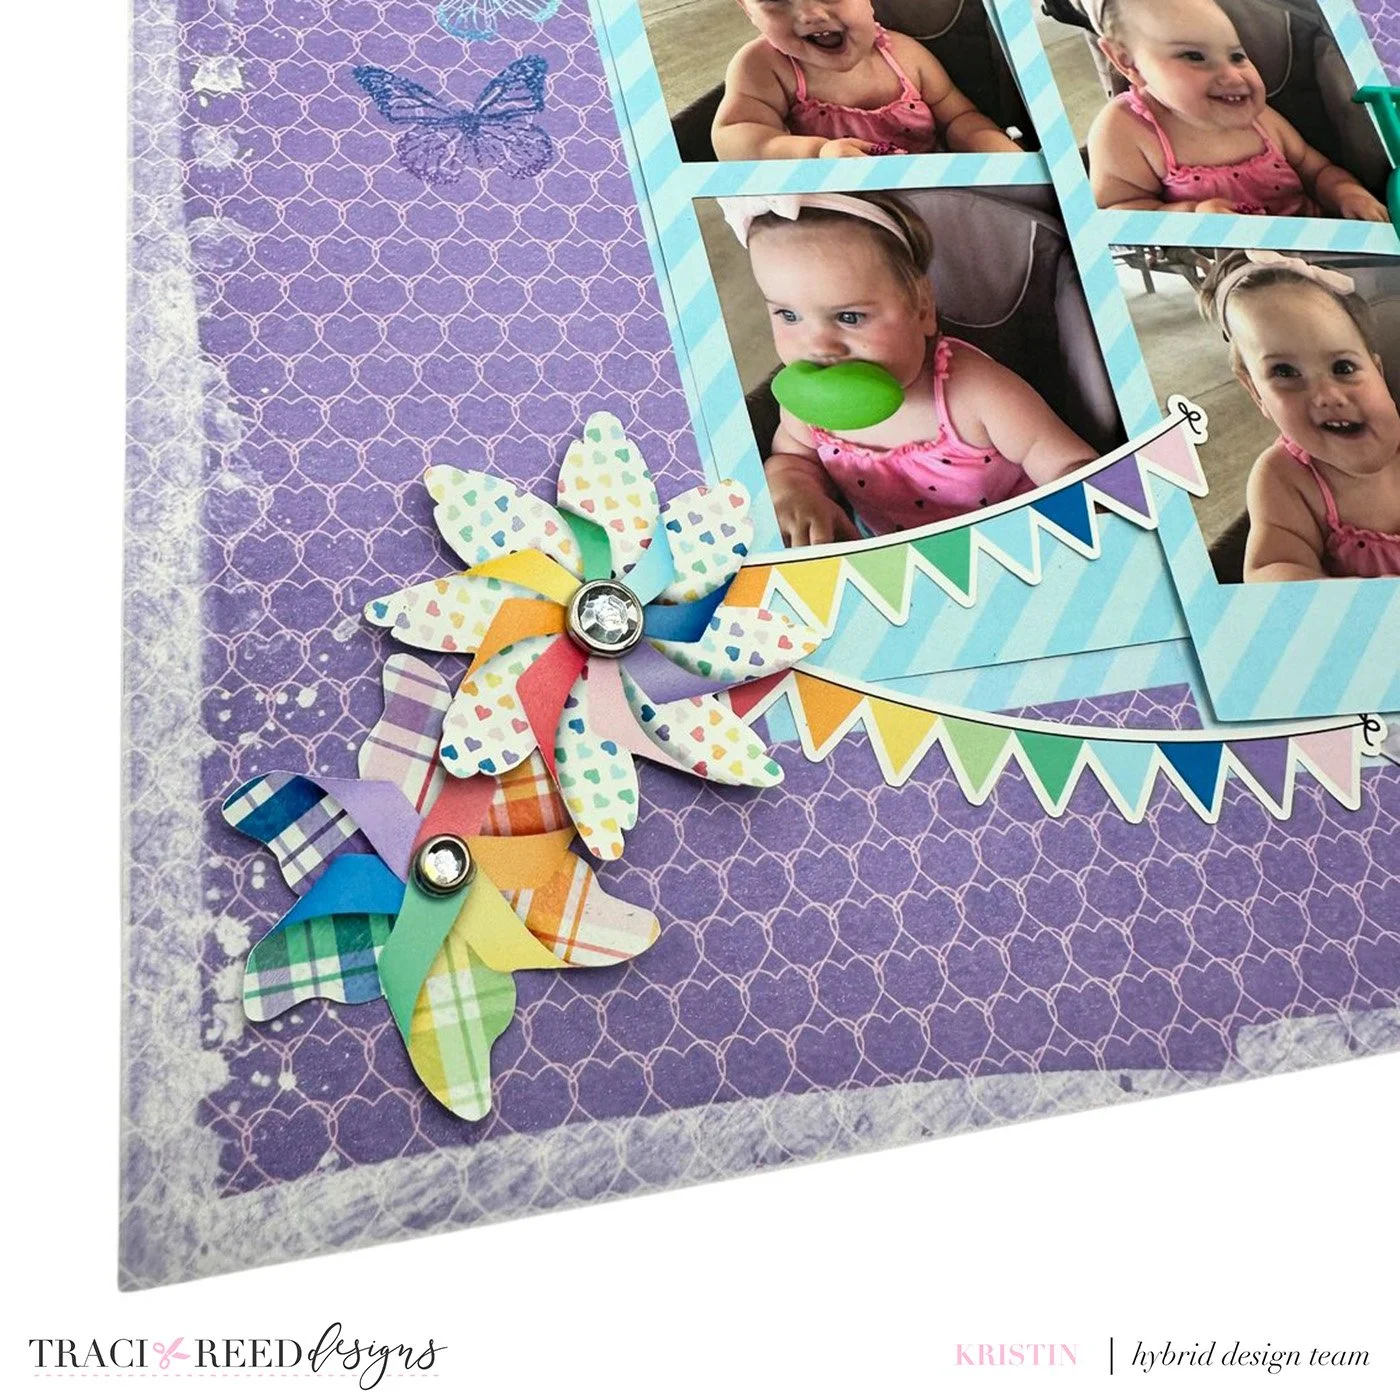
I added 2 of the whirligigs with rainbow banners to the lower left part of the photographs to help create a visual triangle.
I then added brads from my stash and digital ribbons from the collection to add texture and more dimension to the florals. I completed the layout with an acrylic title, arrow, and stars.
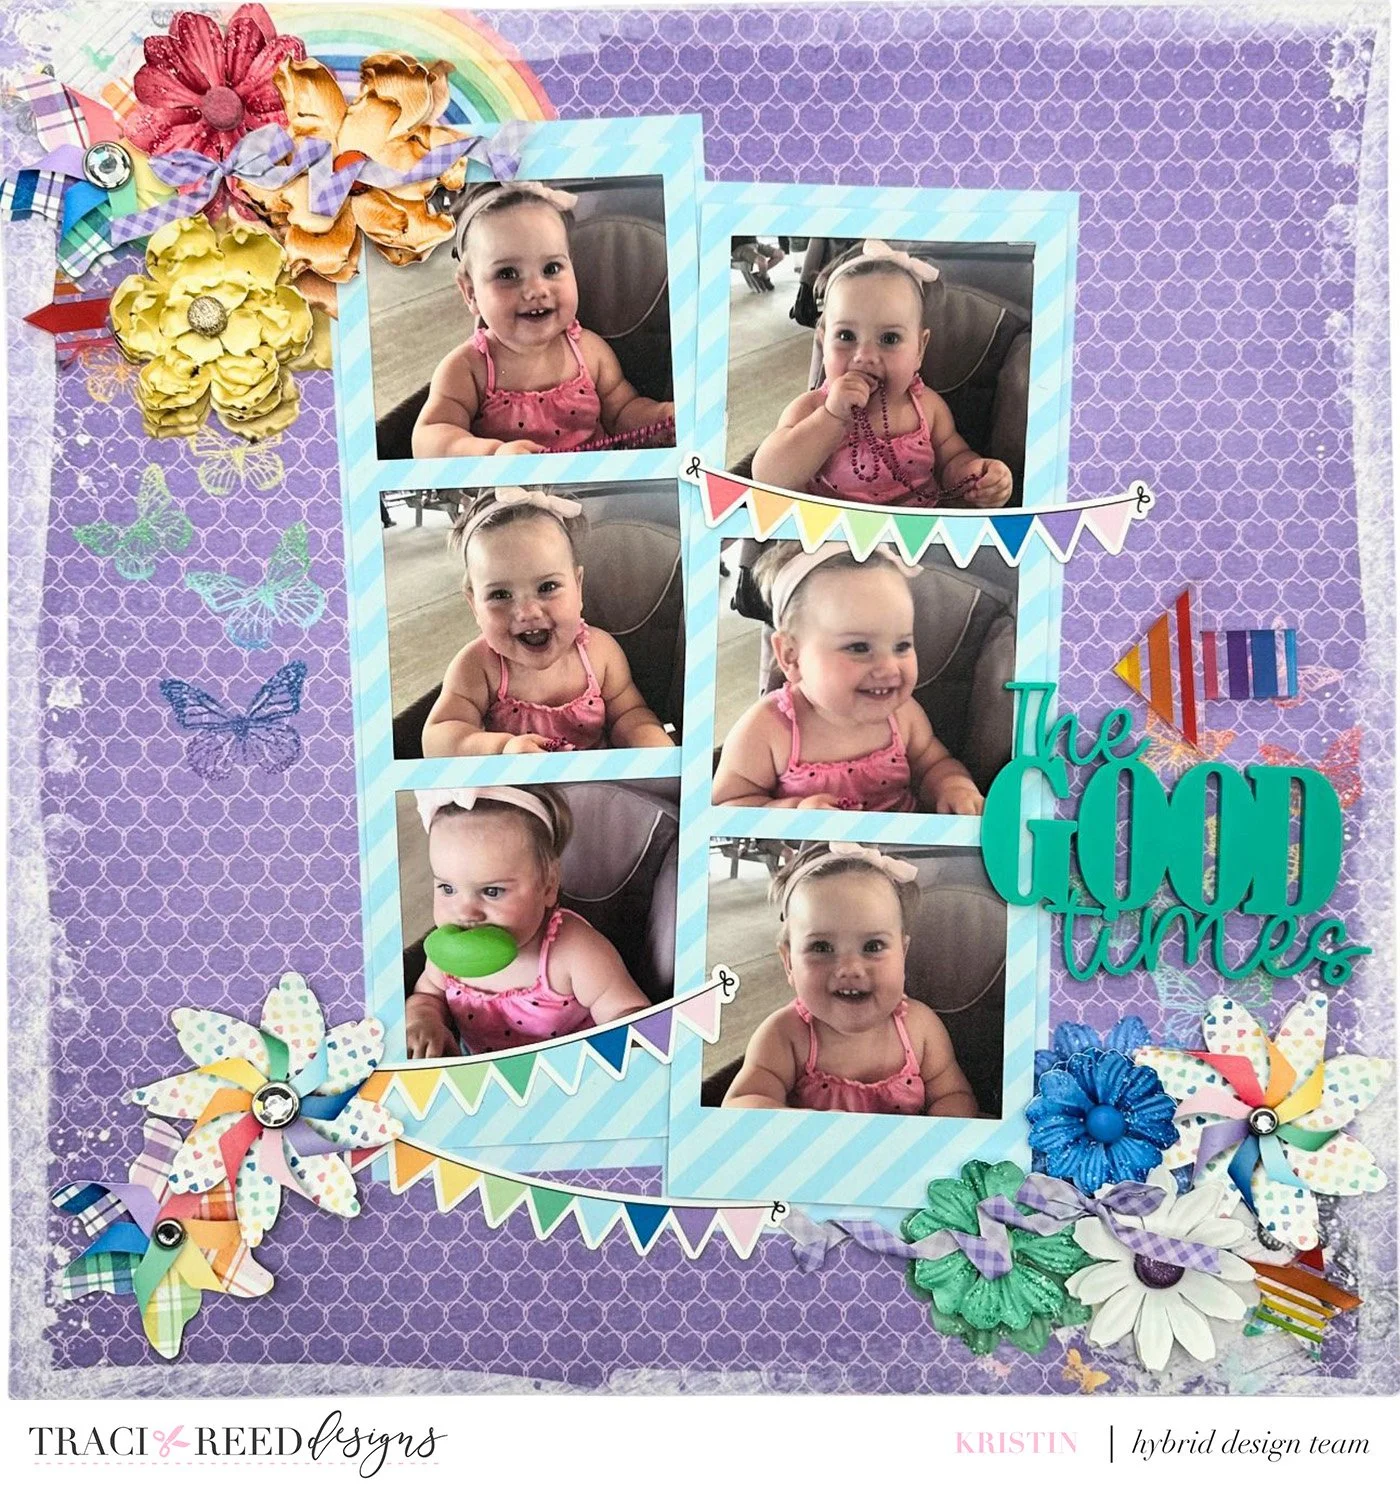
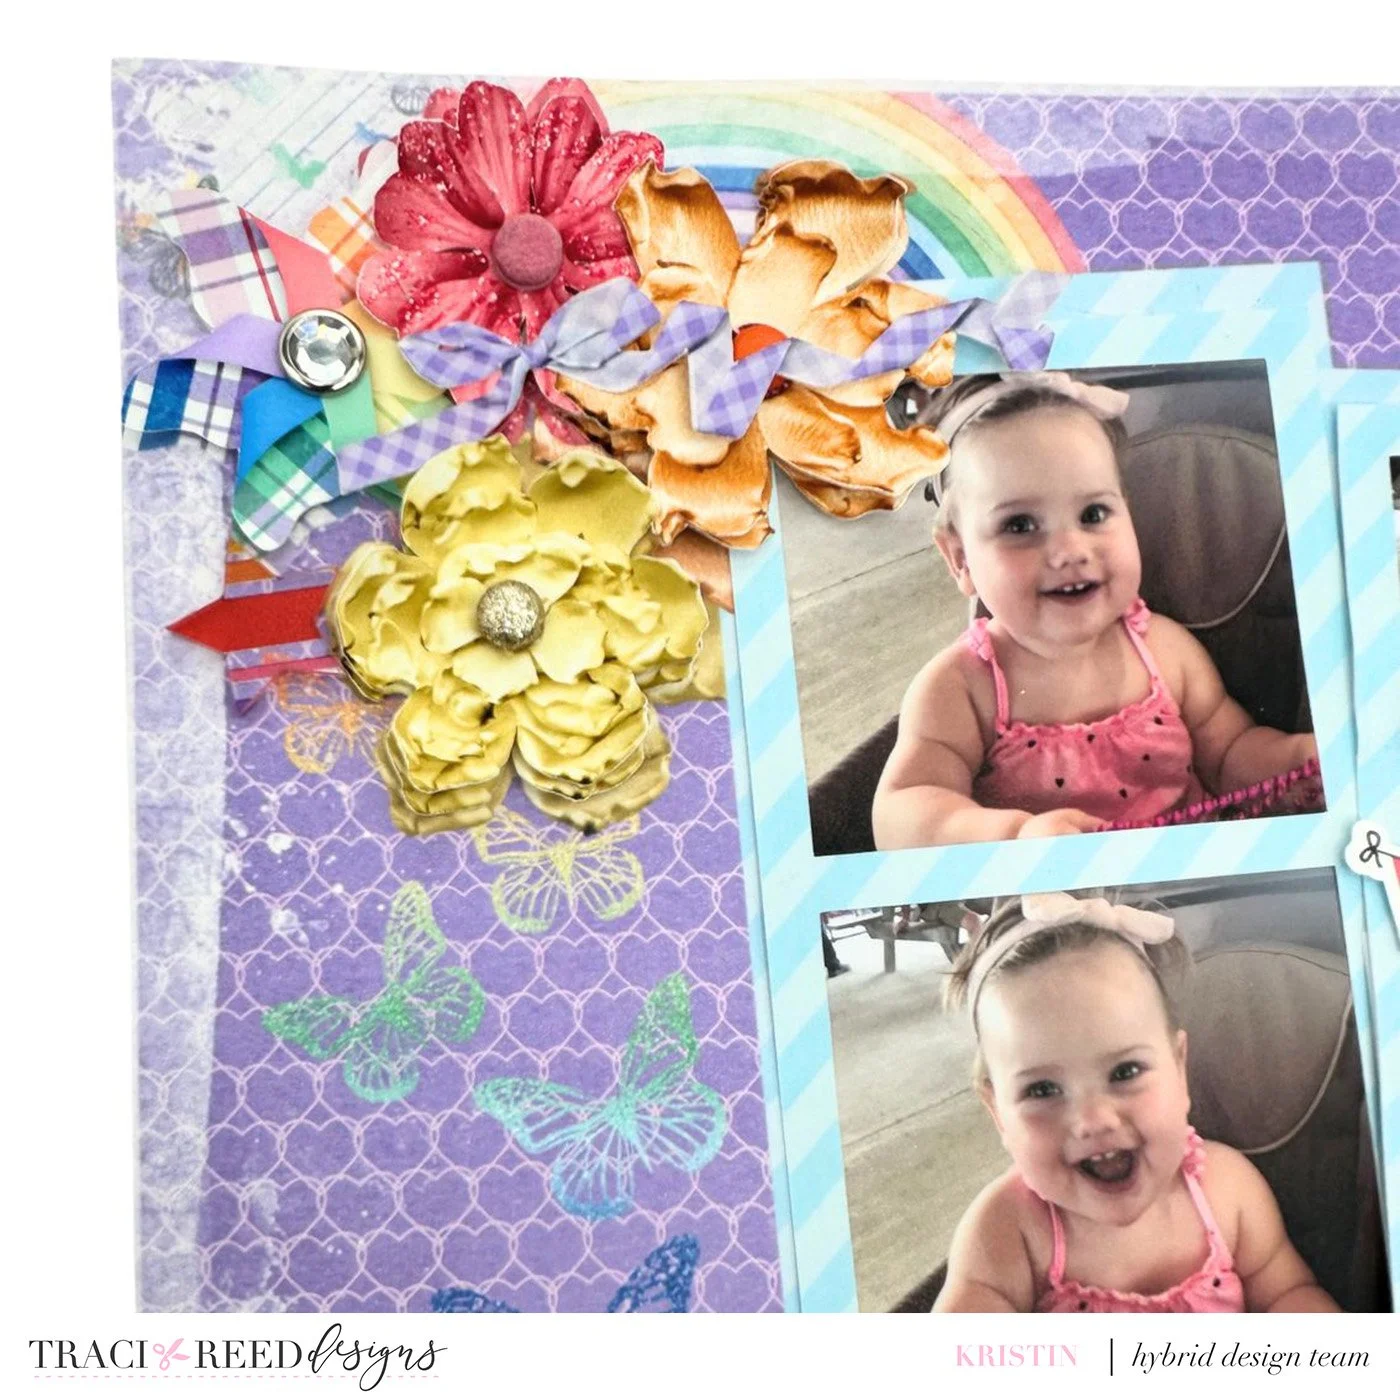
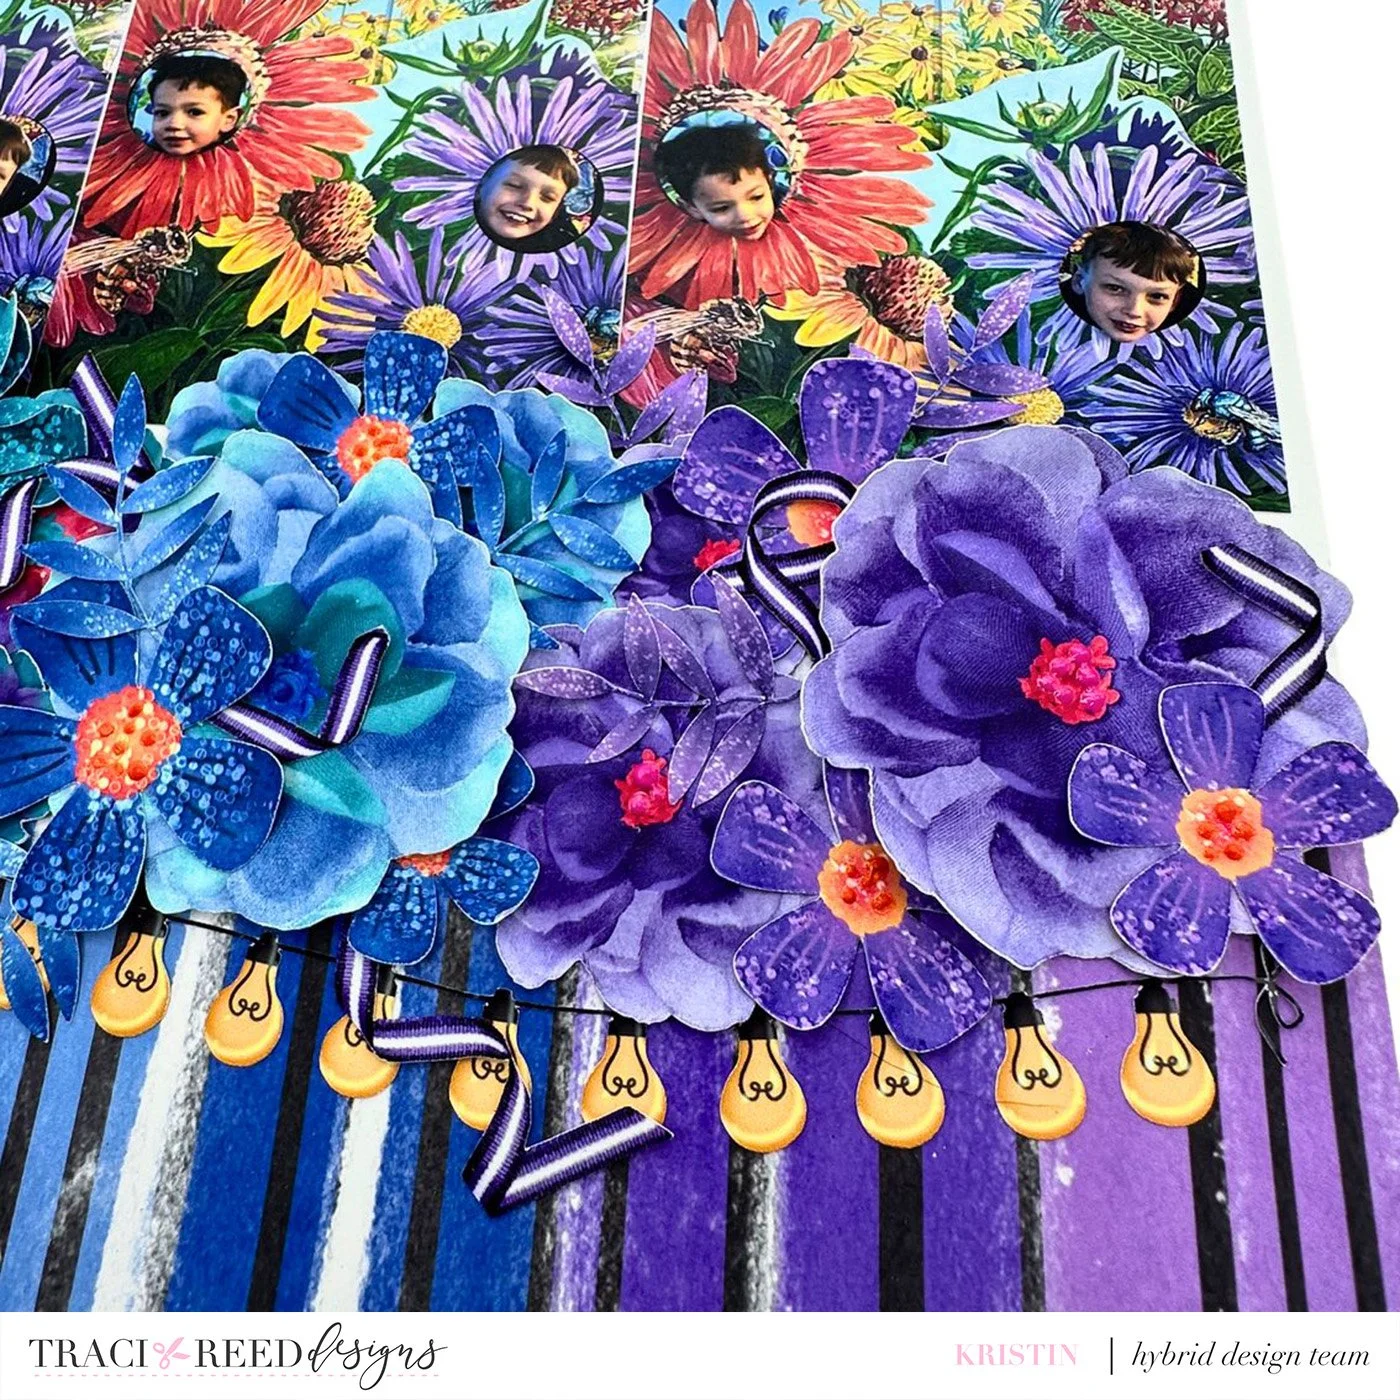
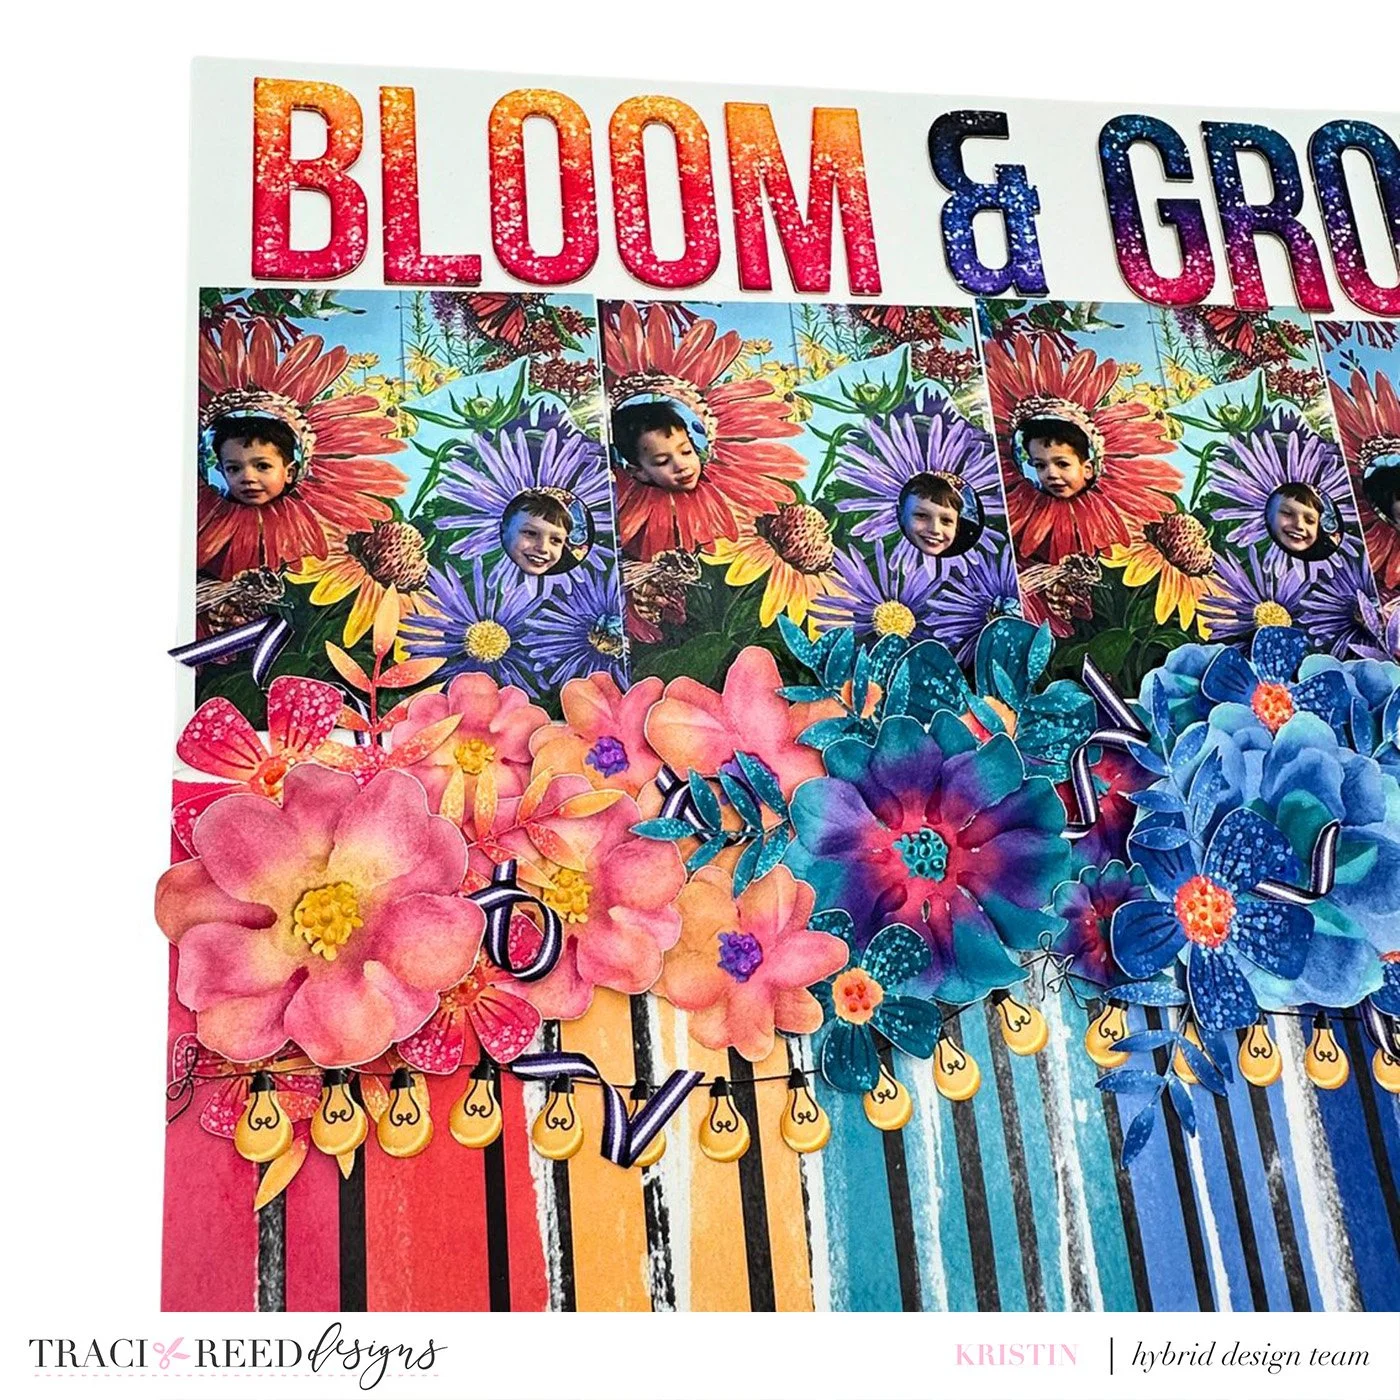
A second way I use florals is to use them as a shelf for my pictures or as a way to build a scene. In this layout, using the Moonlit collection, I do both. The rainbow patterned paper I chose has black lines that reminded me of stems so I felt would be a really good paper to build a scene with. It is a bold paper so I opted to tear the paper in half and keep the top half of the layout white cardstock.
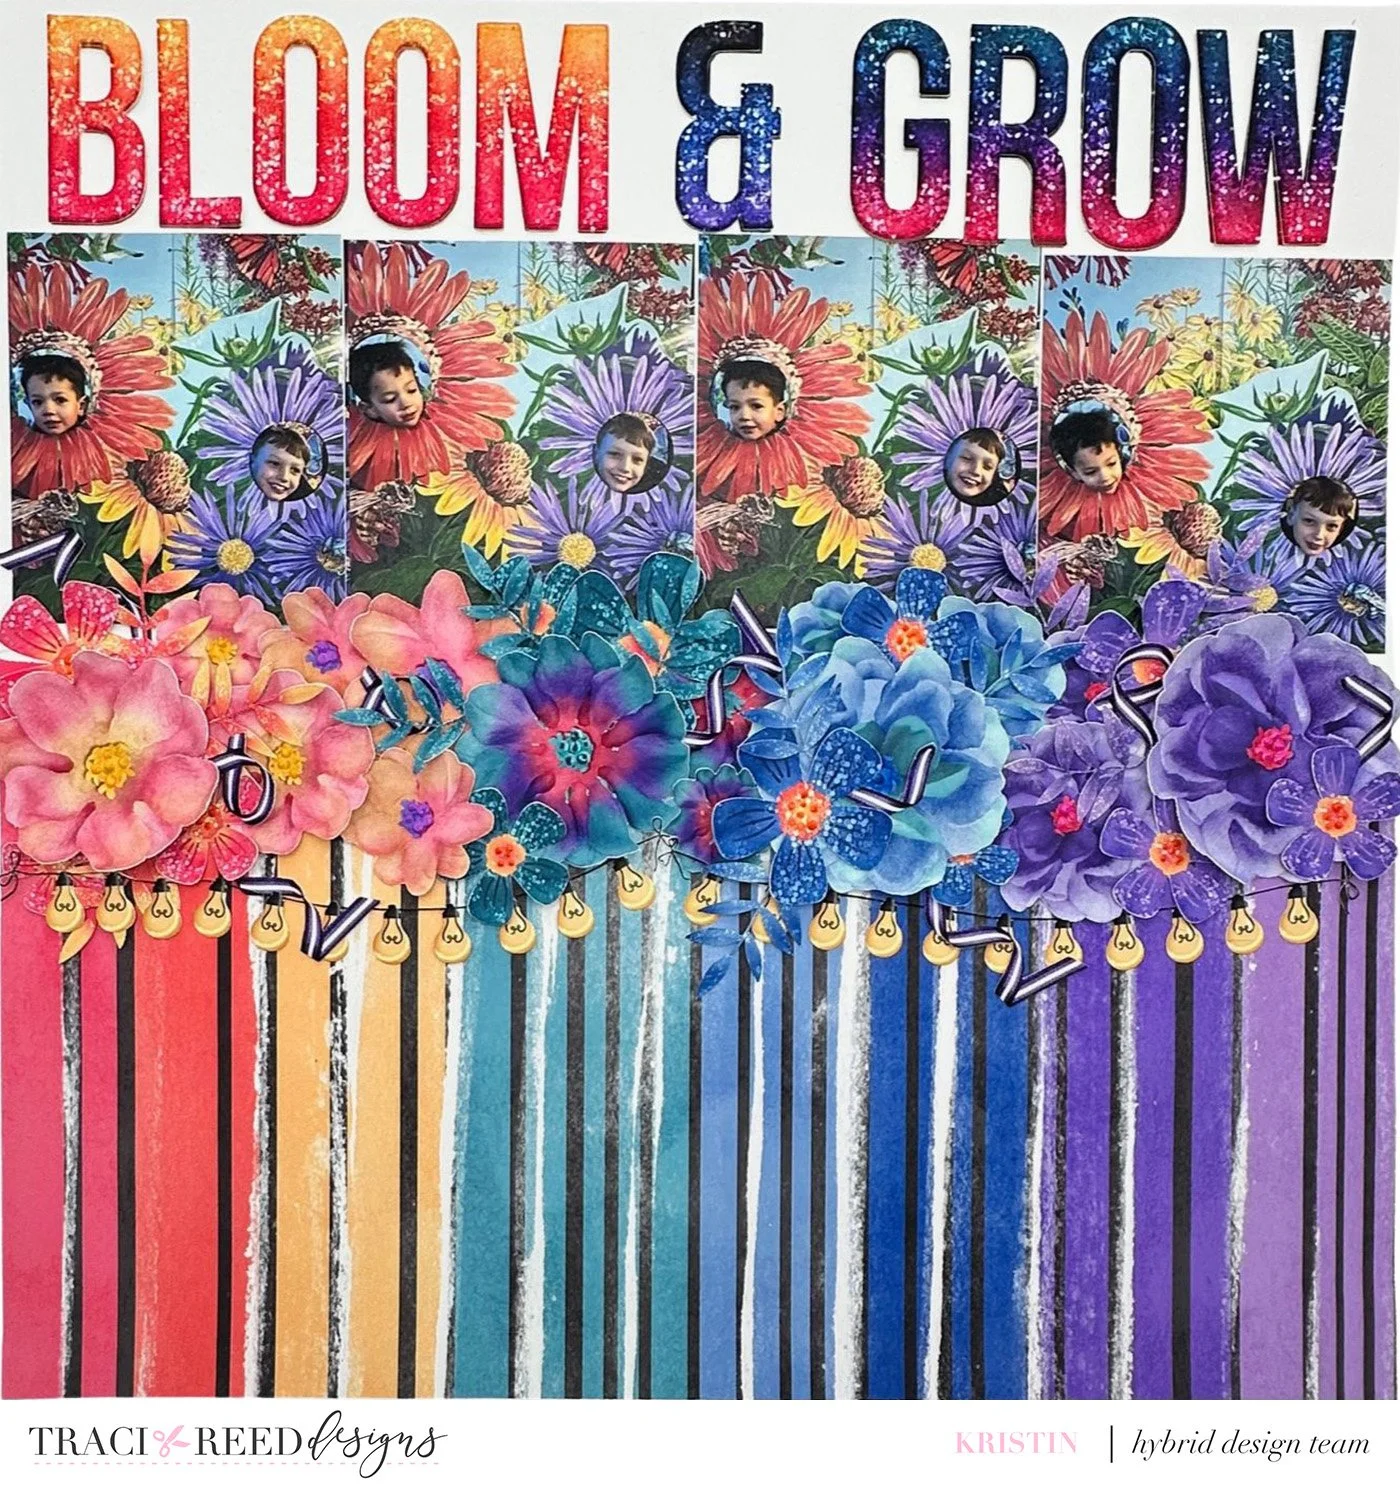
I printed and cut 3 of each of the florals in different sizes. I then layered the florals in a tone on tone pattern in the middle of the layout, where the patterned paper and plain white cardstock met.
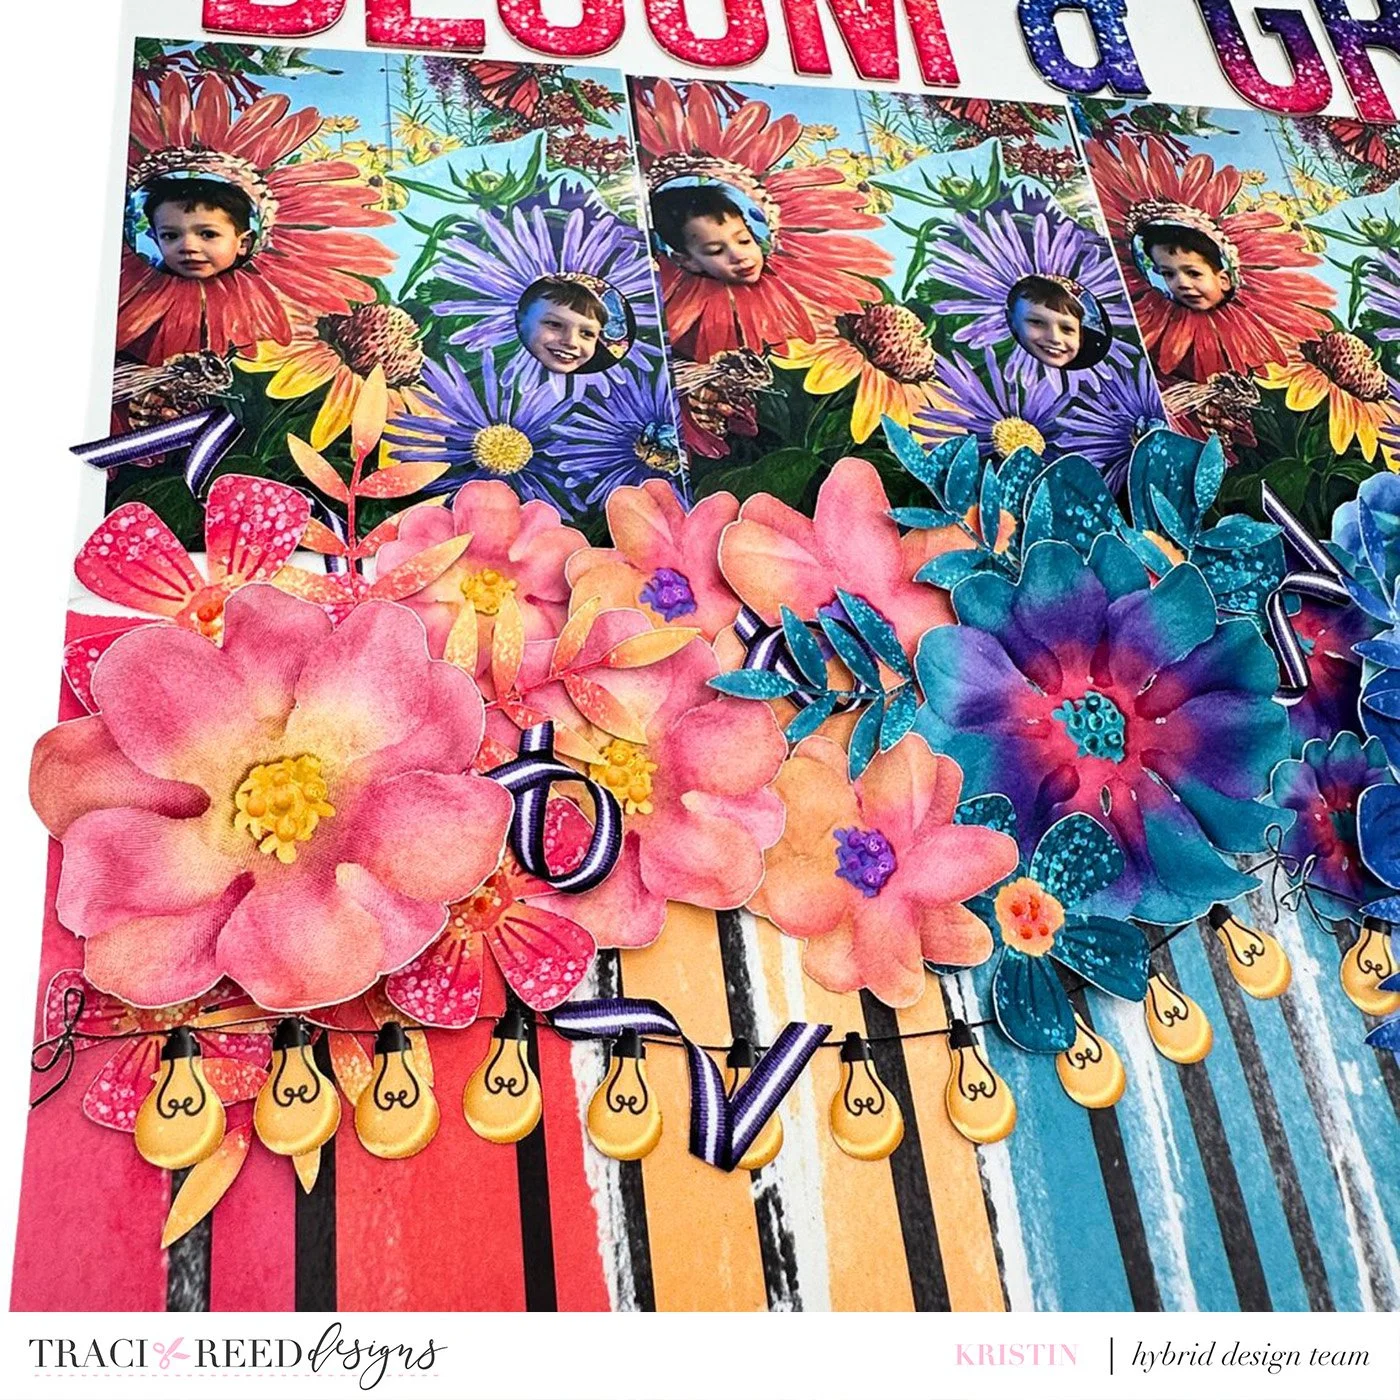
To break up the florals and create added interest, I added tone on tone greenery to the florals as well as some ribbon from the collection. I then added Pops of Color to the centers of the florals to create an even more 3D appearance. To further break up the florals from the patterned paper, I added 2 strings of lights under the florals. I then added photographs of my sons on top of the florals…and I chose photos that closely mimicked the colors in the collection—they look like part of floral cluster!
To complete the layout, I printed and cut the Moonlit alphas 3 times in 3 different colors so that I could layer the alpha letters, essentially creating my own foam/chipboard sticker.
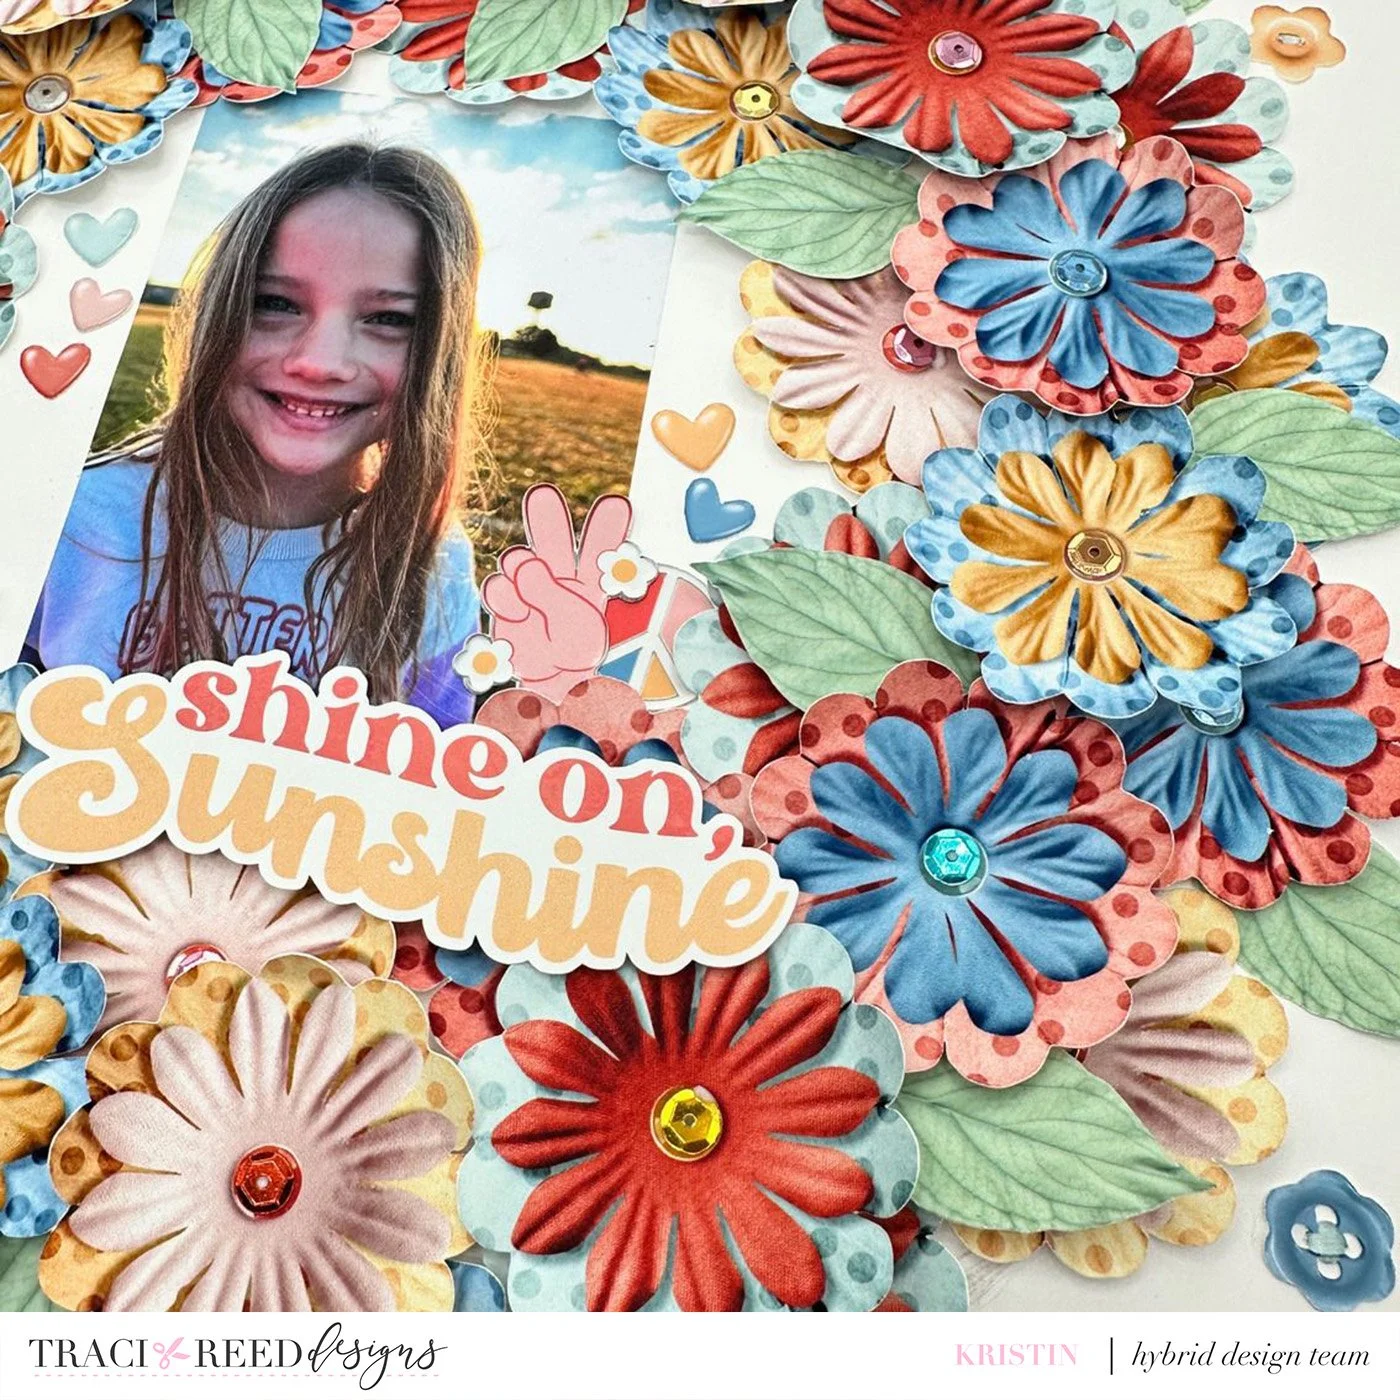
My final layout is probably one of my favorite ways to use florals…create a wreath with all of the florals! For this layout, I chose the Flower Child collection and printed and cut a ton of the florals from the digital kit. I knew I wanted all of the attention to be on the florals and so I kept the base paper simple with a plain white cardstock from my stash. I traced a circle using a mixing bowl so that I could follow the circle with the florals.
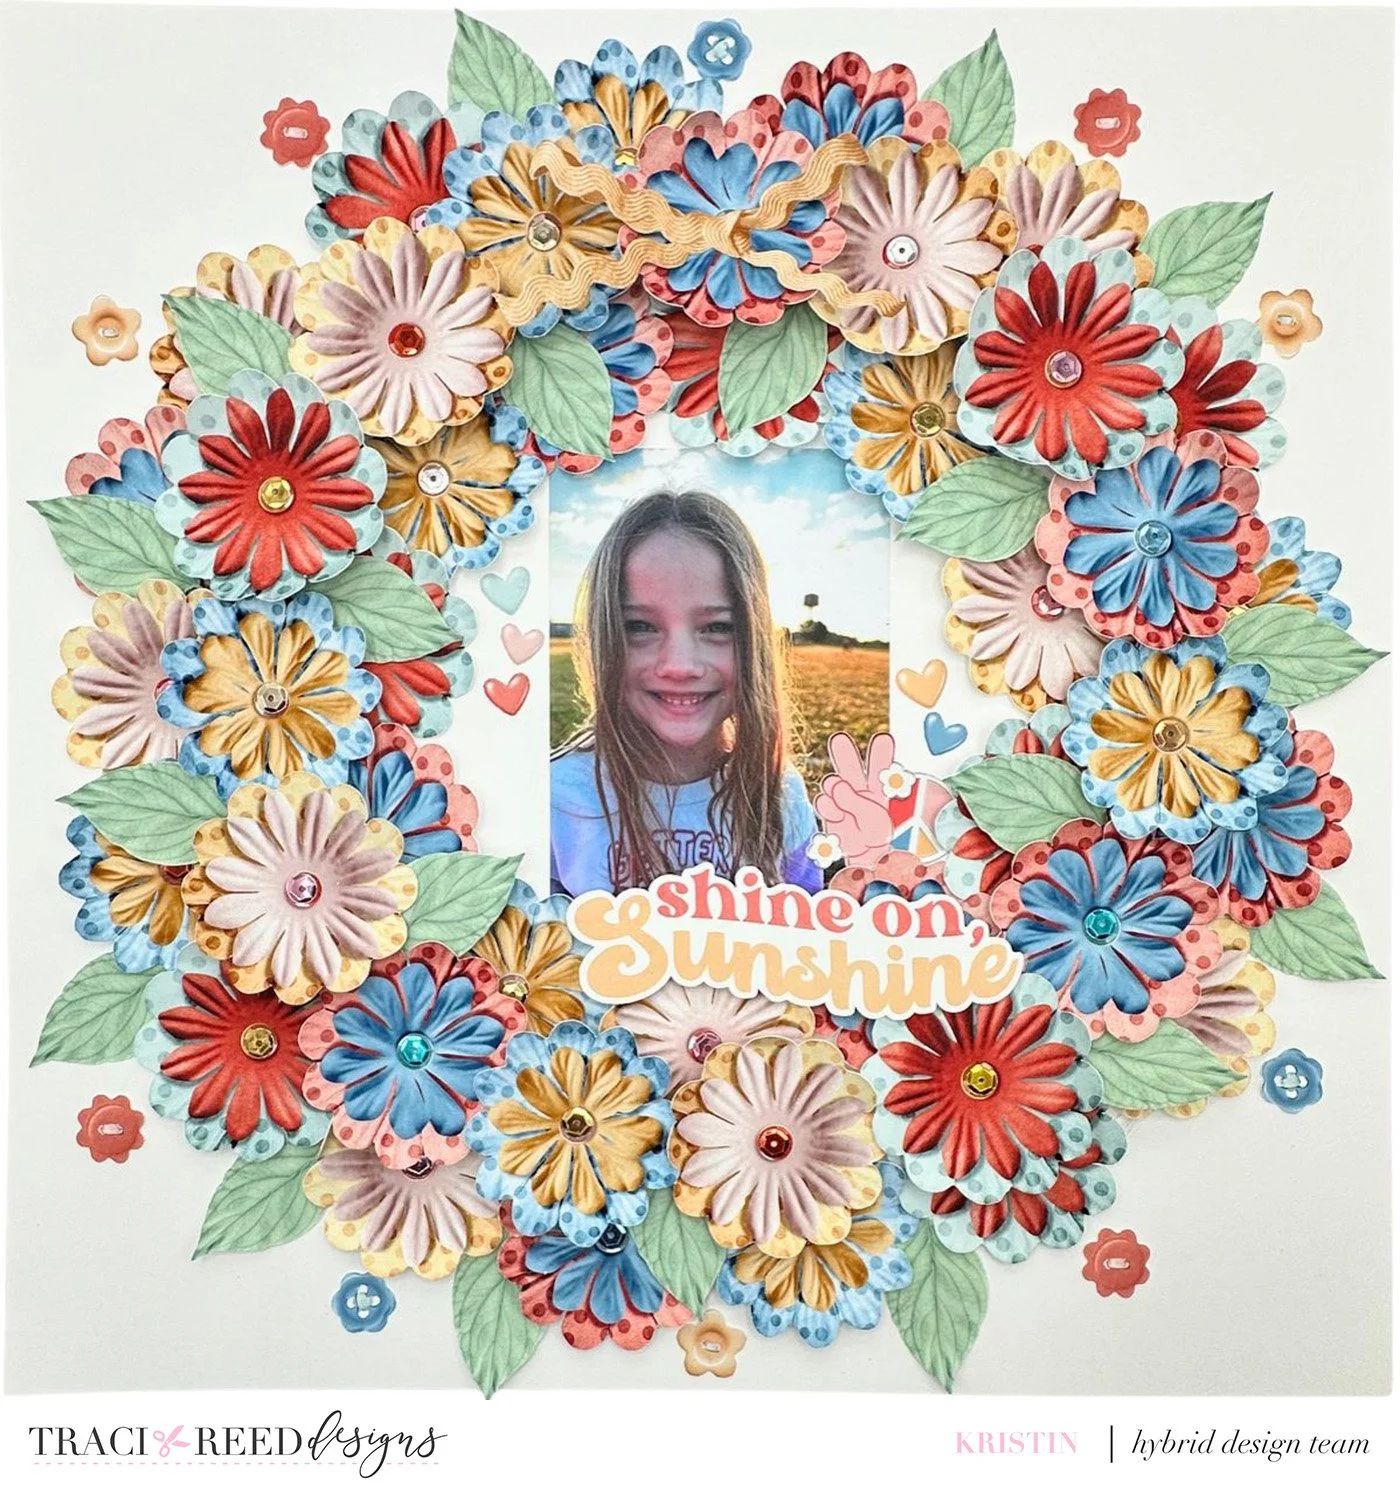
I layered 2 rows of the florals around the page, following the line I had traced. I then popped a third layer up on foam to cover any gaps and to create a 3D effect. I tucked green leaves from the collection around the layout to break up the florals a little bit and to add extra texture. I added a few buttons from the collection to the outside of the wreath for some added interest.
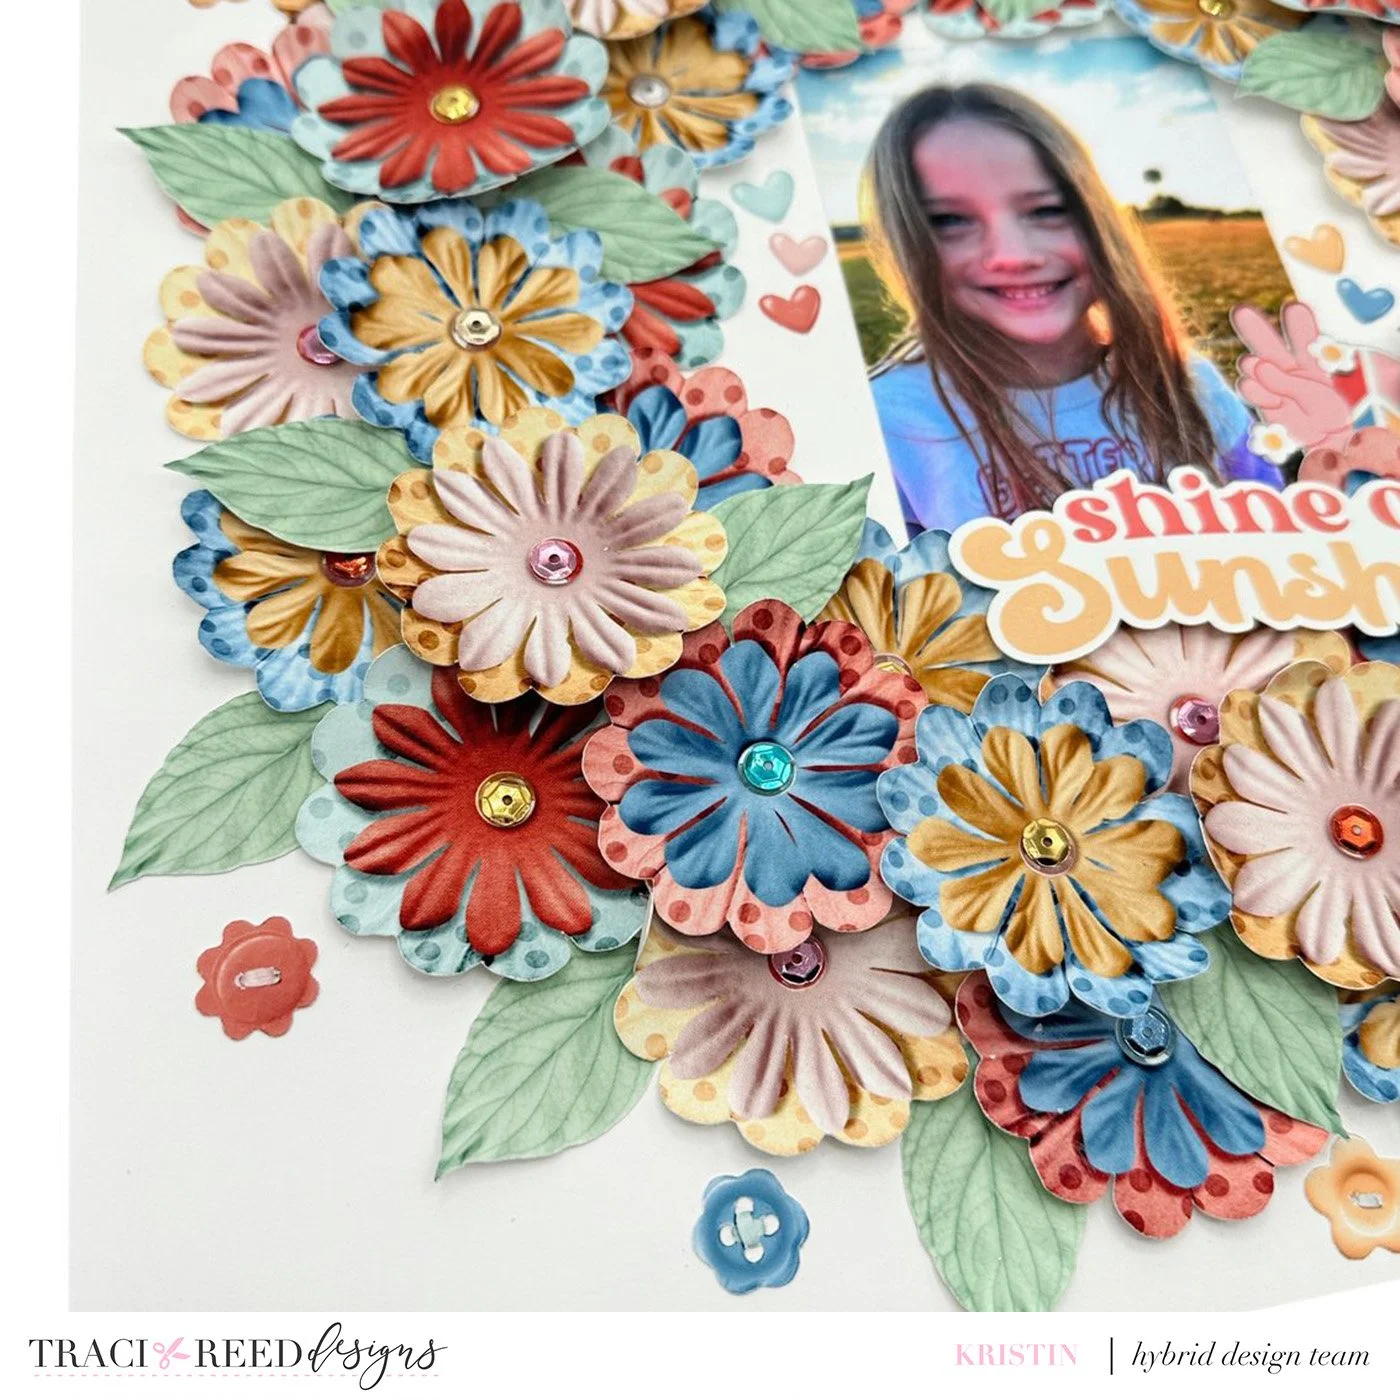
To add some shine to the layout, I glued sequins from my stash to each flower center. I added a photograph of my daughter to the center of the wreath. I wanted to keep the center simple so that the focus would be on her photograph as well as the floral wreath so I added just a few heart and peace sign embellishments around her photograph, keeping the rest of the center plain. I also added a yellow ribbon from the digital kit to the top of the wreath.
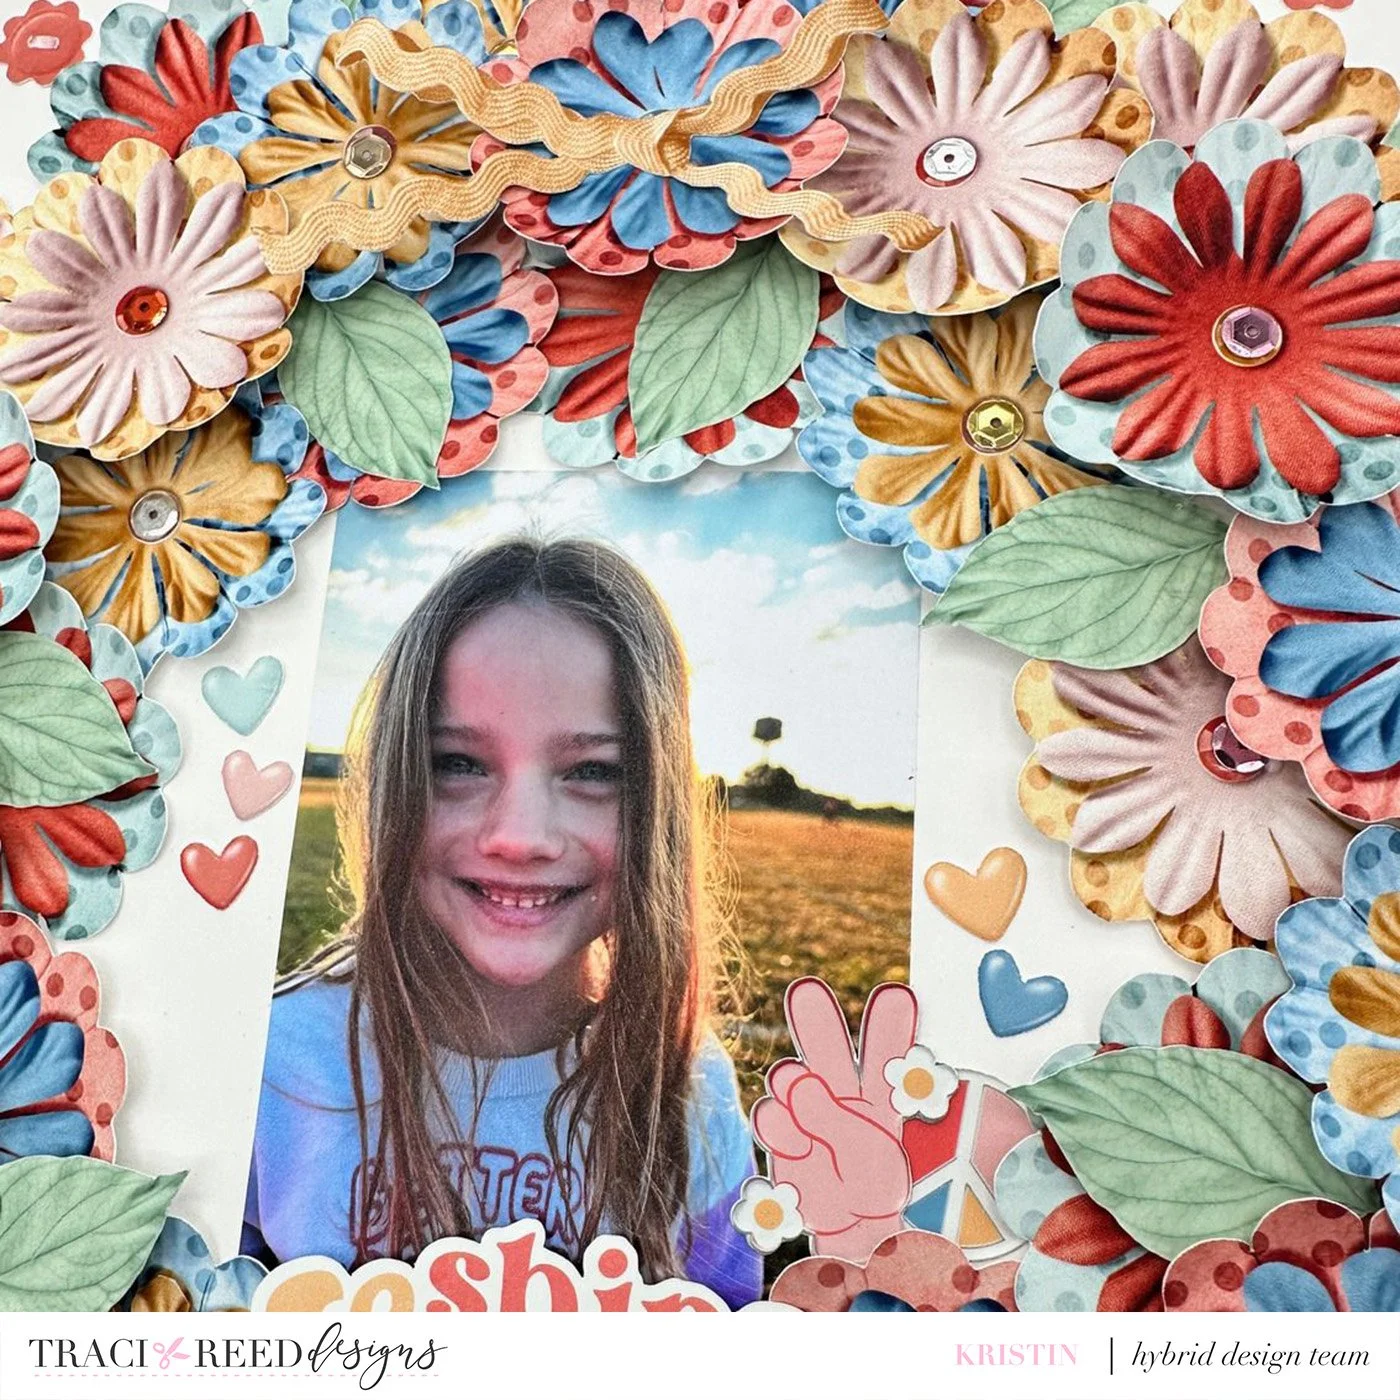
And finally, to complete the layout, I chose a title from the collection and placed it under her photo.
I absolutely love creating with florals and Traci’s beautiful digital florals create so much color, dimension, and interest! I hope I have inspired you to use your florals in some unexpected and different ways!
Products Used in this Article


