Tutorial: Create Your Own Stitched and Bound Traveler's Notebook Mini Album with Ana!
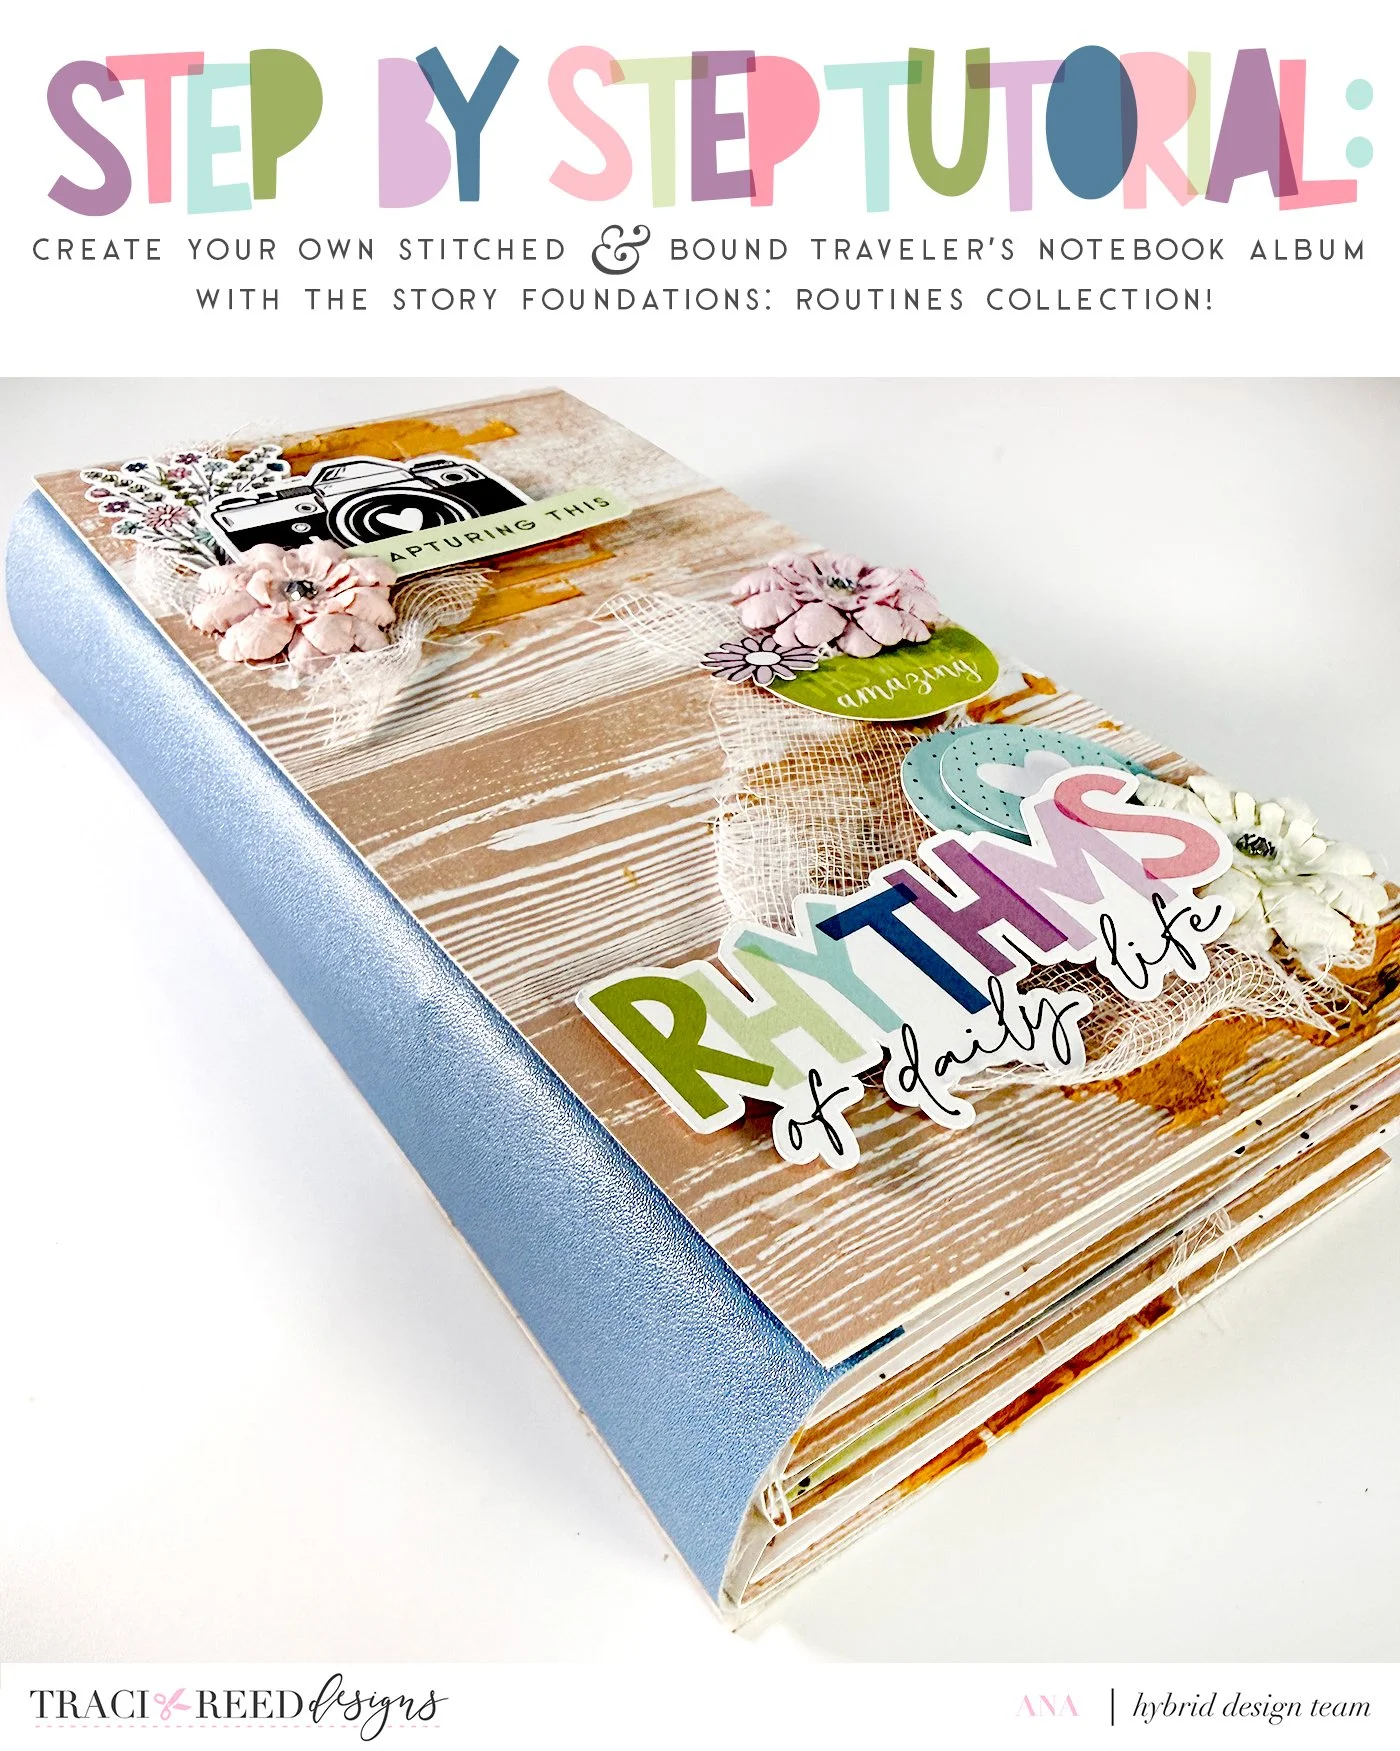
I was originally planning to make my usual mini album for this collection launch, but as I went through the papers and elements, I just knew I had to make myself a TN first. Still, the mini-album-lover in me couldn’t fully let go, so I ended up making something a little different - a TN and my usual mini-album version of a TN.
If you’ve seen my usual mini albums, this TN will probably feel familiar. That was very intentional!
Creating the TN Base
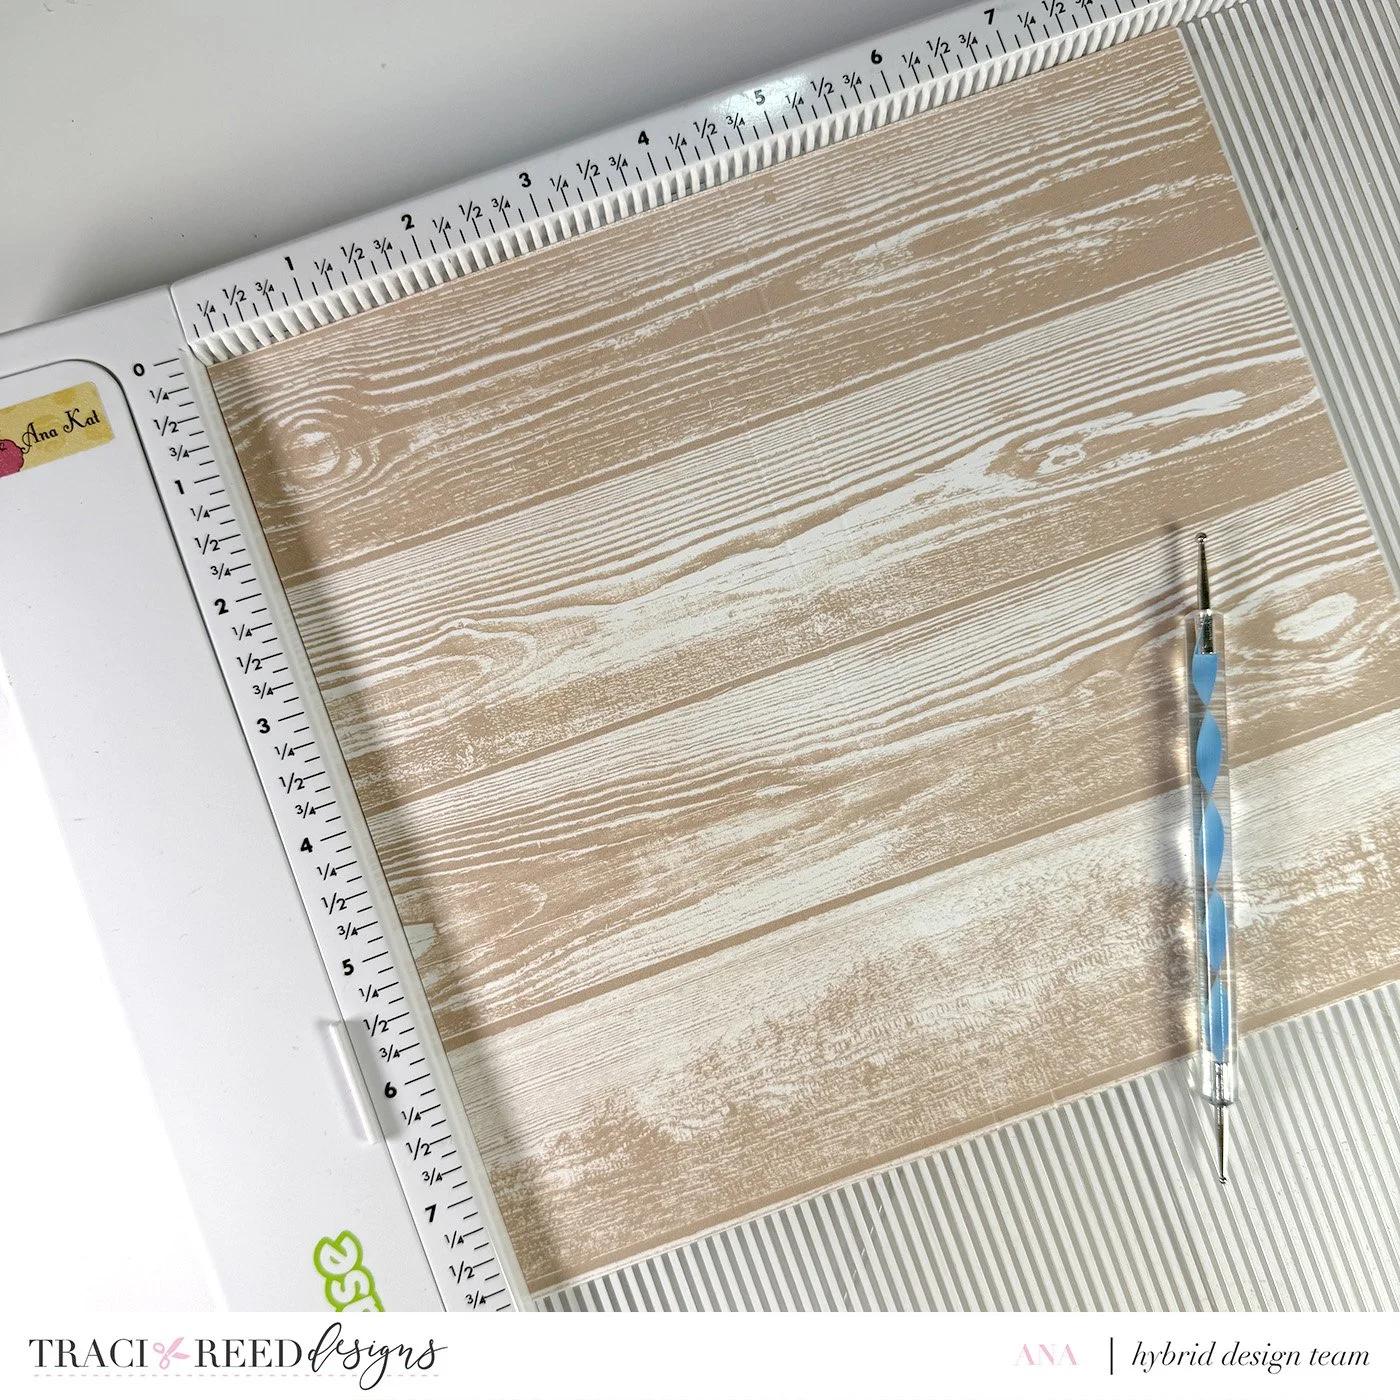
I chose one of the simplest pattern paper designs from the collection (not an easy decision, believe me! I wanted to use everything! But I did print extras for my next project - my mini album).
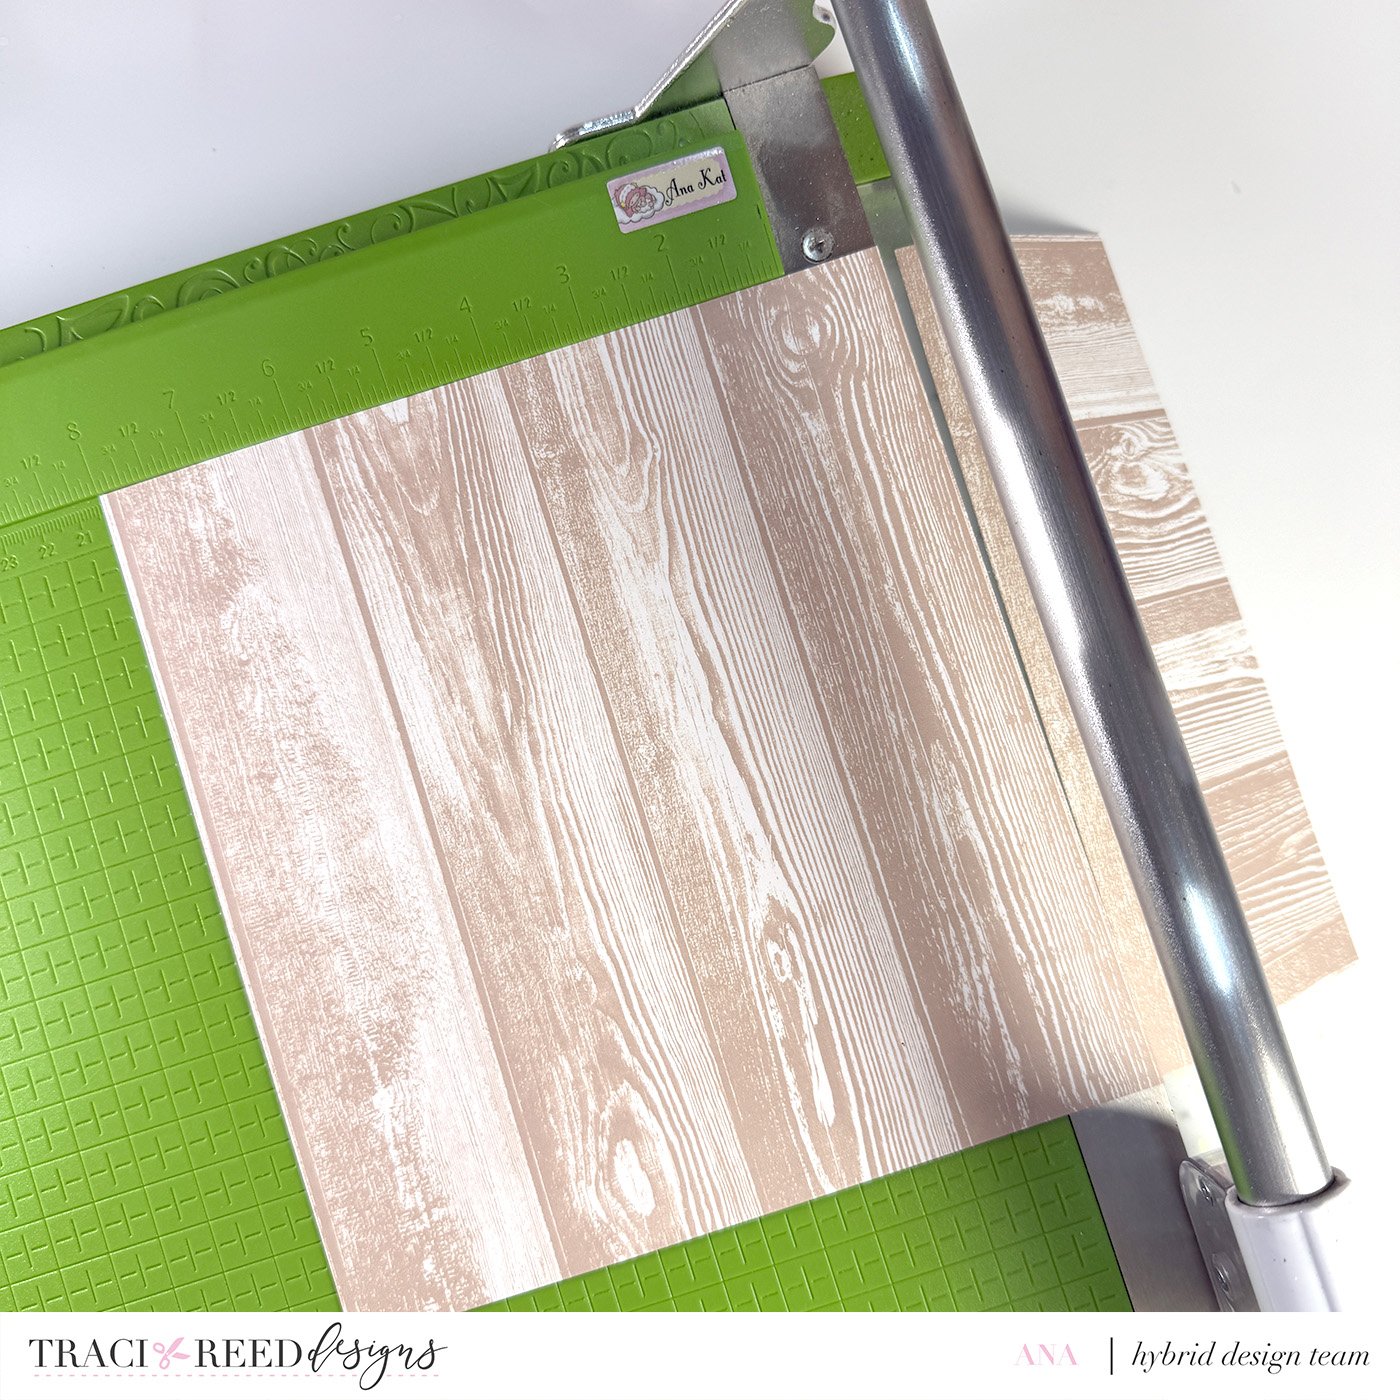
Trim 3 pieces of pattern paper to 8.5 x 8 inches. On the 8.5-inch side, score each piece at 4 inches and 4.5 inches.
(editor’s note from Traci: for a “true” TN size, you’ll want to print your paper at 9” wide by 8.25” tall and then score at 4.25 and 4.75”)
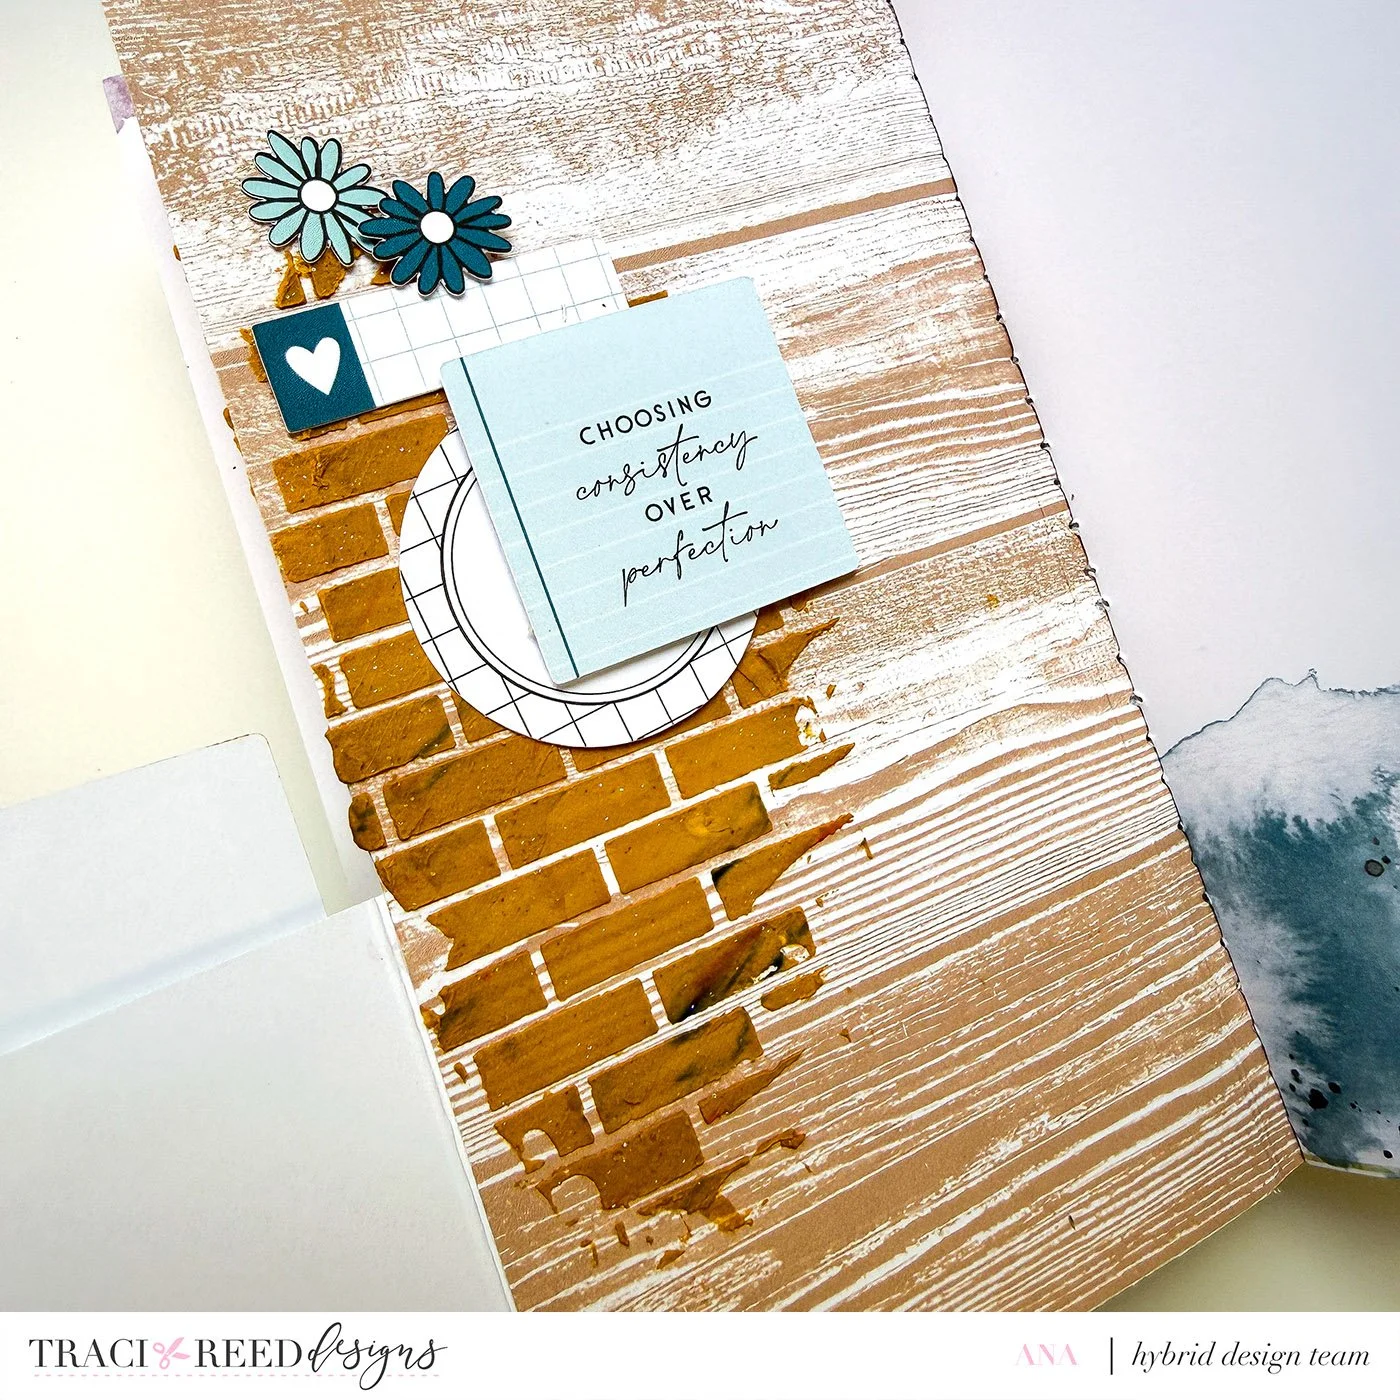
Adding Texture (Optional but Fun!)
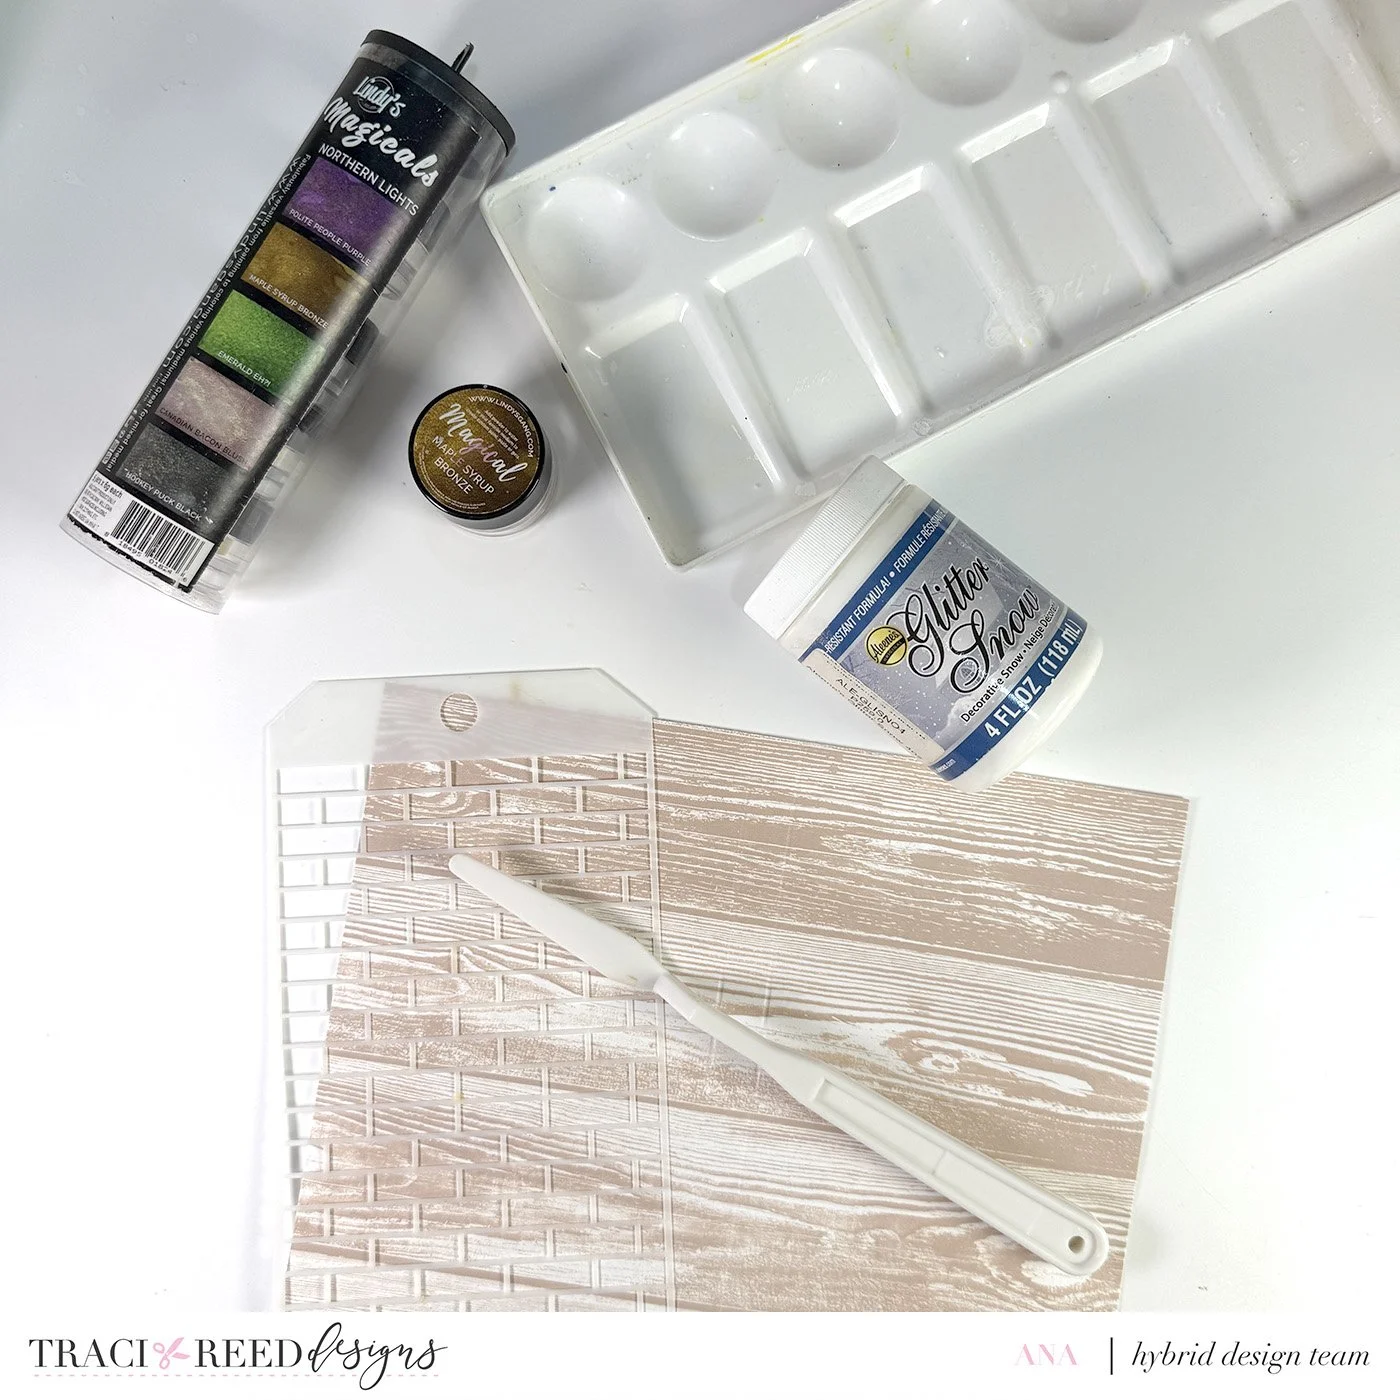
This step is totally optional, but I really wanted to add more texture to my TN (and tbh, practice my mixed media!). I mixed Aleene’s Glitter Snow with Lindy’s Magicals – Maple Syrup Bronze, which matched the brown tones of the pattern paper perfectly.
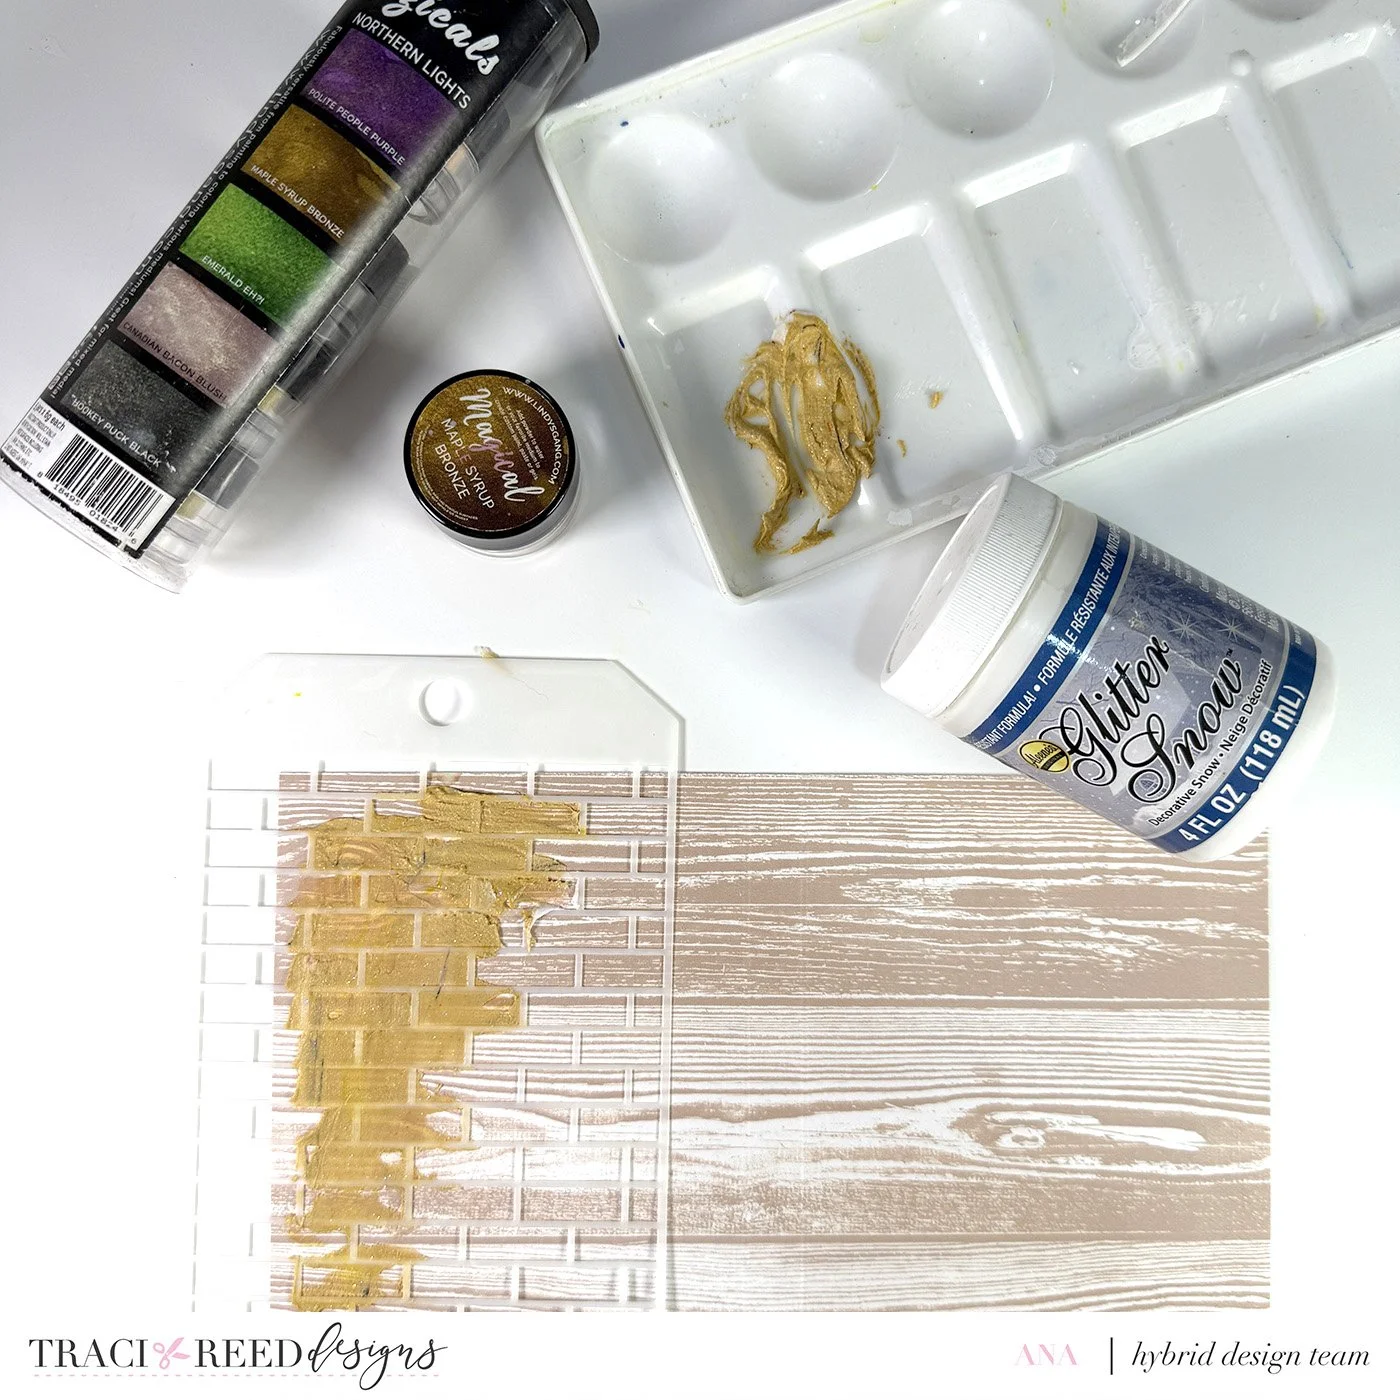
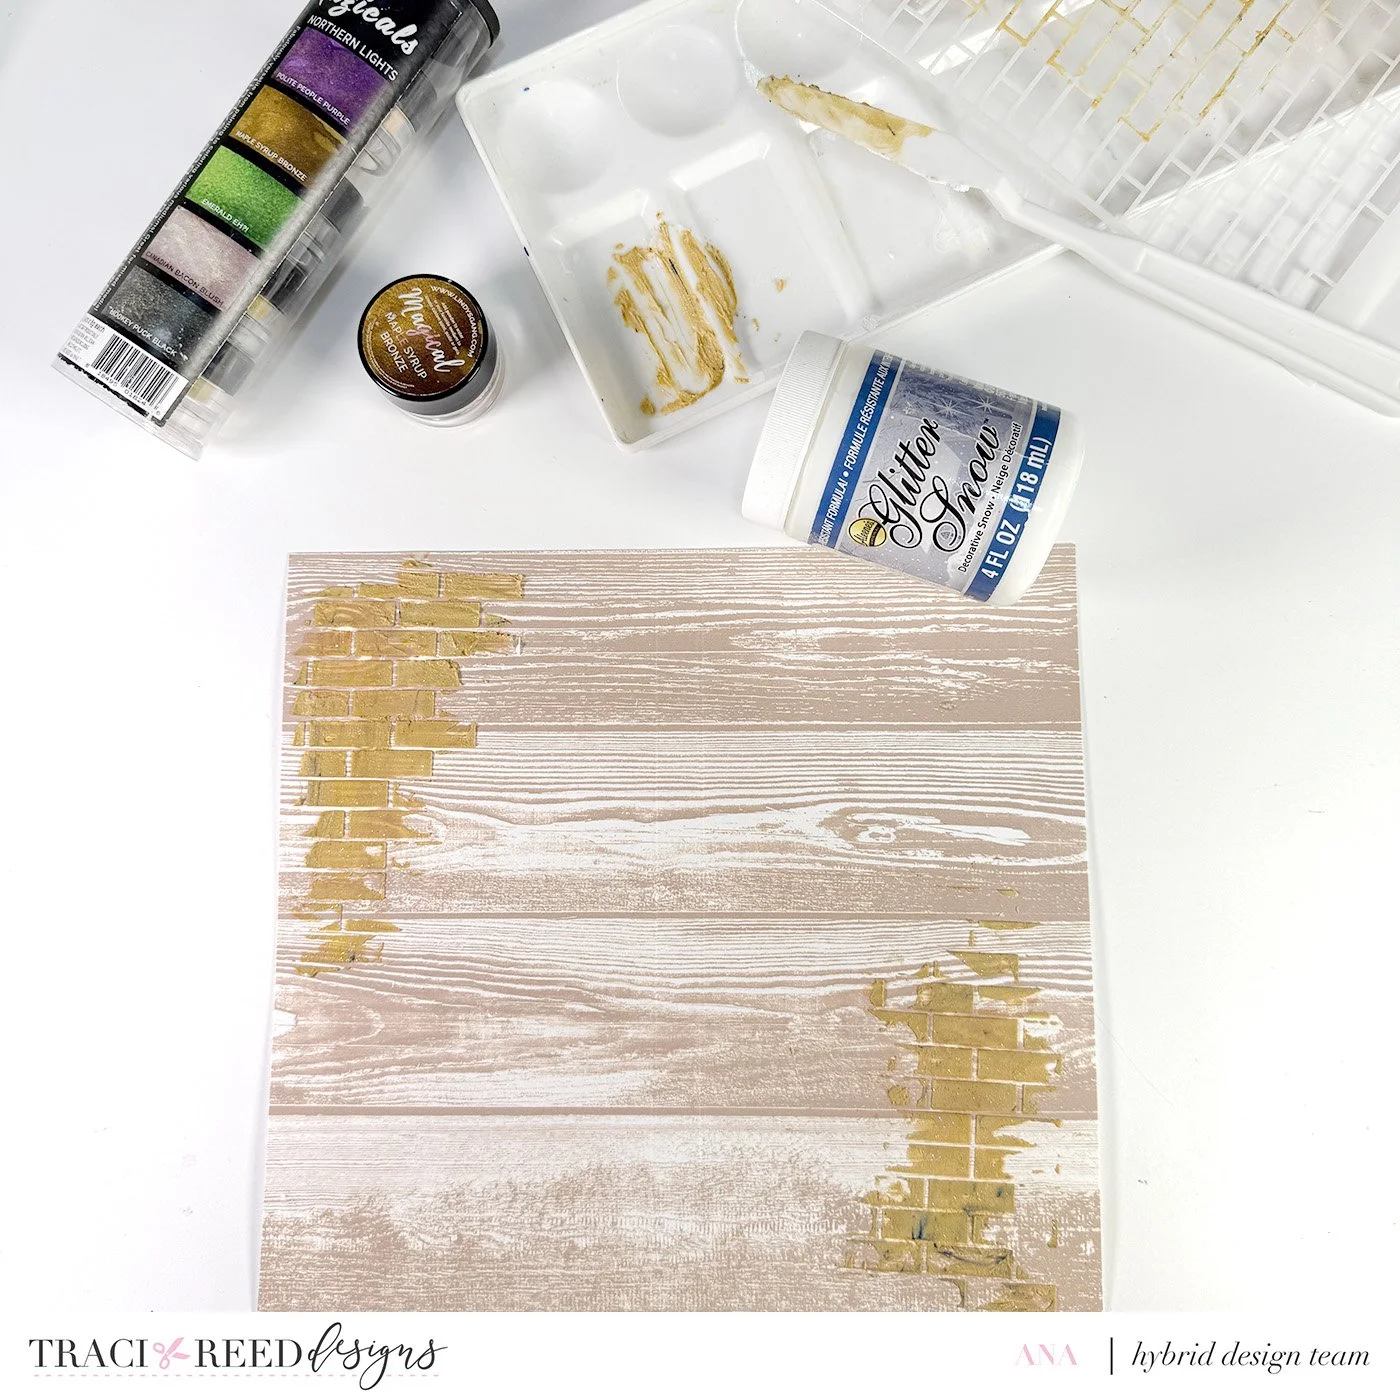
I stenciled the mixture on each side of the scored pages, then set them aside to dry while I worked on the embellishments.
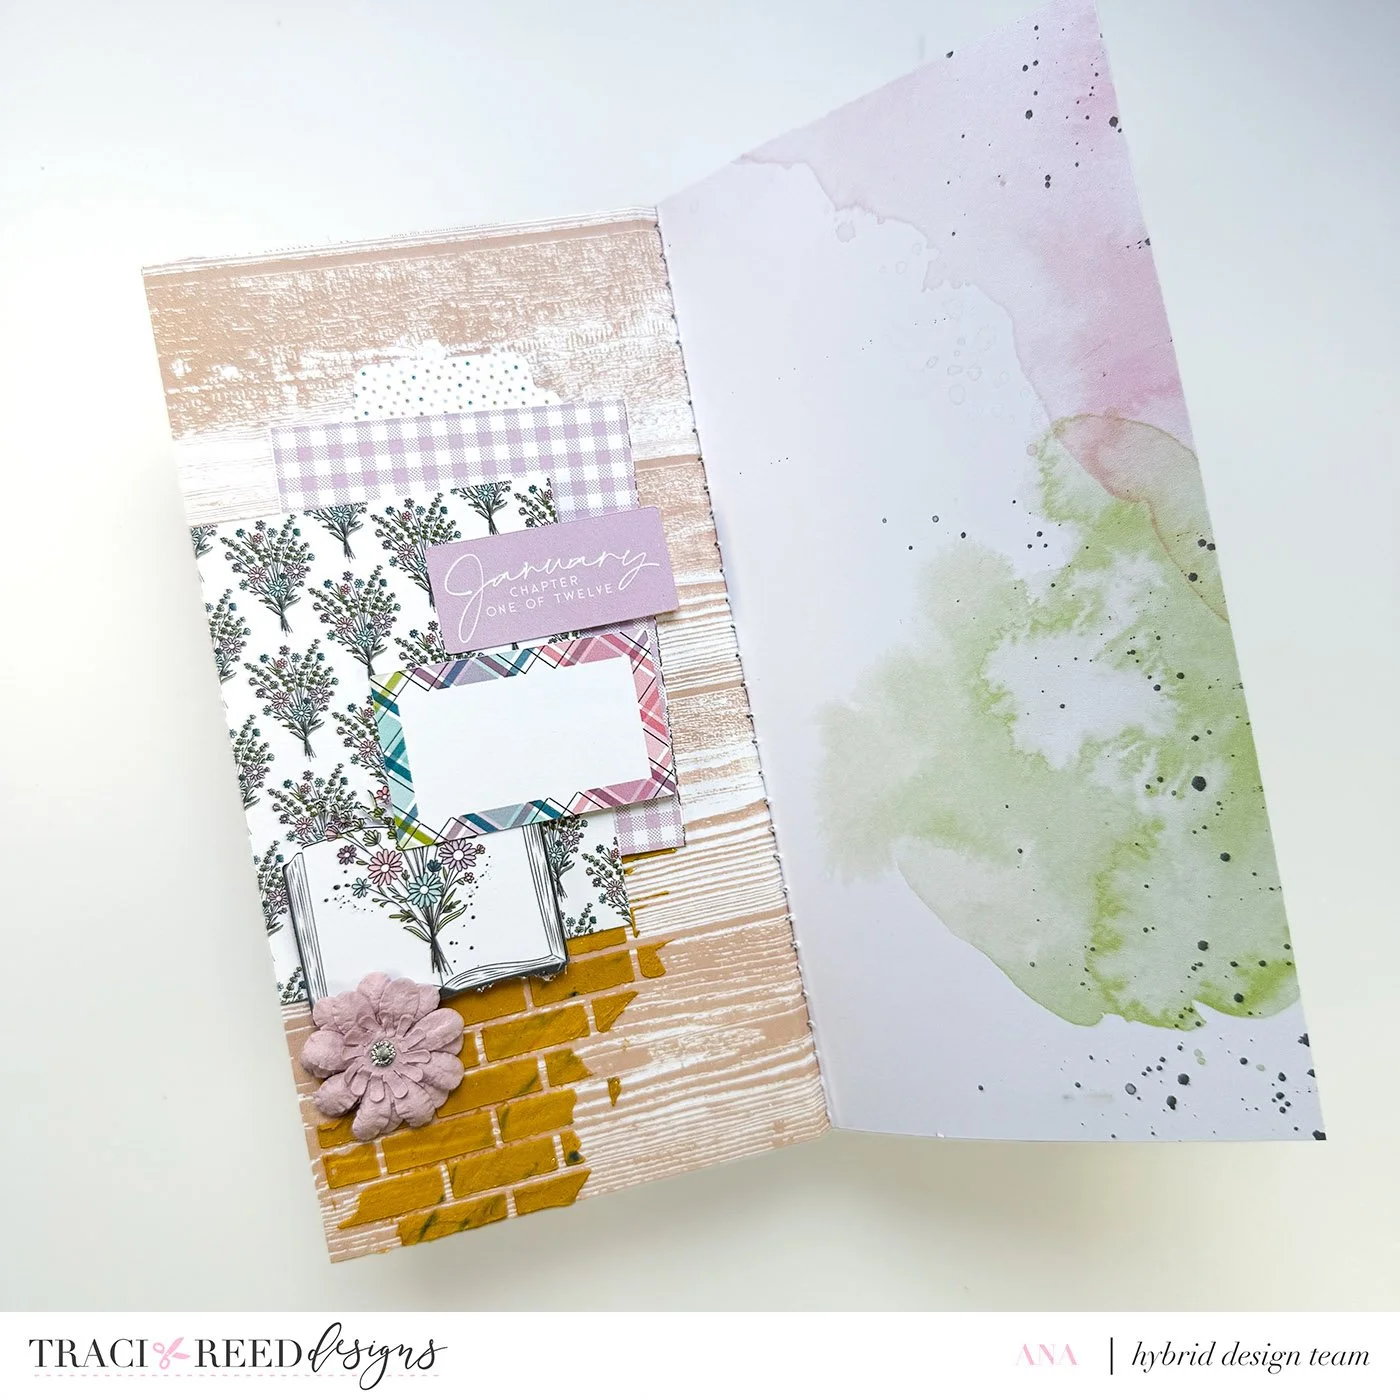
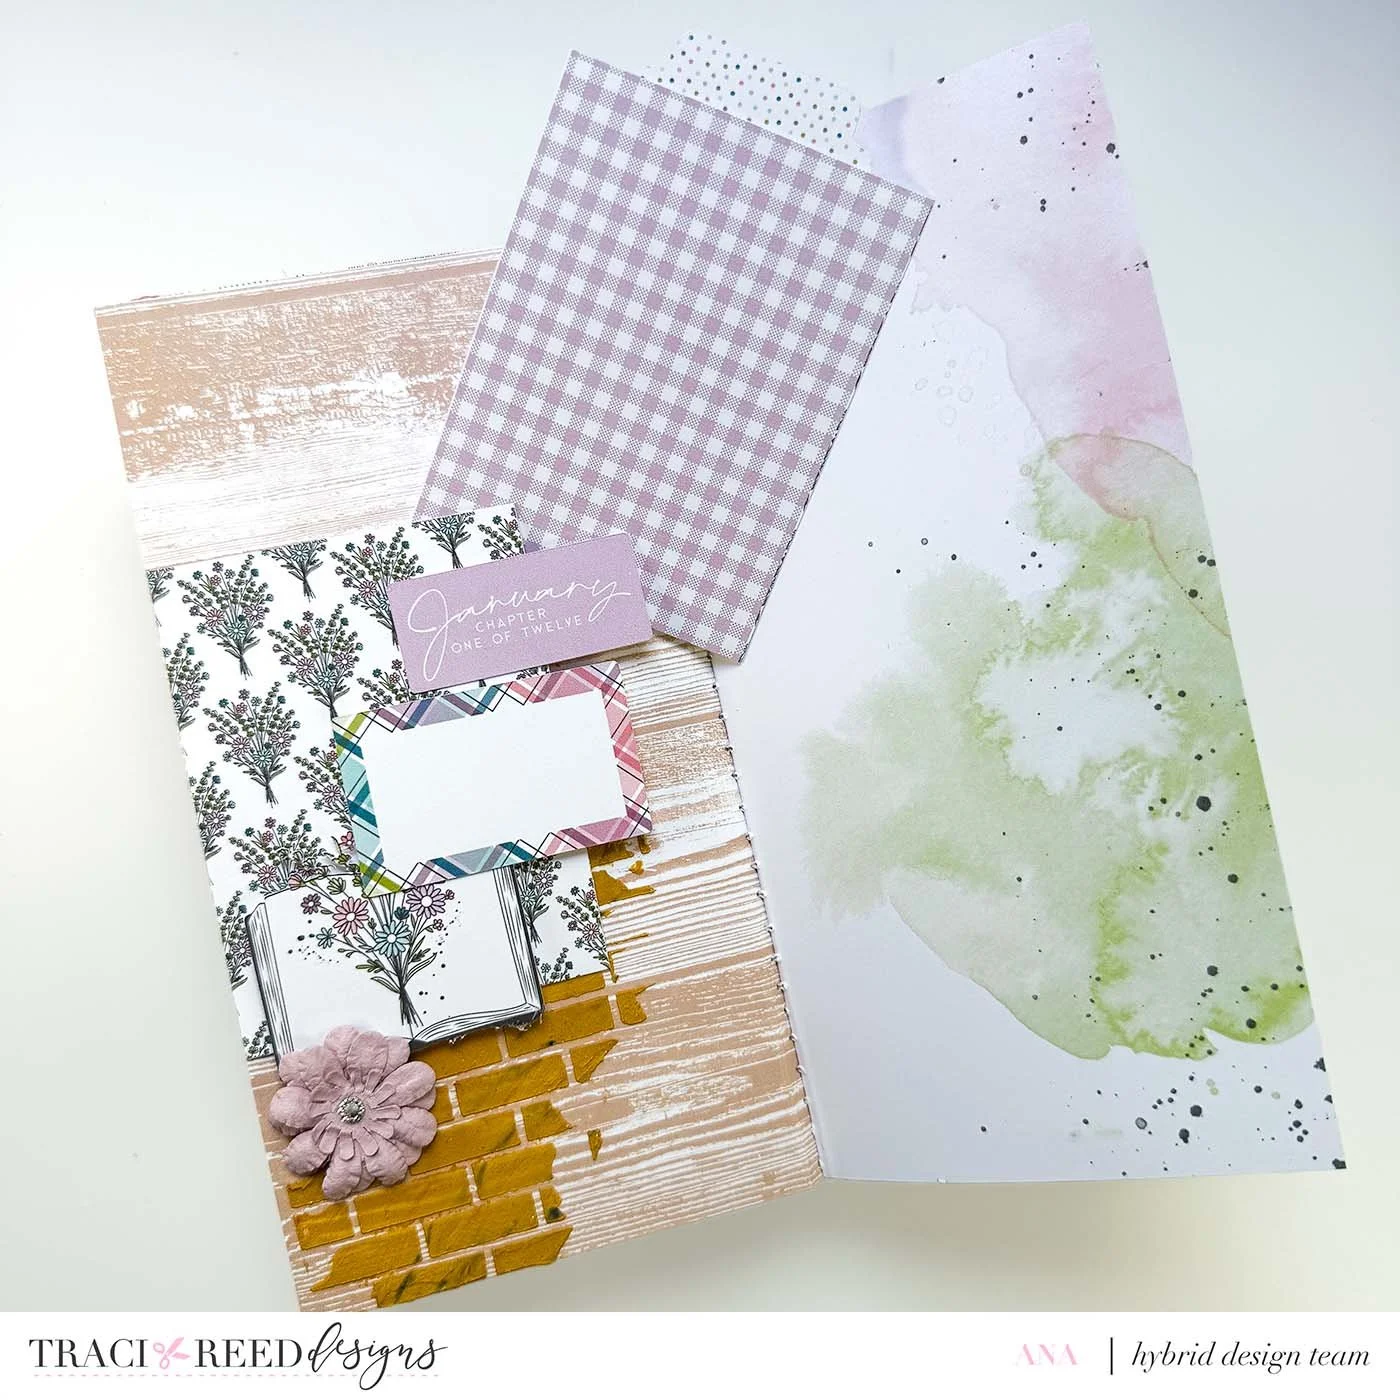
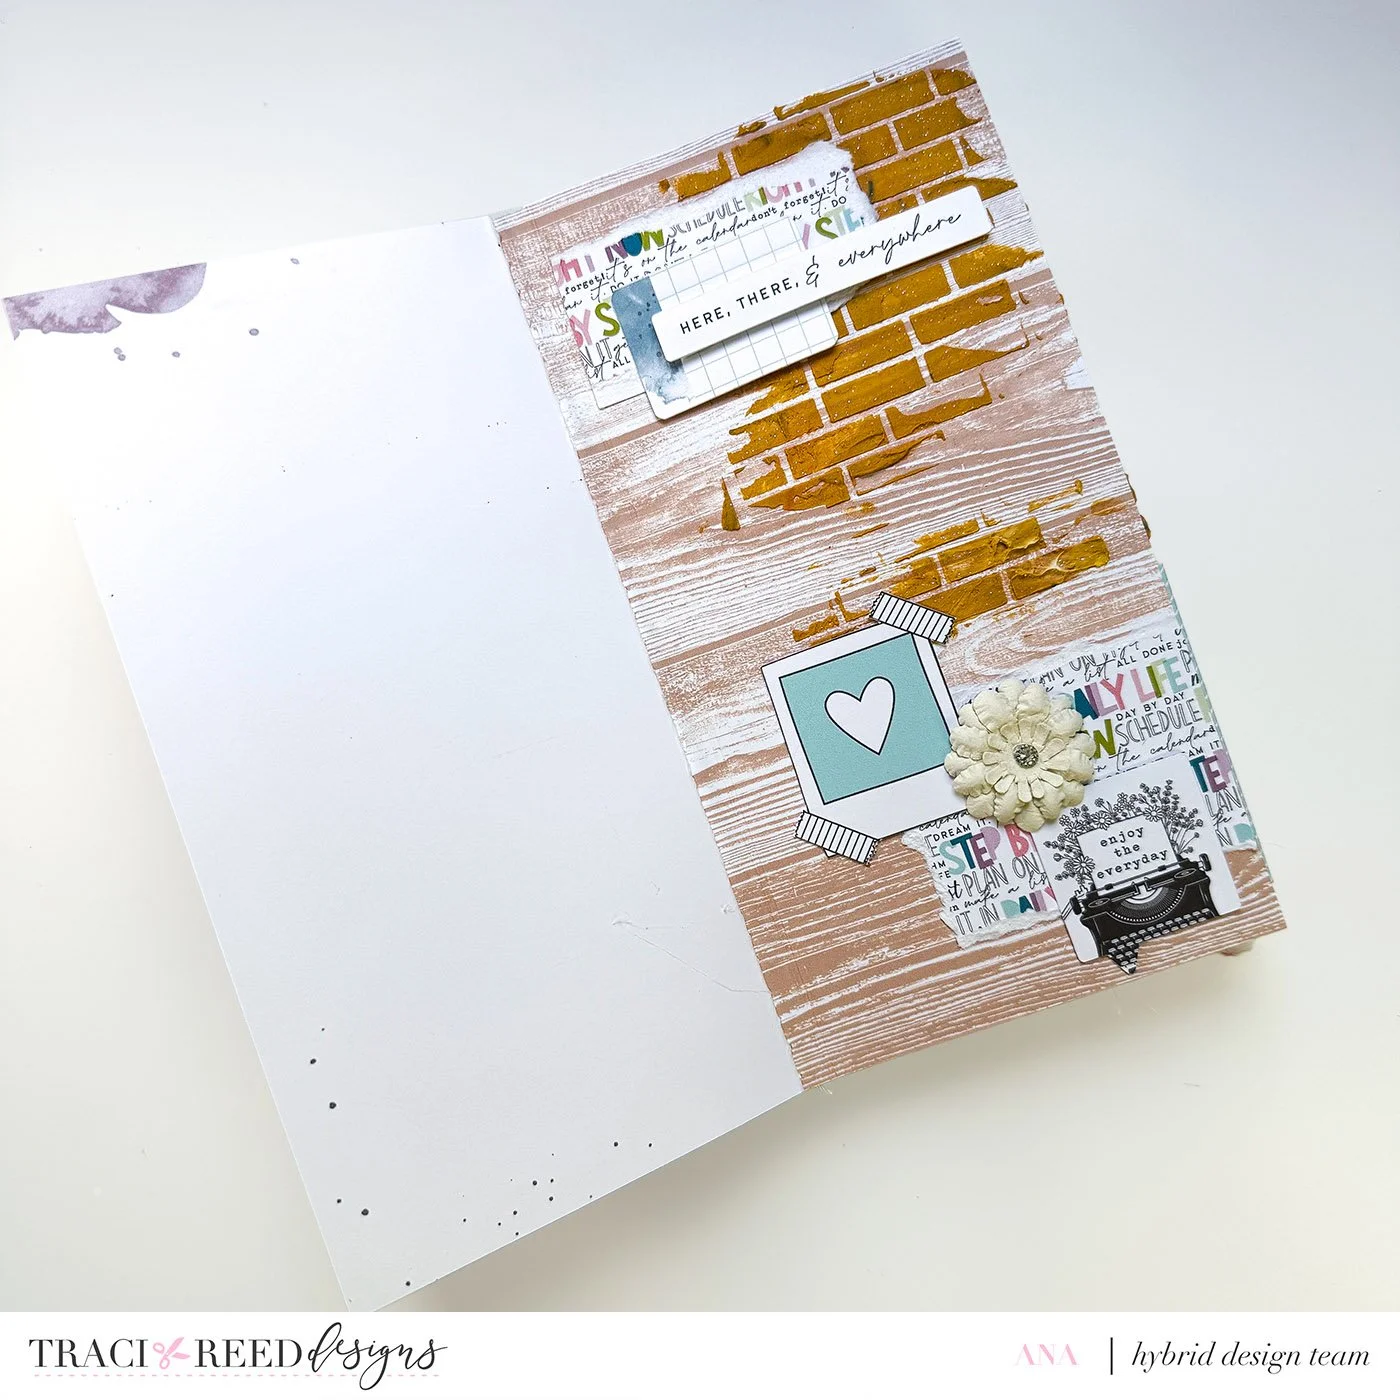
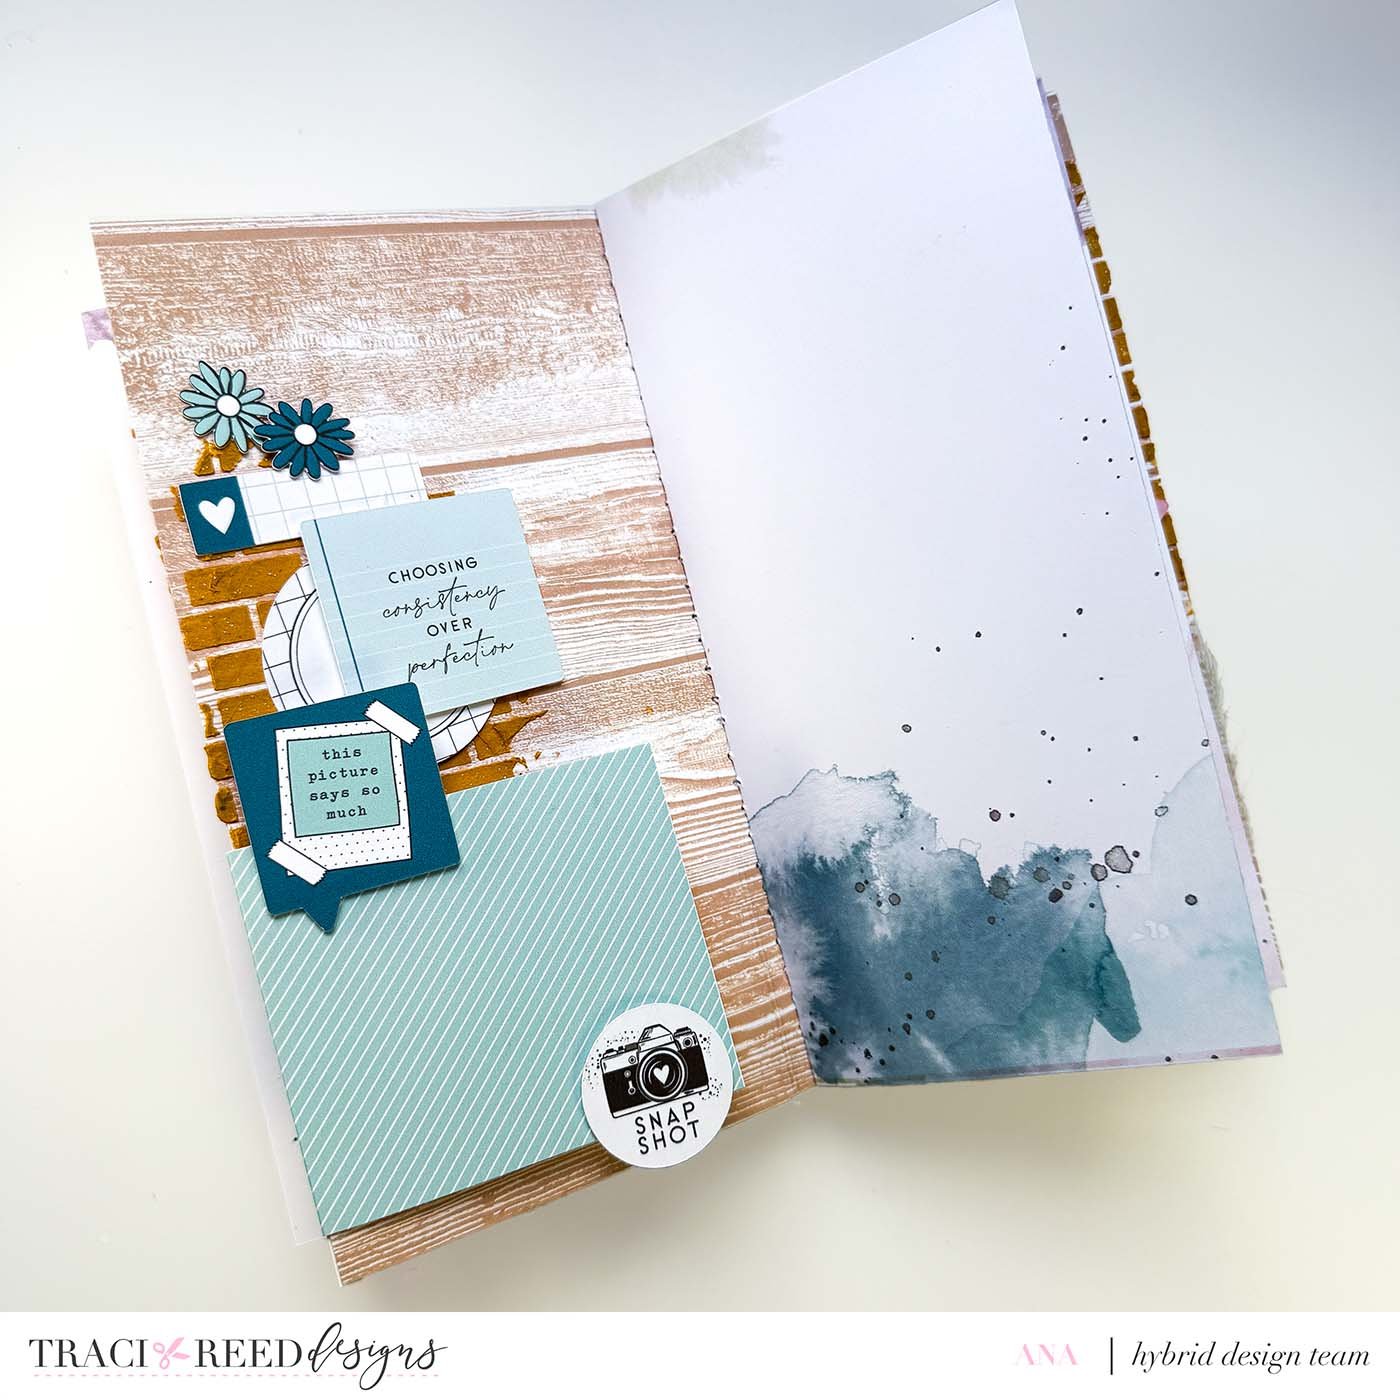
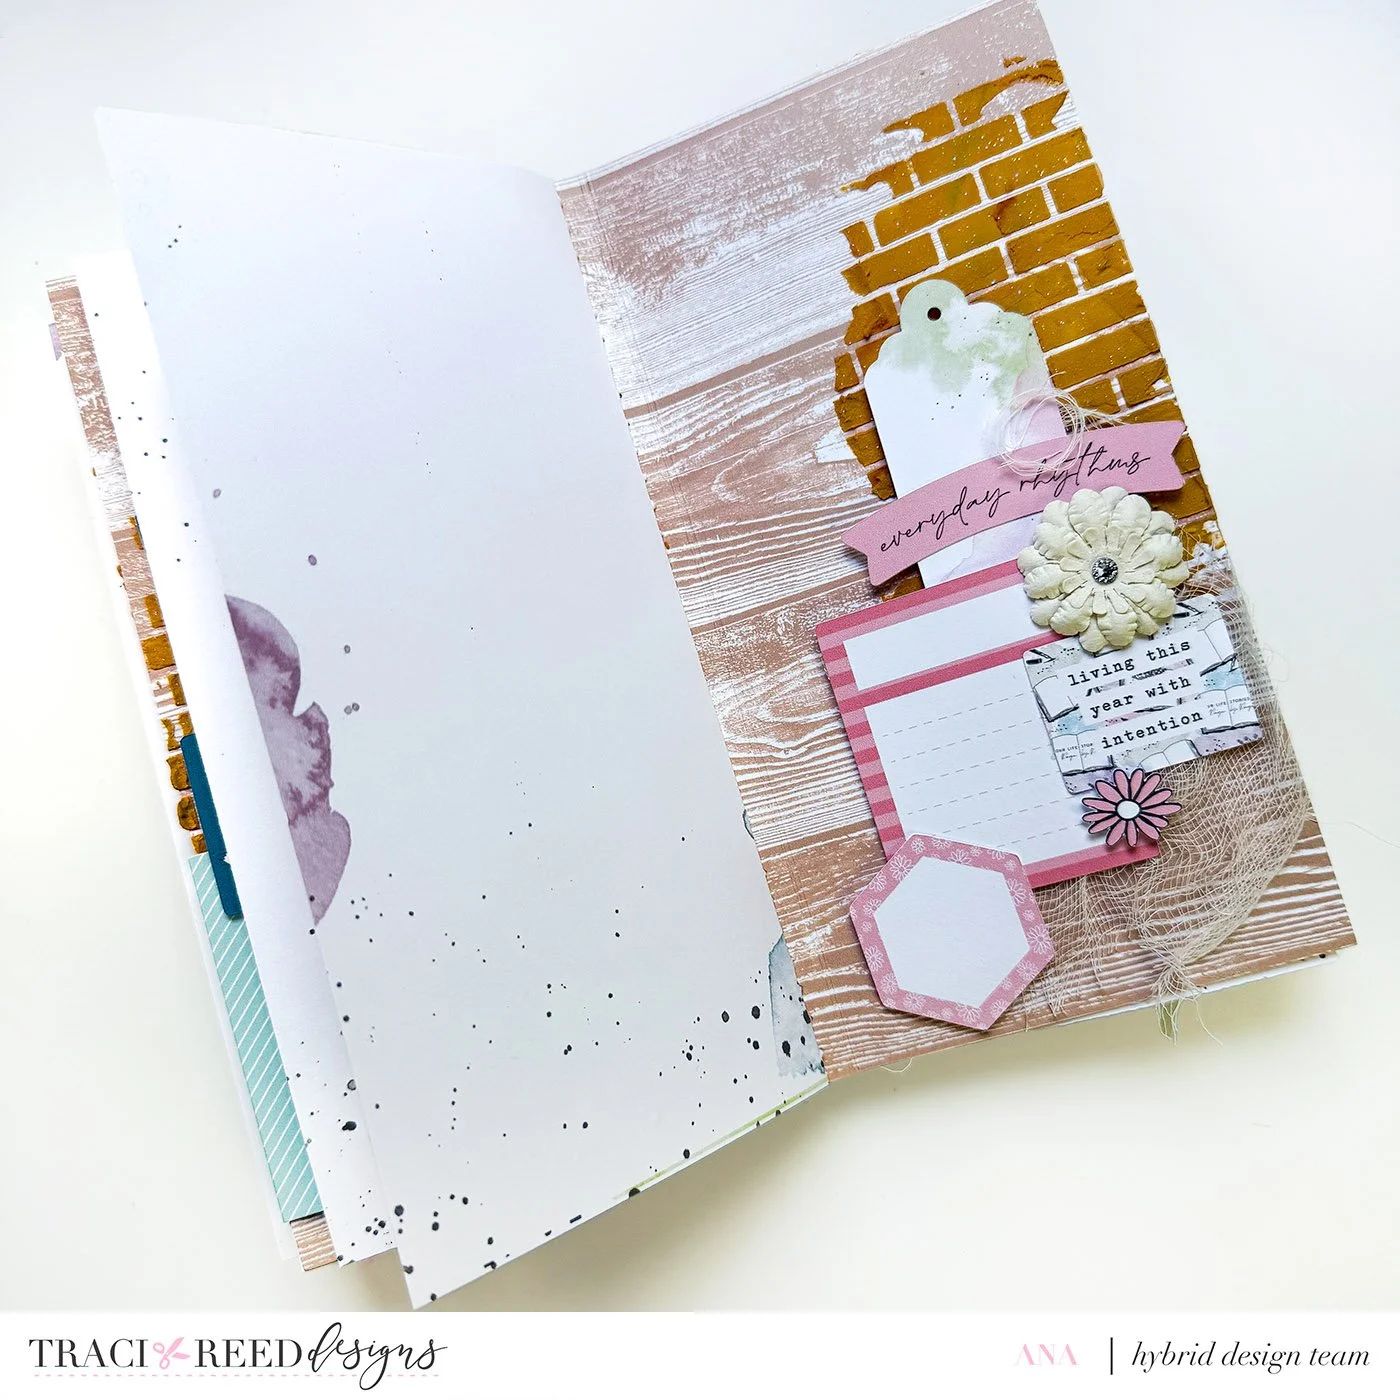
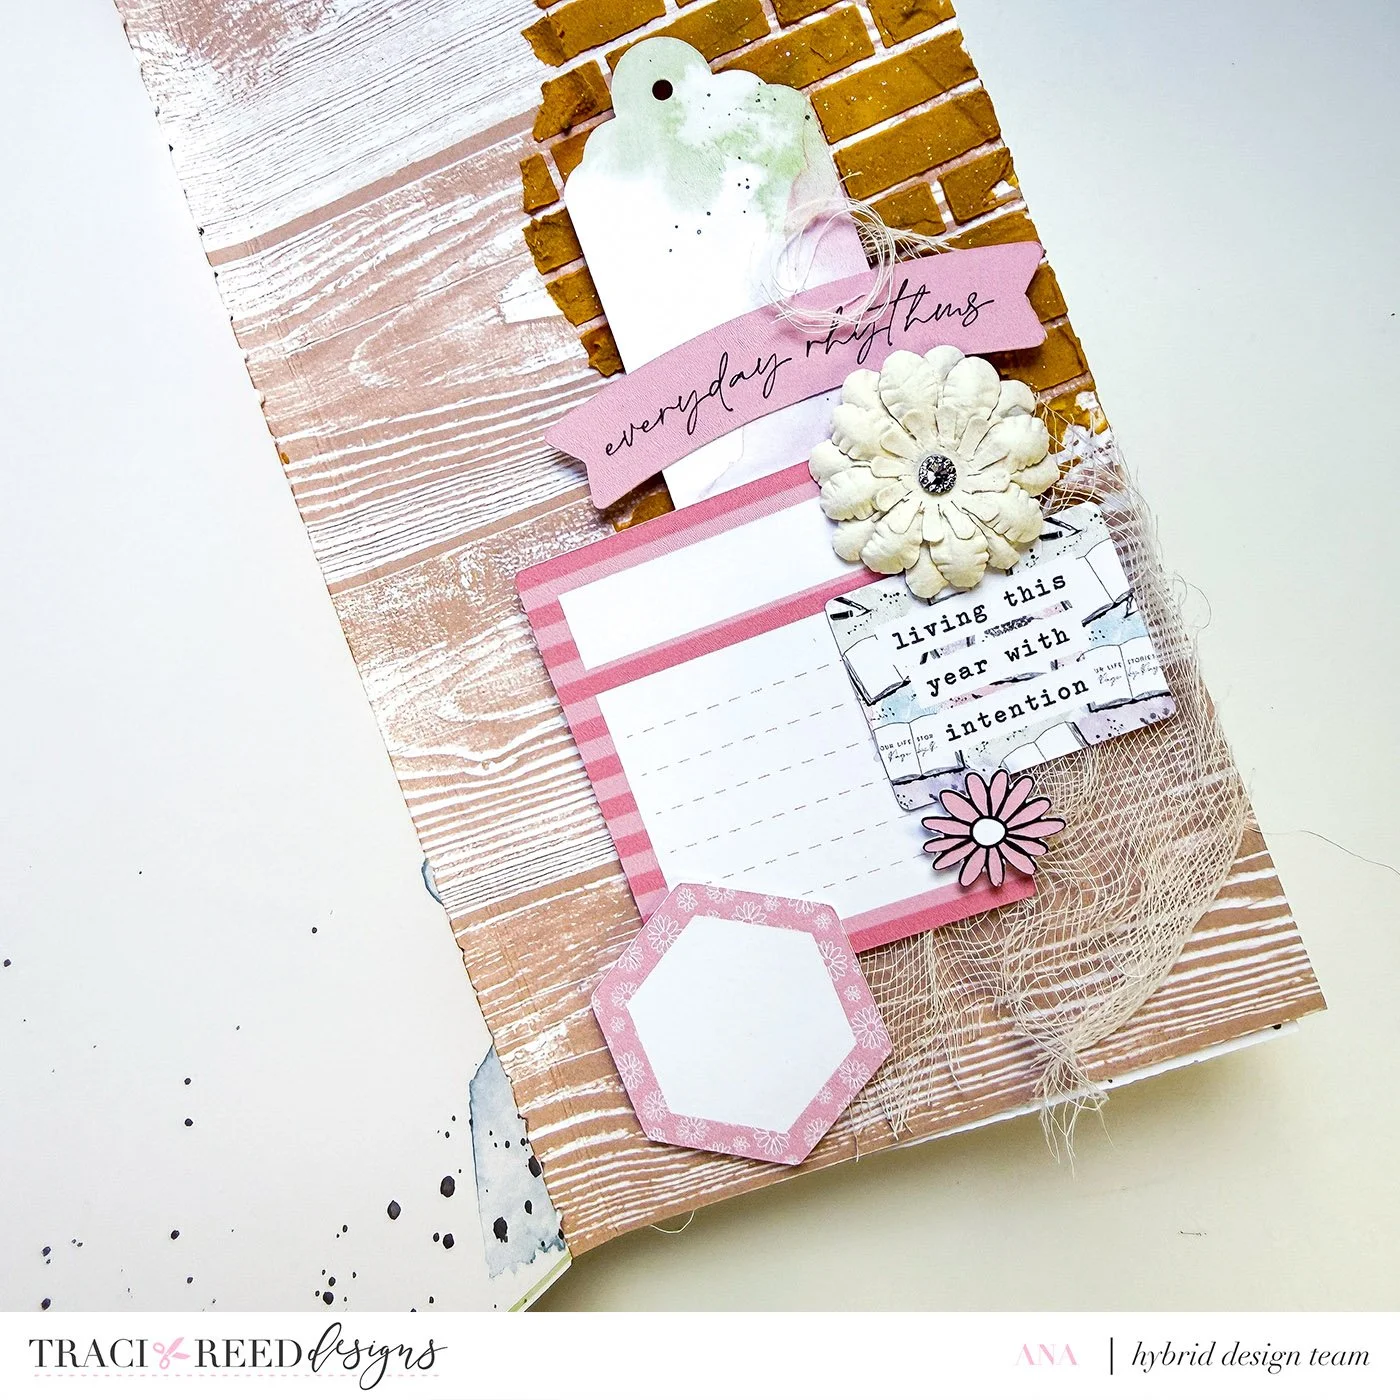
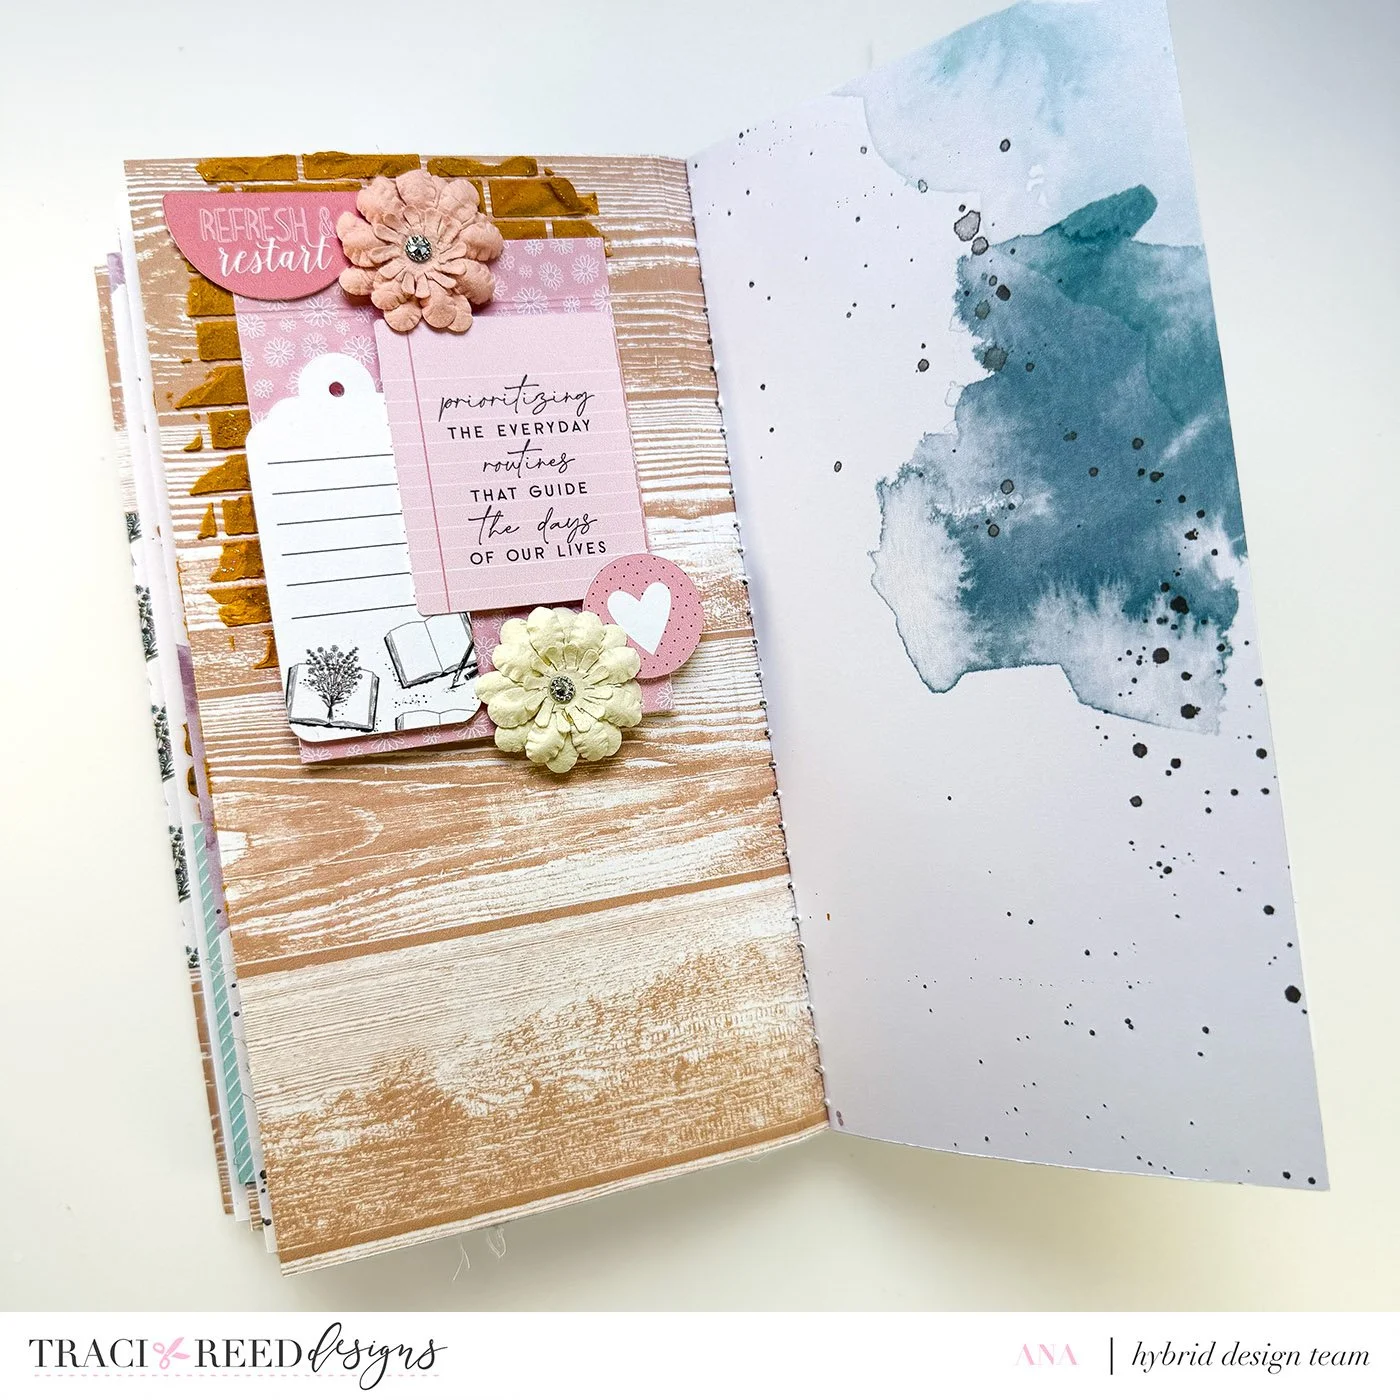
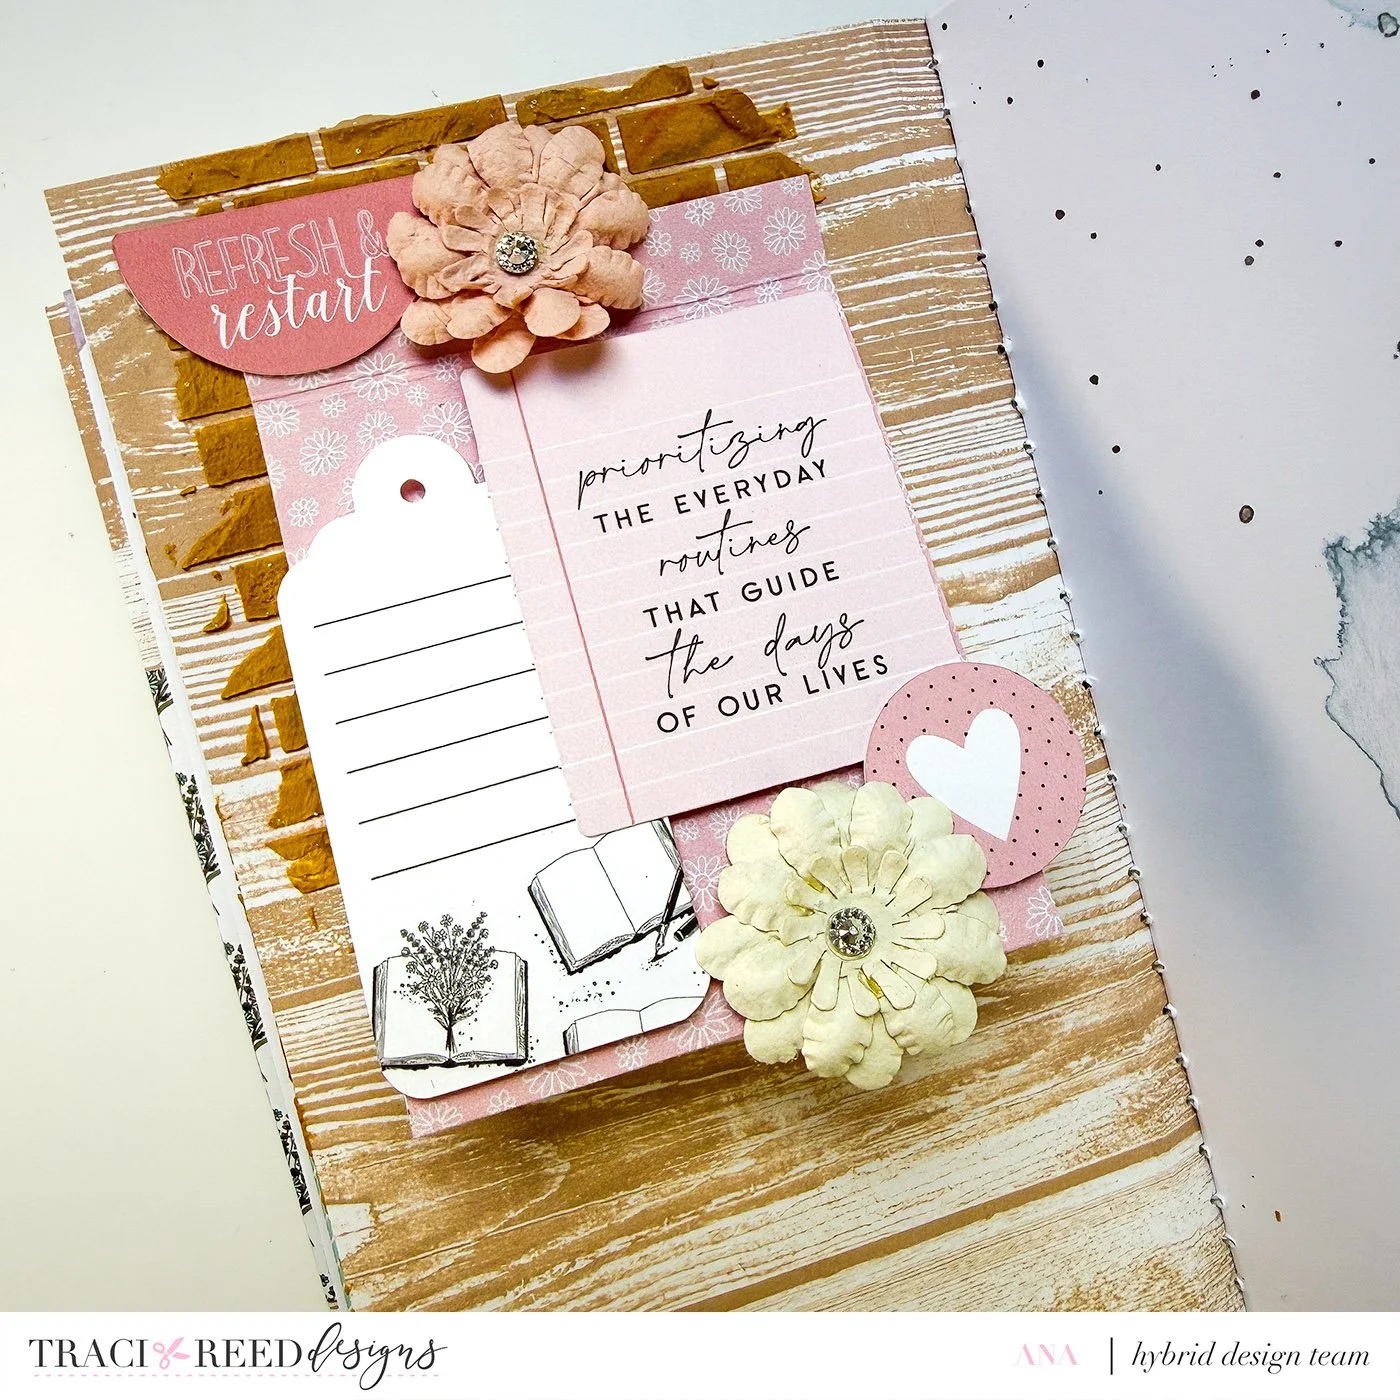
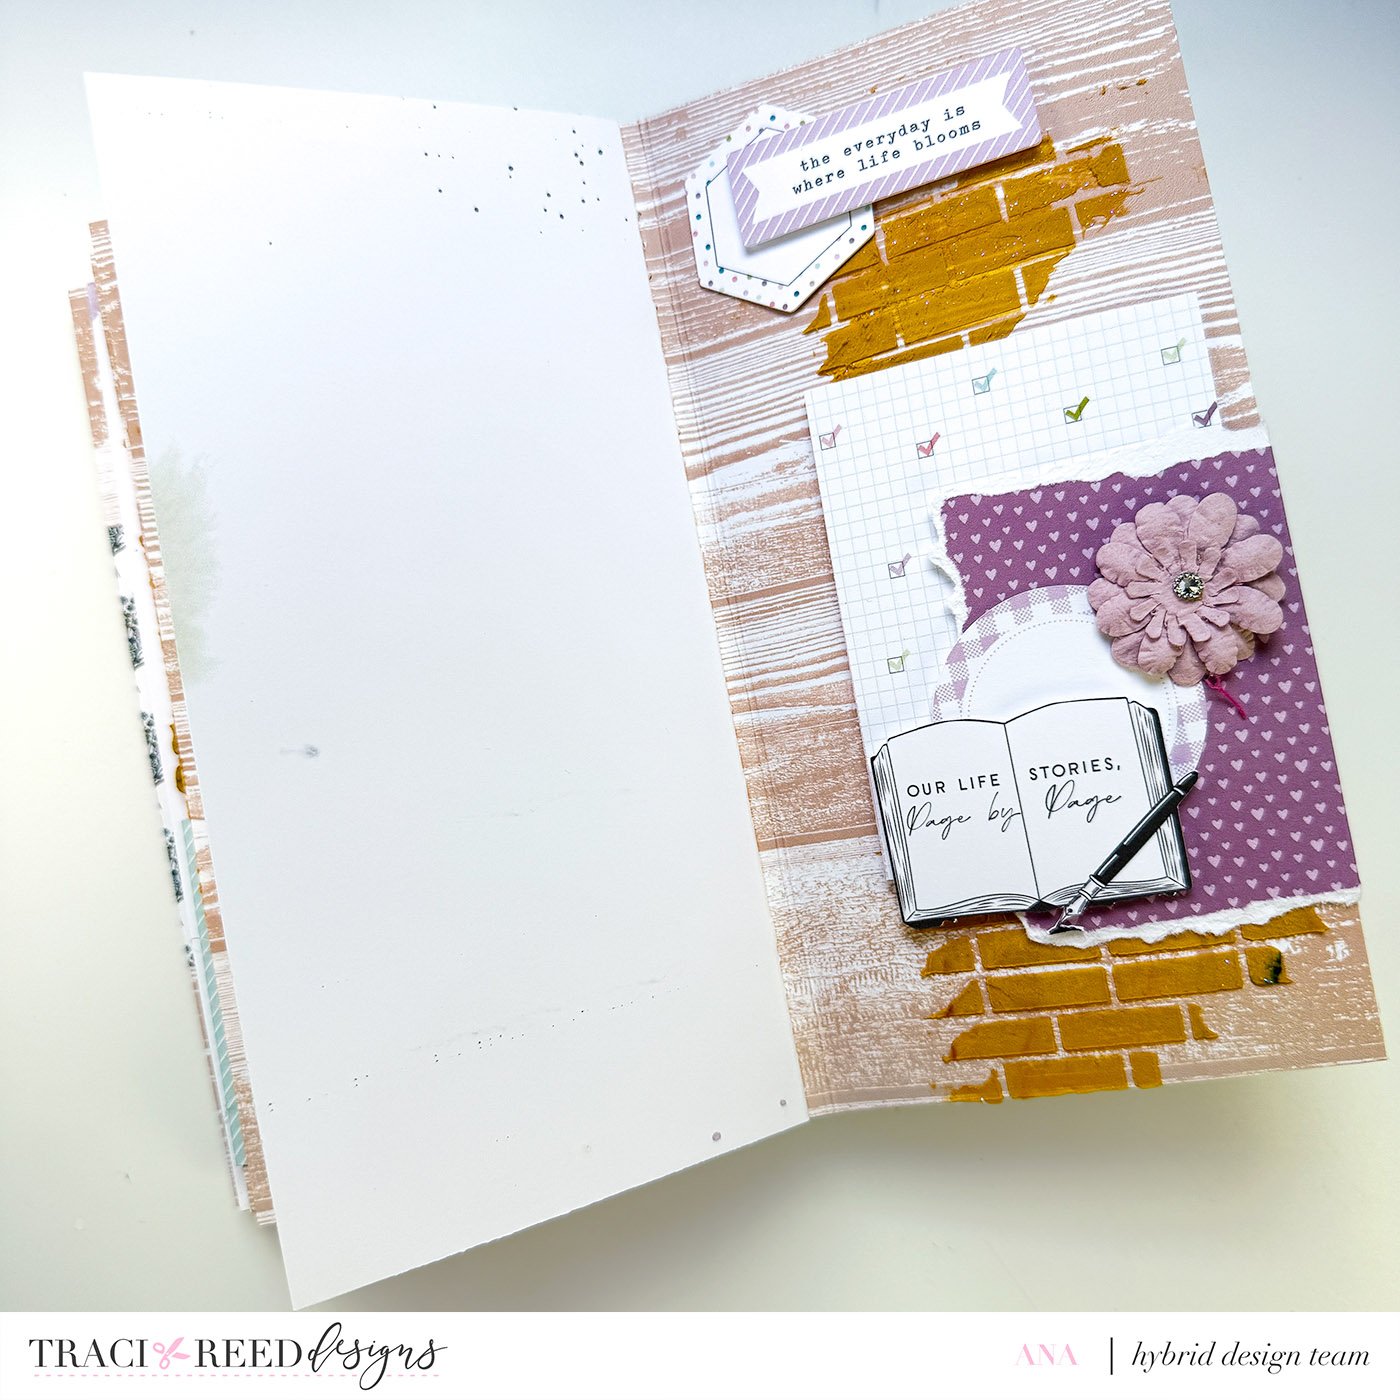
Embellishing the Pages
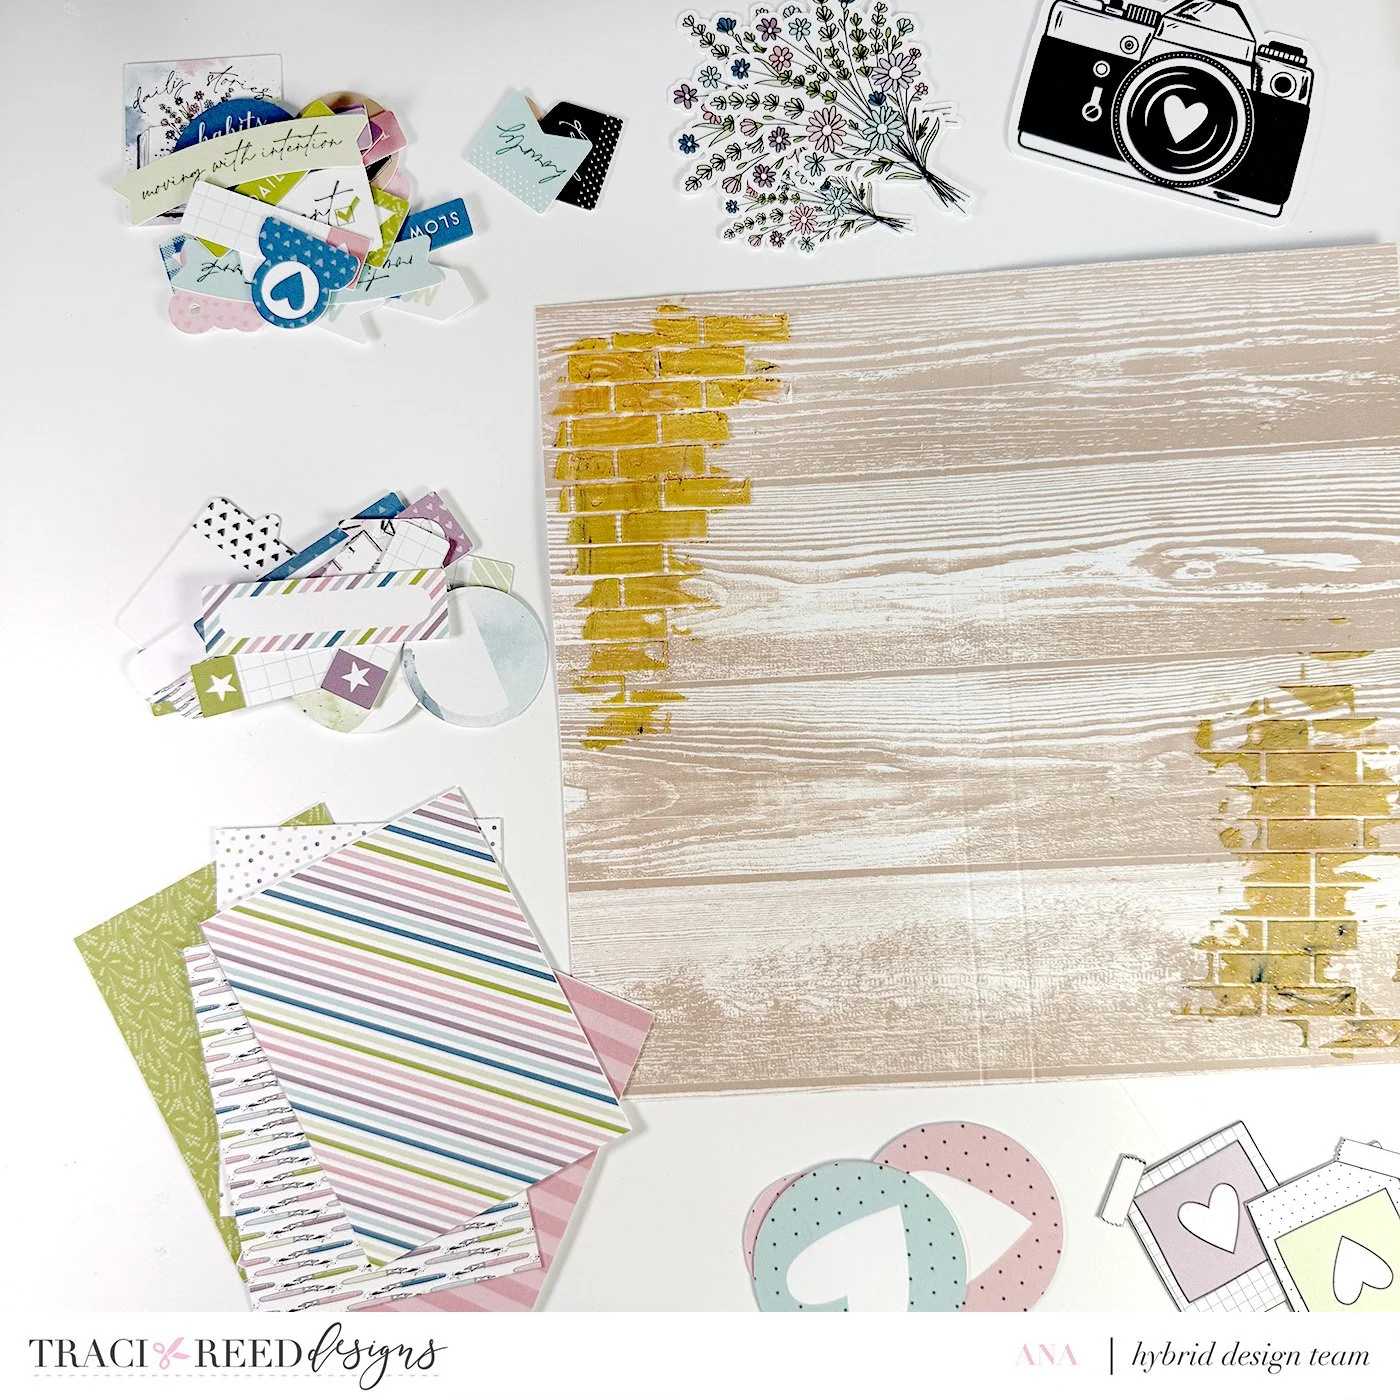
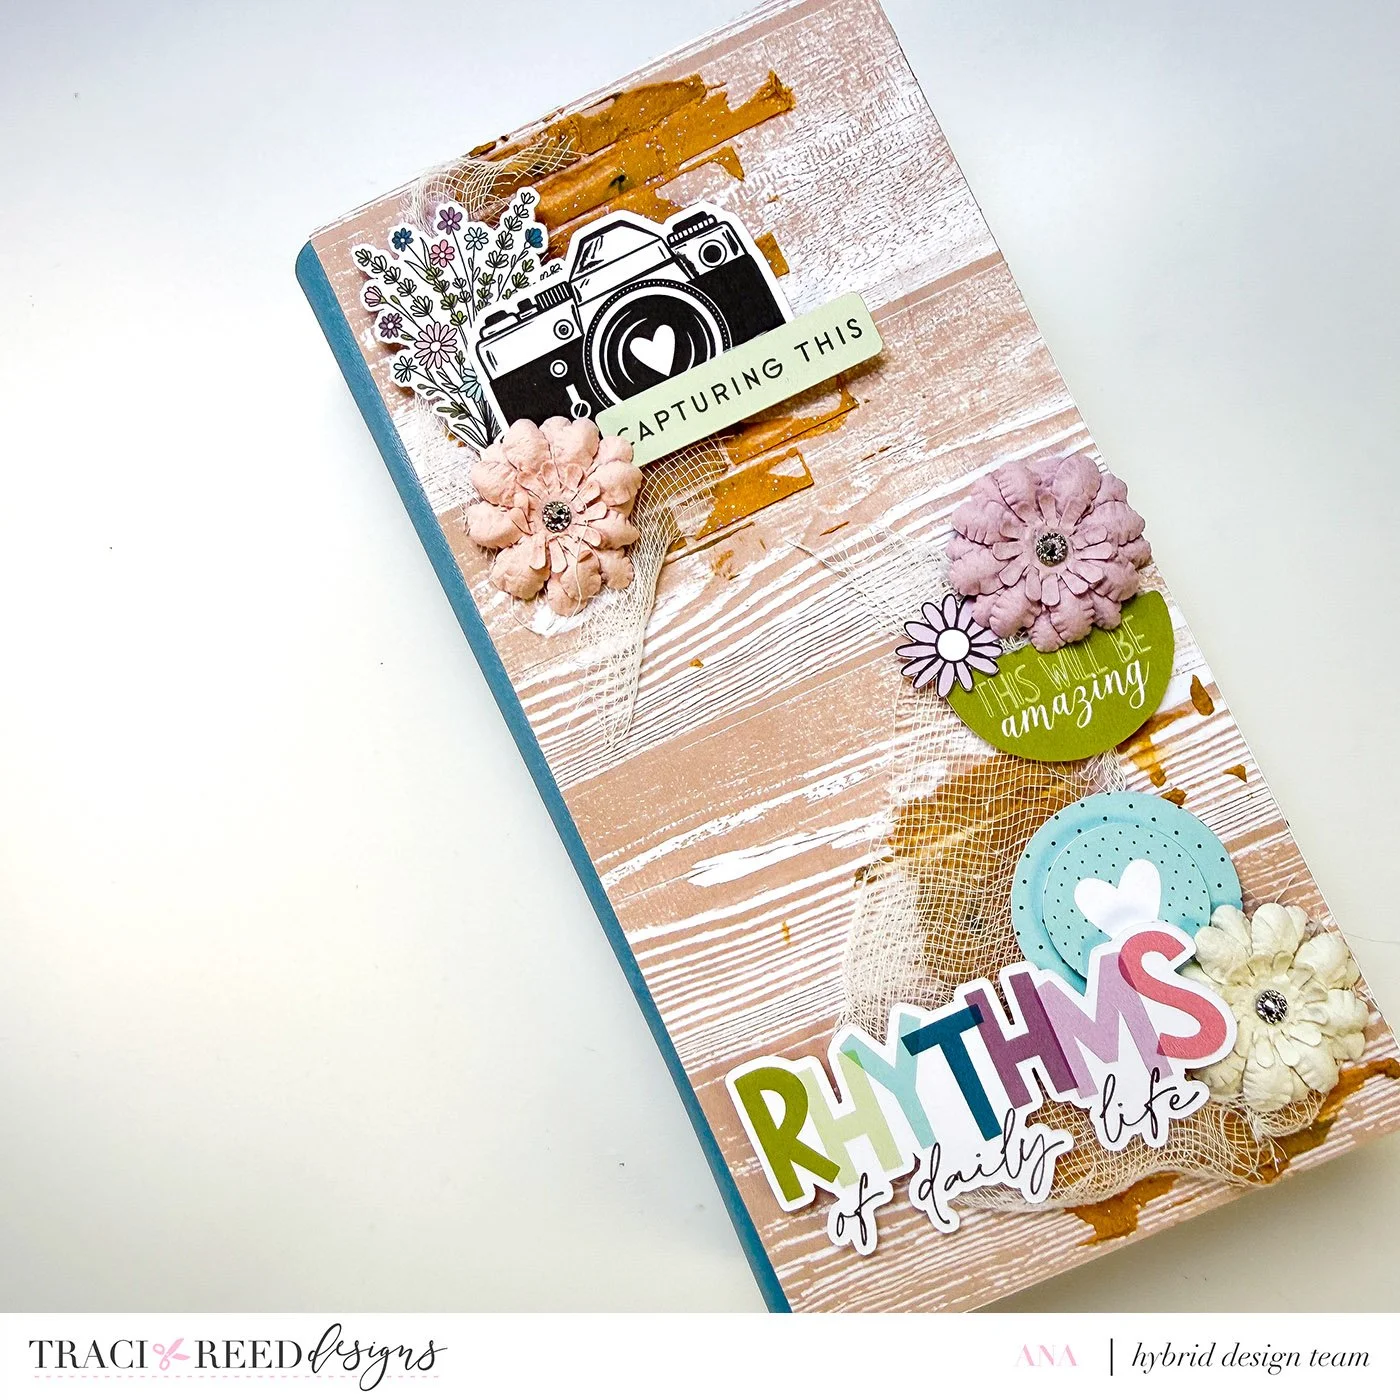
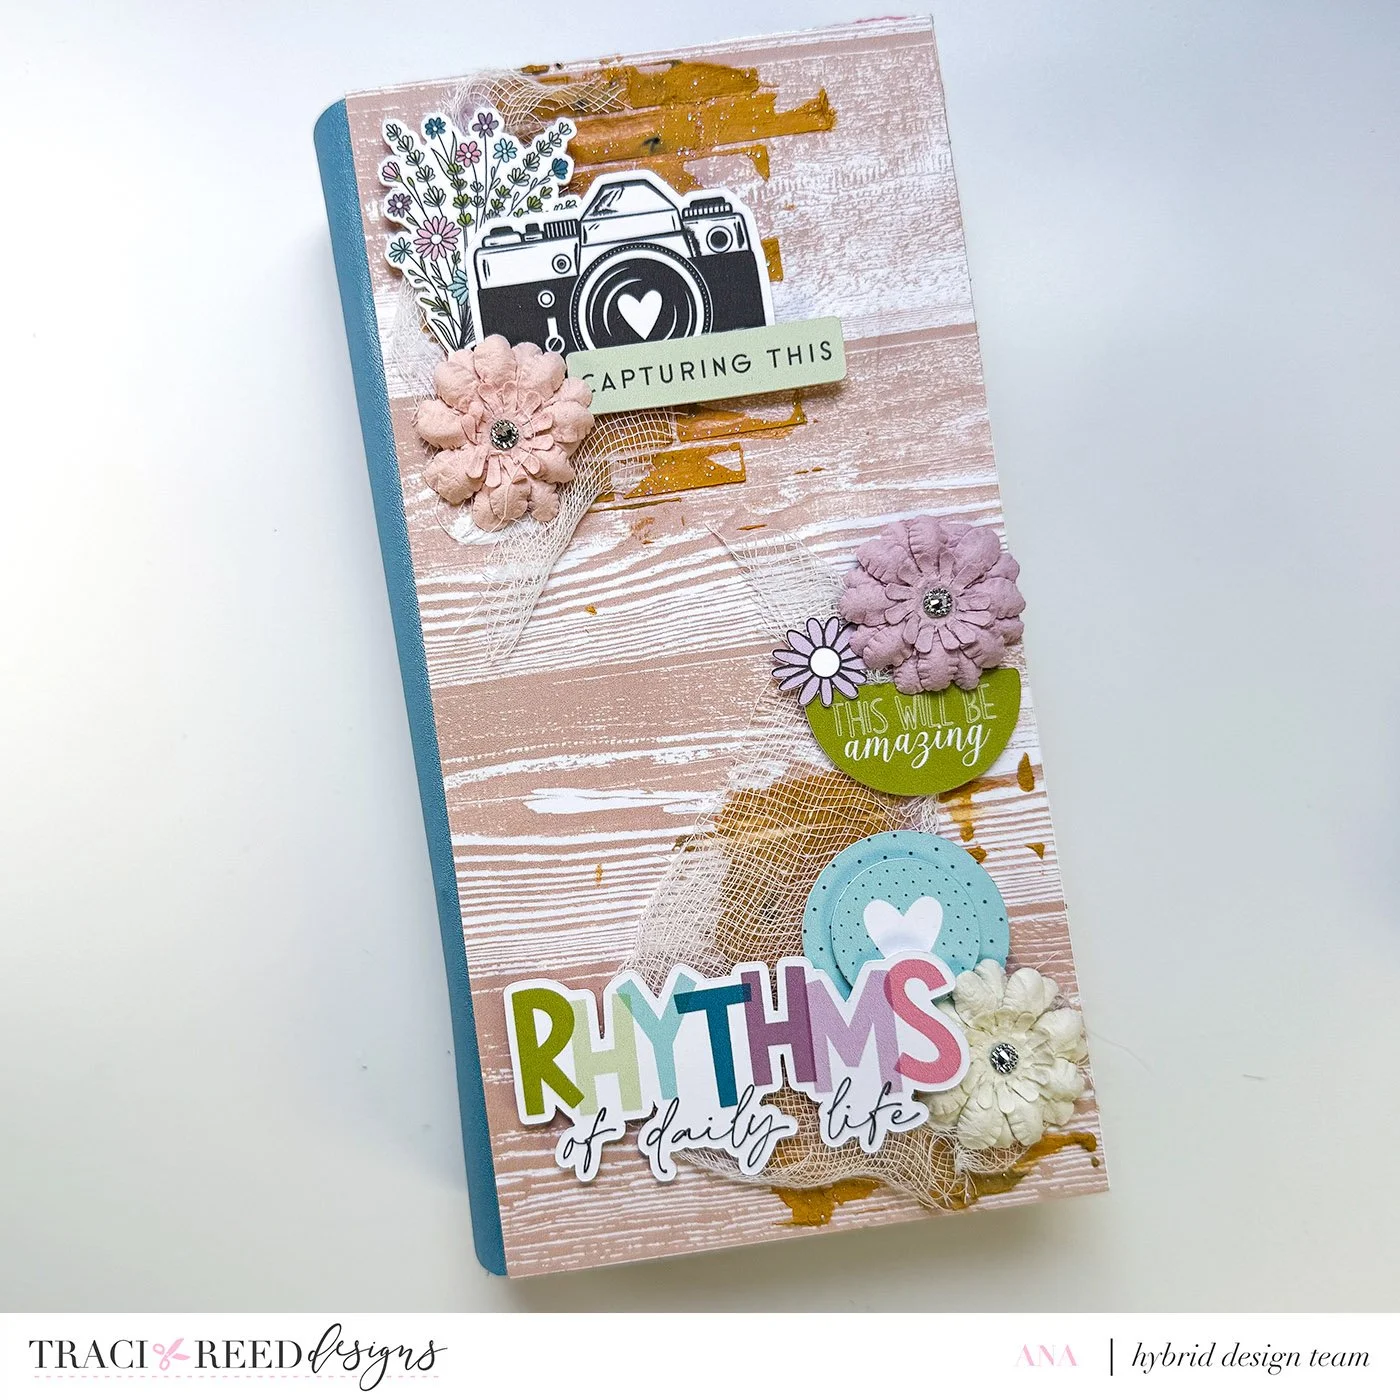
This was my favorite part! Once the textured paste was fully dry, I went completely embellishing-happy - layering pieces, adding foam tape for dimension, and incorporating 3D flowers and gauze.
This is one of the many reasons I love working with digital files. I can use as many embellishments as I want without worrying about running out, and still feel excited about using them again in future projects.
Once all 6 embellished panels (two on each page) were finished, it was time to prepare the inside pages.
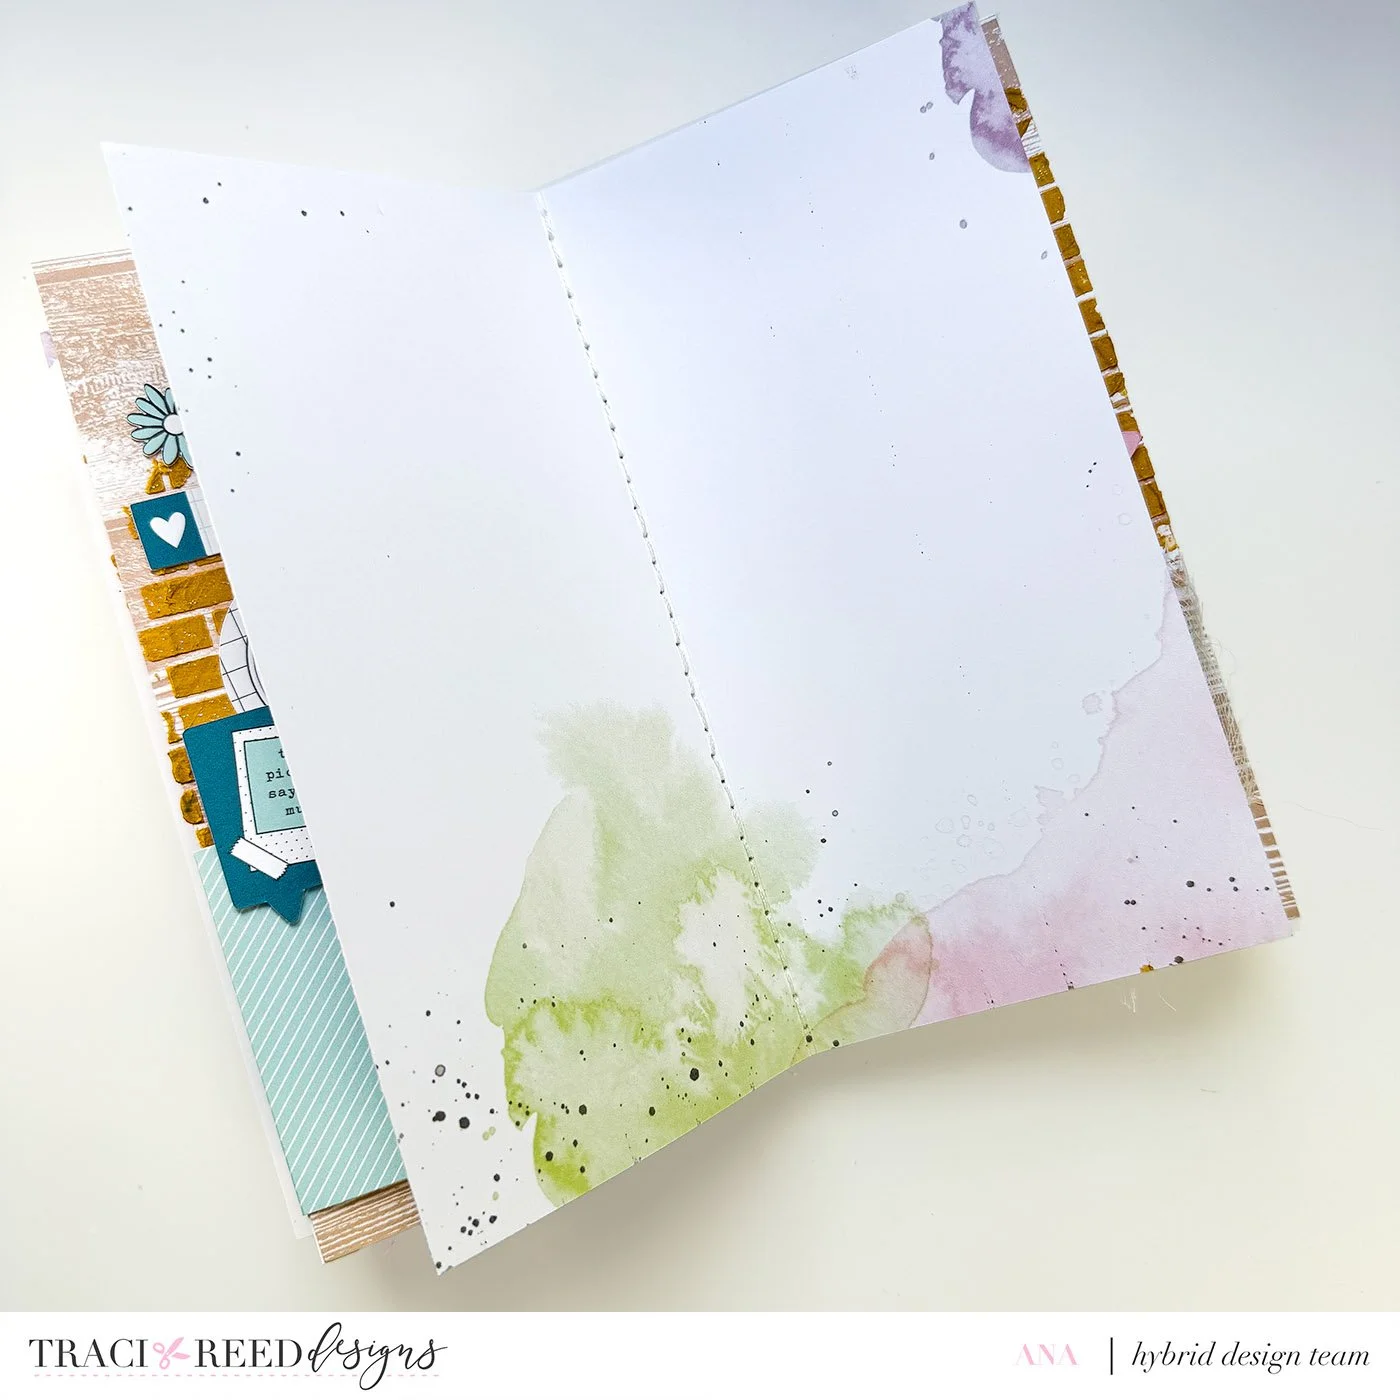
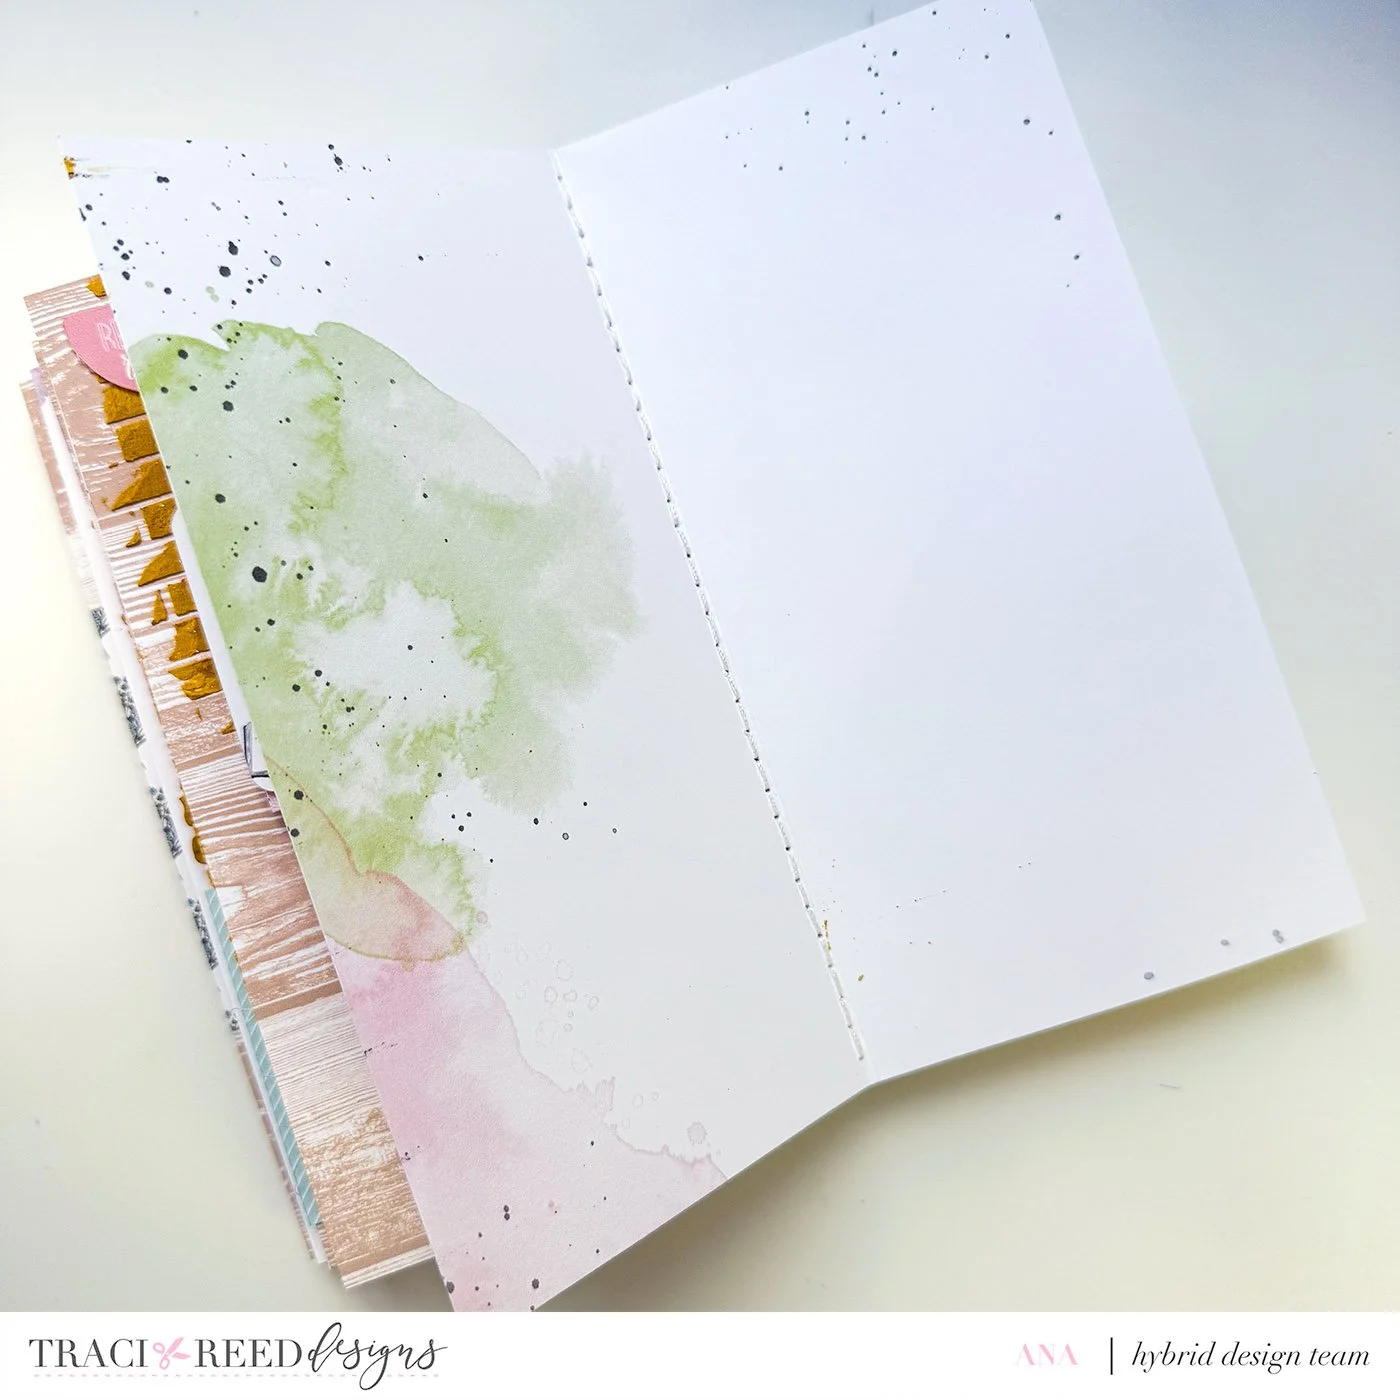
Preparing the Blank Pages
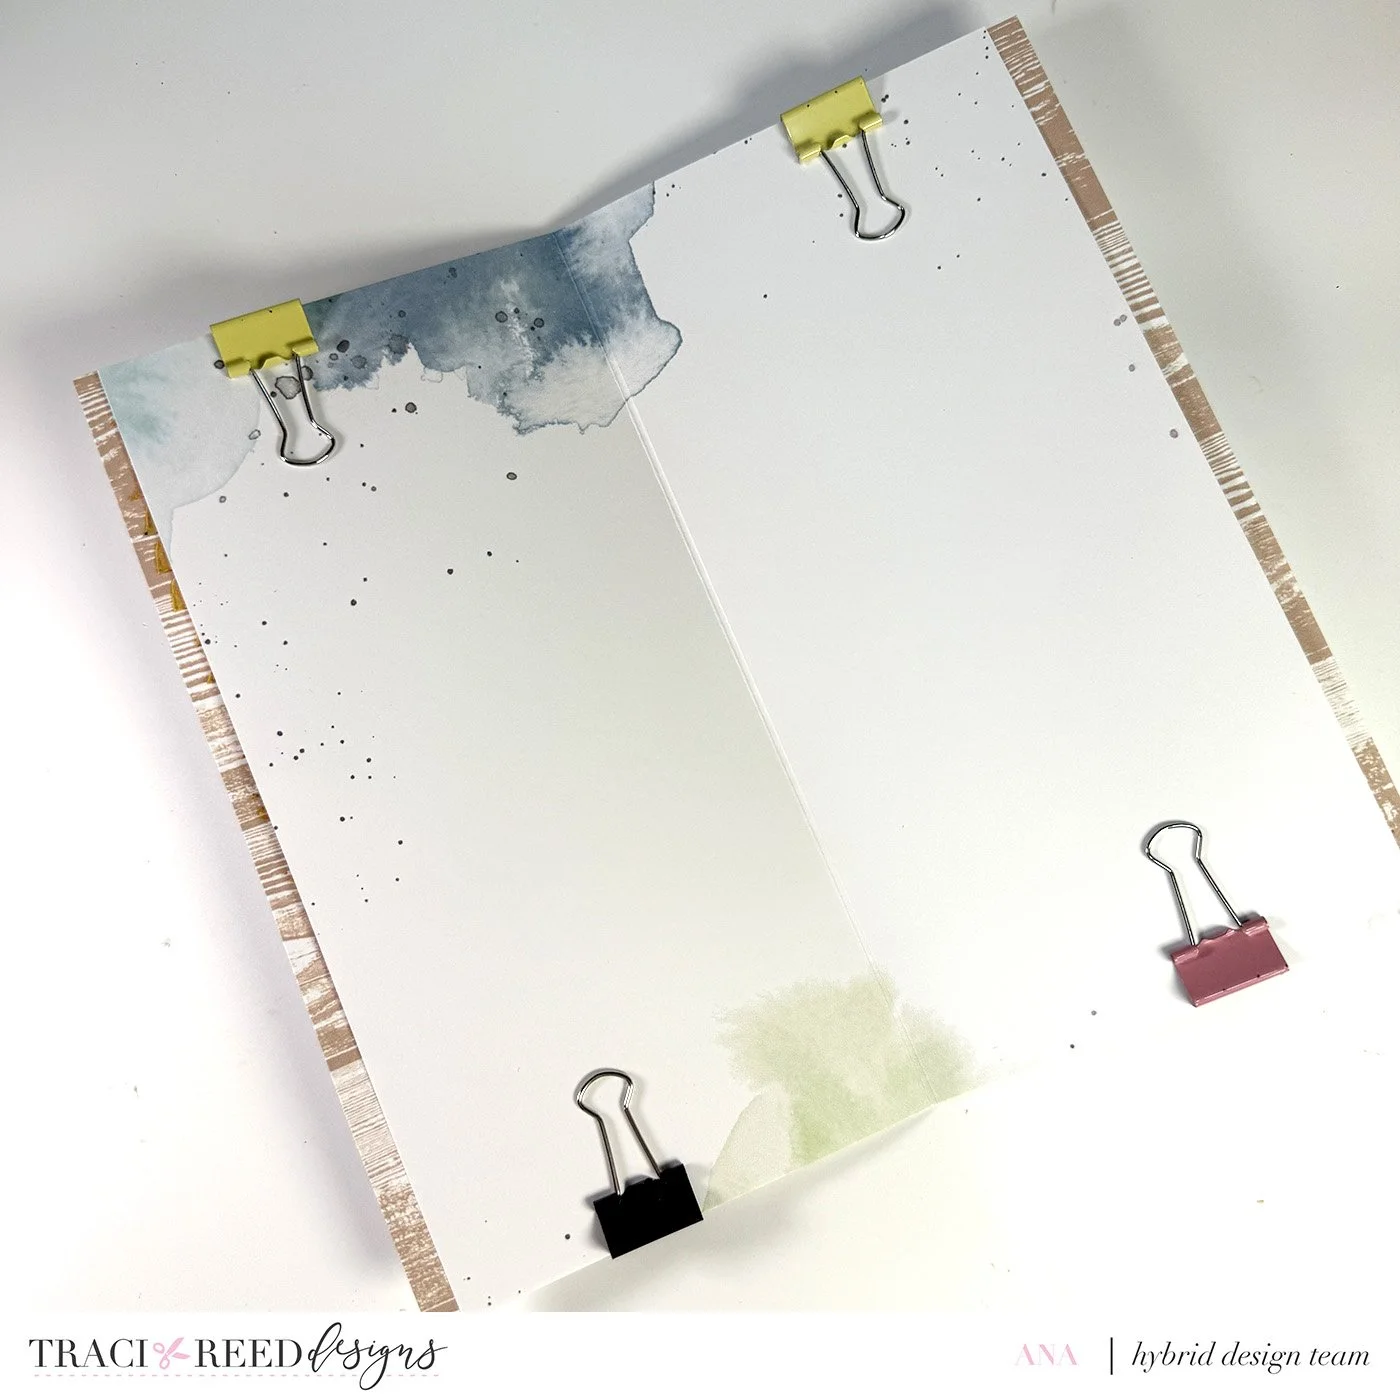
I picked another more plain design from the collection, one with a subtle watercolor look, so the pages would still feel open and ready for journaling. Print this on 3 sheets, back to back.
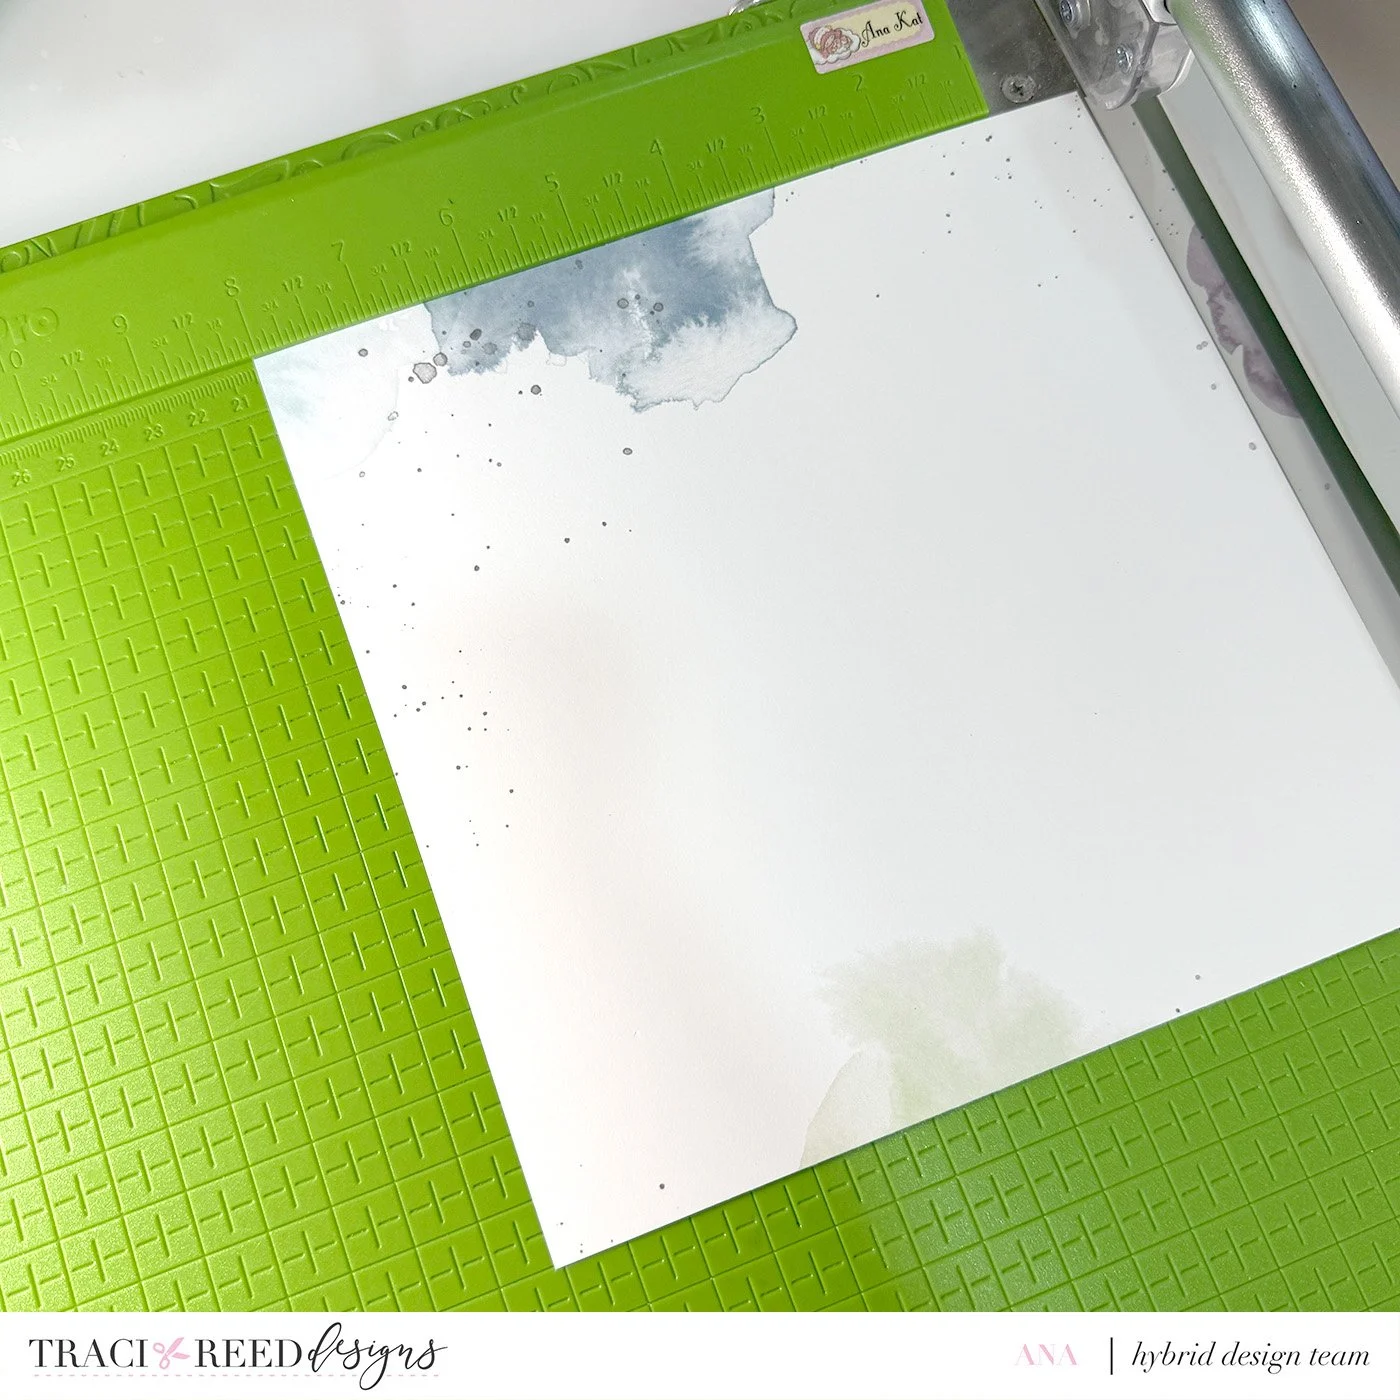
Trim the paper to 8 x 8 inches. Score each at 4 inches.
(editor’s note from Traci: for a “true” TN size, you’ll want to print your paper at 8.25" tall x 8.5” wide and then score at 4.25”)
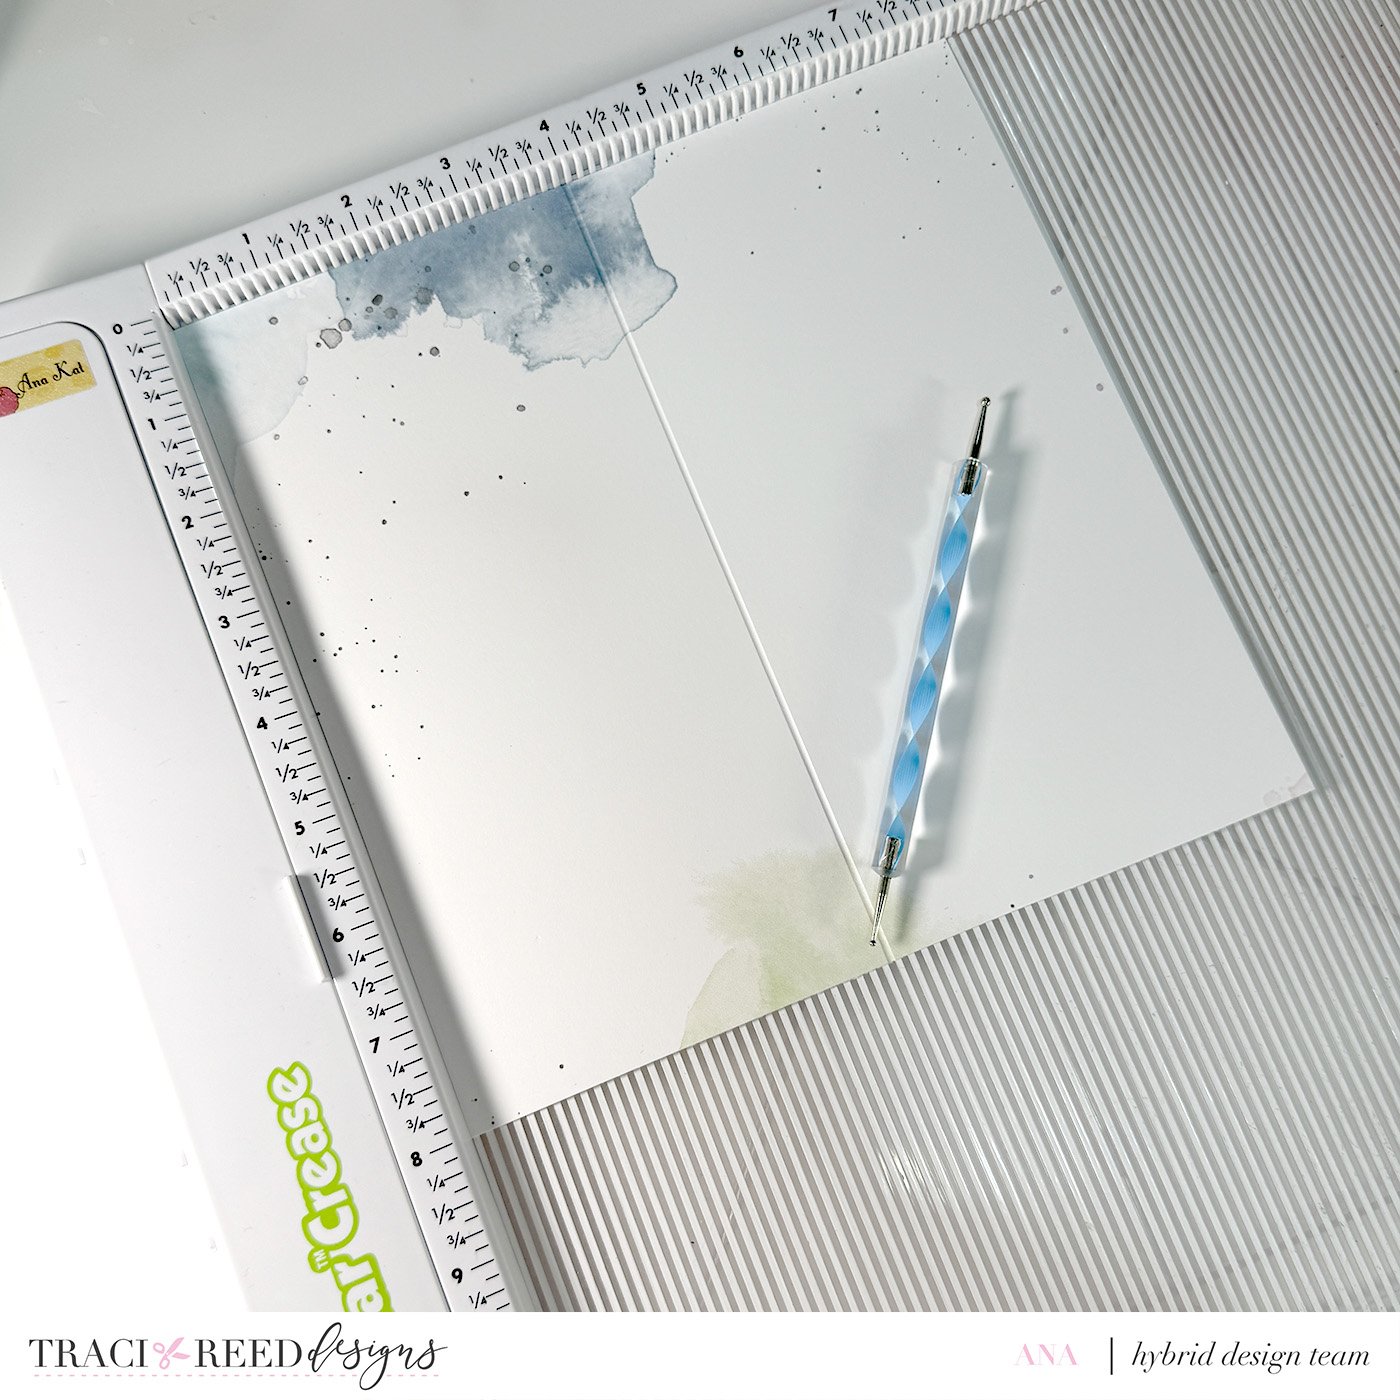
Fold the pages and align the center fold with the 0.5-inch scored section of the embellished pages. Use binder clips to hold everything in place.
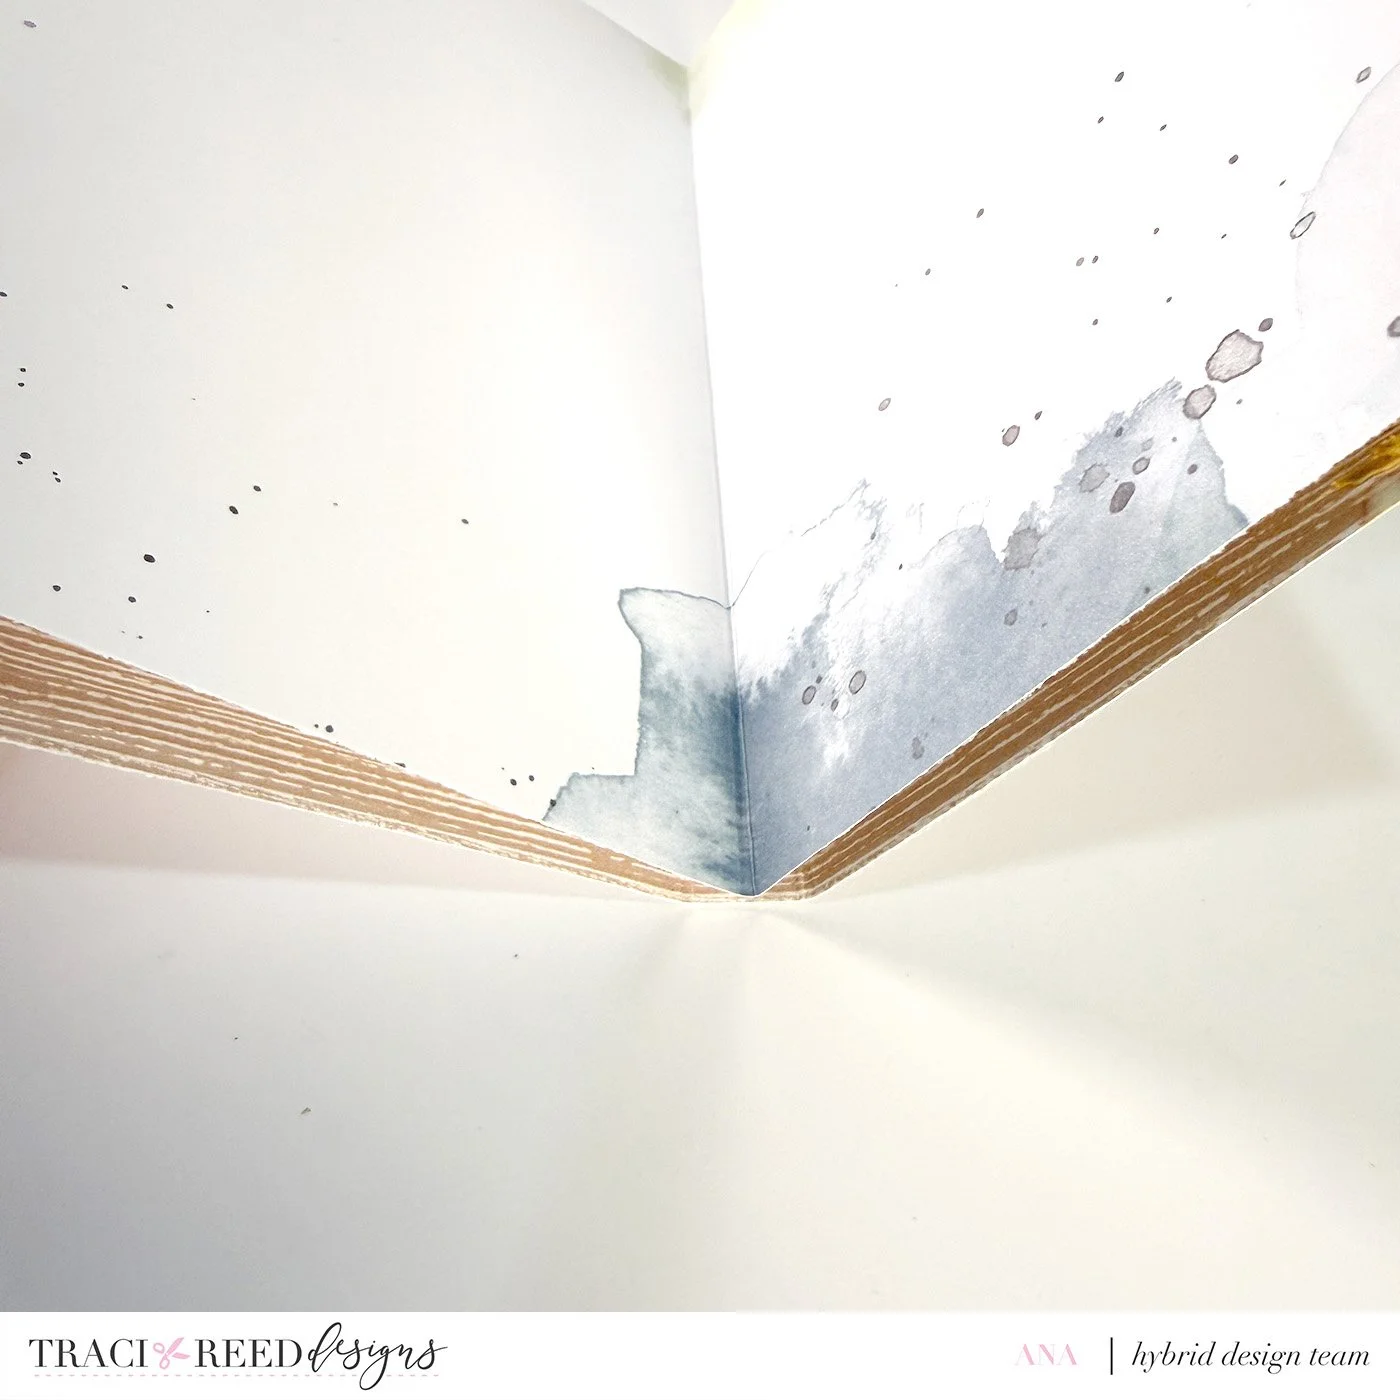
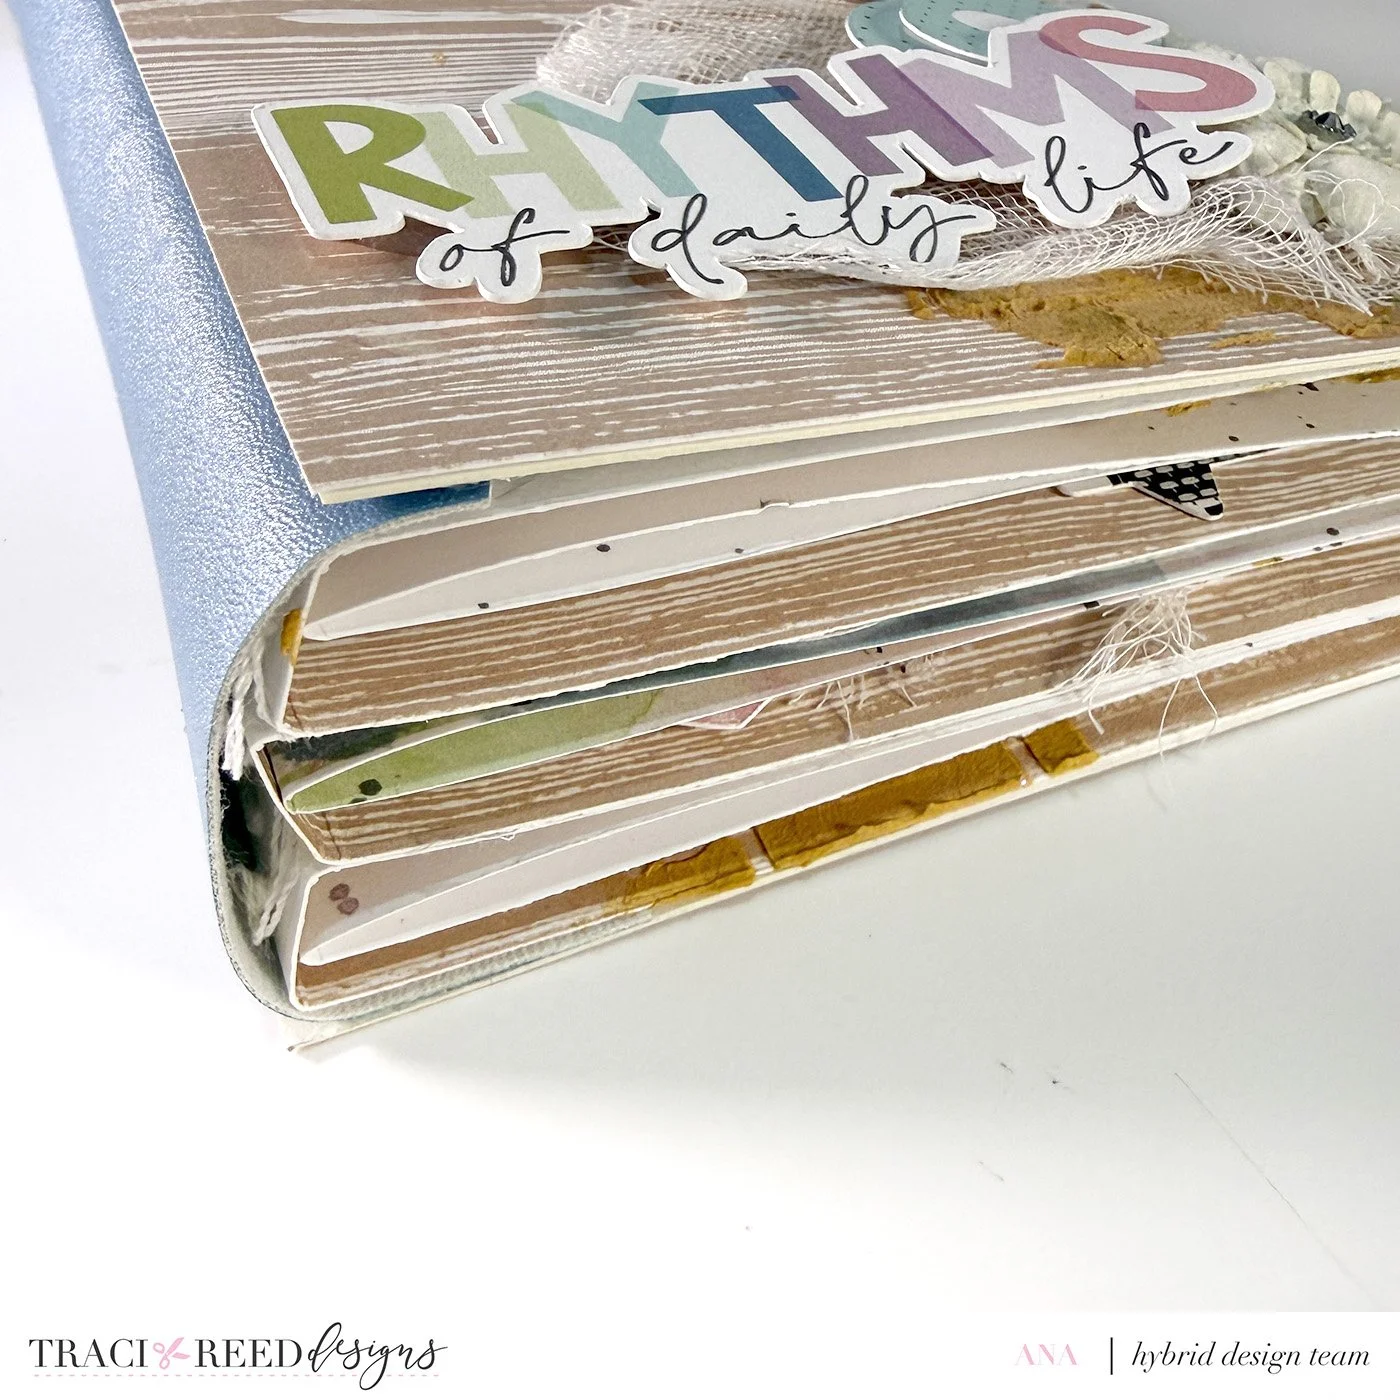
Binding the Pages
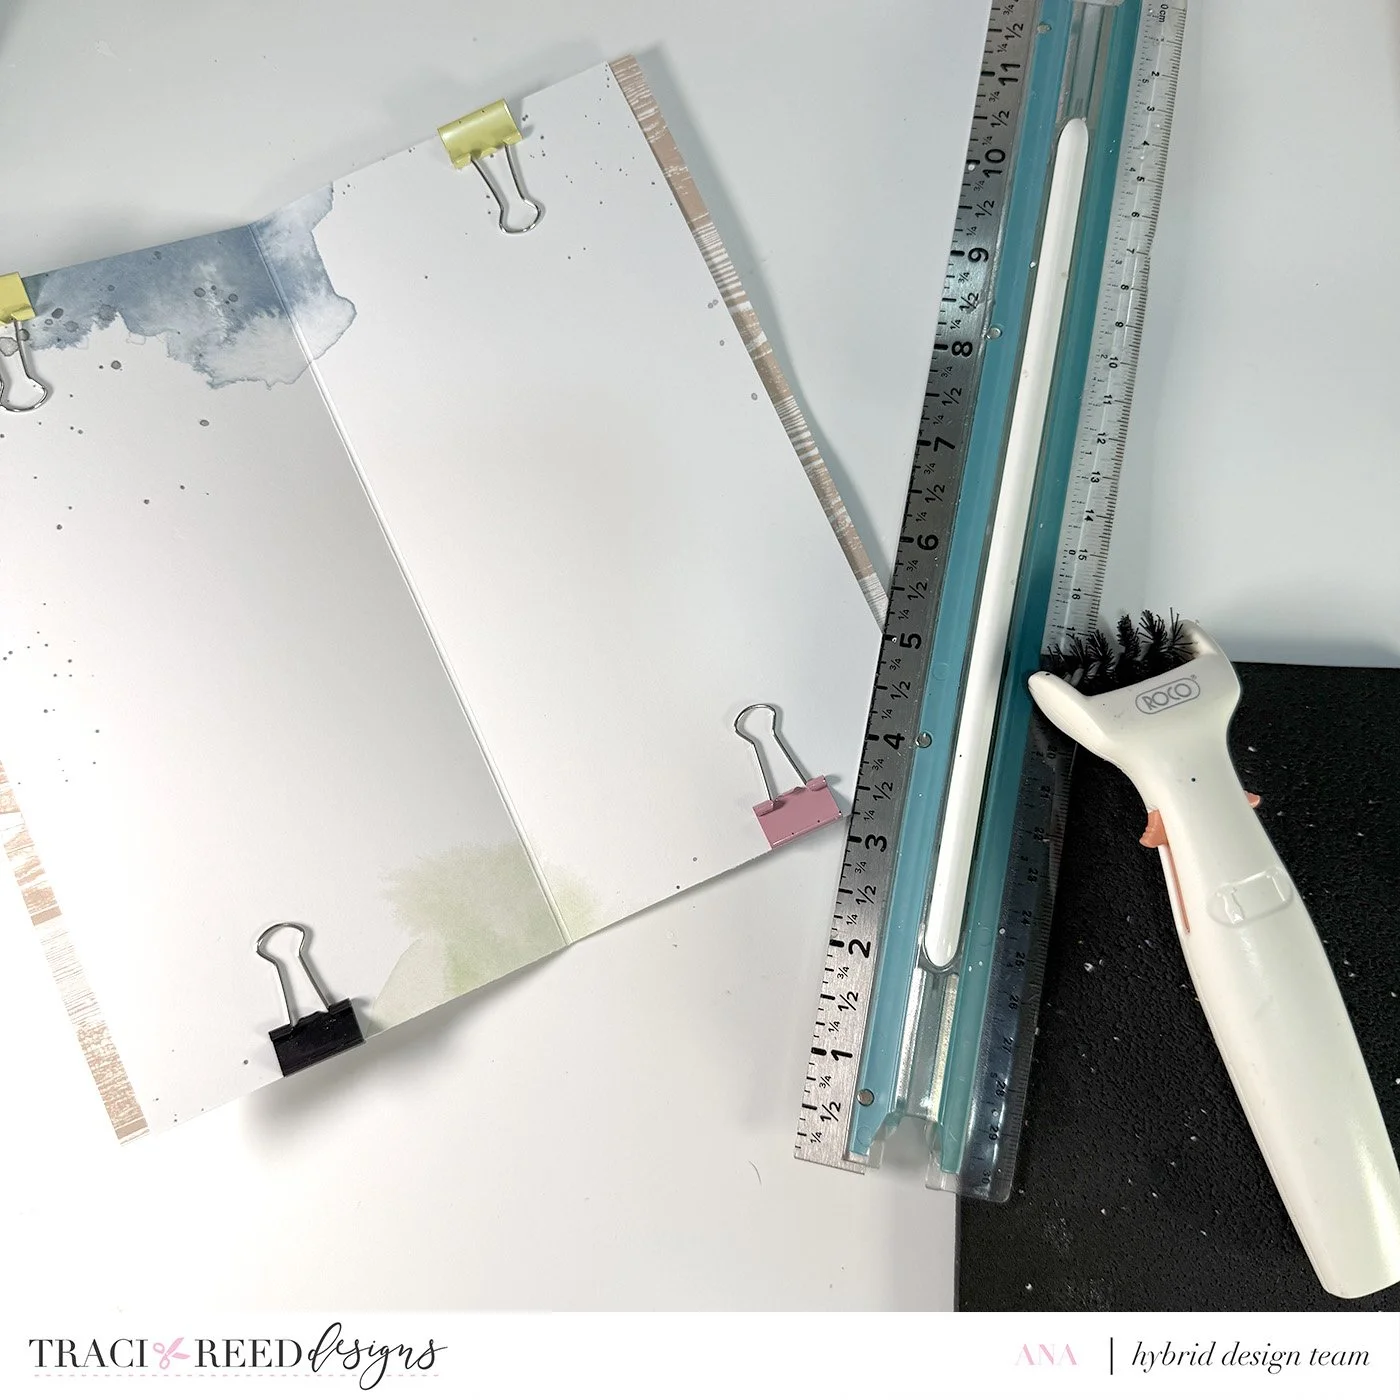
Once everything is aligned and centered, poke small holes along the middle using ¼-inch gaps. I used a poking tool with foam underneath, but a needle works just as well.
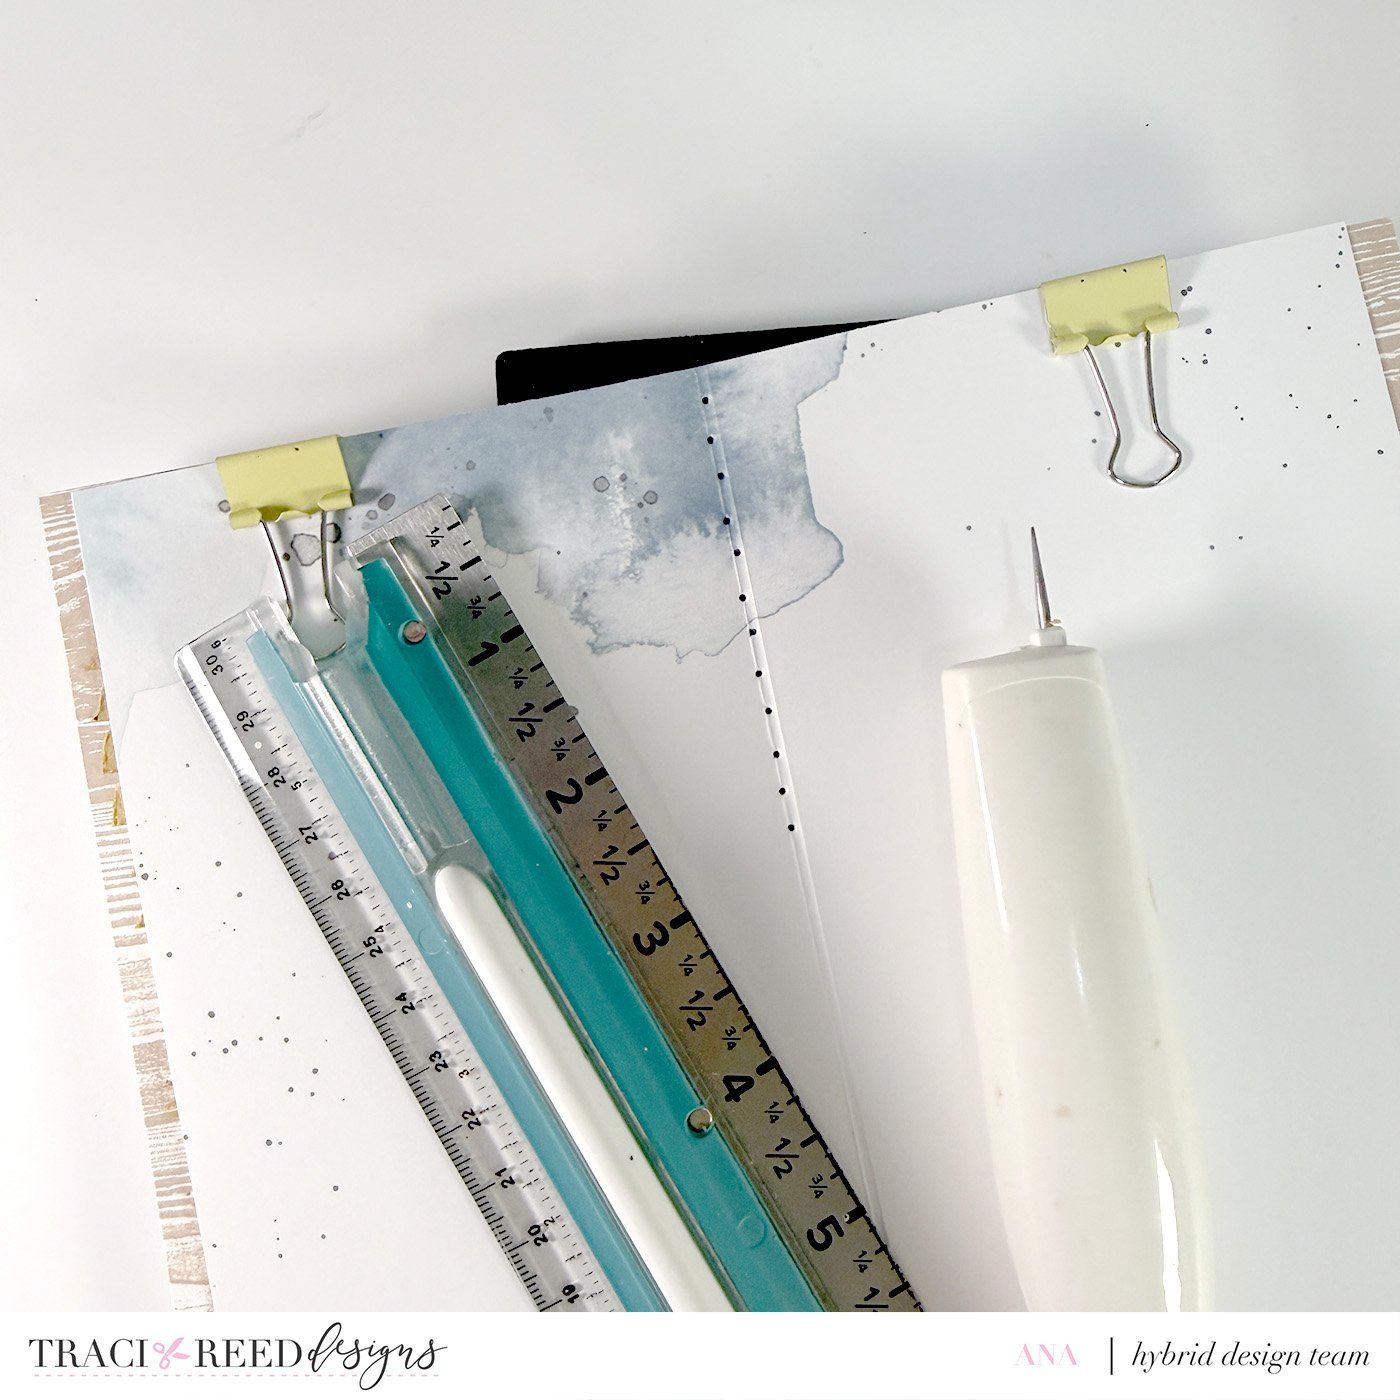
Repeat this process for all 3 embellished pages and the 3 sets of 8x8 pages.
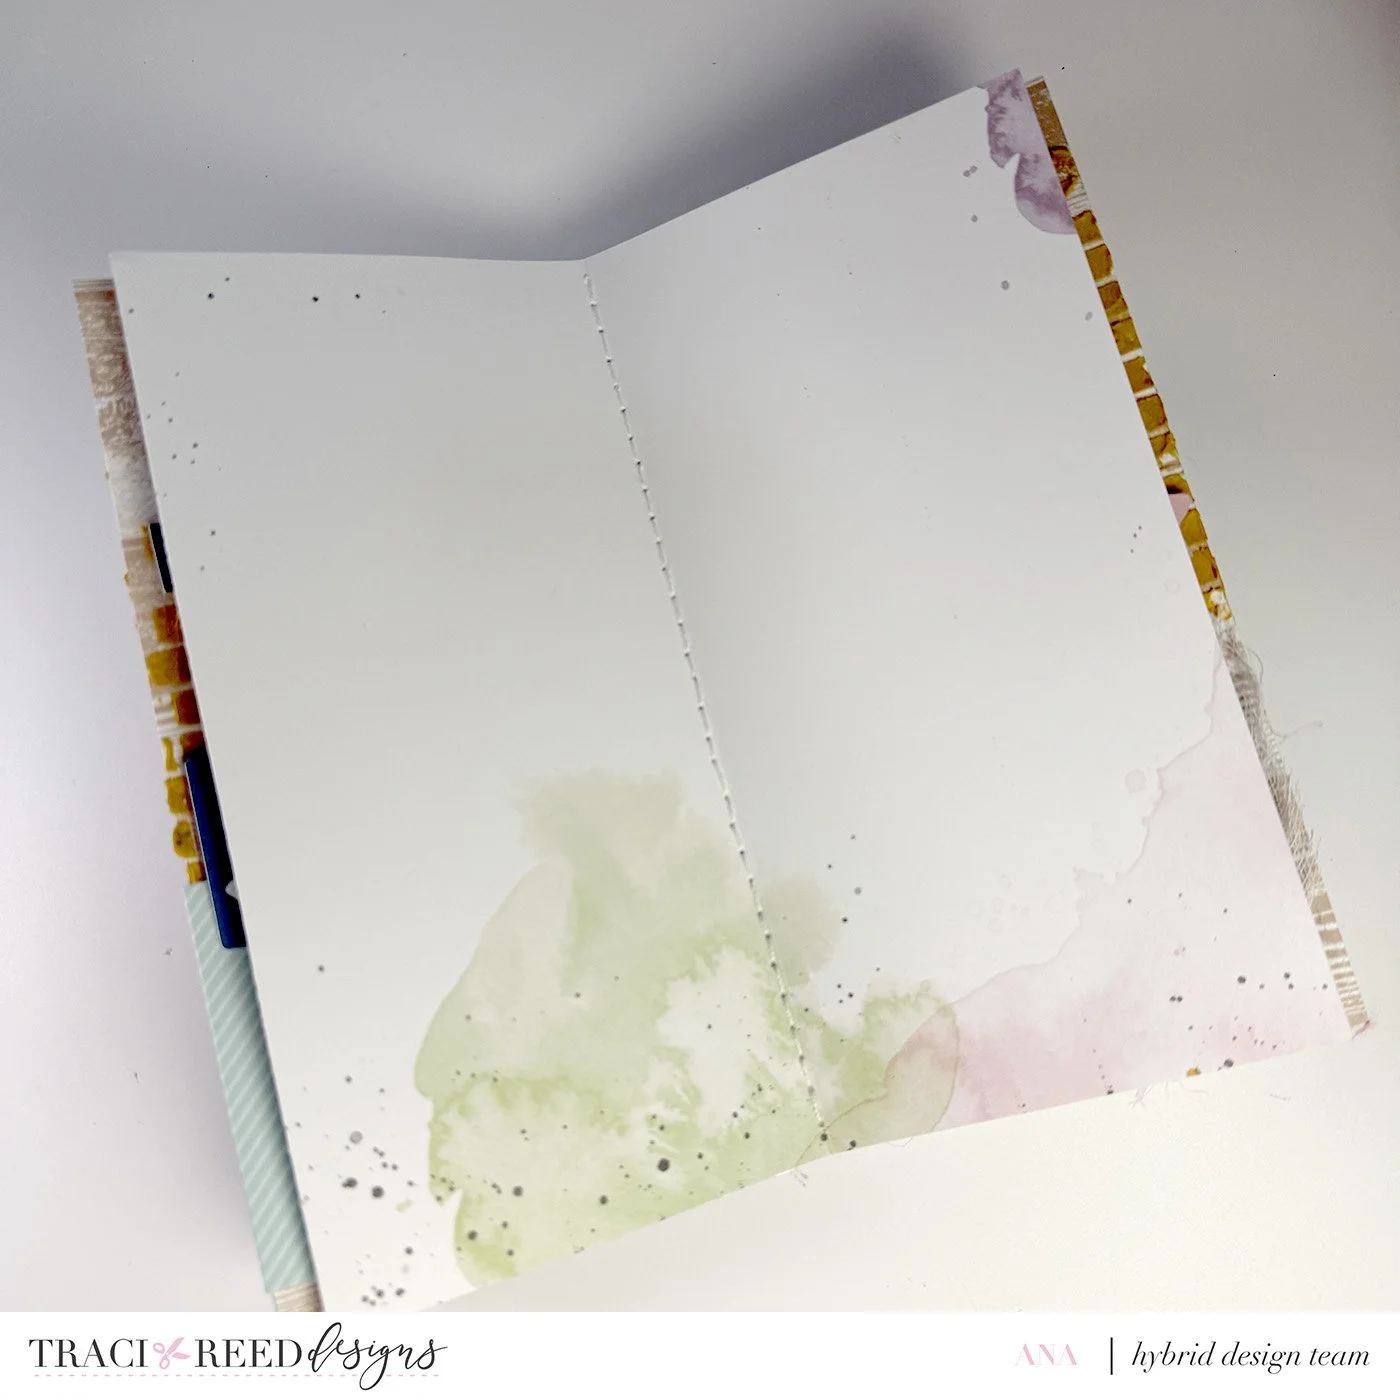
Sew the pages together using a backstitch. This gives the TN a sturdy yet handmade feel. Plus the stitching looks really good too!
Assembling the TN
After sewing all the pages:
• Glue the right panel of the first page to the left panel of the second page
• Then glue the right panel of the second page to the left panel of the third page
To finish the spine, I covered it with faux leather. I cut a strip of faux leather to 3 x 8 inches (editor’s note from Traci: if you’re following my measurements, that would be 3x8.25”) and adhered the sides to the front and back pages using hot glue. If you’re using trims, like in my mini albums, adhere the front and back covers first (next step) then finish off with the trims to be glued on the sides.
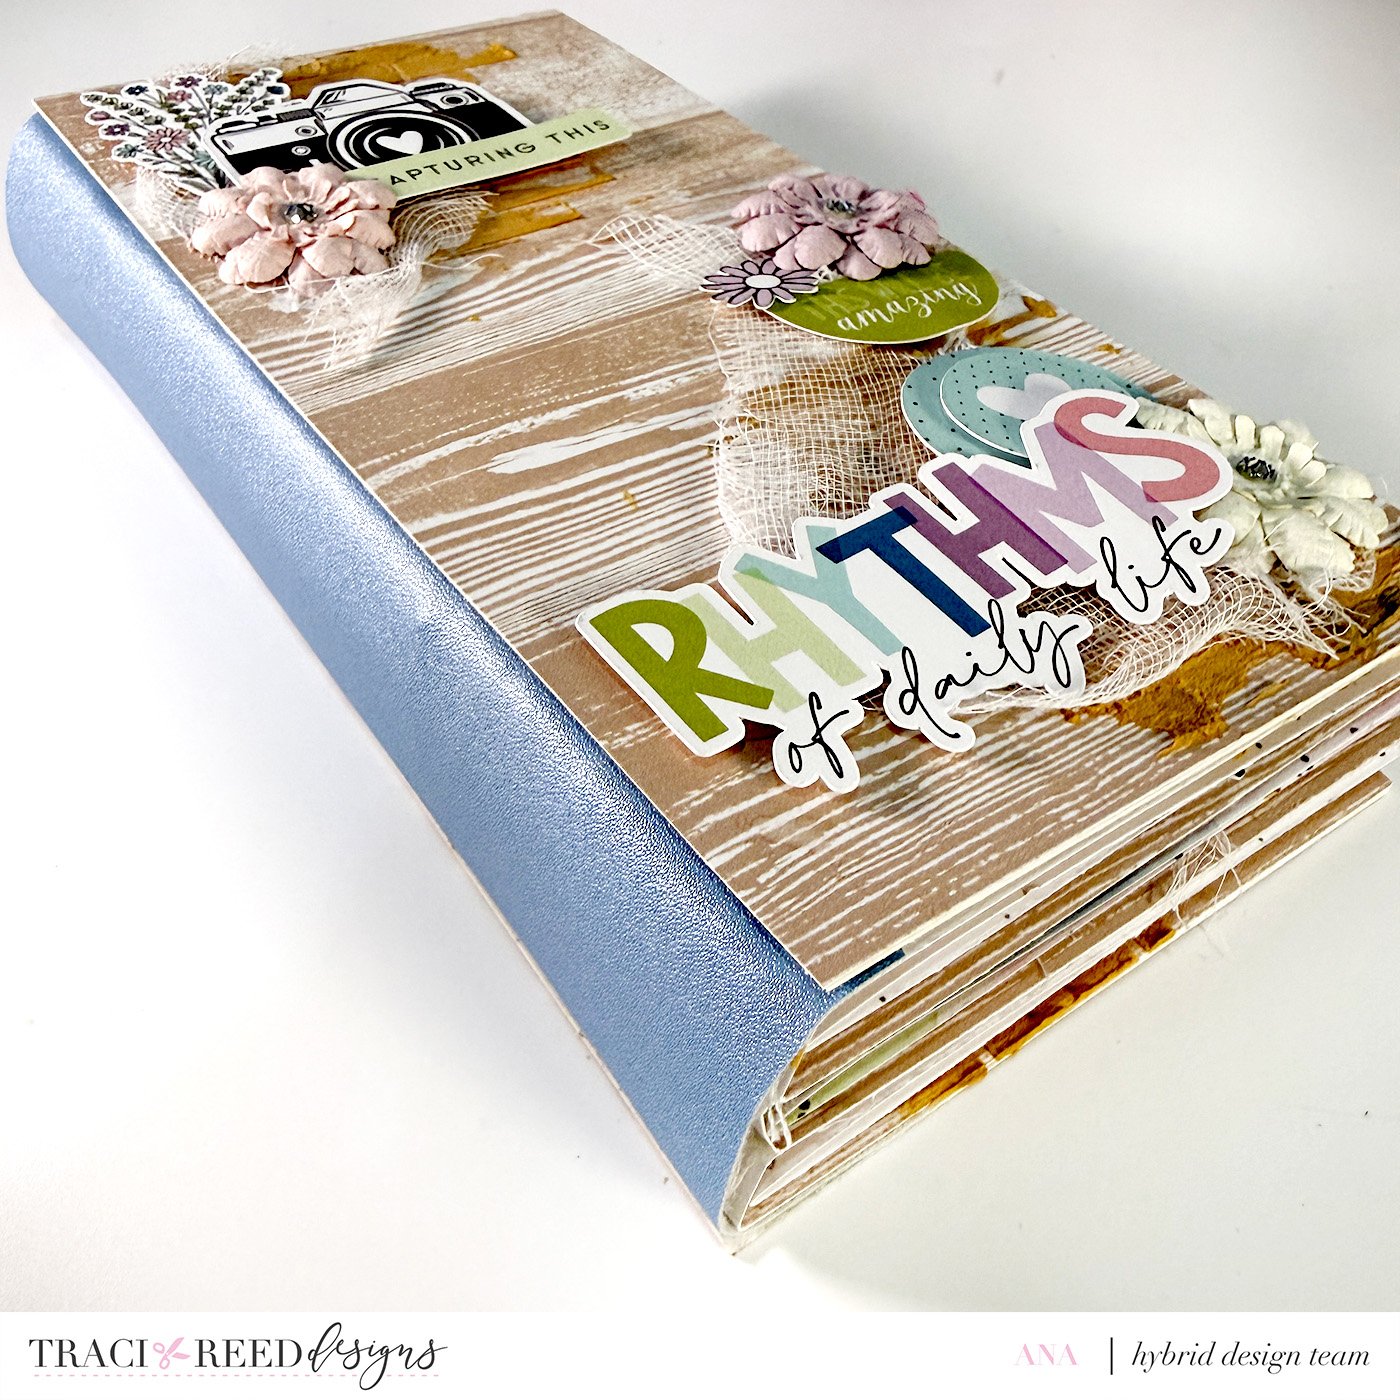
Finishing Touches
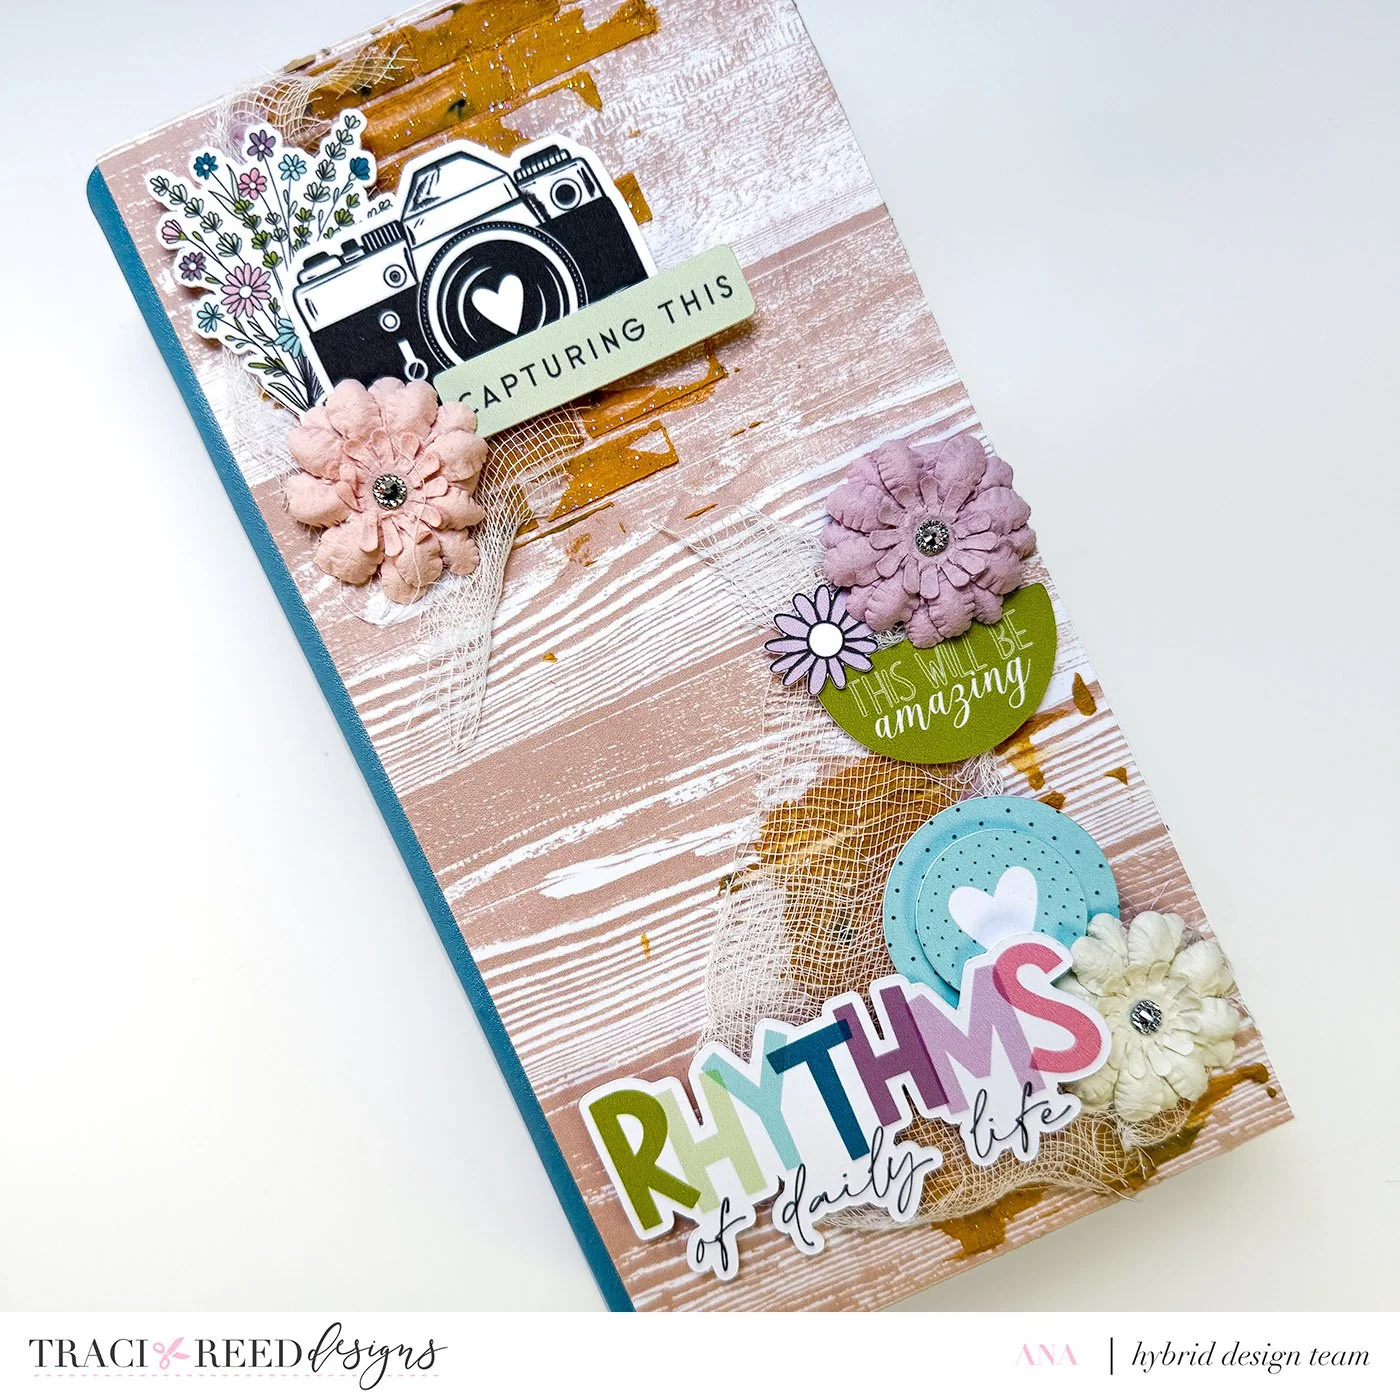
Cut two pieces of pattern paper to 4 x 8 inches (editor’s note from Traci: that would be 4.25x8.25” if you’re following my measurements), adhere them to cardboard or chipboard, then glue them onto the front and back covers of your TN.
Finish by embellishing the front however you like. I decorated mine the same way I did the pages - with textured paste, flowers and lots of embellishment!
This project was such a fun mix of my love for mini albums and TNs, and I absolutely enjoyed every step of creating it. I look forward to filling it with memories - photos, journaling and junk!