Photoshop Tutorial: Level Up Your Drop Shadows with Cheryl
Have you ever thought that the basic drop shadows in Photoshop are fine but could be better? Well Cheryl is here with a fantastic video tutorial on how to level up your drop shadow game with the warp and smudge tools in Photoshop!
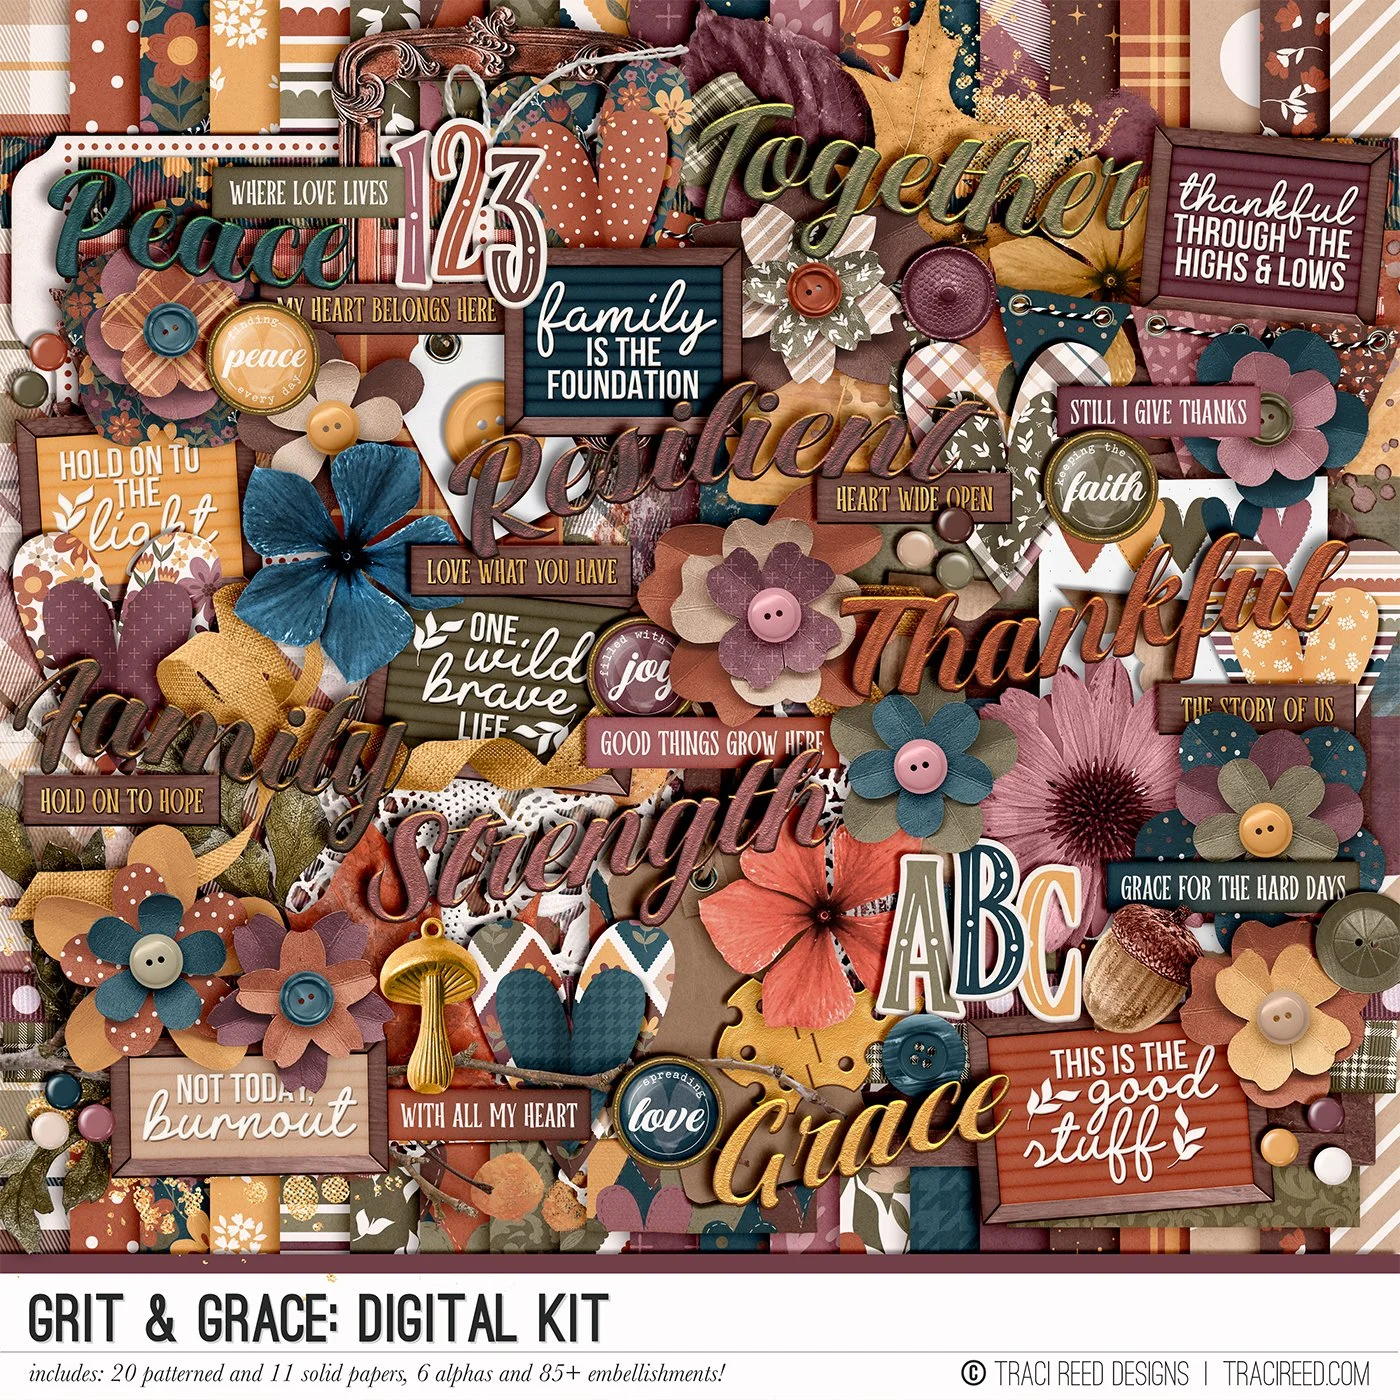
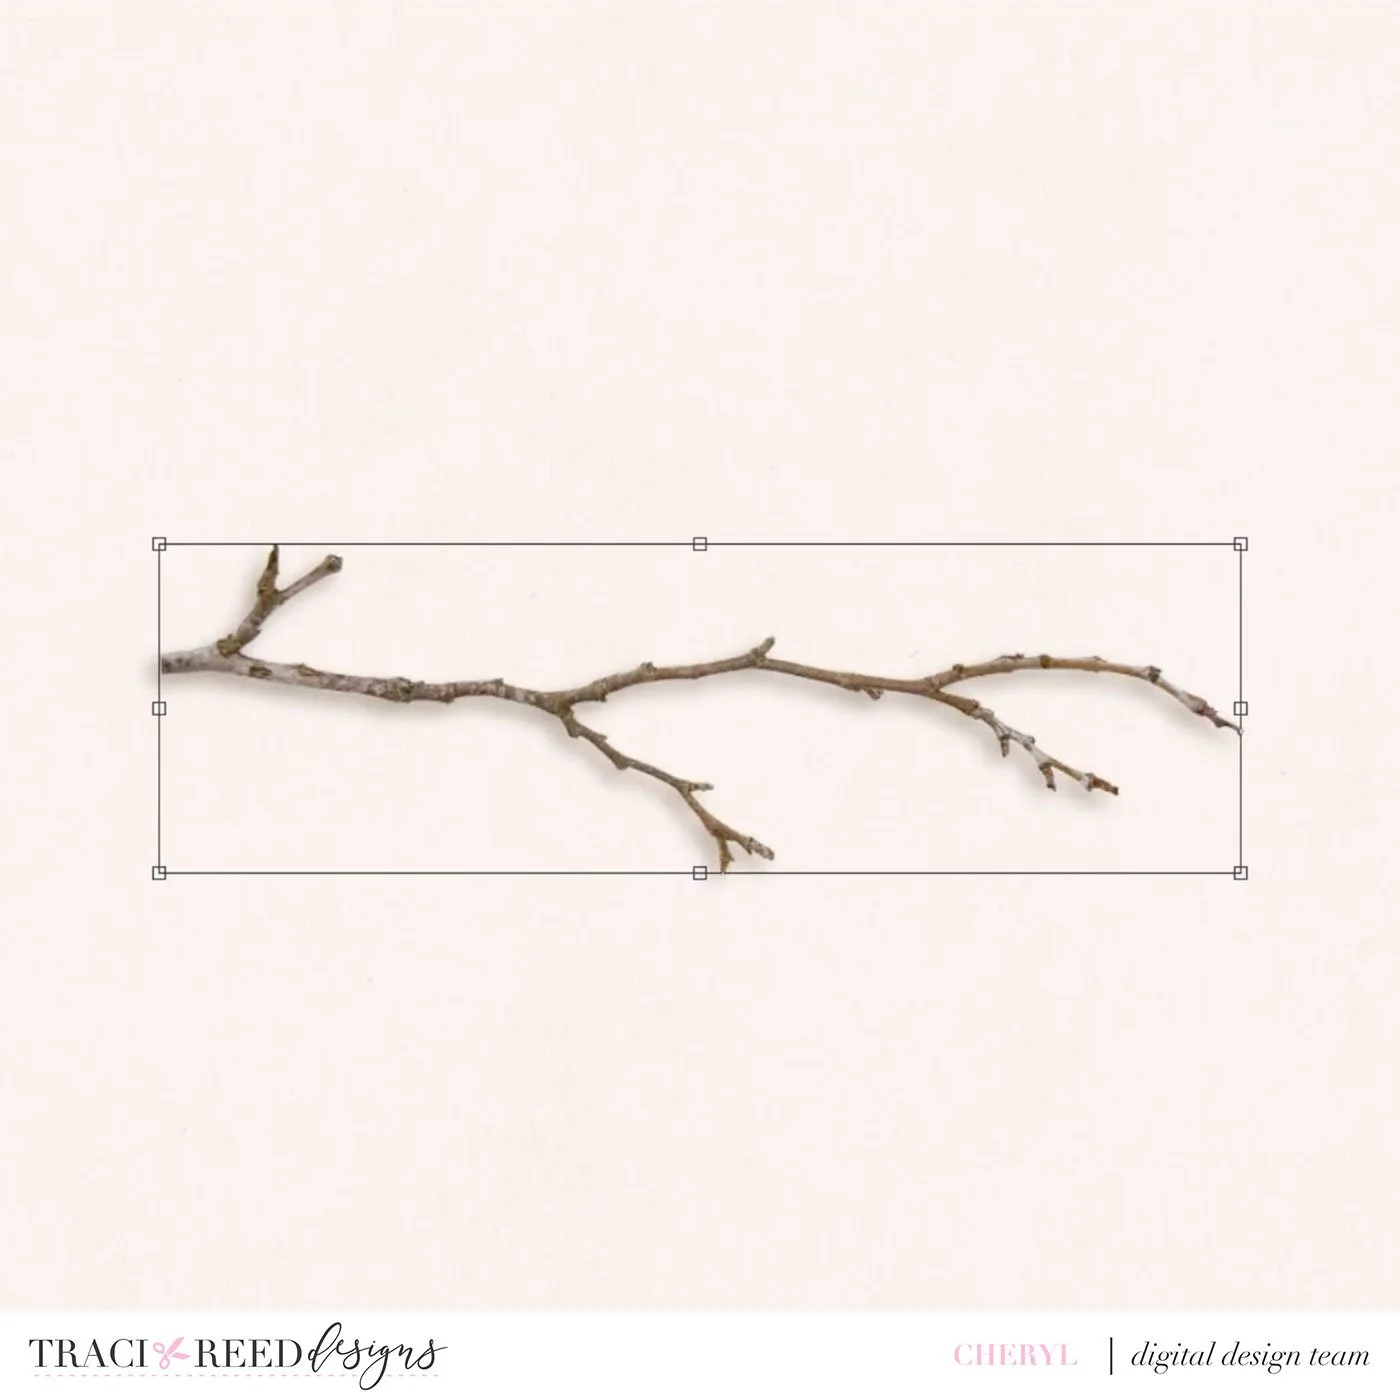
Cheryl has an amazing set of basic drop shadows for anything you can think of that you can purchase here, but sometimes you just want a little bit of oomph. I mean, this is a great start and will do the job, but with a few simple steps you can make them even better!
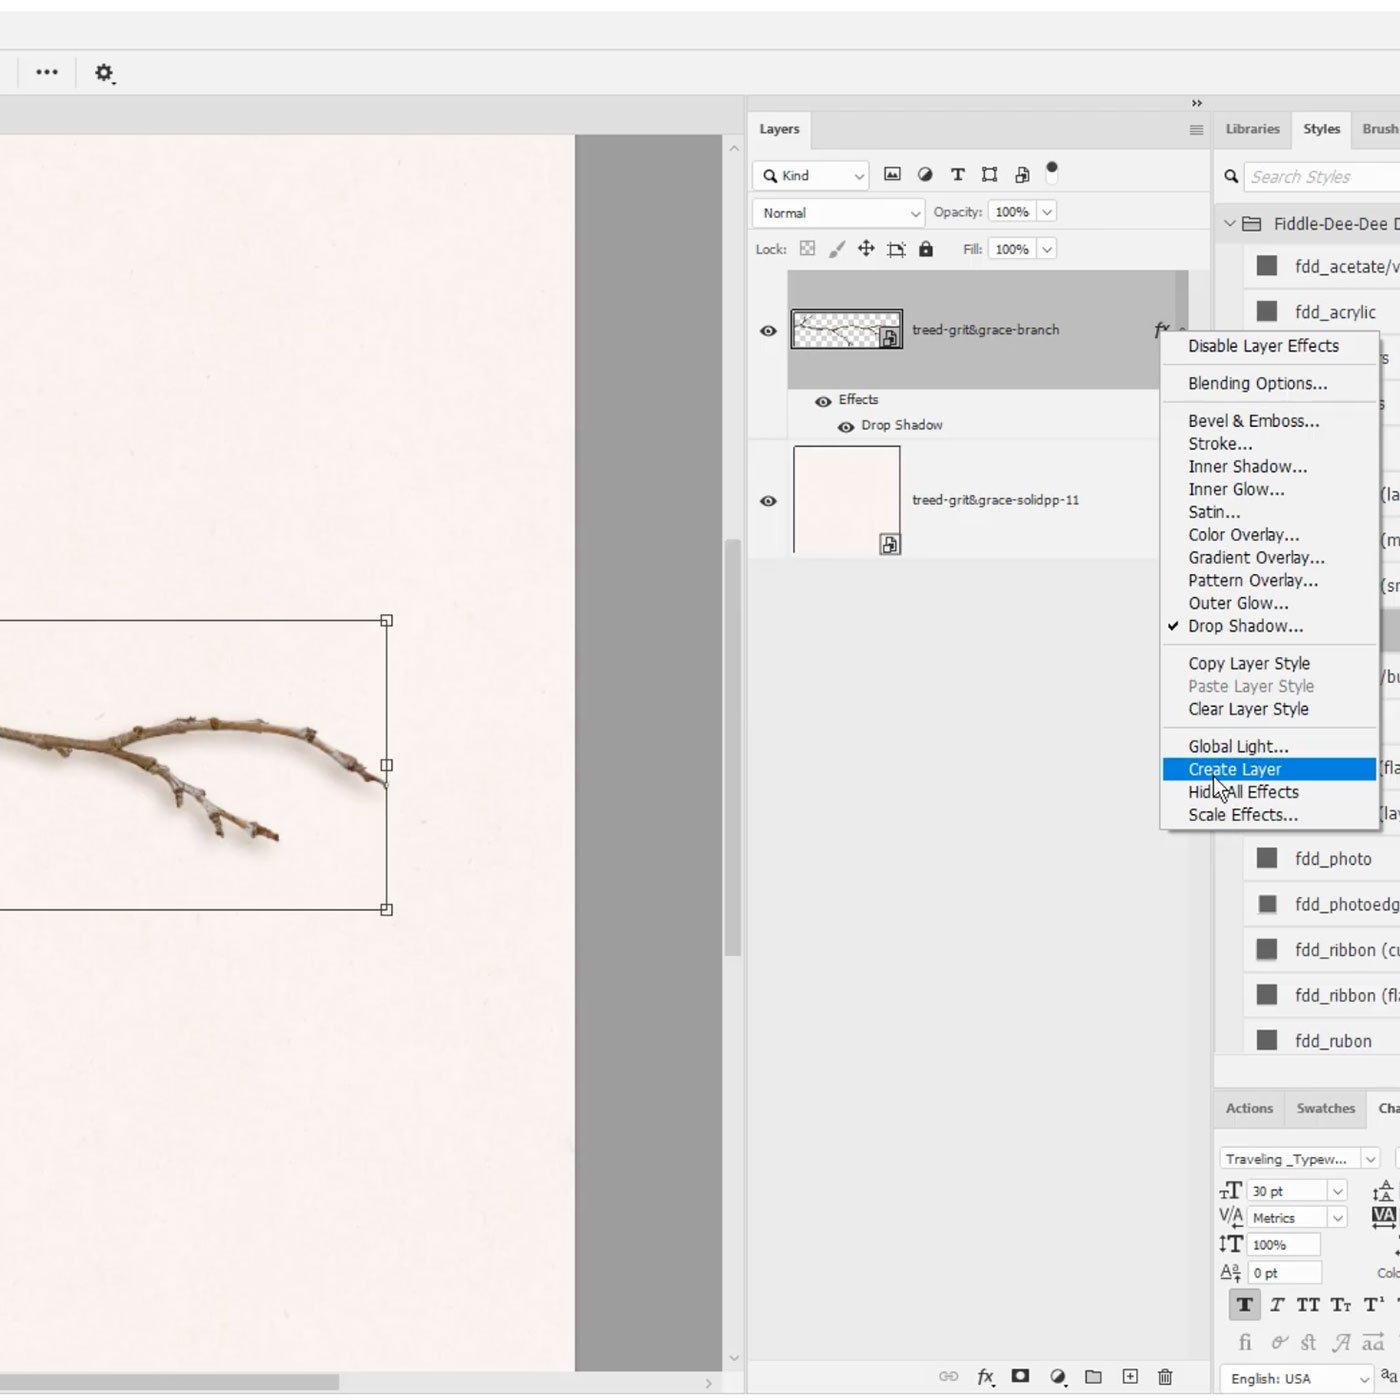
First, right click on the fx symbol on your layer in the layers palette and choose “Create Layer” to make the shadow its own layer.
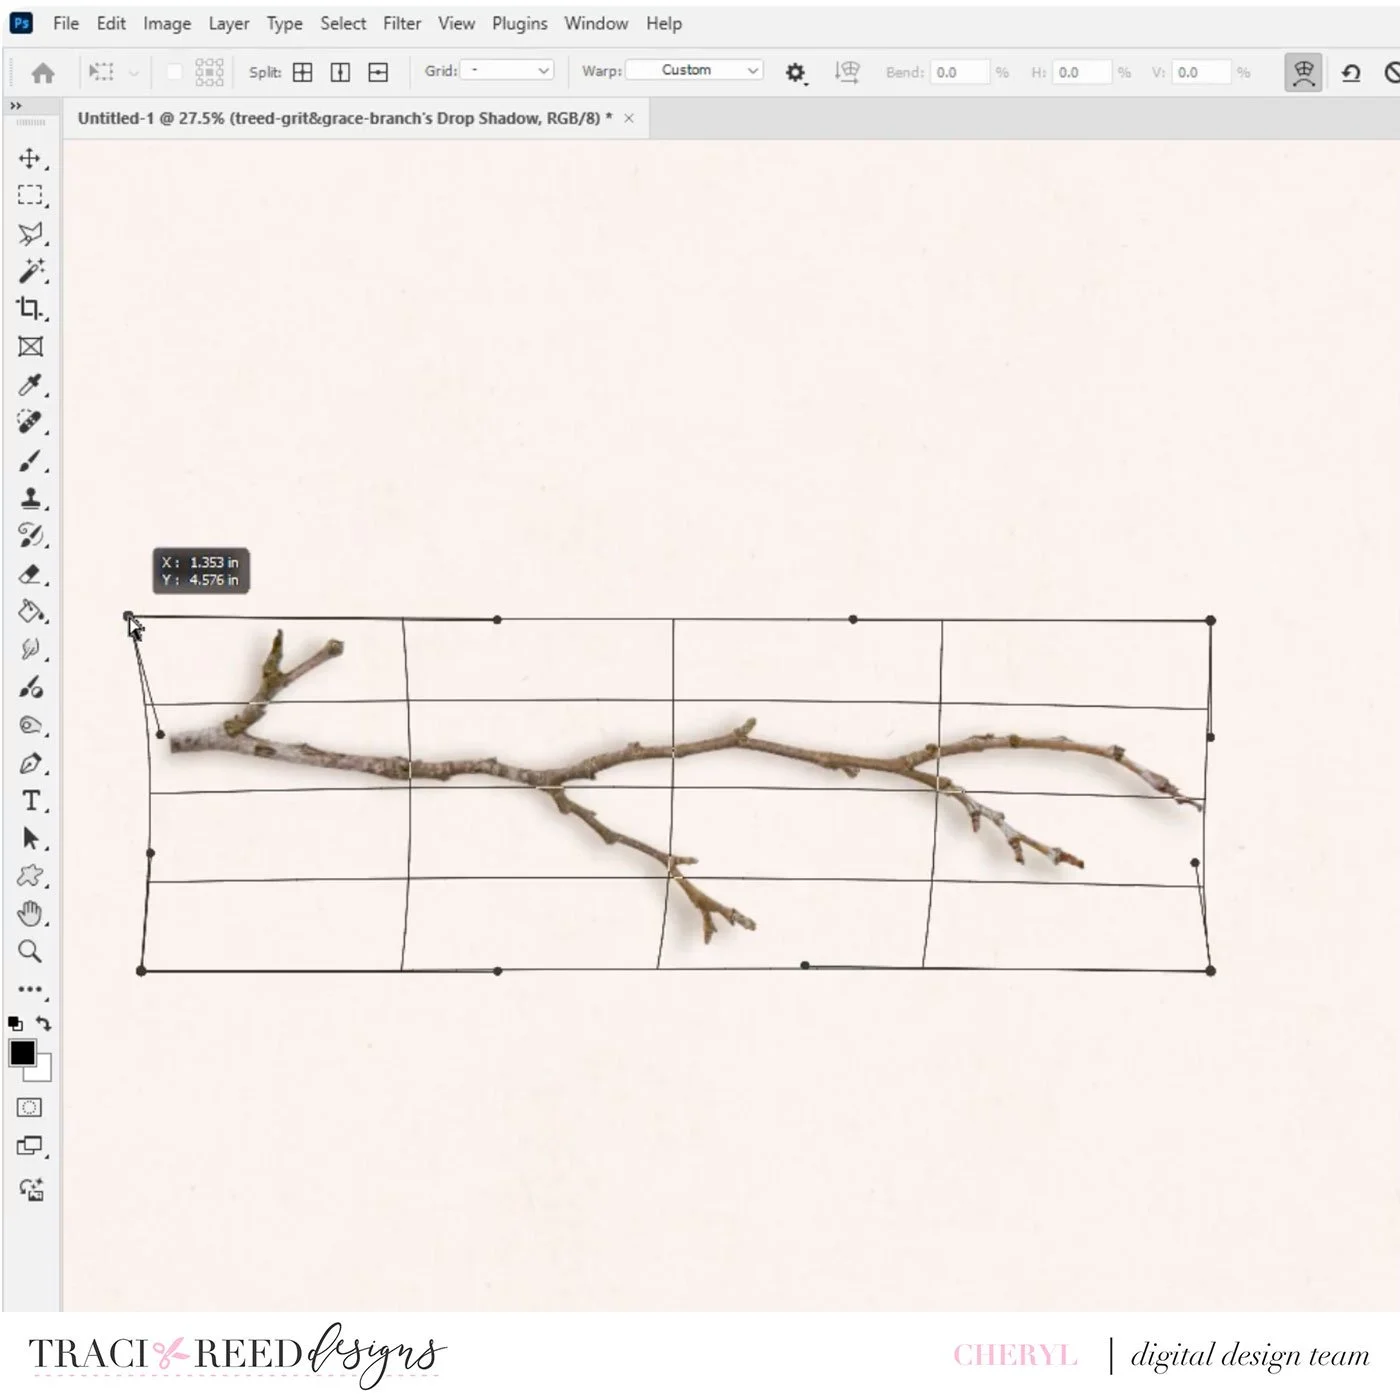
With the shadow layer selected, hit CMD or CTRL to go into transform mode and the, the warp tool at the top, which looks like an arched grid.
You can now warp the shadow by dragging different intersection points or corners of the grid in different directions to achieve the affect you like:
The effect can be subtle, but when you do this for each element, the entire effect can be transformative for your layout!

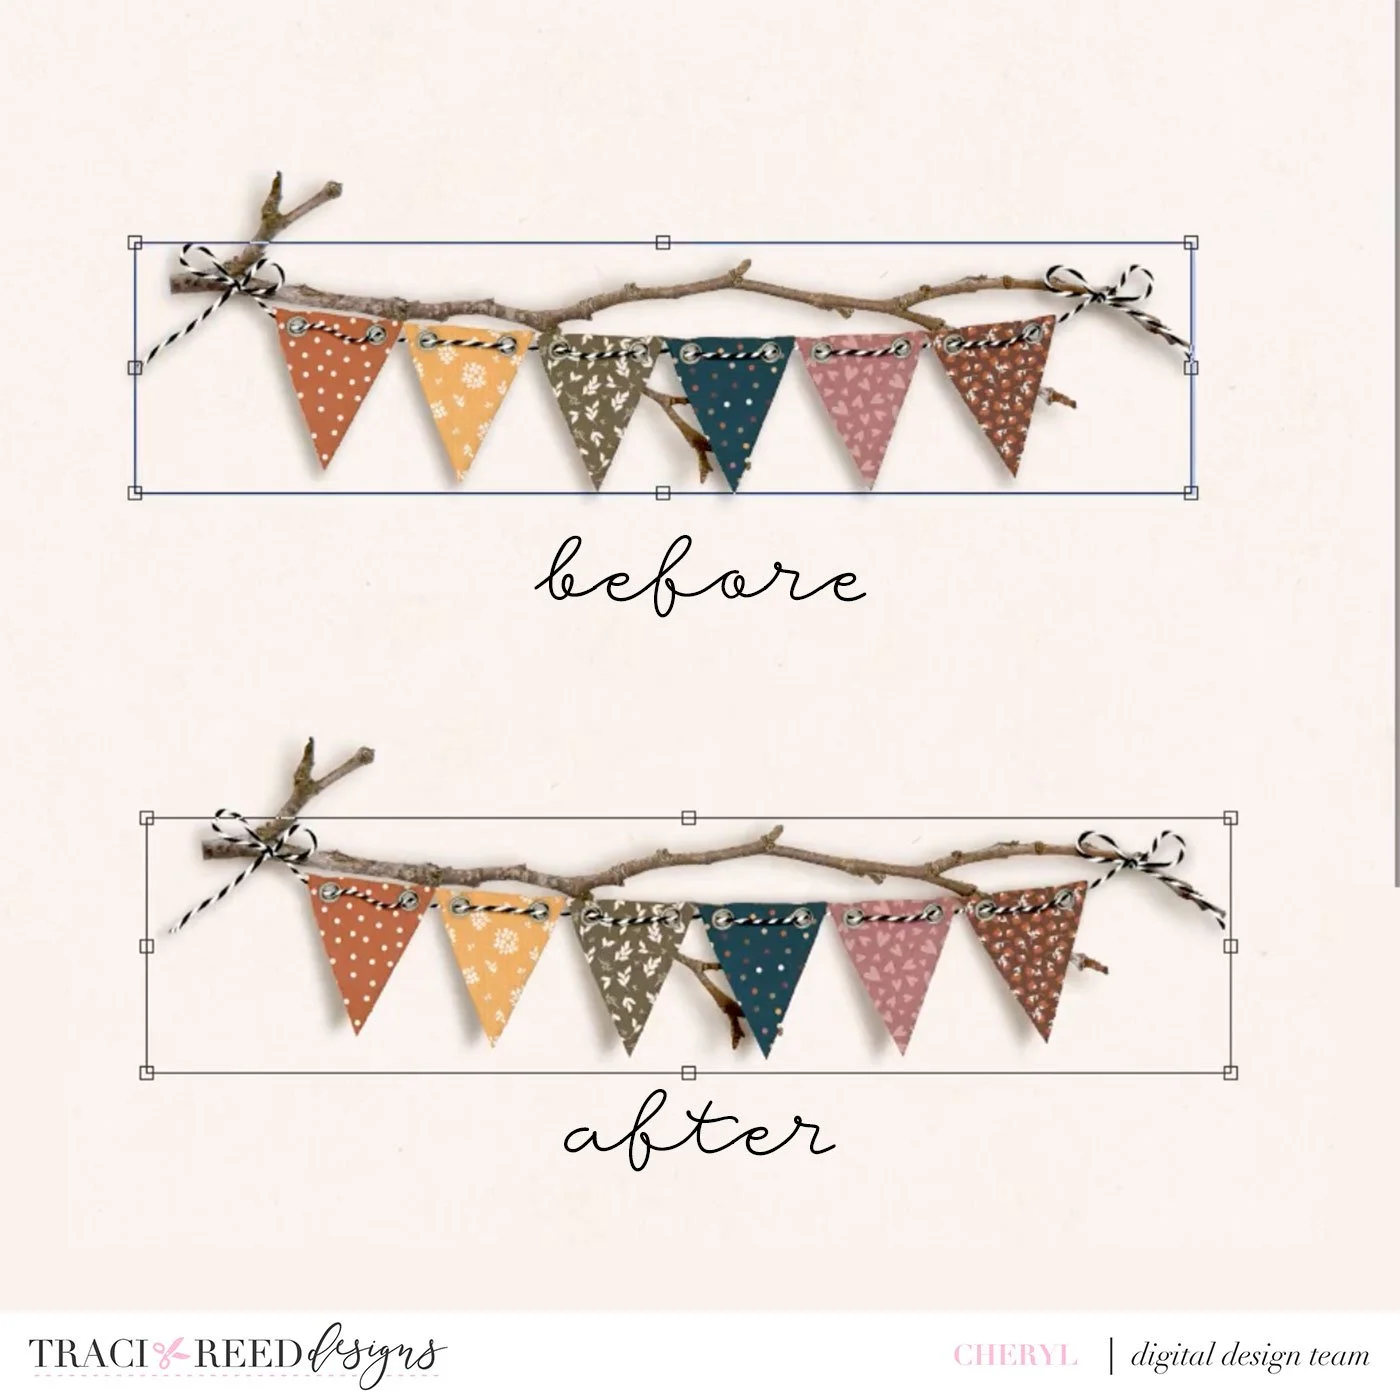
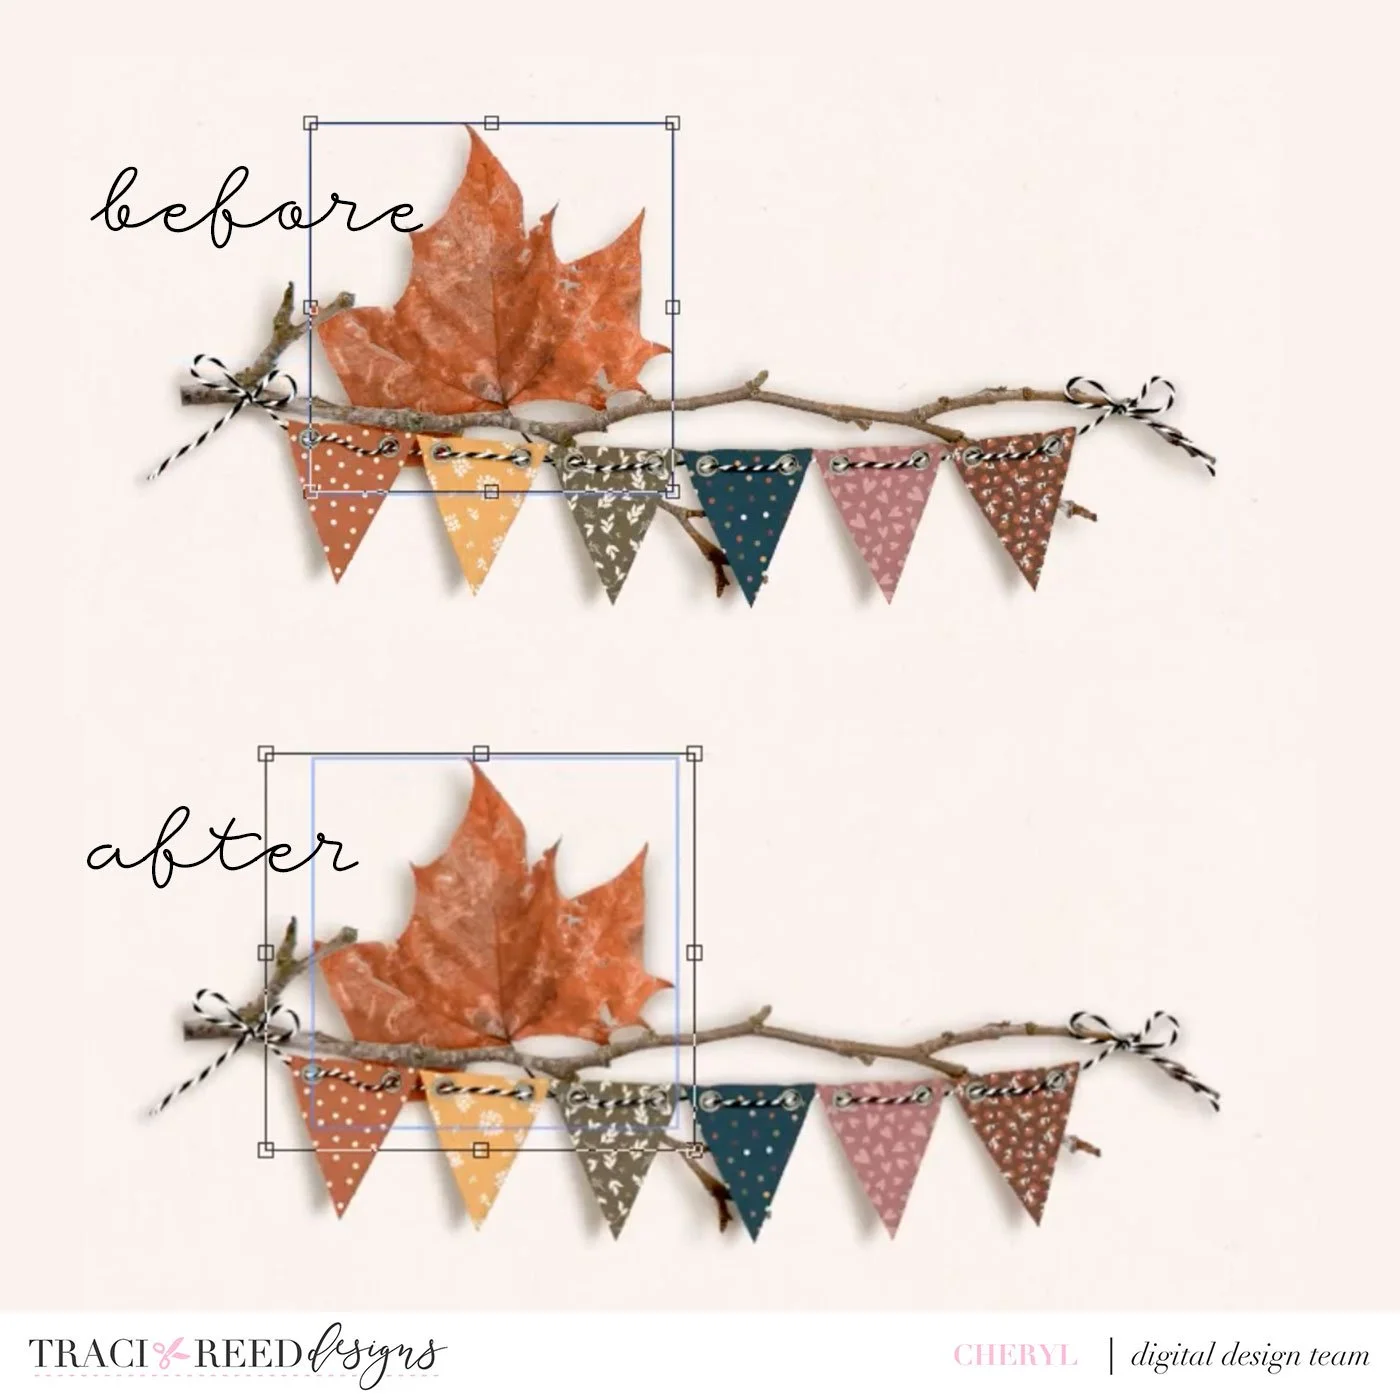
Let’s repeat the process with the banner shadow:

You can see now how the banner pieces look like they’re moving away from the paper at the tips!
Again with the leaf, making it look like it’s floating in places:
Another way to warp the shadow is to use the smudge tool rather than the warp controls:
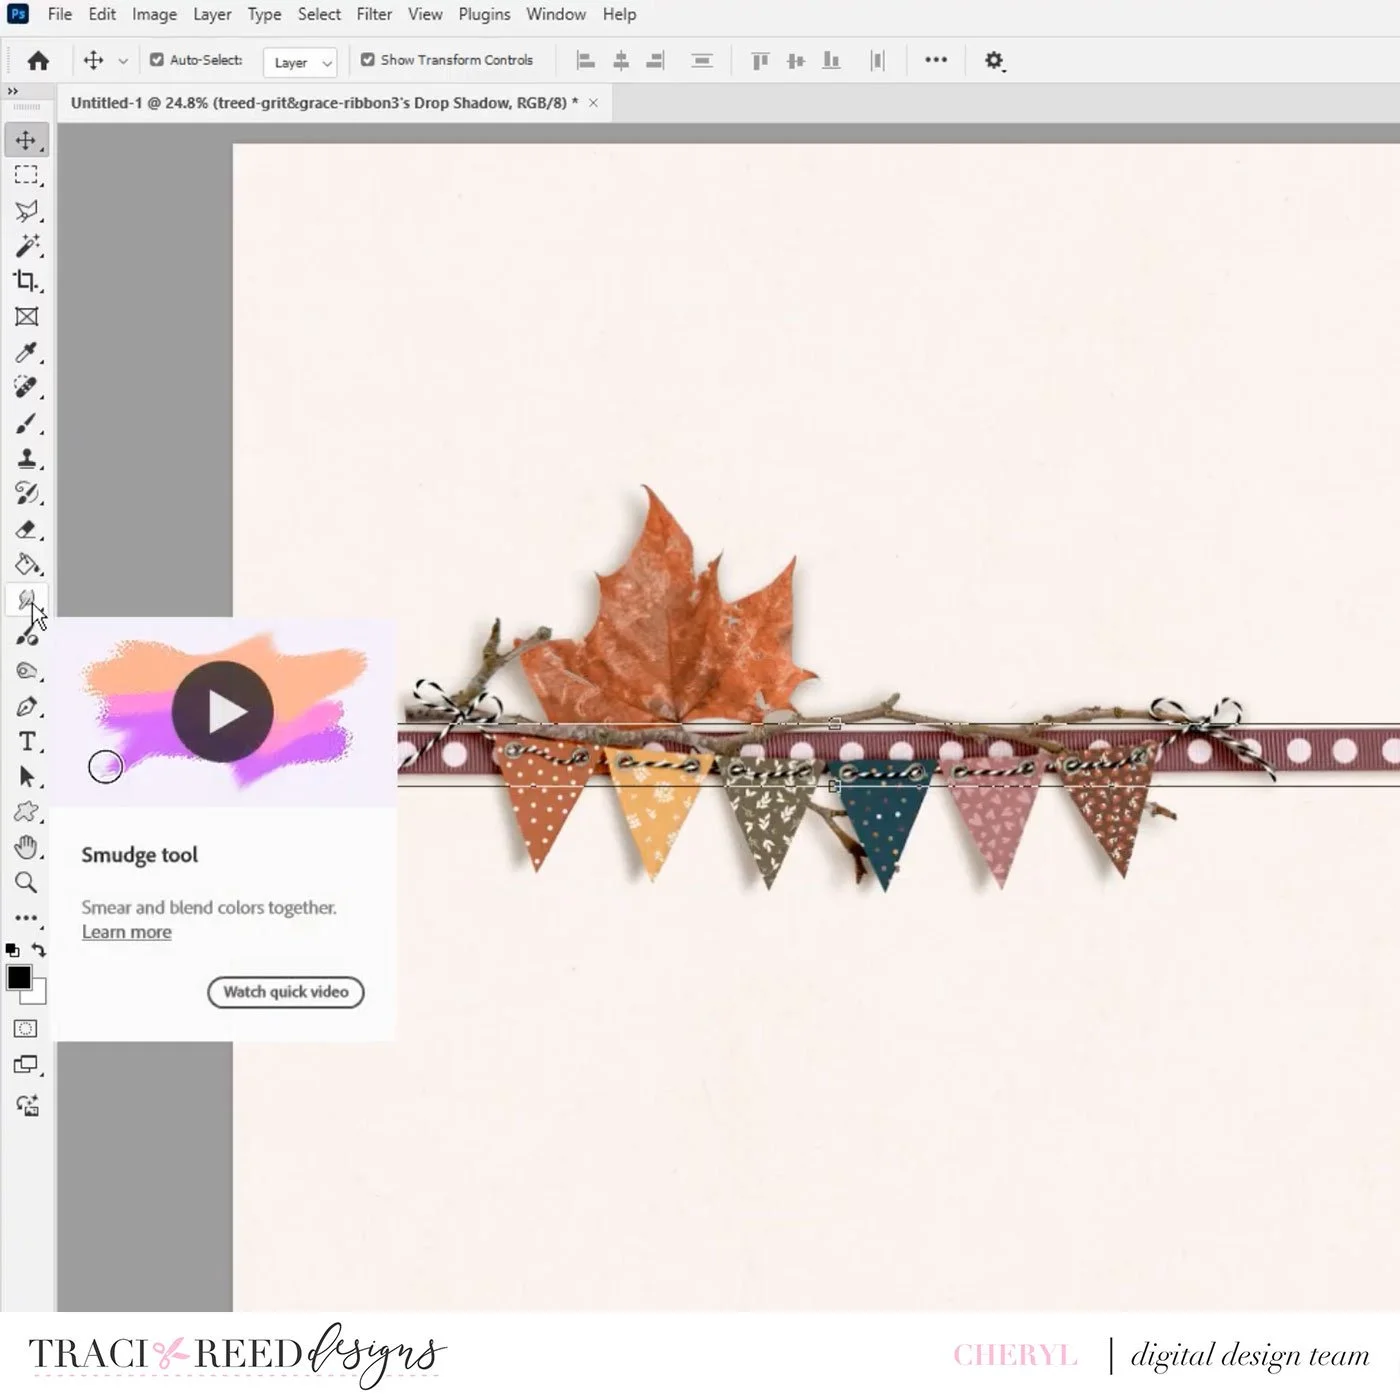
Using the smudge brush, just warp your shadow in subtle places for things that would lay a bit flatter on the page:

Again, subtle but transformative. You can really see this cluster coming together:

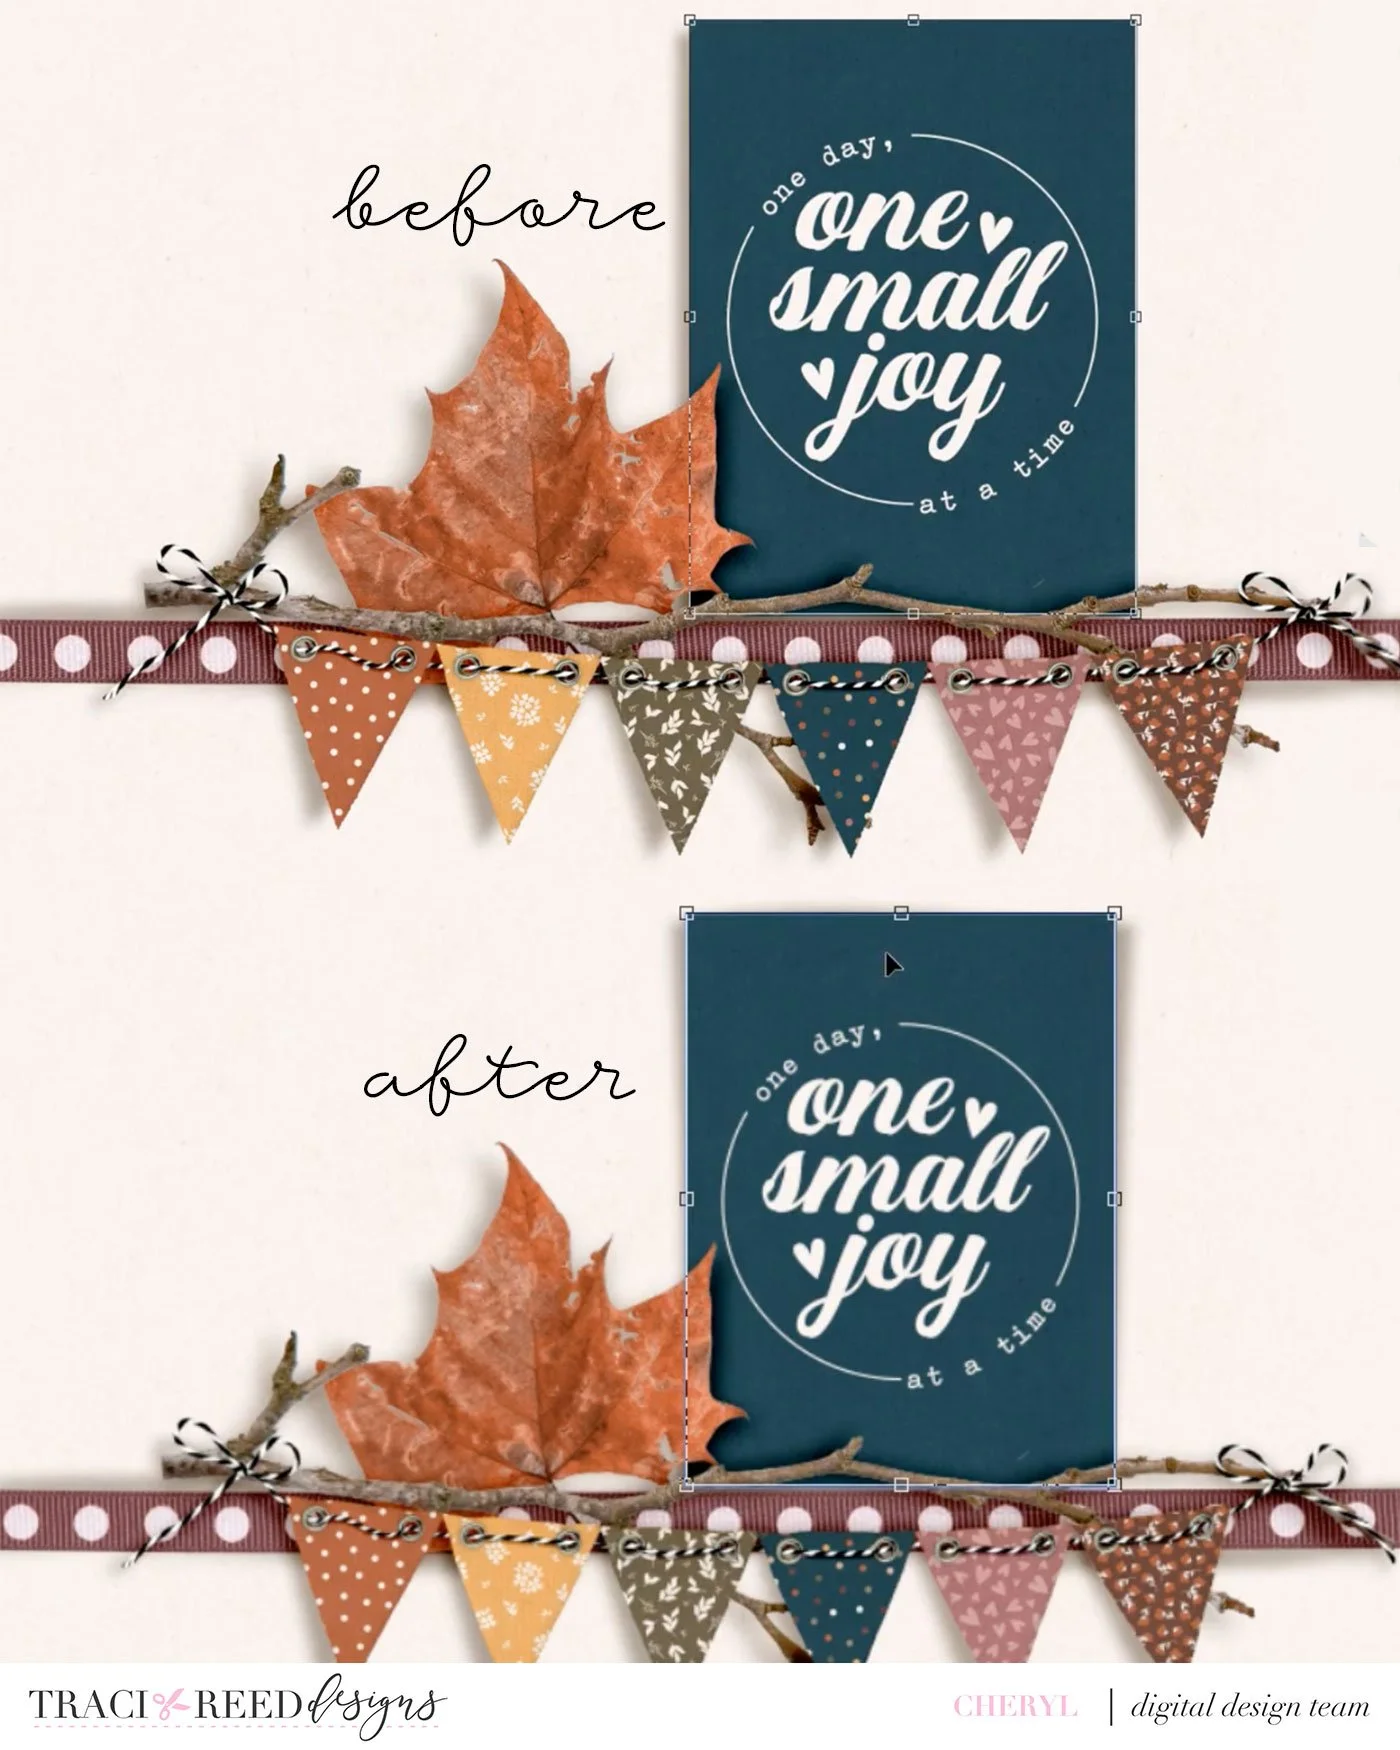
We’re going to repeat the warp process with the journal card, making it look like the card is pulling away from the background:

Voila:
And then once more for the small flower:
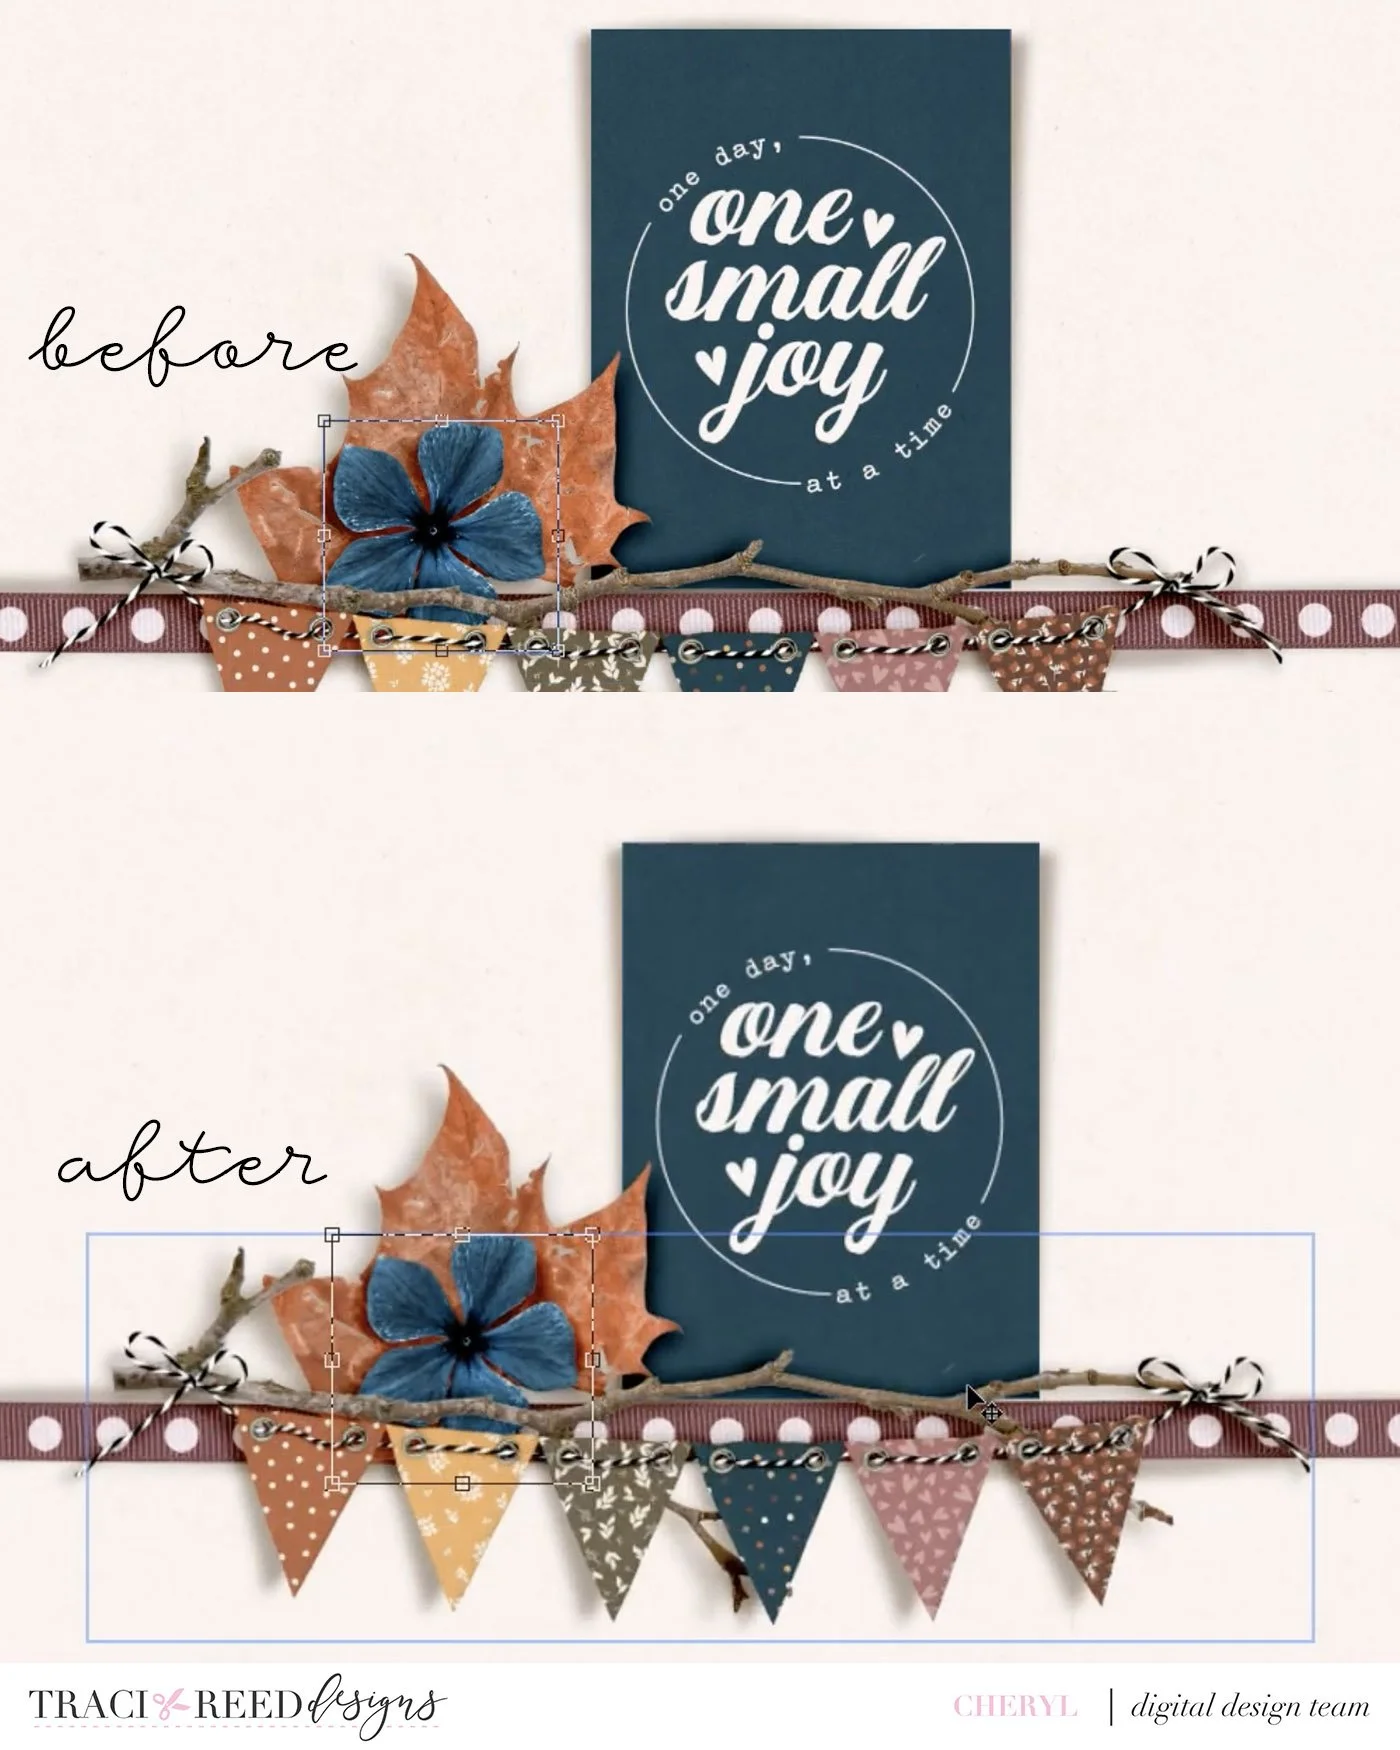
All of these shadow styles layered together create a beautiful, realistic cluster rather than a flat, boring one!