DIY Enamel Stickers Tutorial from Theresa using the Fierce Collection!
Hi friends, Theresa here and today we are going to make our very own enamel stickers using the incredible Fierce digital kit. Celebrating Pride is important every day, but for this enamel and puffy sticker loving gal the celebration is not complete until there’s some depth and dimension to it! I learned that Silhouette offers a Doming Kit that provides all the ingredients you need to transform plain stickers to magical. Let me tell you all about it!
This year I have been documenting each month in my 6x8 Life Crafted album (from Citrus Twist) and the Fierce collection was perfect to use for my divider and affirmation page. This is the layout I originally came up with:

I love creating a transparency divider for each month. This one utilizes the gorgeous rainbow stripe patterned paper from Fierce printed onto a regular office supply transparency. For my title, I brought in
the Fierce alphabet, which is the perfect rainbow disco feel that Pride brings! I also utilized those fabulous matching stars, and that is where the idea for enamel stickers was born. Those stars really need to shine to show off that fantastic gradient color, don’t you think?

Underneath the transparency is my affirmation page. I love creating these each month so that I can set a fabulous tone and remind myself of the wonderful vibe I want to live out for the month. I’ve repeated the rainbow stripe and lifted the word Fierce from one of the journal cards in the collection. I printed the hand border to fir across the page, leaving just one sticking out slightly in the album as a special marker. For my second half, I began with the pink rainbow patterned paper and digitally layered the stamped stars and enamel dots. I printed out my photo inside one of the frames, a journal spot, and the stickers. One of my favorite elements is the Proud Queer I created simply by layering those two pins.
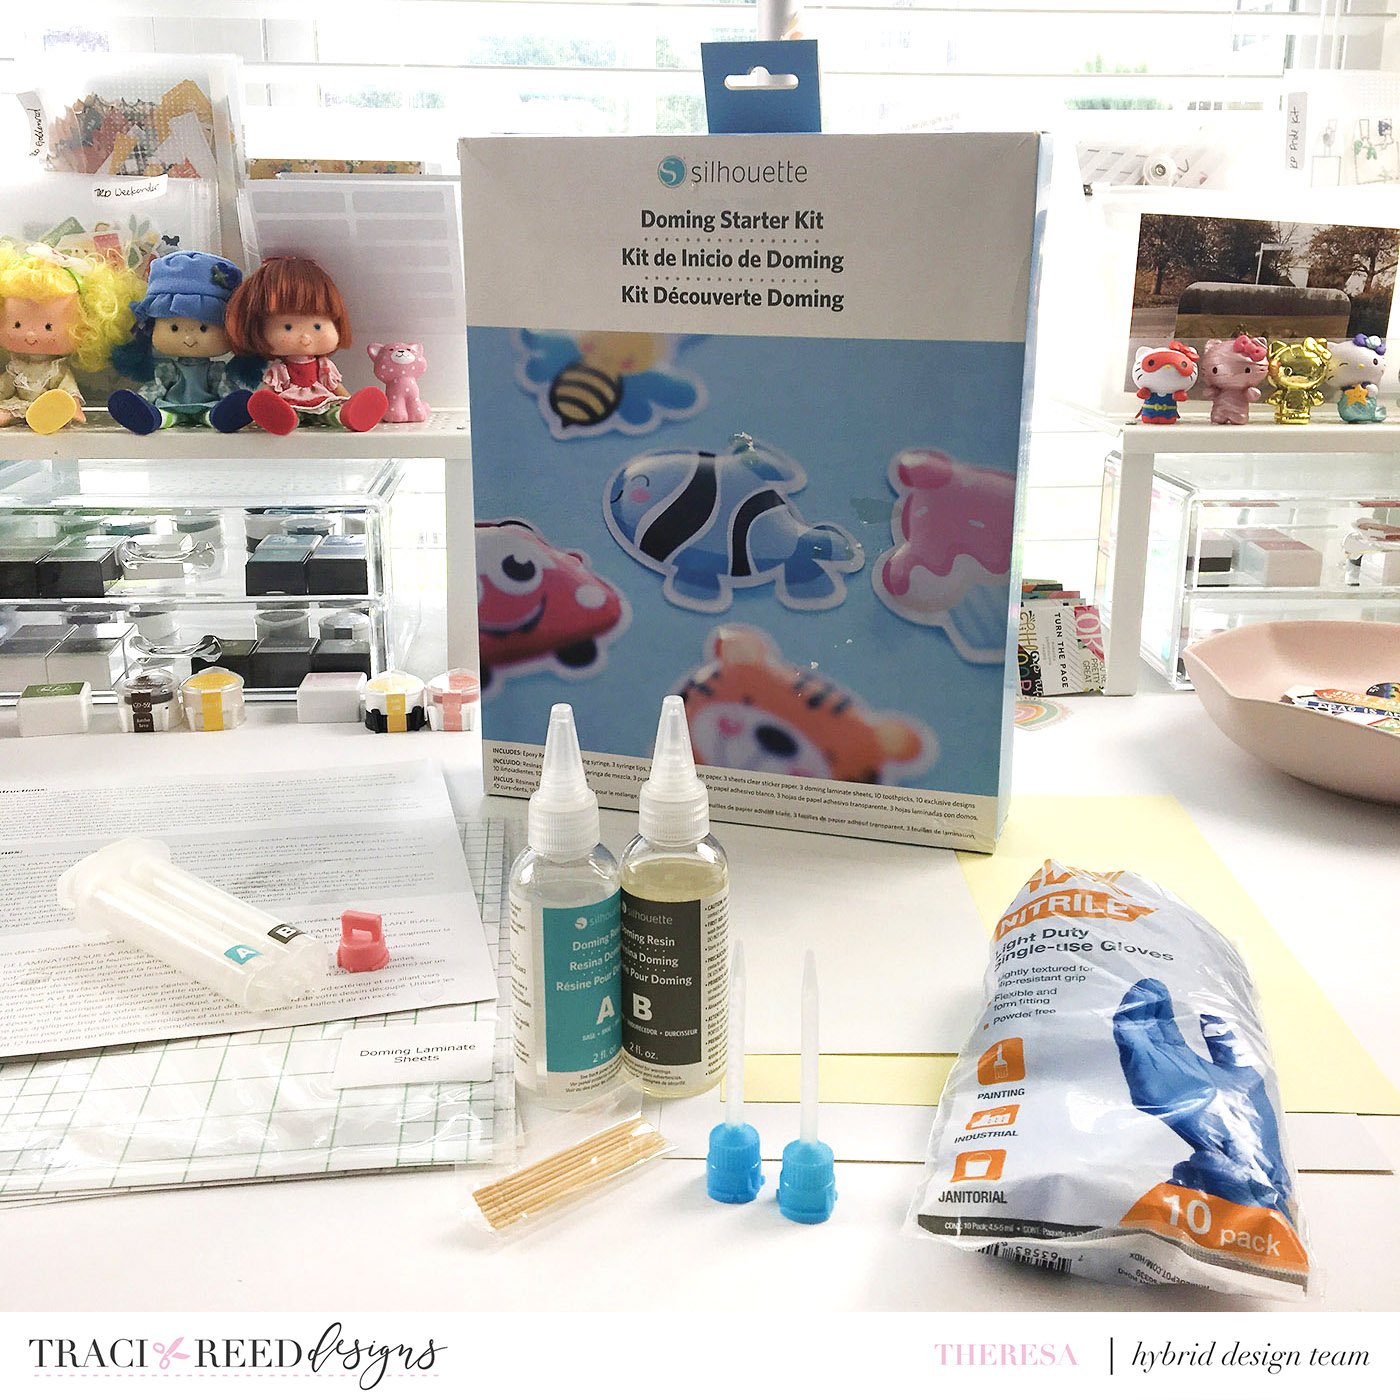
And now for the fun part!!!! The doming kit from Silhouette builds by printing and cutting your stickers with the machine, and then layering a resin chemical over top to form the shiny dimensional top. The kit comes with these products:
Full instructions in English, Spanish, and French.
Several sticker sheets.
Several heavy gloss papers.
Doming laminate sheets.
Large syringe with three blue applicators.
Doming resin A and resin B, plus alternate caps for filling the syringe.
Toothpicks for detail work.
I also recommend working on a throw-away surface, and please use rubber gloves for safety.
Once you have everything all set up, print your stickers onto the sticker sheet just as you would any other stickers or embellishments. I have a few recommendations for you:
Print each sticker very small. You will be filling in each one with glue, which takes a bit of time.
You can use one sheet to print a selection of stickers from more than one collection at a time.
Be very selective about which stickers you choose. The simpler the shape, the easier it will be to
fill them in!
The stickers have to set overnight, so you have time to work with them and get them how you
want them before they set up.
The part where you set the stickers up is pretty simple although time-consuming. Once your stickers are printed you layer the Doming Sheet over top and smooth out any wrinkles or bubbles. The Doming
Sheet is very sticky and not forgiving, so lay it down much like you would place contact paper, just a bit at a time and smoothing as you go. Then use a brayer or some sort of smooth object to get the last bubbles out – I used a ruler for that. They go into the Silhouette and cut just as you would cut any other sticker sheet. I used the heavy cardstock setting so it would go through the Doming Sheet and the sticker paper, but still leave the back sheet on. Remove the sticker sheet from around your stickers and then you can begin applying the resin.

When you are ready to fill the syringe and apply the resin is the time to put on your fancy gloves. You will want to use them because the resin is super sticky! Ha! Fill each reservoir with the labeled bottles, so A resin goes into the A reservoir and B goes into B. I filled my syringe about 1⁄4 of the way up because I wasn’t sure how much I would need. That 1⁄4 reservoir covered about half of the sticker sheet, and it was super easy to refill it and keep going. It took me about an hour to an hour and 1⁄2 to fill in my full sheet of stickers. They dried beautifully over night! Then I finished up my layout and this is how it ended up.


For a full detailed tutorial on how to make these domed stickers, you can check out my video here:
And to see my full process video for creating the layout itself, I have a video here for you:
Thanks so much for joining me today! I hope are inspired to use your Silhouette in a fun new way today! ~Theresa
TRD Products Used In This Post
