Tutorial: Creating Dimensional Elements From Stickers in Photoshop Elements
Years ago, I took a card making class. In the class we stamped an image of a mandala multiple times. Once they were all stamped, all the mandalas were cut out. However, the images were cut so that when layered and stacked, each layer exposed a different part of the mandala directly below creating a three-dimensional effect. To give the mandalas more dimension, they were adhered to each other with pop dots.
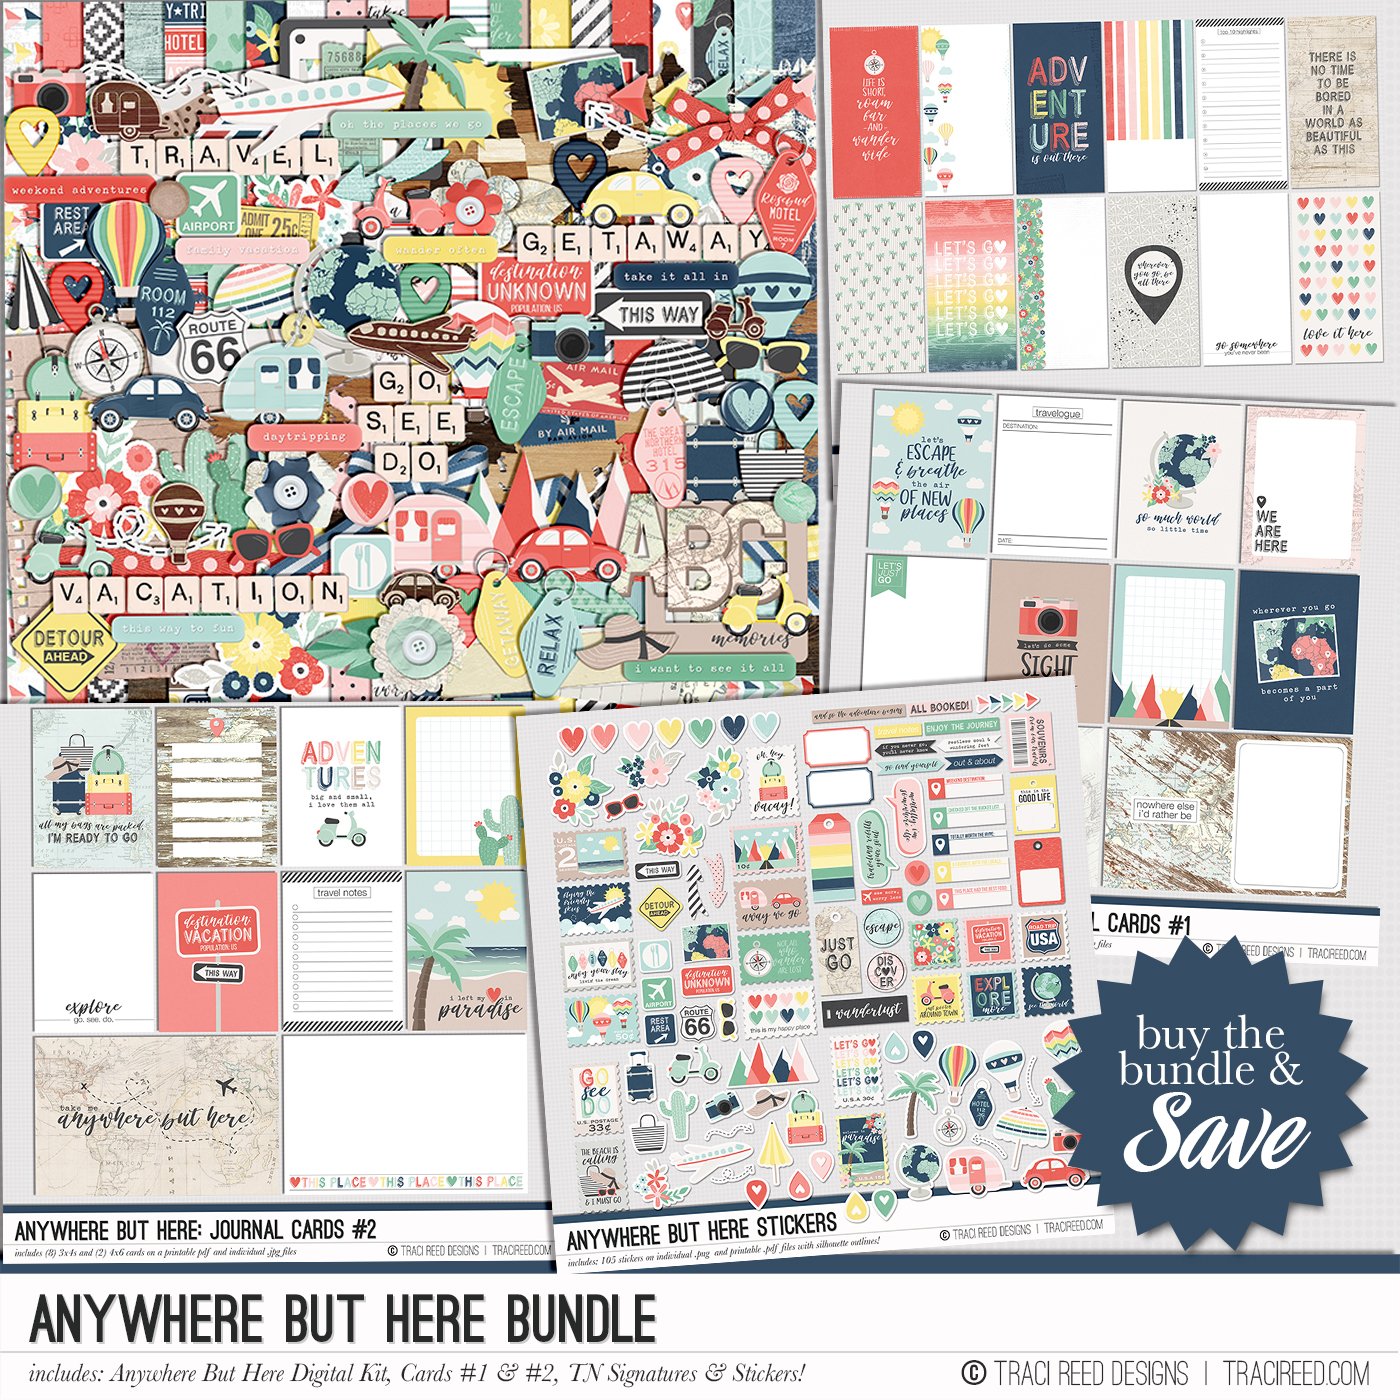
Traci always has a gorgeous pack of stickers in her collections and that got me thinking that I could do the same thing that I did with the mandalas to the sticker embellishments! Since this technique is inspired by a paper crafting class, it will work for hybrid and digital scrapbook pages alike!

I implemented the digital version of the technique in the above layout. For the page I used Traci’s Anywhere But Here collection and a template from fellow creative team member Cheryl of Fiddle Dee Dee Designs called Adventure Awaits! I will teach you how to replicate this technique in your own projects.
I will preface my tutorial by saying that I use Photoshop Elements. I am sure there is a technical way to achieve the same effect in other programs, but this is the method I use. I find that floral cluster stickers work best for this technique, but it should also be able to be used with other types of images.
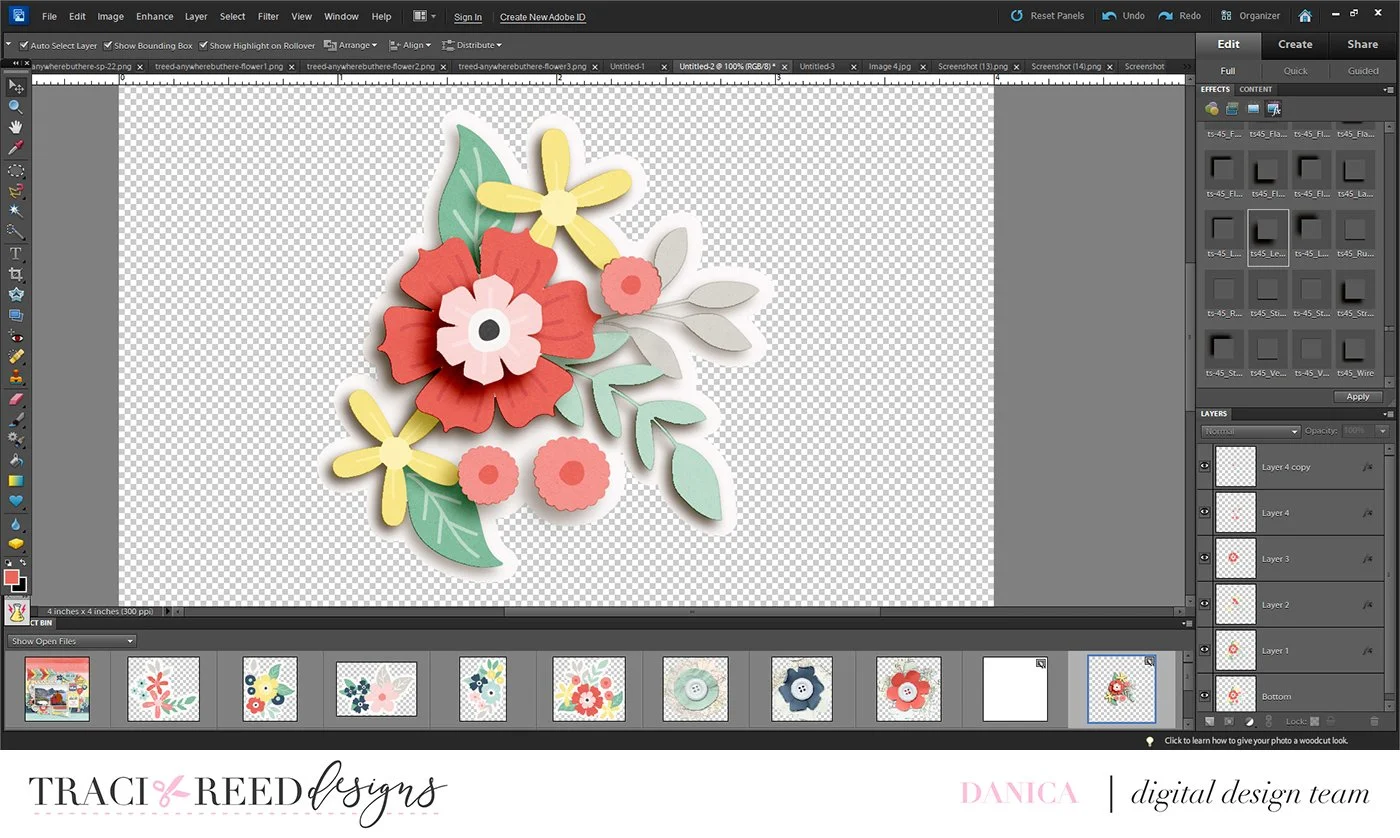
Pick a sticker element you want to use. For the sake of the tutorial I will have it in its own window, but I usually just create directly on the scrapbook page itself. Open the element and duplicate it several times. (Layer-Duplicate Layer). While working on your layering, you can always add or subtract more later on if you would like to do so.
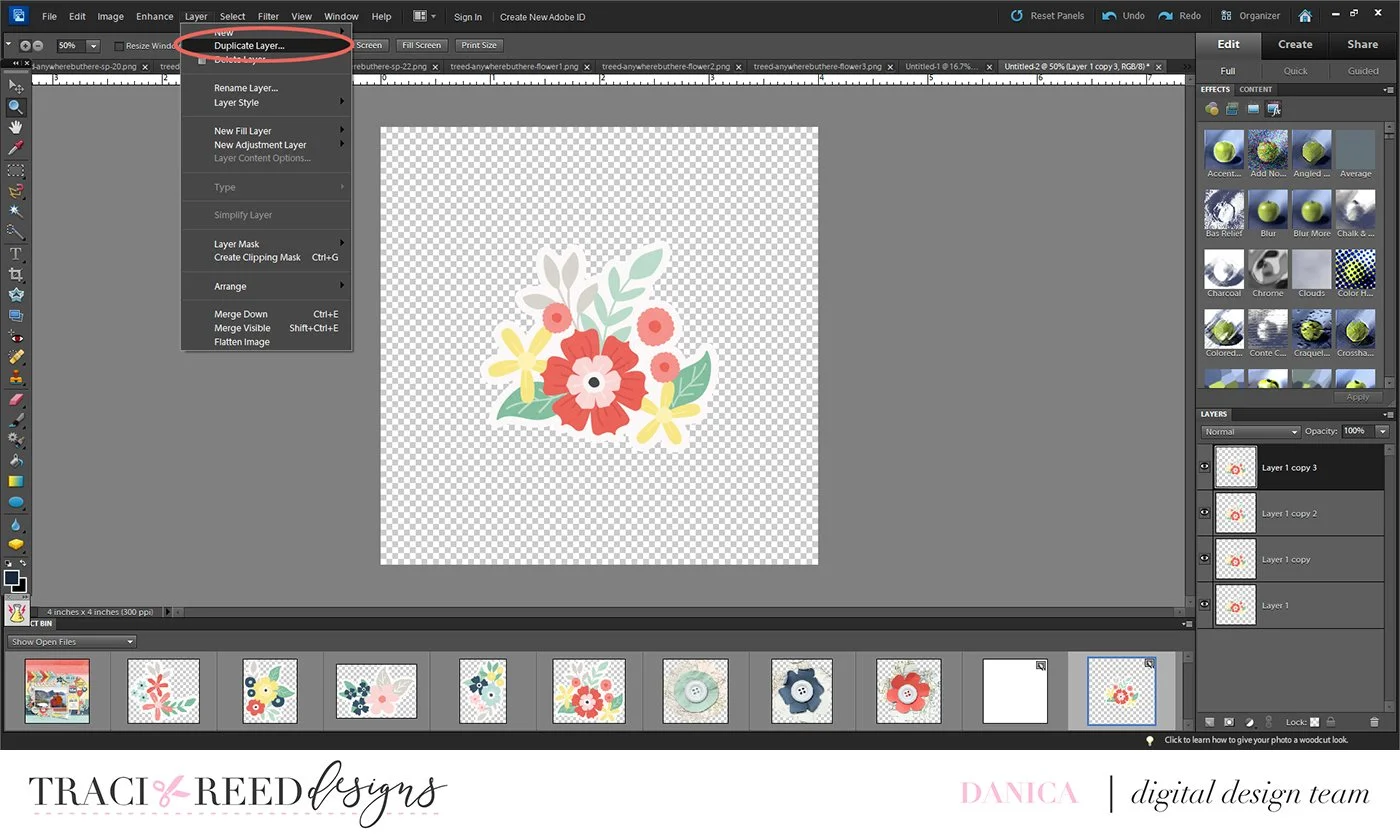
Next link all the layers together. While holding the shift key, select each layer in the layers palette and click the chain link symbol under the layers palette.
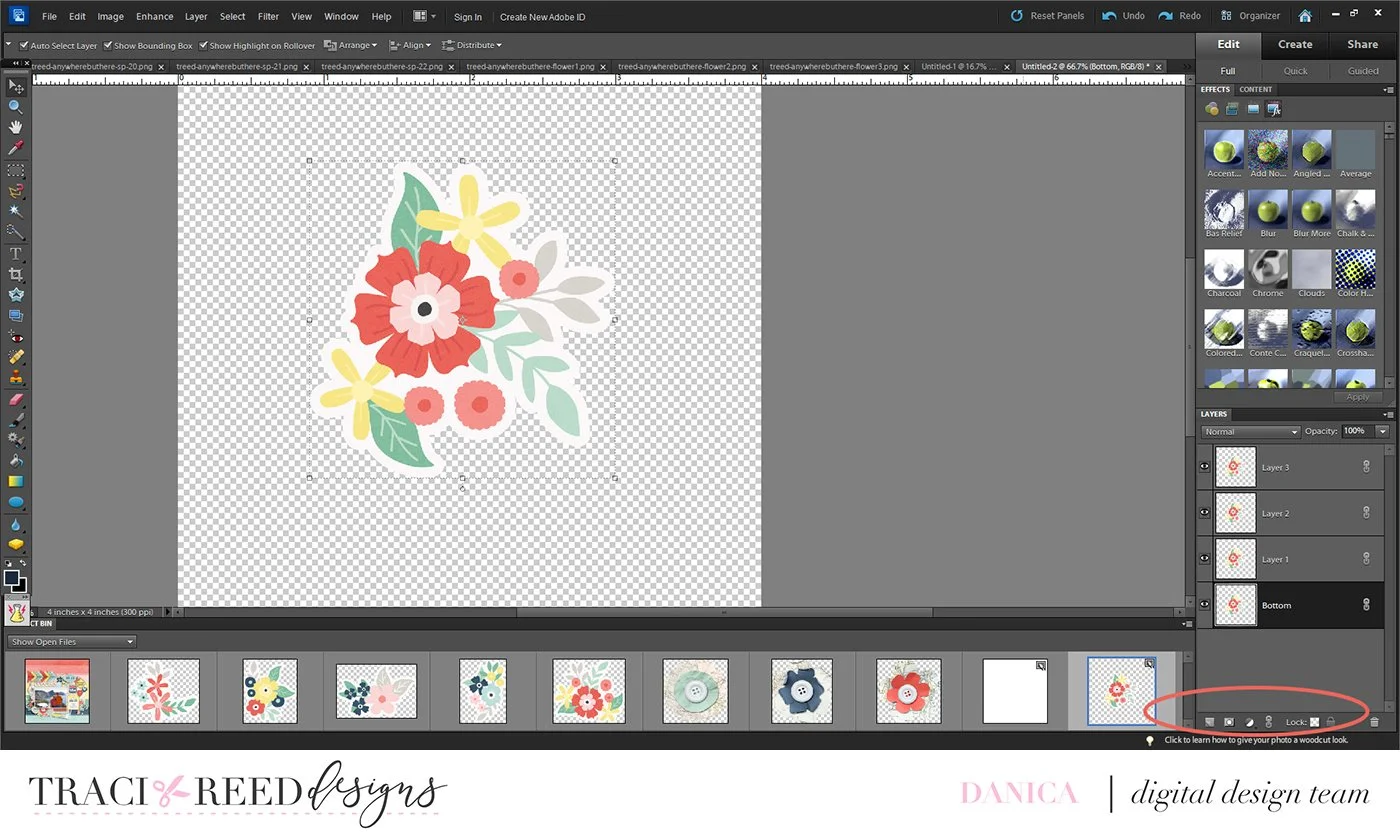
Then you want to hide all the layers except the one that you will be “cutting out”. There will be no edits to the bottom layer so you will start with the layer directly above it.
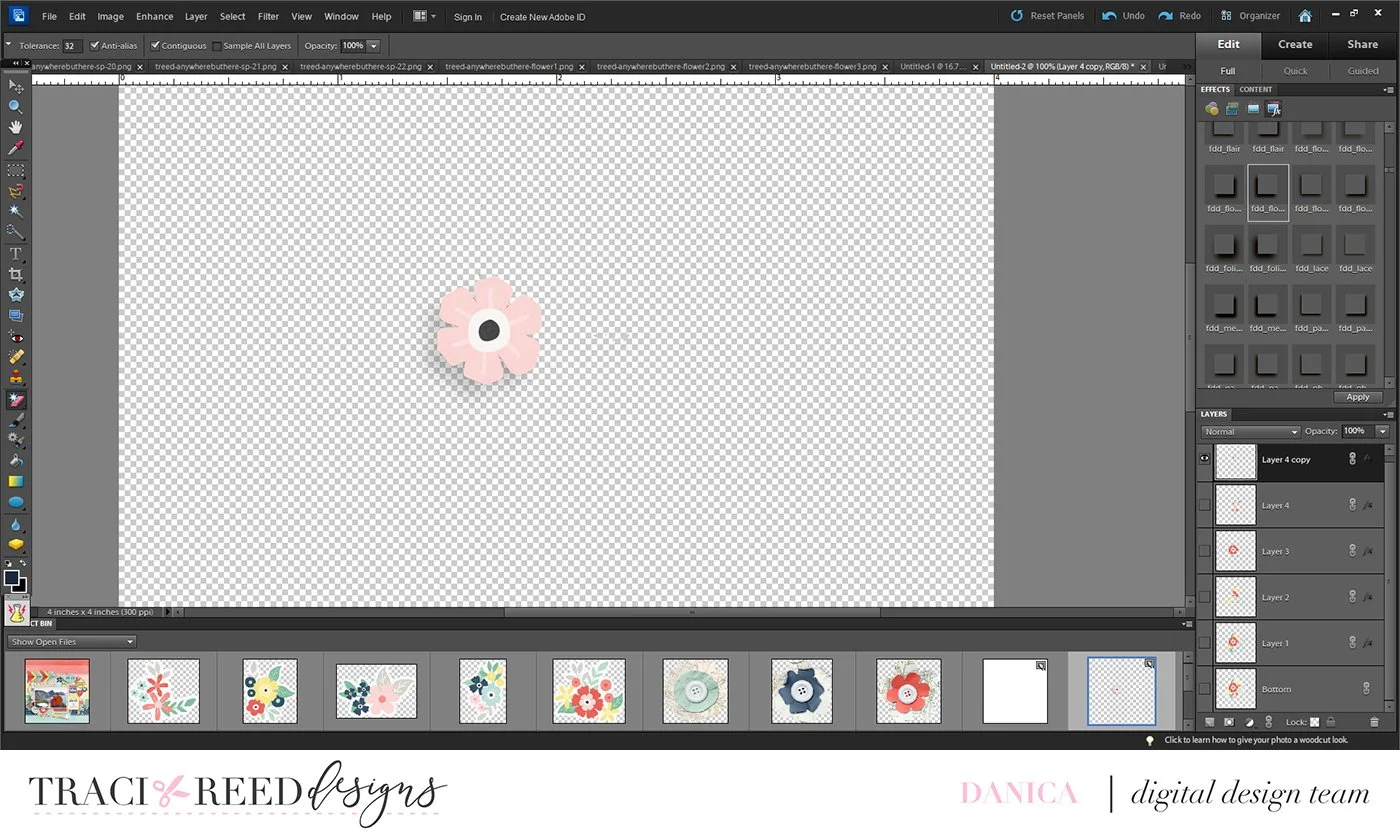
These next few steps take some planning. You will have to decide which parts of the image you want to erase to show the layer underneath it. You will alternate between using the magic eraser tool, shadowing, and duplicating your image.
The first thing I do is remove the stroke around the layer directly above the bottom layer using the magic eraser tool. Add a shadow to this layer. At this point you will also turn the bottom layer on to check to see how it looks. You can make your own shadows, but for time’s sake I generally use shadow styles. This step will be repeated until you finish all your layers.


As you work your layers you will notice that your shadows do get darker since you are also placing shadows on top of shadows. You can change the intensity of your shadows by placing your curser over the fx symbol on the layer you wish to edit on the layers palette and double click. This opens a window where you can edit your shadows.


Once you have your shadows the way you like them you can move your dimensional sticker to your layout by selecting all layers and dragging it to your layout in the project bin at bottom of screen. I will either add dimensional elements to the sticker like I did in my layout here (I added flowers) or I just leave as is.
For hybrid pages, you would just use your scissors and pop dots to replicate what I did digitally, cutting out and layering pieces to create a 3D effect. You could also just glue together several layered images to create depth.
Hope you enjoyed this tutorial and that you will implement it in your projects.