Ways to Work it Wednesday: Circles
Happy Ways To Work It Wednesday! Today we’re featuring techniques and tutorials on incorporating CIRCLES into your projects! Circles are such a fun basic shape to use that we often overlook how versatile they can be! The team has 5 different ways they worked circles into their layouts below!
Sara - Beautiful Dreamer
Sara’s layout features circles, stamped and layered, to create a fun and funky border on her page. Circles provide a base and background to Sara’s project and anchors her whole design. Her dark brown stamping and kraft background highlights and warms the amazing colors and florals in the 2022 Freebie - Beautiful Dreamer collection.

Stephanie - Happy Day
I went back to basics for this 12x12 layout using circles as my shape to accent this entire page. I enjoyed using my punches and metal dies. I may have punched a bit too much,but circles can be used in so many different projects. I also used circle stickers from the Happy Day collection to layer on some of these circles. I used foam tape on those smaller circle stickers to give dimension to my layout. Lastly, I placed foam tape under 3 sentiment stickers that were each of the 3 photos to complete my layout.

Larissa - Happy Day
Having a circle punch is a game changer for me! I especially like the 1 inch one, and I use it all the time! I decided to create some dimensional circle charms that you can add to any project! It’s very simple, you cut five circles from different patterns (I used the Happy Day Collection), fold them in half and glue them all together, making this adorable embellishment! Try to change it a little and making a banner using bigger circles, I’m sure they’ll look incredible!

Theresa - School Daze
No cut file? No problem....I just opened up Photoshop, created a plain black fill layer, and then used the elliptical marquee tool to cut out my circles wherever I wanted them. I used a 3” circle for my photo, and the rest vary from 1.5” to 2.5”. Save your cut file as a PNG, and then bring it into Silhouette (or whichever cutting machine you have!) and then cut it out. I’ve used plain brown kraft paper, and the background paper is from the School Daze collection.
Once everything was cut and printed, I adhered the kraft paper using lots of foam tape for dimension. Then the fun part – filling in all the circles! I went all in, with acrylic pieces, enamel dots, and just anything I could find in my stash. I used die cuts from the kit as well, especially around the photo itself. A cut up tag worked great for journaling, and one last touch was adding the stamping around some of the circles. For those I used some of my Studio Calico stamps that tied in with the school theme. And that is my layout!

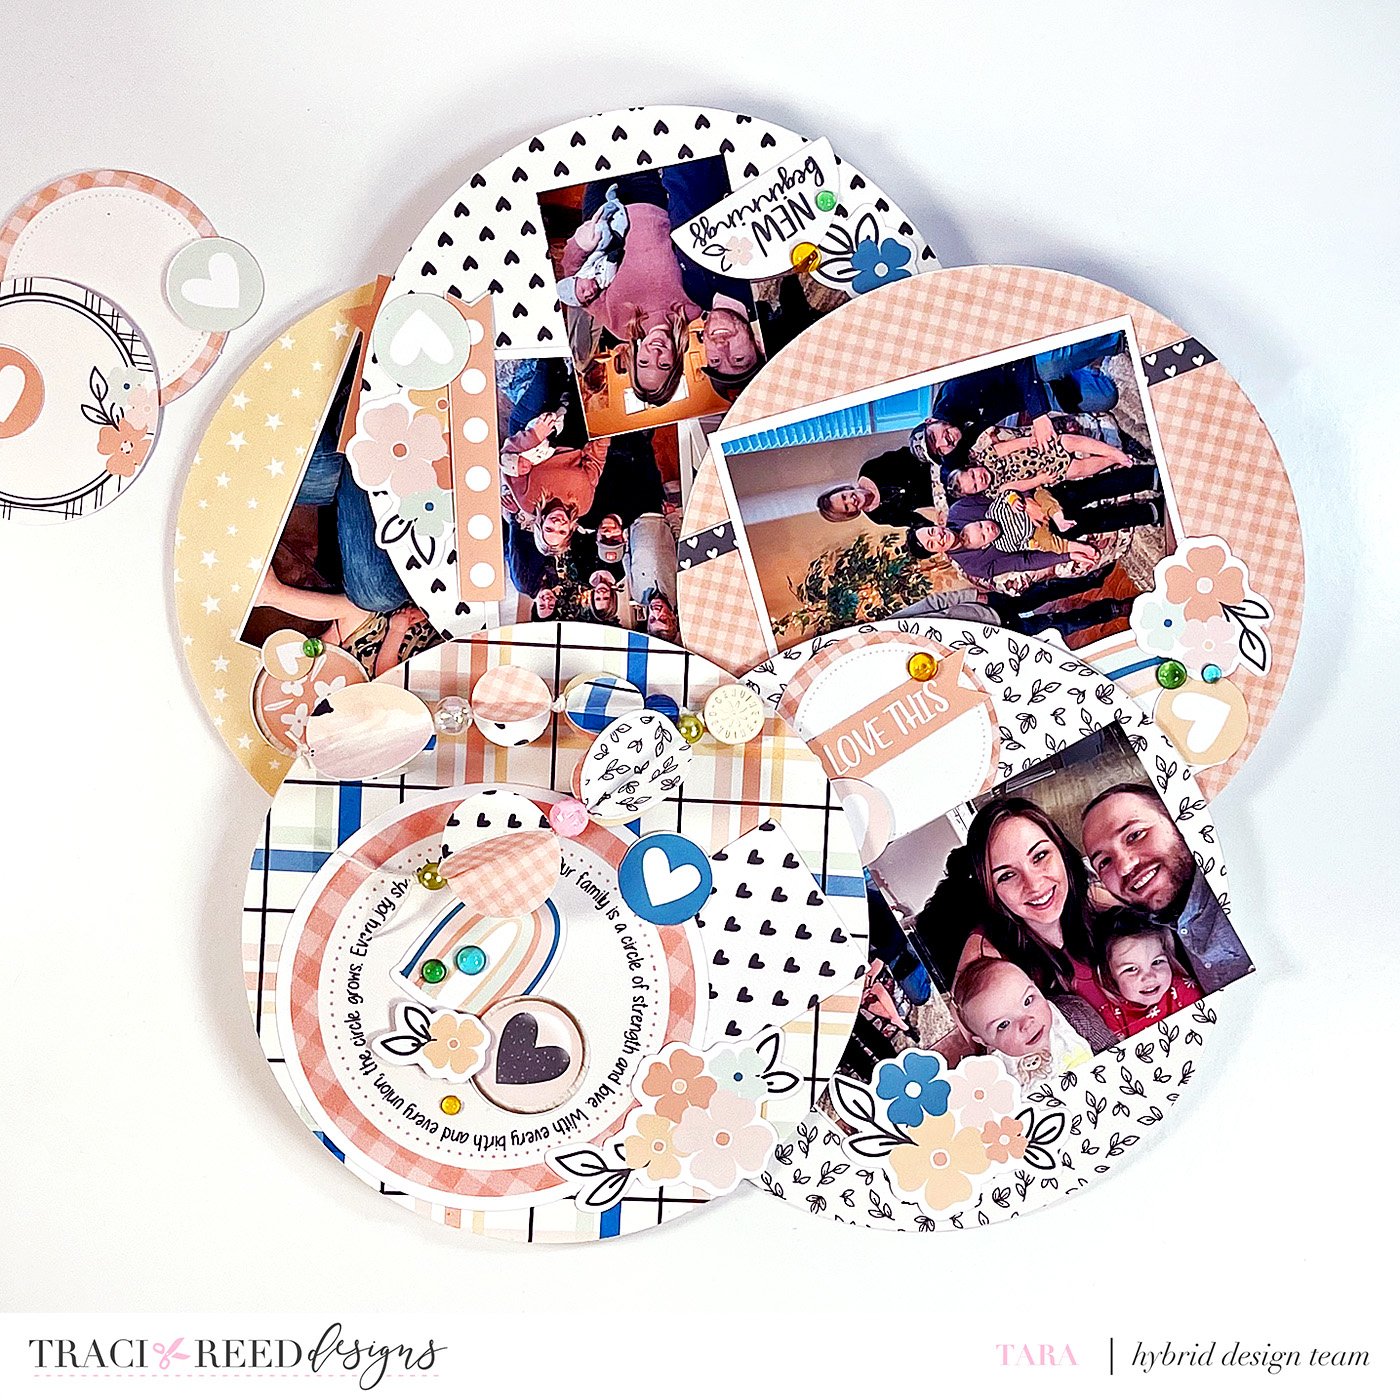
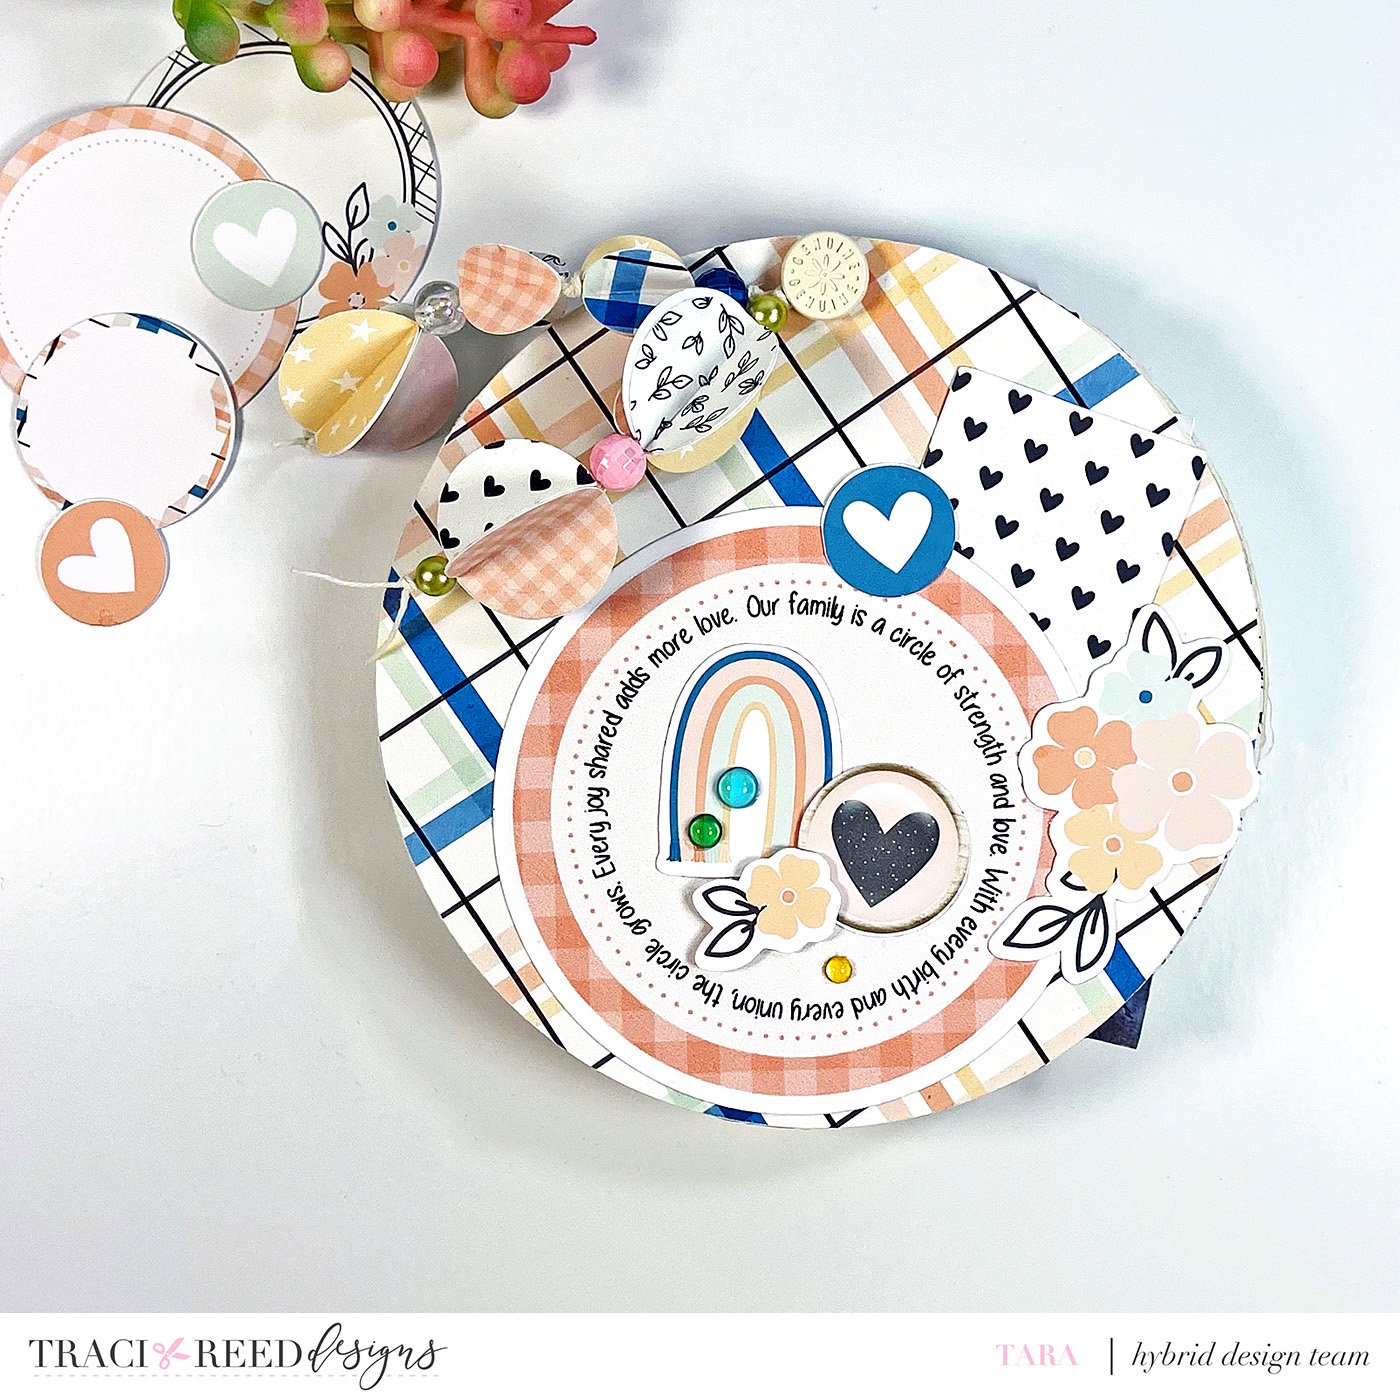
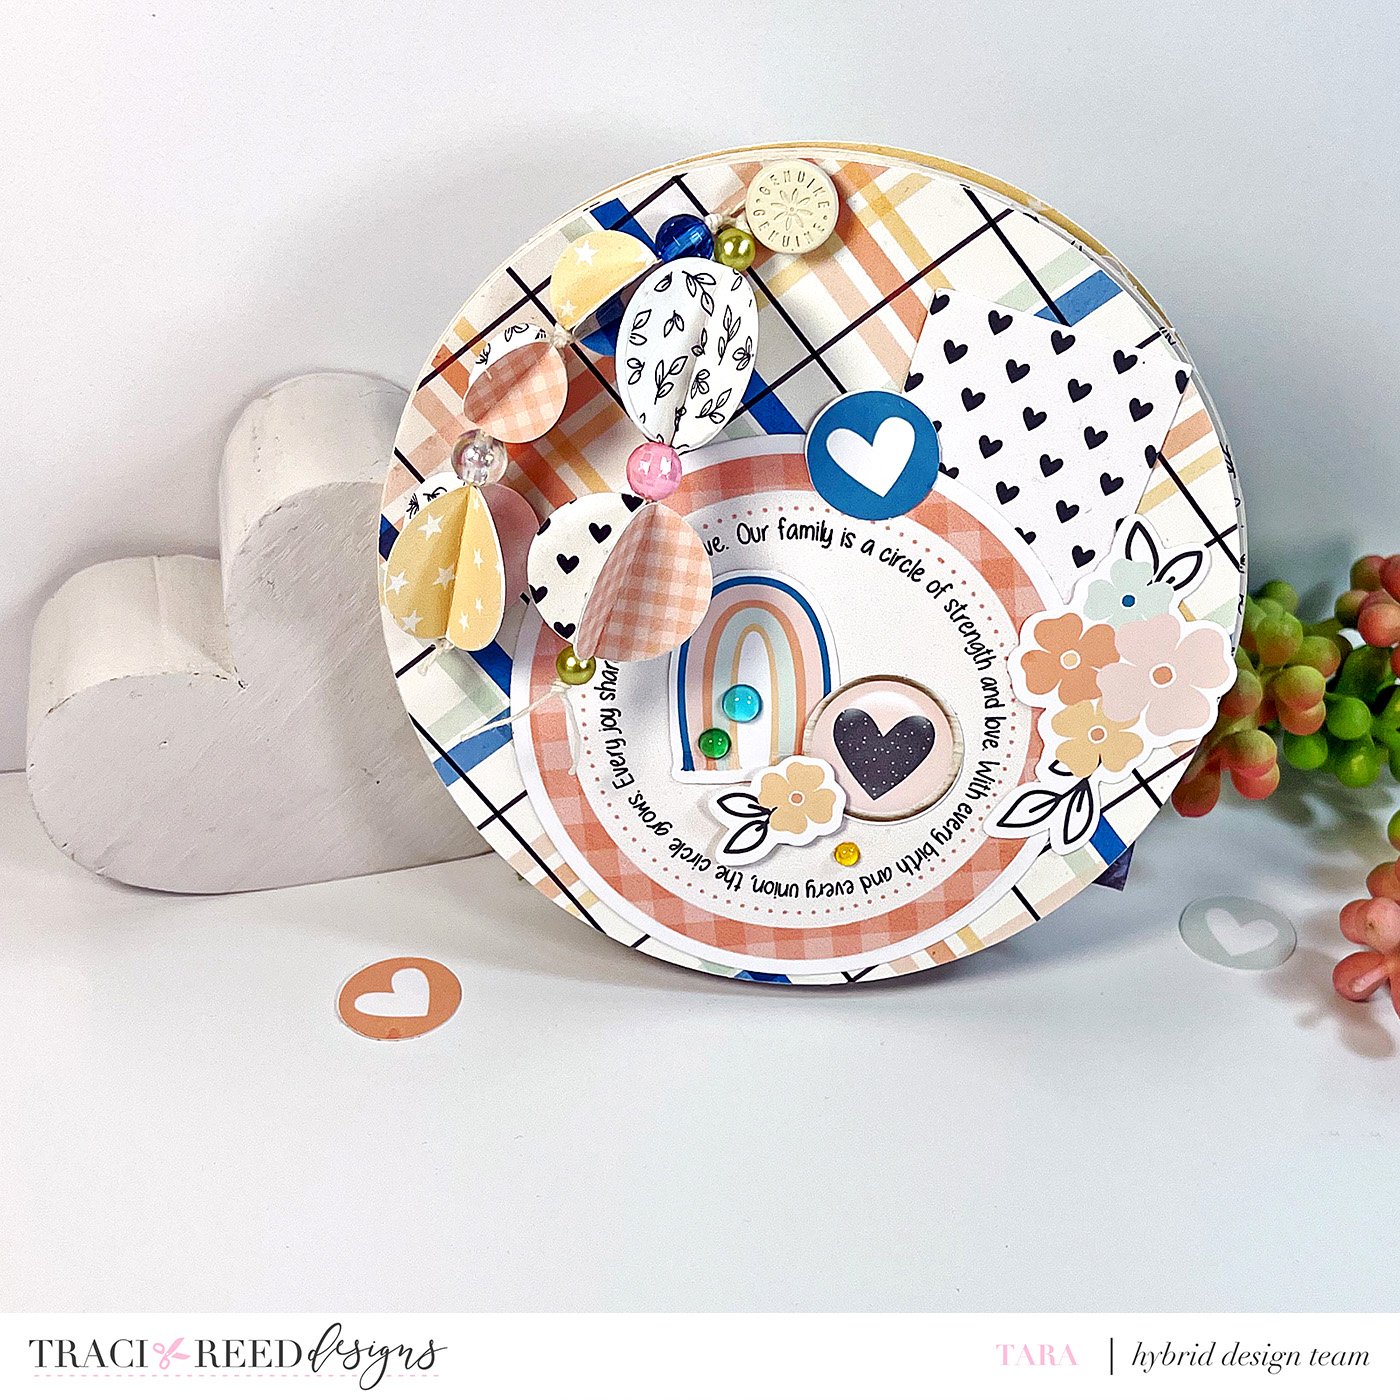
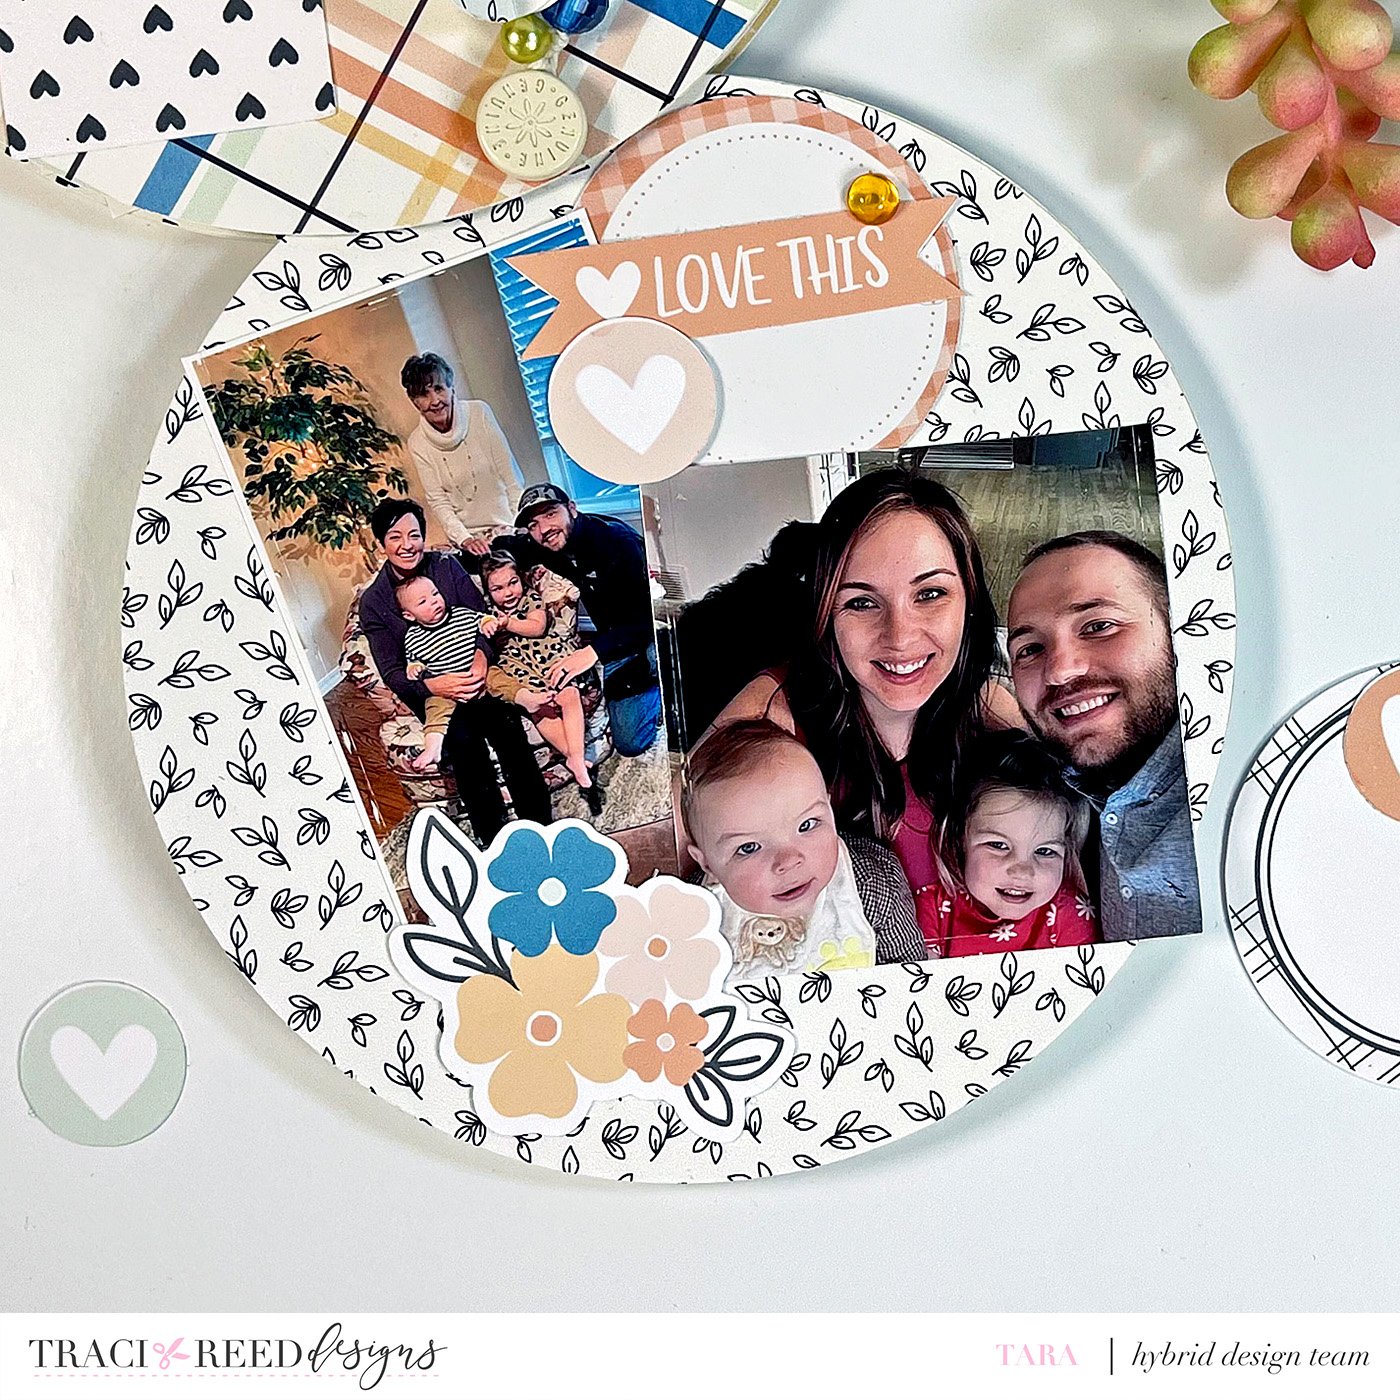
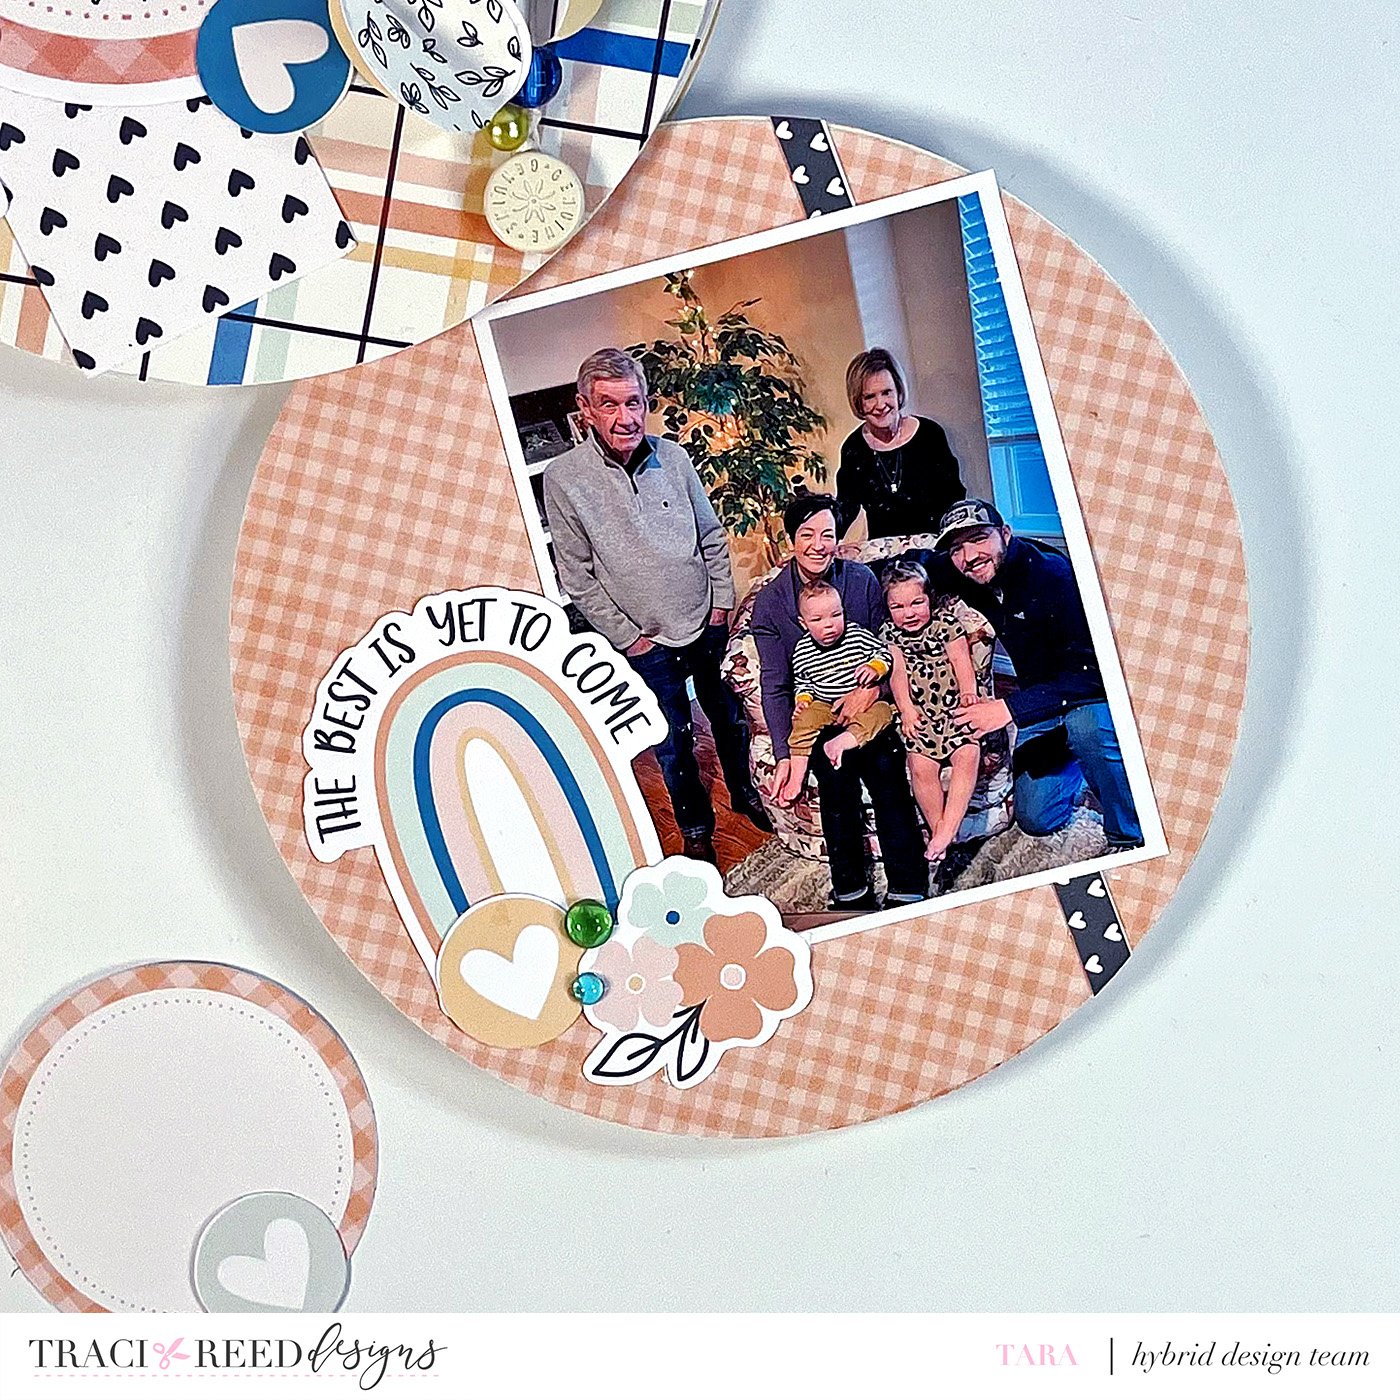
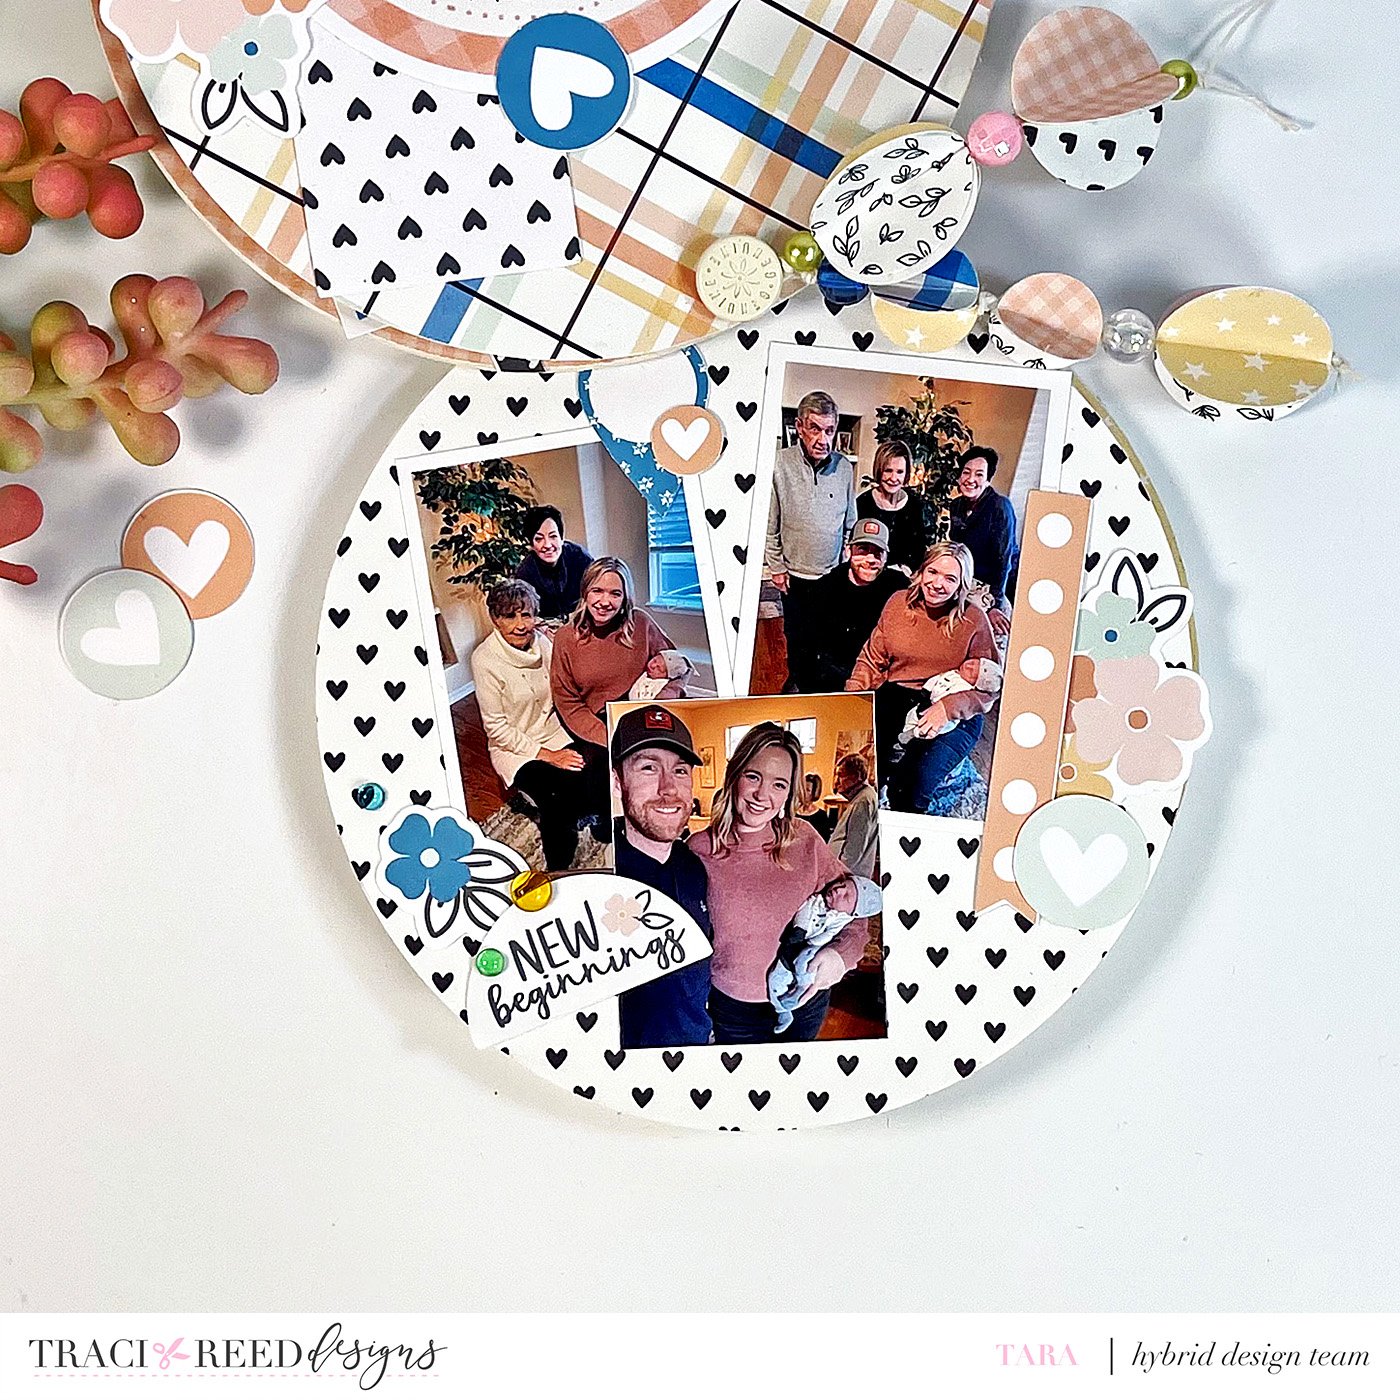
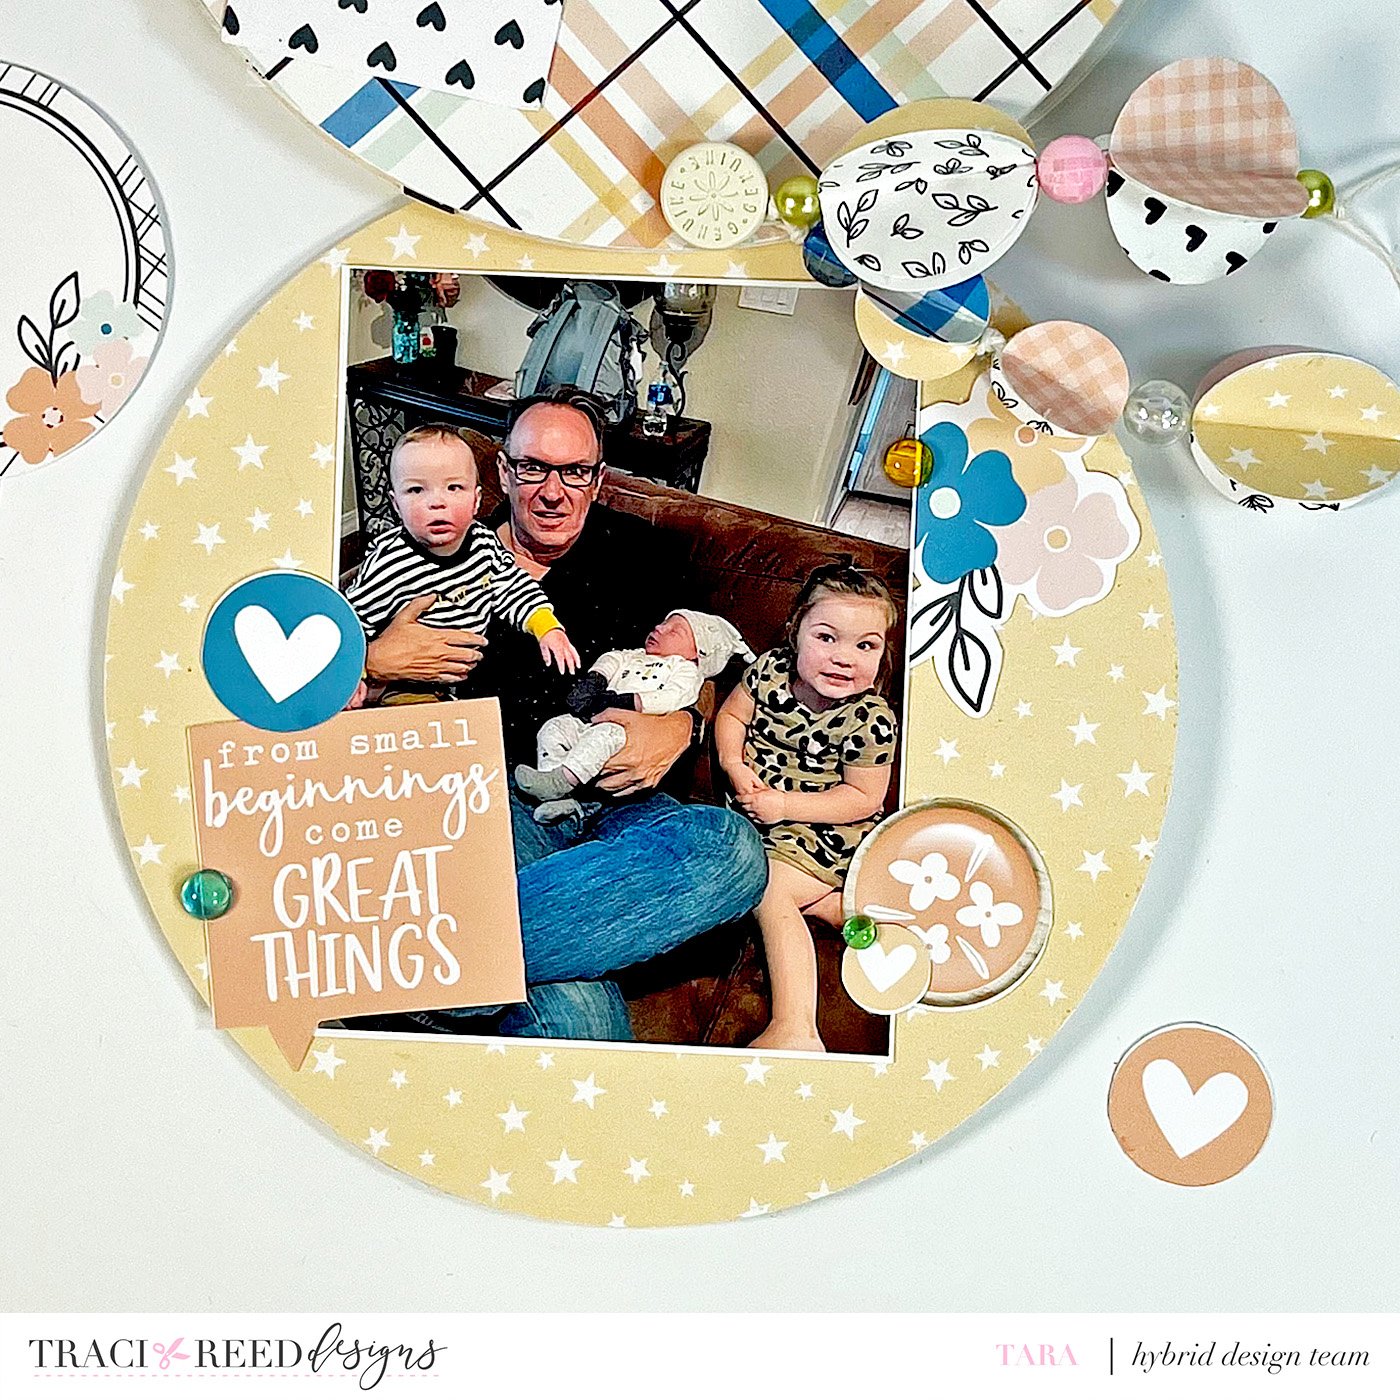
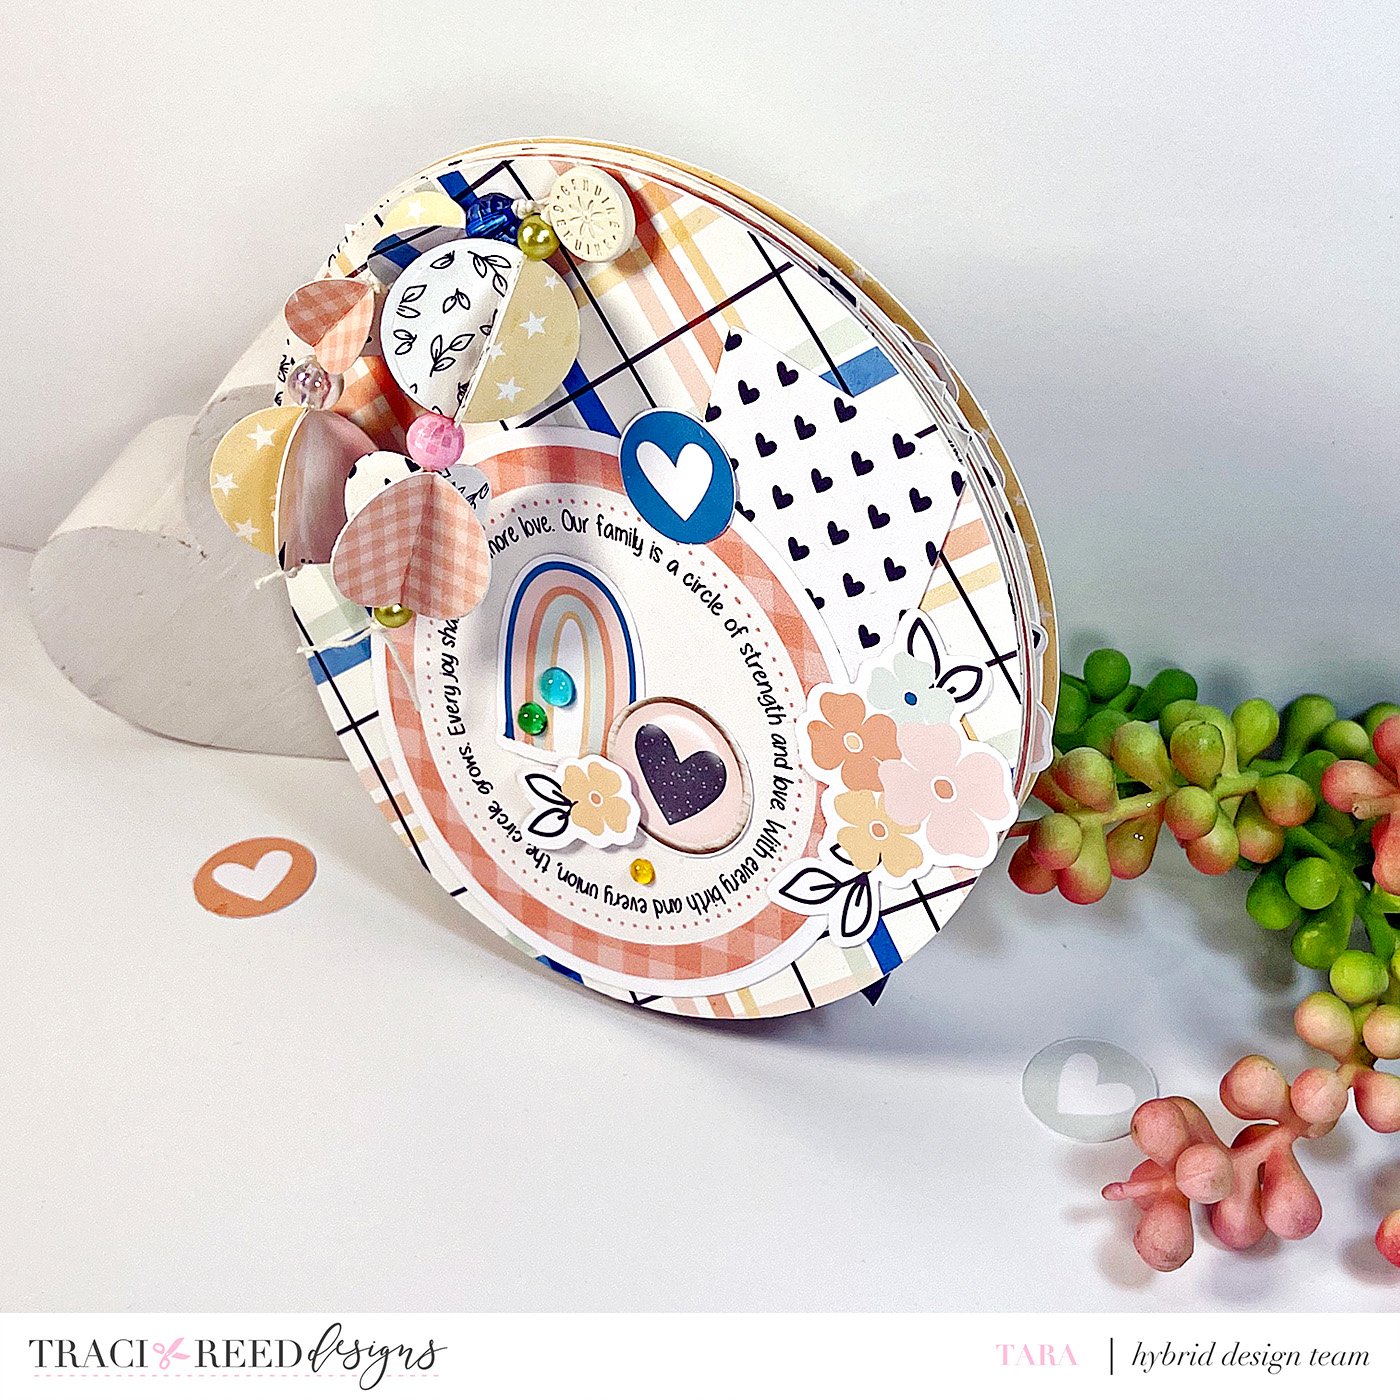
Tara - Beginnings & Endings
Hi everyone! I loved this prompt of 'Circles' for the Ways To Work It Wednesday! Who knew that so simple a shape could make such an adorable mini album! My family recently got together to celebrate and we took the opportunity to take generations photos which were perfect for a 'Family Circle' theme!
I decided to use as many circle shapes as I could in the making of this mini album, so I chose the 'Beginnings and Endings' collection to work with since it has a huge selection of circle shaped embellishments. I altered one of these circle embellishments for the front cover and then added a sweet sentiment to the center.
Each circle shaped page of the album features mostly circle embellishments and the whole album, which is hinged on a decorative brad, opens up to a circular shape. The album is decorated even more with some circle shaped dangling charms and round beads. Too cute!