Save Paper & Ink with these Photoshop Elements Printing Tips from Nicole!
With spring temperatures approaching, I have been in the mood to scrap with some spring time photos. I found some photos from April of an outing that paired well with the Summer Camp collection.

I have been asked from viewers if I personally print out the entire collection and for me it varies. With Traci’s new releases I tend to print most of it and plan from there. With something like this where I am starting with photos and selecting a collection that works with them, I tend to print a little differently.
For the “Let’s Go Explore” layout I messed a bunch of concepts from various sketches together. These are things I lean towards in my personal style are super simple to switch up and even easier to plan my printing around. I started with selecting my photos and settled on four. These were all in a horizontal orientation, so I cropped and printed them to be 4x3s.
For the papers, I decided to I use 9 different patterns and great way to show off a lot of patterns is to go simple with paper strips. Using PhotoShop Elements I dropped the full size 12x12 striped pattern onto a blank letter sized canvas, shifting it over to the left so only about an inch shows (I planned on using this as a border element so I didn’t need a full sheet). From there, I know that I have room for strips about 6 inches wide. I took the 9 patterns I want to use from my strips and changed the image size to 6x6 so that the entire pattern shrinks down. From there I cropped a 3”x6” section and dropped this onto my letter sized image and repeated until I filled up the page. I ended up with two sheets of these small “samples” of the papers to cut from. This saved me printing time and ink, and gave me that 6”x6” pad of paper feel.
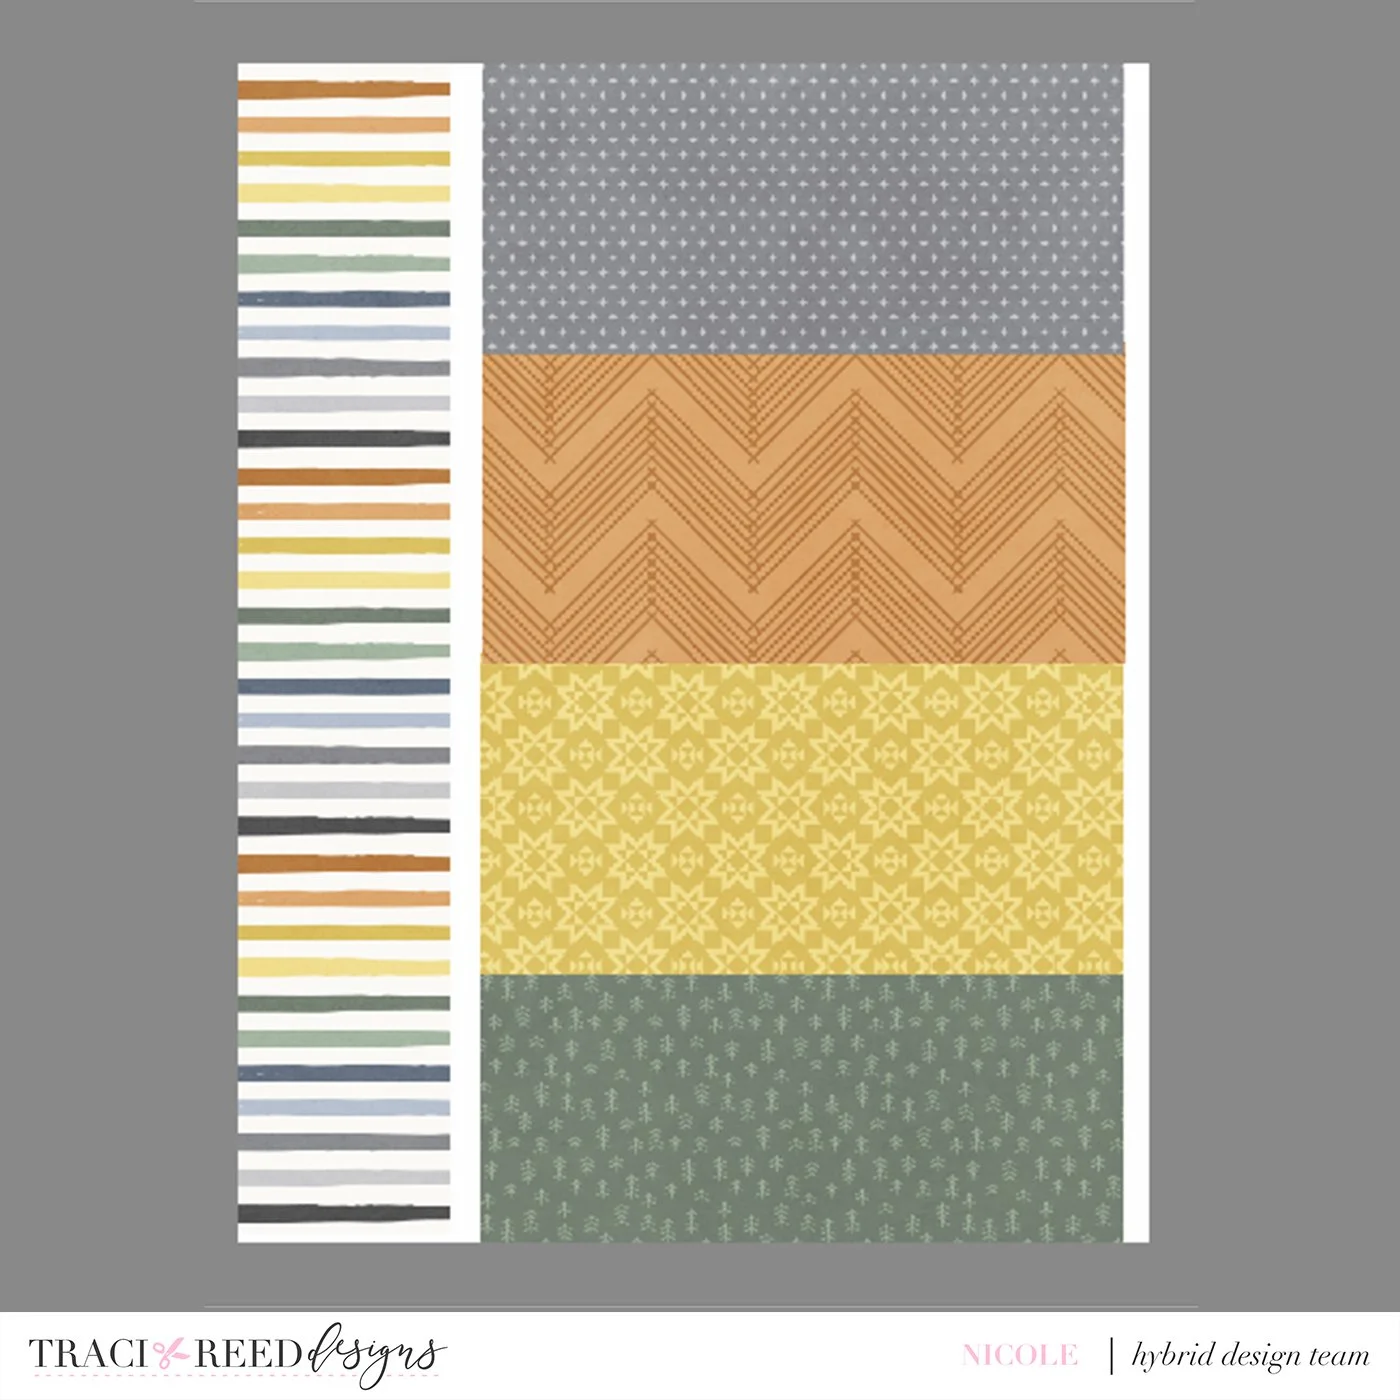
After printing, I trimmed 1” strips from the smaller sections and a thin border strips from the fun multi colored pattern. I used a banner punch to notch the ends of the 1” strips and stacked them horizontally. This style is something I use a lot as I love seeing a lot of different patterns and it’s a simple design concept that still allows for fun embellishing and a focus on the photos.

This same concept of printing smaller portions of the digital papers can be done in free web based apps like Canva as well, and I always encourage crafters to give hybrid a try - you might be surprised.


Don't let the name fool you, there's nothing "camping" about this collection, so if you're like me and HATE to camp, you'll be fine!
Instead, Summer Camp refers to that certain nostalgia you feel for summers as a kid - maybe you were lucky enough to go to camp, maybe you weren't, but I think we all feel that certain vibe when we look back.
The Summer Camp collection is perfect for all your outdoorsy summer photos, whether you like to go on hikes or just like to lay in the sunshine - I got you. Of course, there's my signature snark and introvertedness laced throughout the collection as well so you know you're going to giggle too!
Check out the Summer Camp Unboxing Video + Sample Layouts Here!
BUNDLE INCLUDES:
Summer Camp Digital Kit, Cards #1 & #2, TN Signatures and Stickers!
BUNDLE DOES NOT INCLUDE:
Summer Camp Stamps, Patterned Cards or TN Papers!