Photoshop in 5 with Theresa: Three Easy Ways to Work With Hybrid Embellishments

Hi friends, it’s Theresa here. Last month when Traci Release the Smitten collection I created a fun little Valentine’s Mini Album. We had a fun date planned and I wanted a special home for this occasion and Smitten is just the best collection for love stories, don’t you think?! You can see this album, along with so many other beautiful layout ideas from that release here: Smitten Collection.

Today I wanted to share the completed album, now that we have had our wonderful date day. We visited Old Salem here in Winston Salem, NC, which is a historical site where Salem was founded. The best part was we had the opportunity to take a carriage ride! This is something I have always wanted to do, and it was the best time. I was so happy to have the base album already prepared as it made it super easy to print the photos and add my fun stories. Be sure to scroll to the bottom where you will find three videos: the first is on how I assembled the album, the second is the tutorial video sharing how I worked with the stickers from this collection, and the third video shows a full flip through of the completed album.
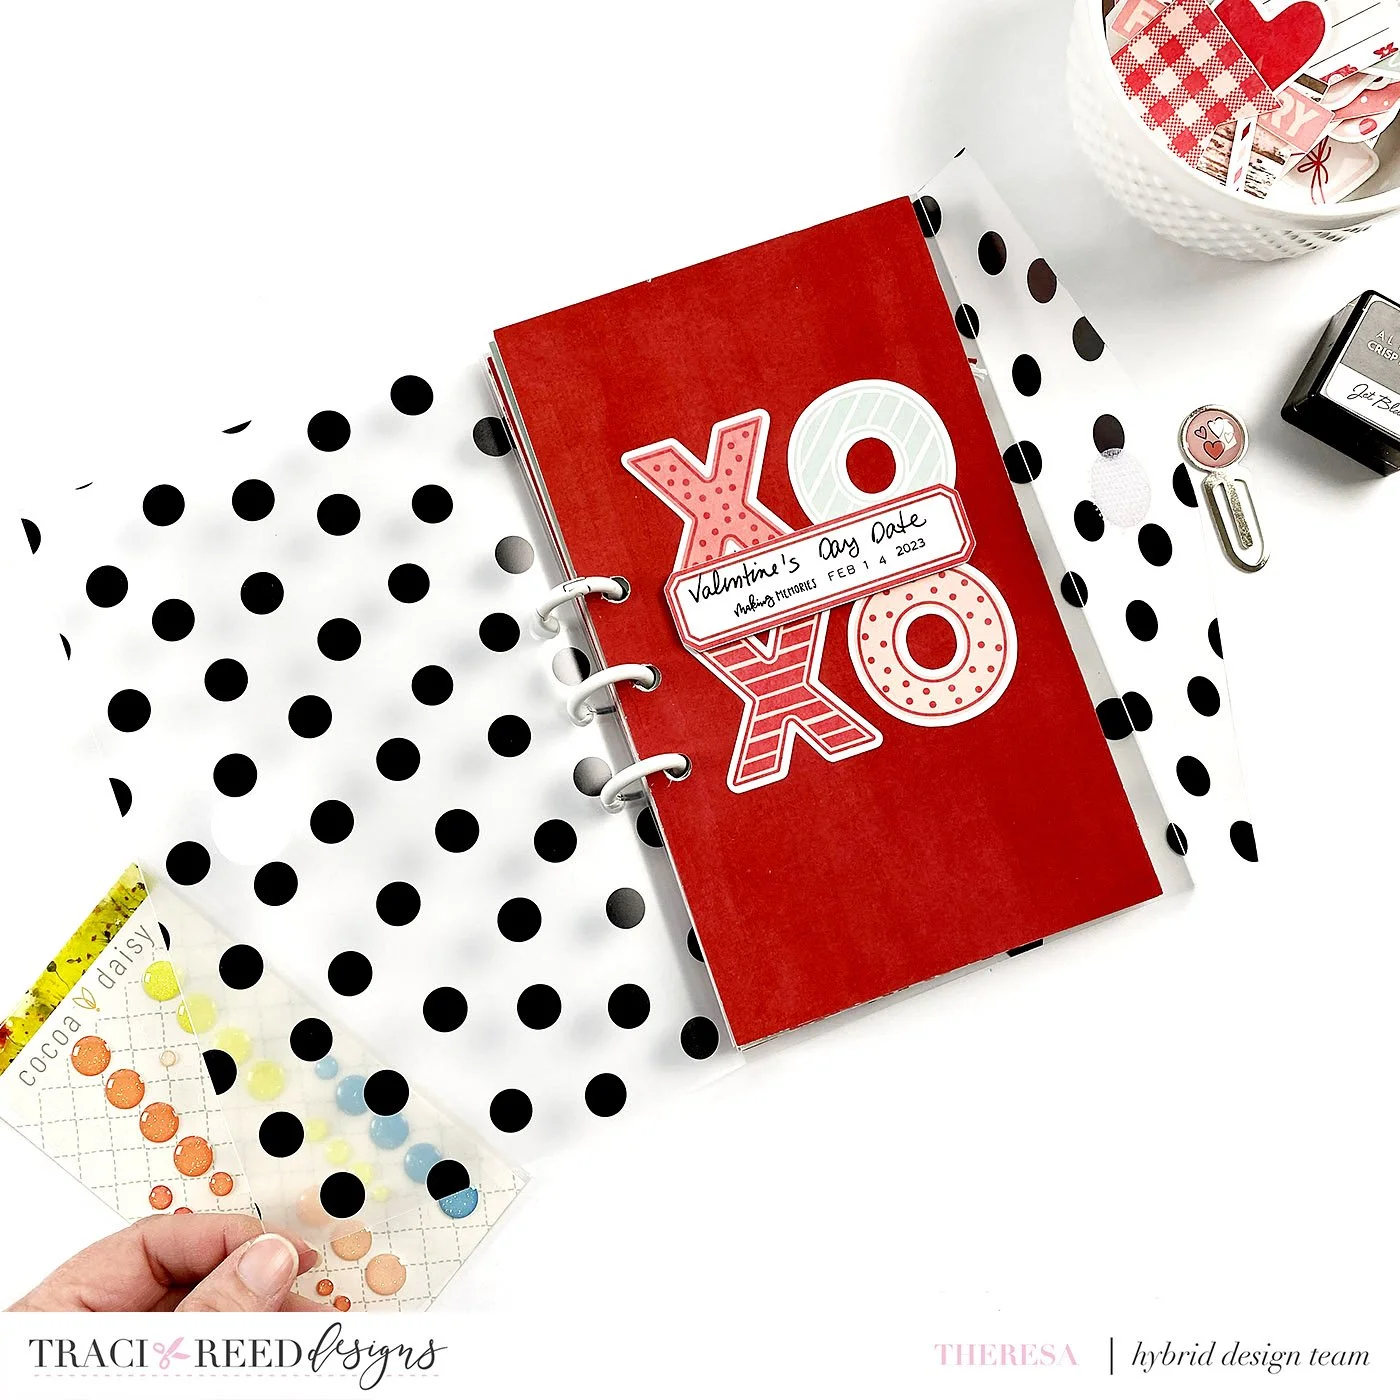
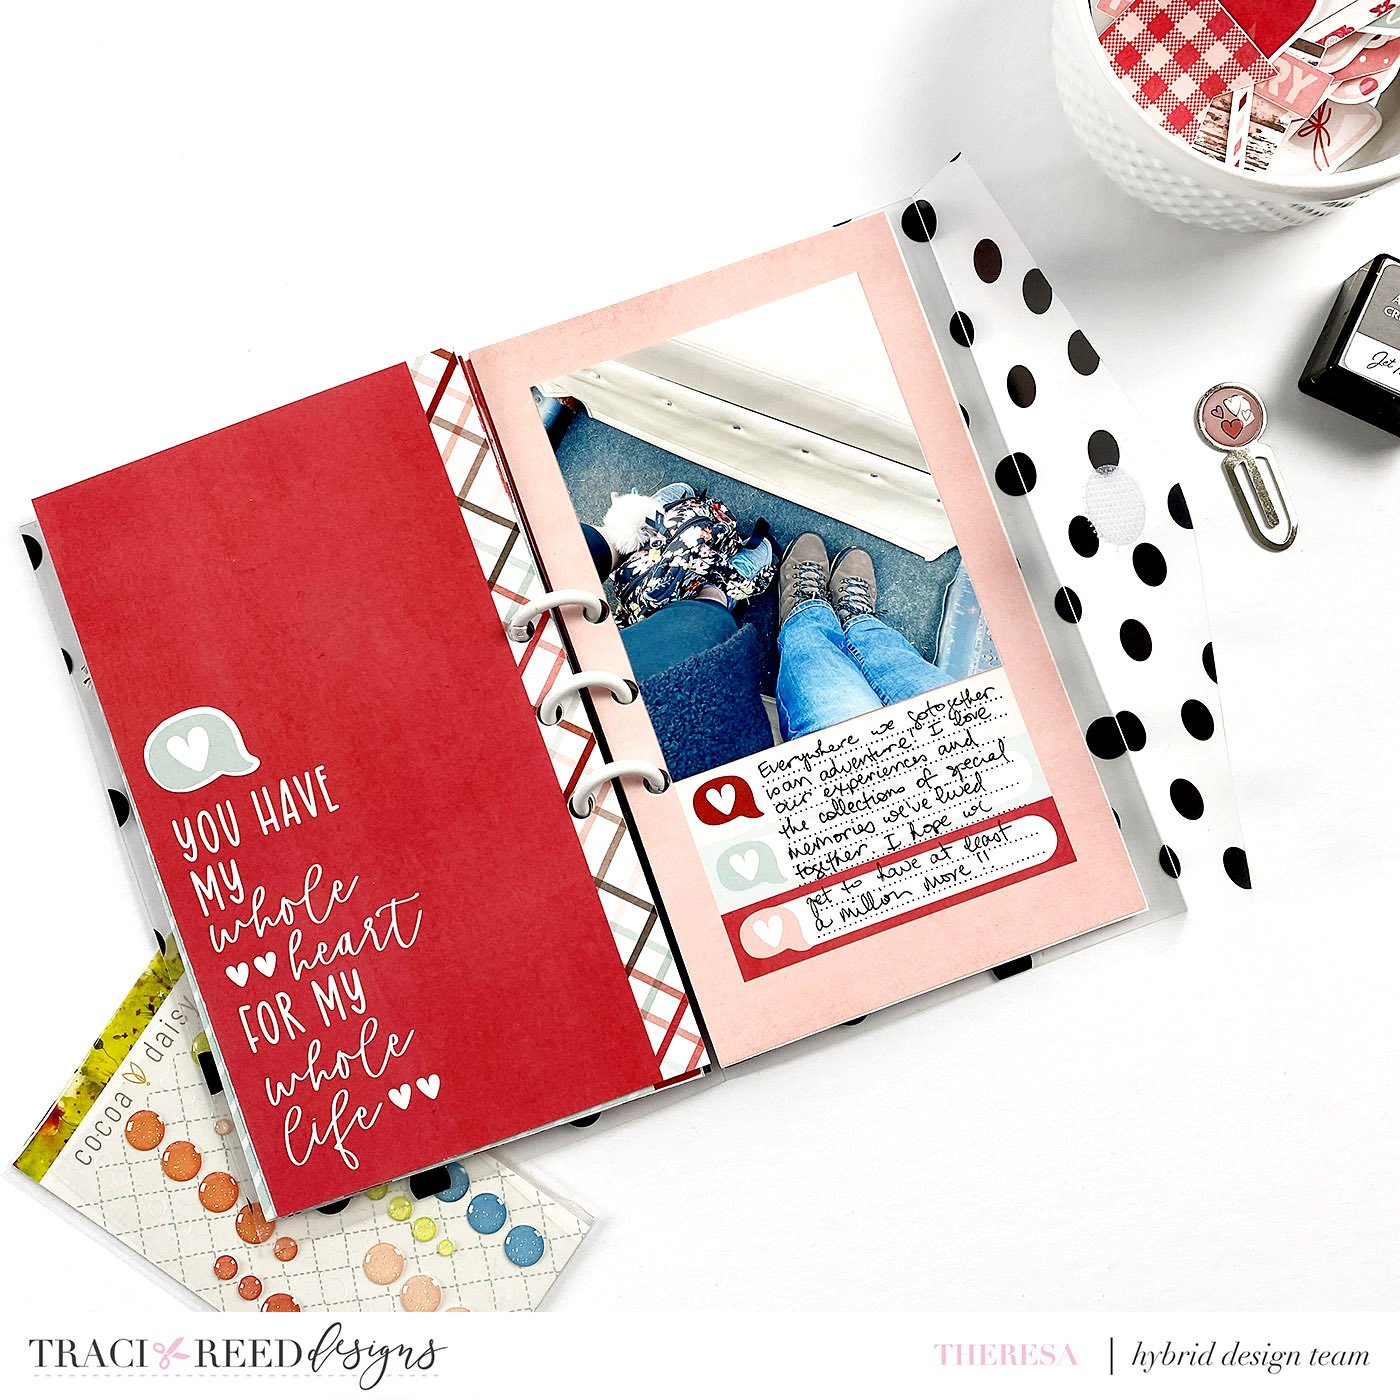
My Intro page was very simple really, I’ve used one of the beautiful solid red patterned papers as the background and then layered the XOXO as a title and a label with the date and event. The red looks fantastic behind the black polka dot cover!

The first full layout was a super fun flip out I did as an introduction layout sharing a bit about where we were. I used the banner stickers along with two small photos of us and then inside the flip out used an enlarged photo of the Visitor Center at Old Salem.
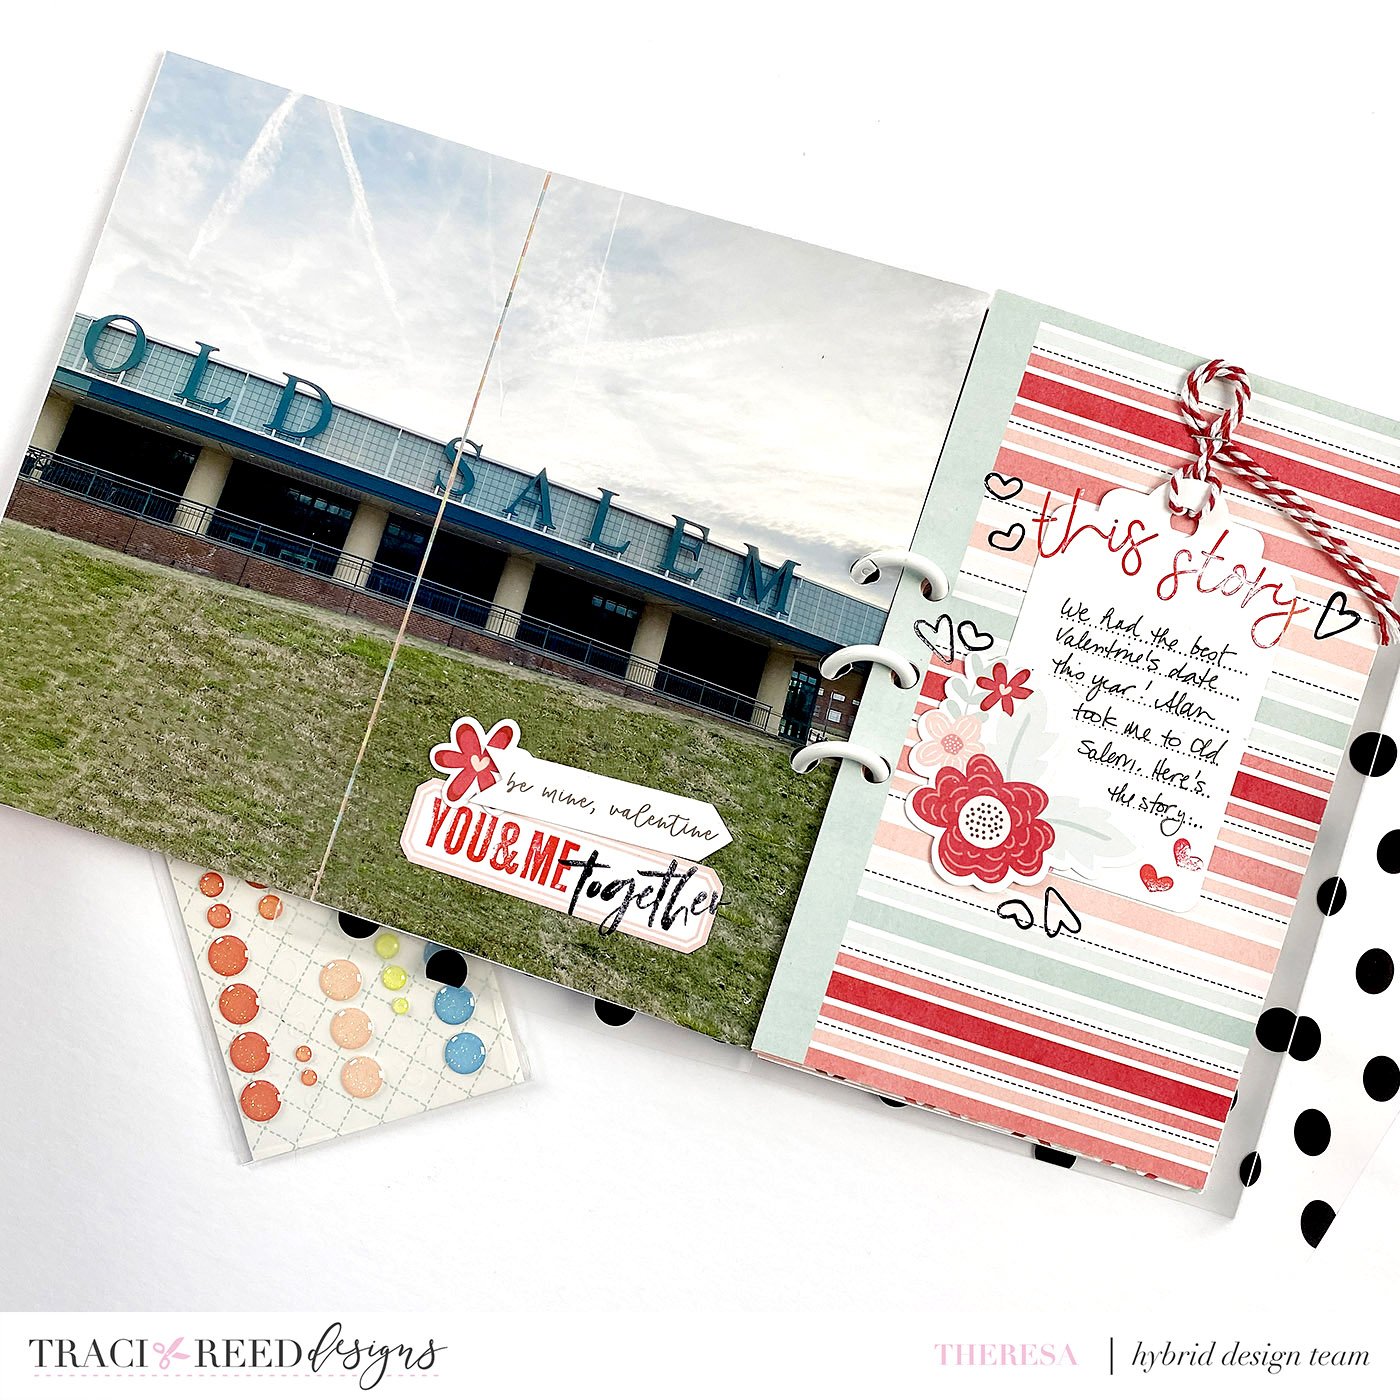
For my journaling I’ve used one of the Smitten tags. This tag has flowers already on it, but to add dimension I added a fun die cut floral along with a few tiny stamped hearts. I also stamped This story as my title with red ink (stamps here are from Cocoa Daisy). I masked the stamped lines to go around the floral and wrote my words. The tag is backed with the cute striped patterned paper from the collection.

My next layout houses the story of the Old Salem Bakery. This wonderful place is home for the giant open oven they used for baking and also of course has a fabulous bakery/gift shop. We loved checking it out and I created a little flip out for some of the photos I wanted to include. It’s just three photos adhered back to back and made into almost a booklet. The journaling is housed on a travelers notebook signature, and I’ve included more information about that in the tutorial video.
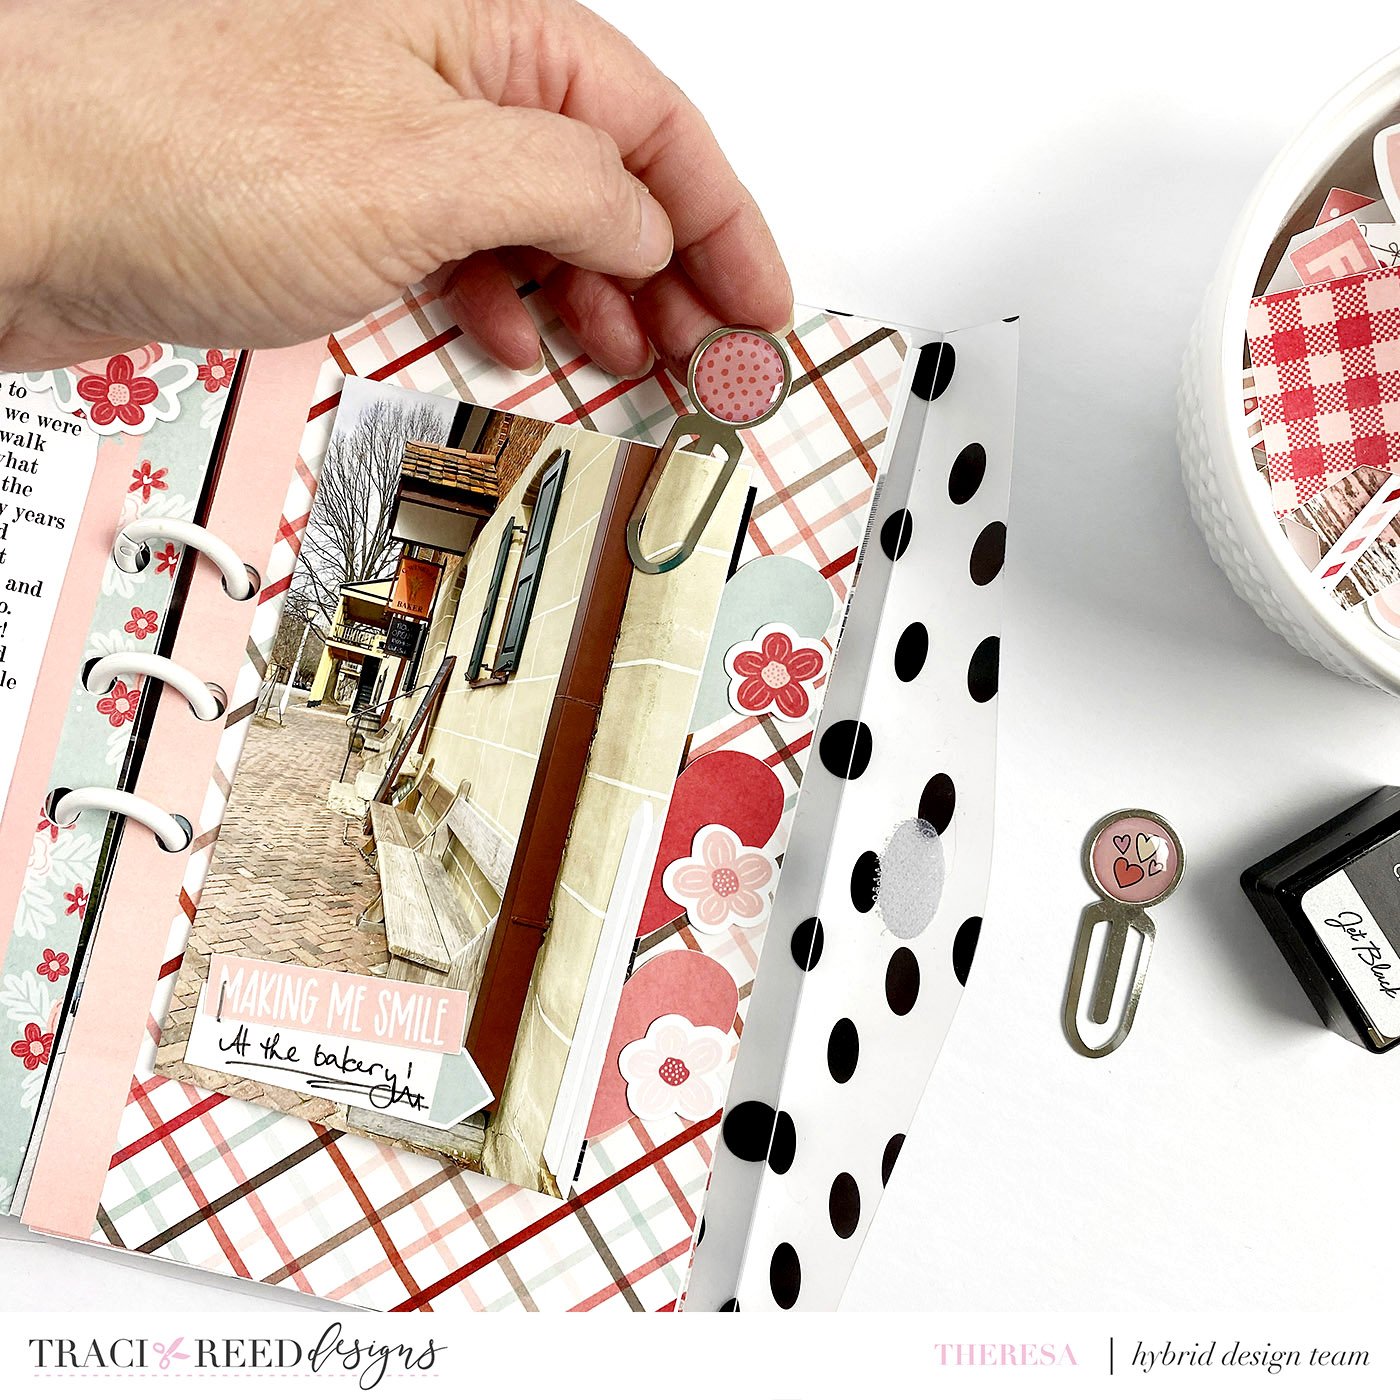
The outside of the bakery is on the top photo and I added a tiny clip from Freckled Fawn so the viewer would know to turn the page.
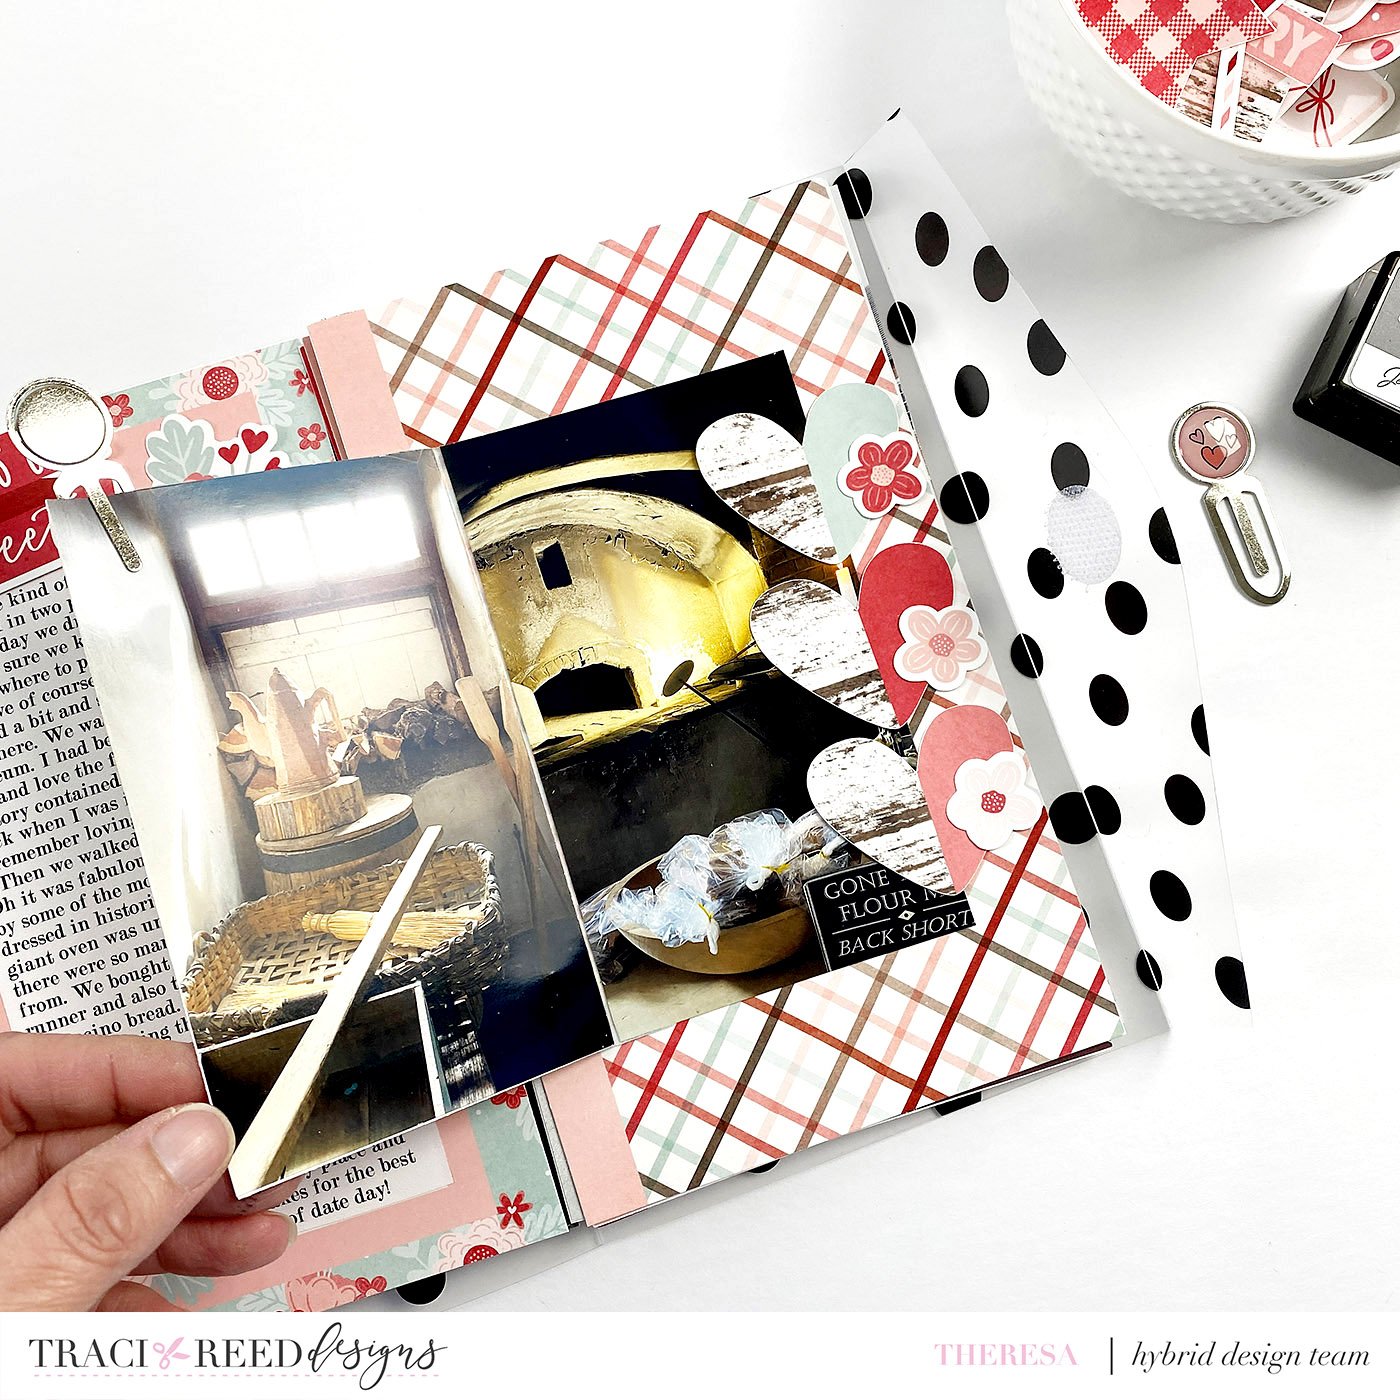
When you flip the page you find two other photos from inside the bakery, including a gorgeous still life and that amazing oven! I also added some tiny flowers to those fun heart stickers just for fun.

Next layout is a photo taken of us together in this fabulous carriage! I have always wanted to experience what it is like to ride in a horse drawn carriage and I thought it was amazing. Our horse’s name was Midnight and our drivers were great! Riding through the streets was fun and so many people waved at us. I would say this goes down as one of the most romantic dates we have ever had.
One of the biggest challenges of creating a mini album is finding ways to include more photos. These stamps immediately inspired me to add my own photos to make my own stamps. I’ve shown in my tutorial video exactly how I did that. For the facing page I’ve again used a signature and then layered a journal card so that just the top and bottom “LOVE” are showing.

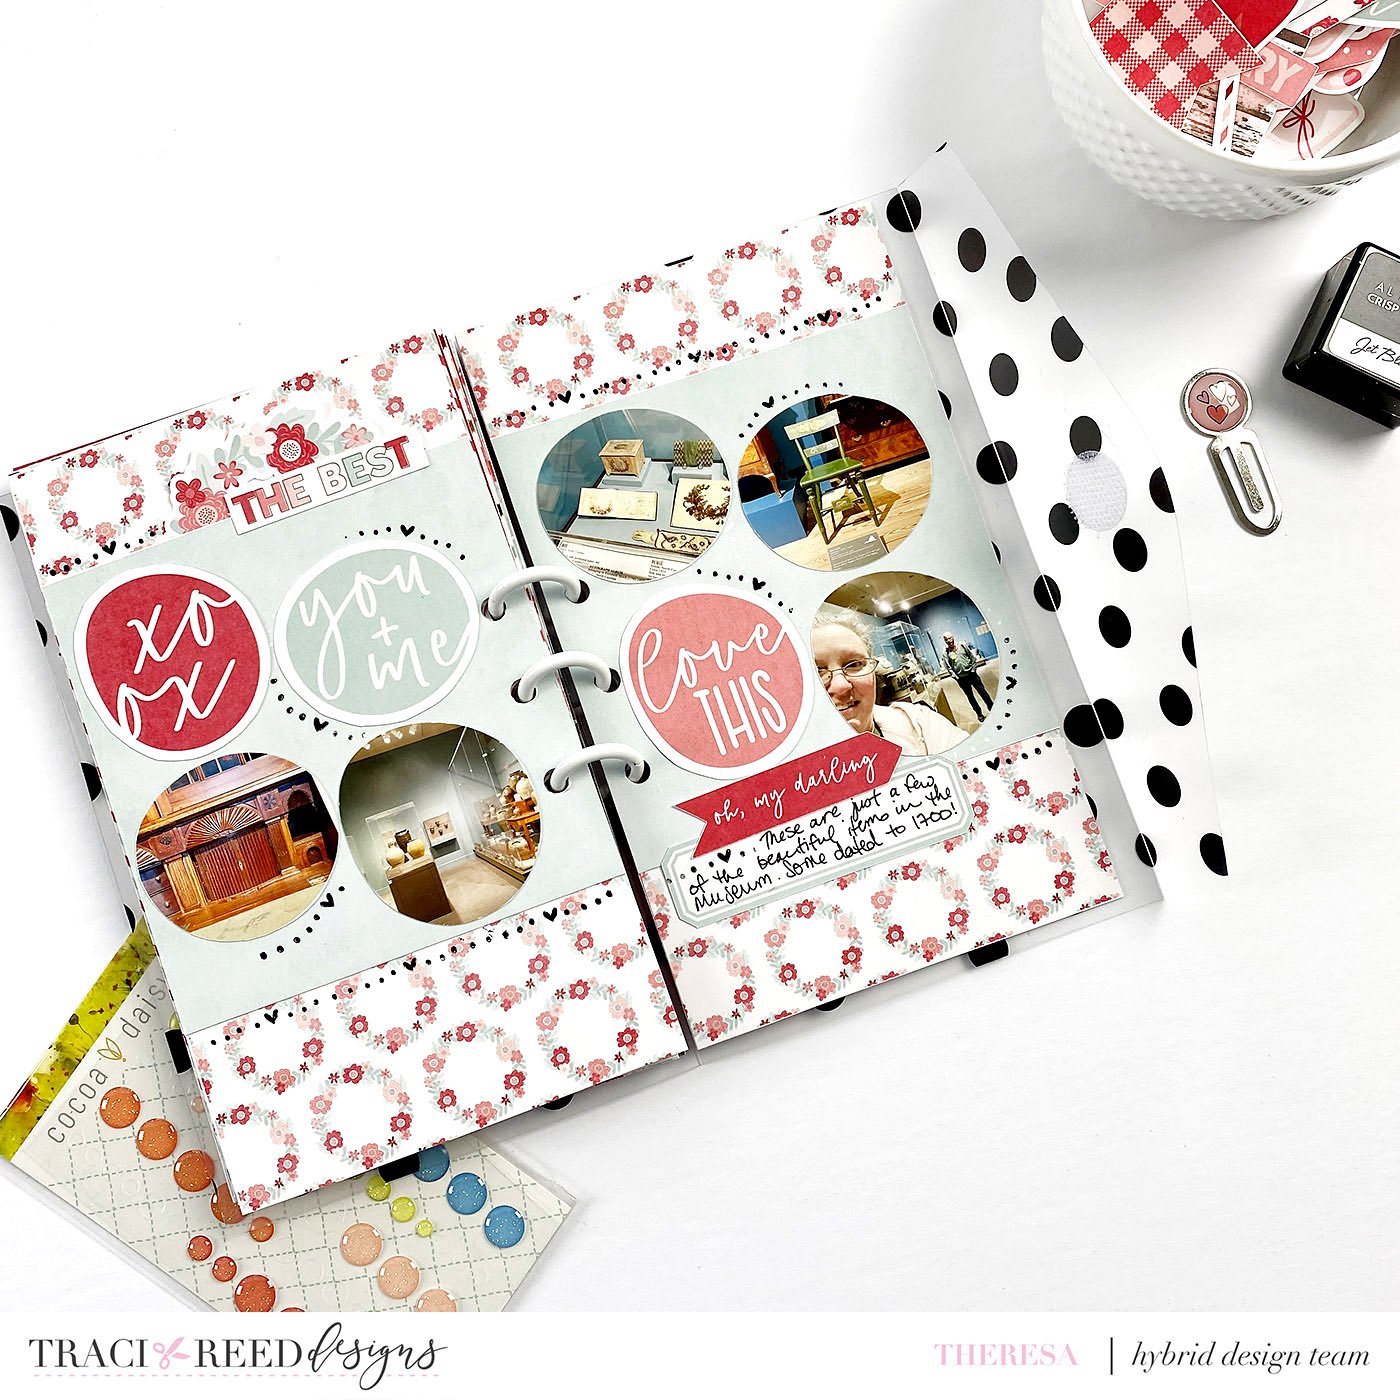
The last layout I’ve made about our visit inside the Museum, which houses many historic furnishings, artifacts, and handmade items. I’ve used the circle bits here, and you will find more details about how I did that in the tutorial video below. This gave me another opportunity to include more photos in a really fun way. Notice the fun heart and dot stamps (Elle’s Studio) that draw your eye around the page to each photo.
The final back cover I’ve kept simple with the plaid patterned paper and just the red margin for the binder rings.

This album was so fun and easy to make, and of course I’d like to share all the details about how it came to be through videos. First up is a process video I made showing how I constructed the album with the envelope and binder rings.
Second up is a Photoshop tutorial all about how I used those fun stickers to make photo shapes and also how I added my journaling to the travelers notebook signature.
The final video is a flip through, with narrative.
Thanks so much for following along with the making of this fun mini album! See you again soon!
~Theresa
TRD Products Used in this Post
