Digital to Paper: Tips for Creating Digital Collaged Backgrounds for your Paper Pages
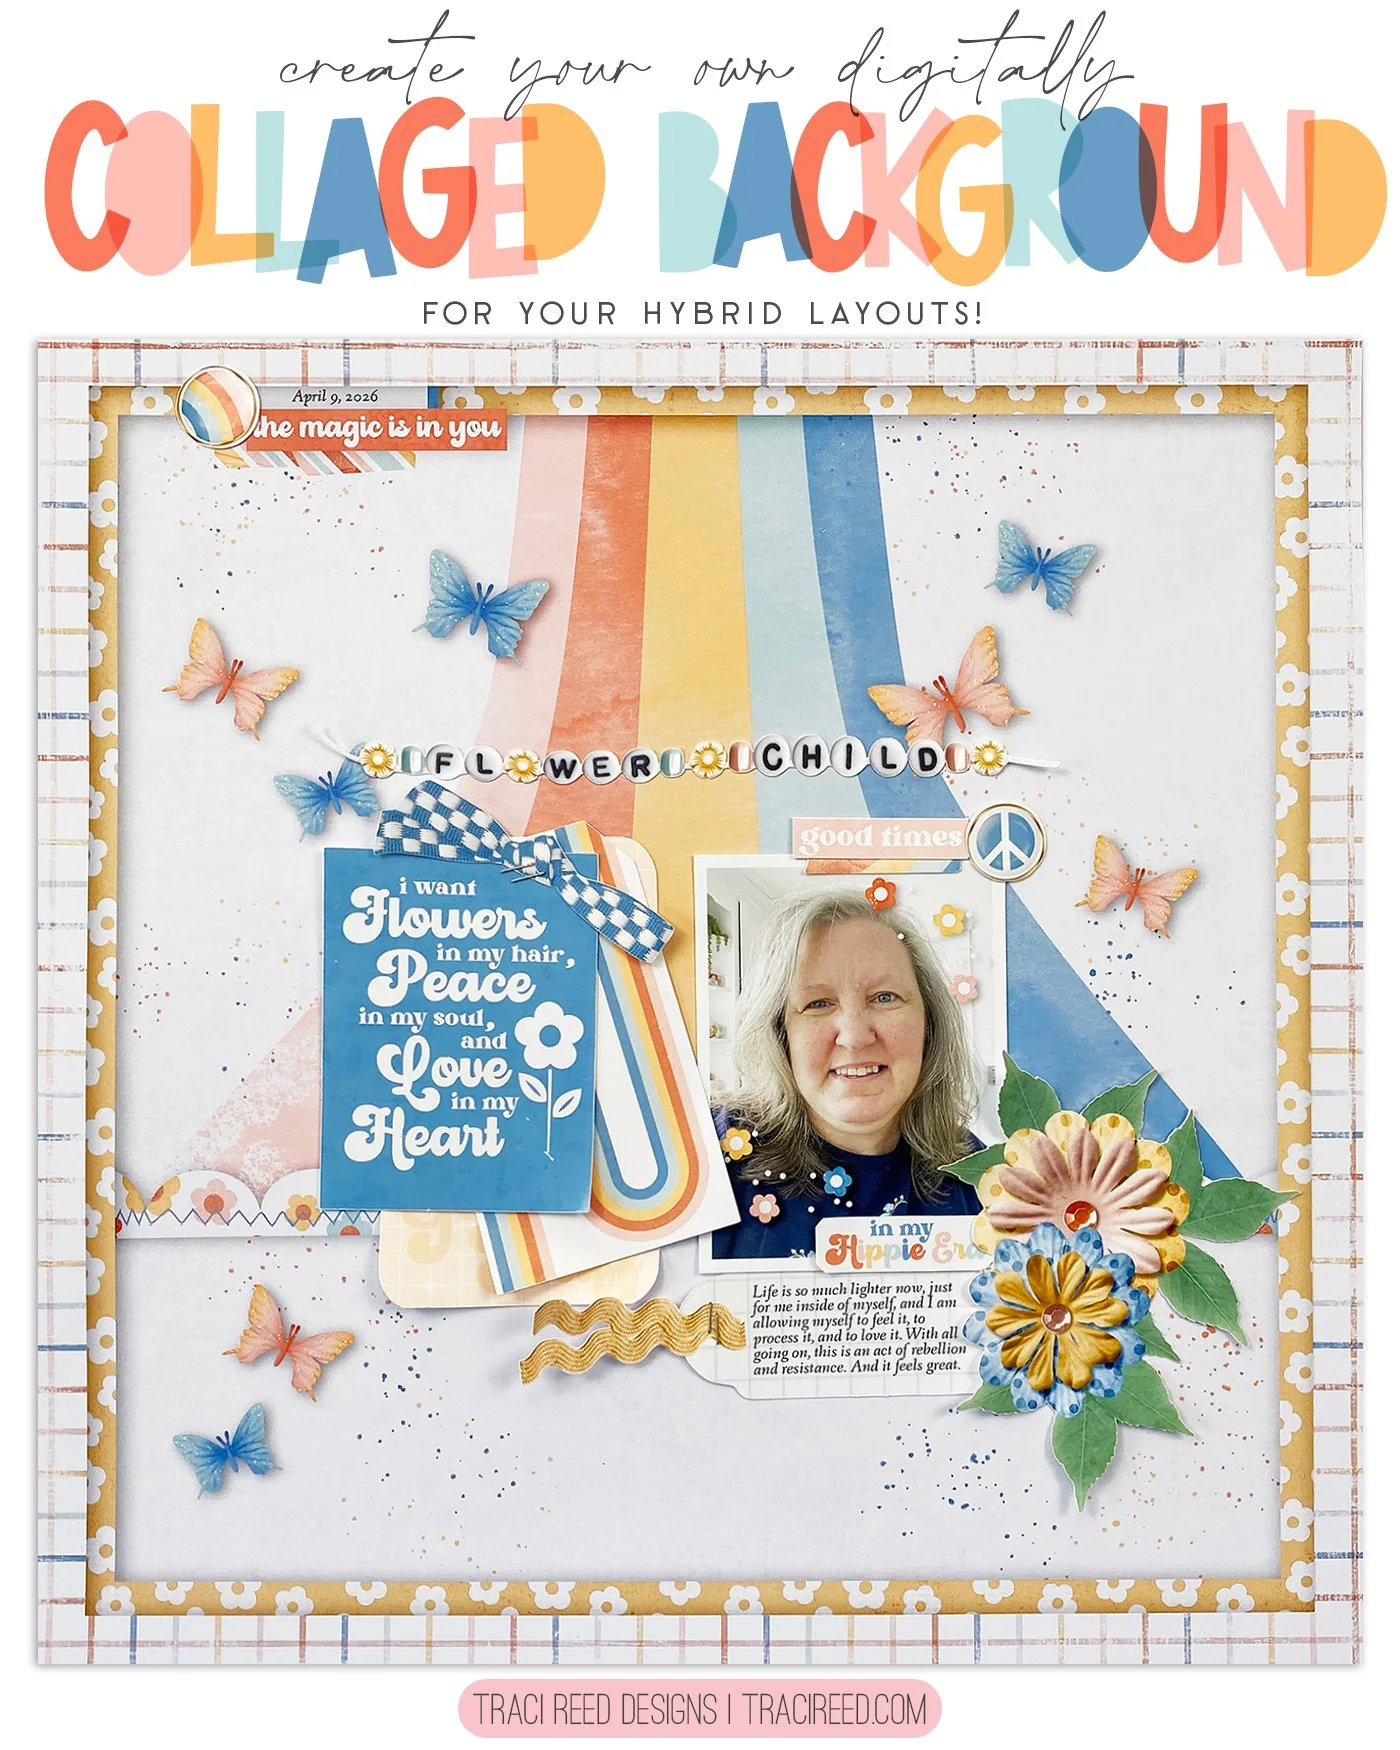
Hi friends, it’s Theresa here and today we are going to have a fun play with Layers in Photoshop! I love using different Layers to help create dimension and really draw the viewer into the stories on my layouts, and I think you will like these tips. I am working with the Traci Reed Designs Flower Child collection and am creating a 12x12 layout. You can use these techniques for any layout, including Project Life, travelers notebooks, mini albums, or anything your imagination can think of!
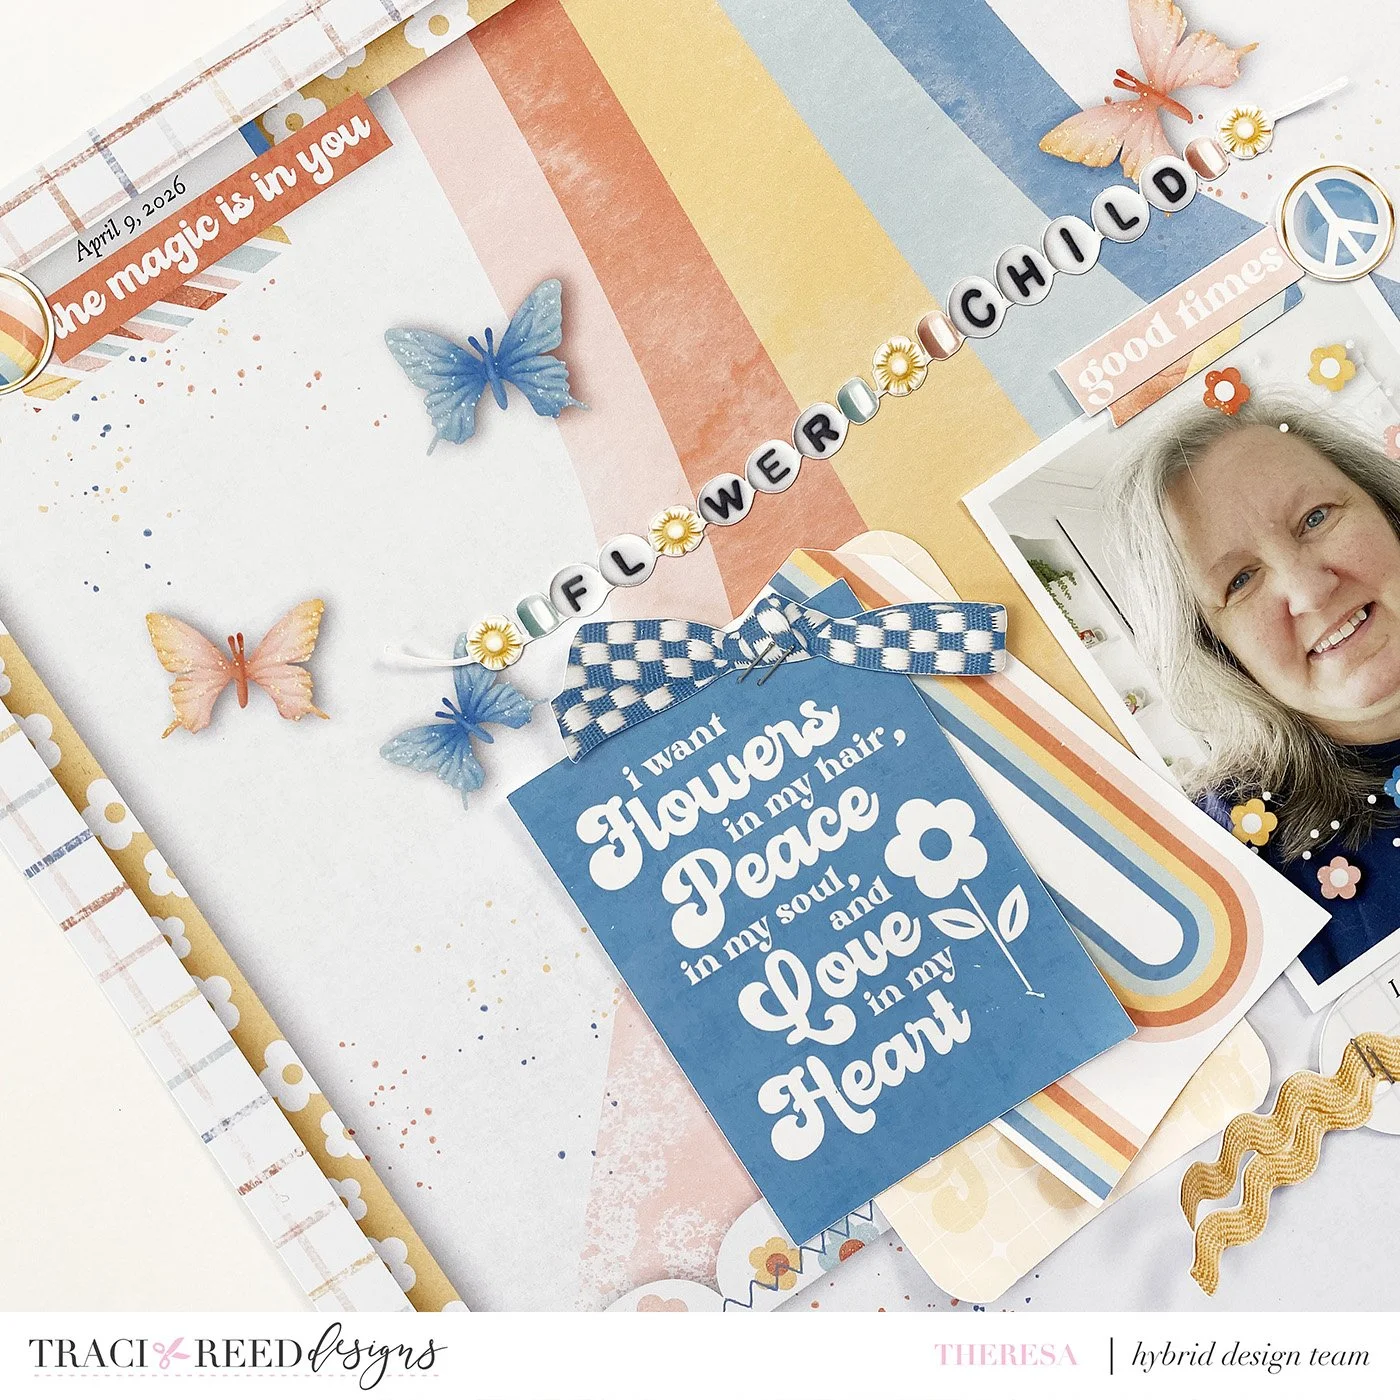
One of my techniques is to add my own splatters around the page. First, check your designer collections to see if they have ink splatters in their digital mixed media elements. If they’re not the right color, simply recolor them by adding a new Layer and using the Fill Bucket to create a colored Layer. Then create a clipping mask and merge Layers. But sometimes you want to add your own splatters, and in that case, Kyle’s Spatter Brushes are great. These are available in Photoshop CC via the subscription, and are easy to adapt to the look you want to achieve. I’ve used the Pressure Control ones, which add more splatters the longer you hold your mouse. You can also adjust the size of your splatters.
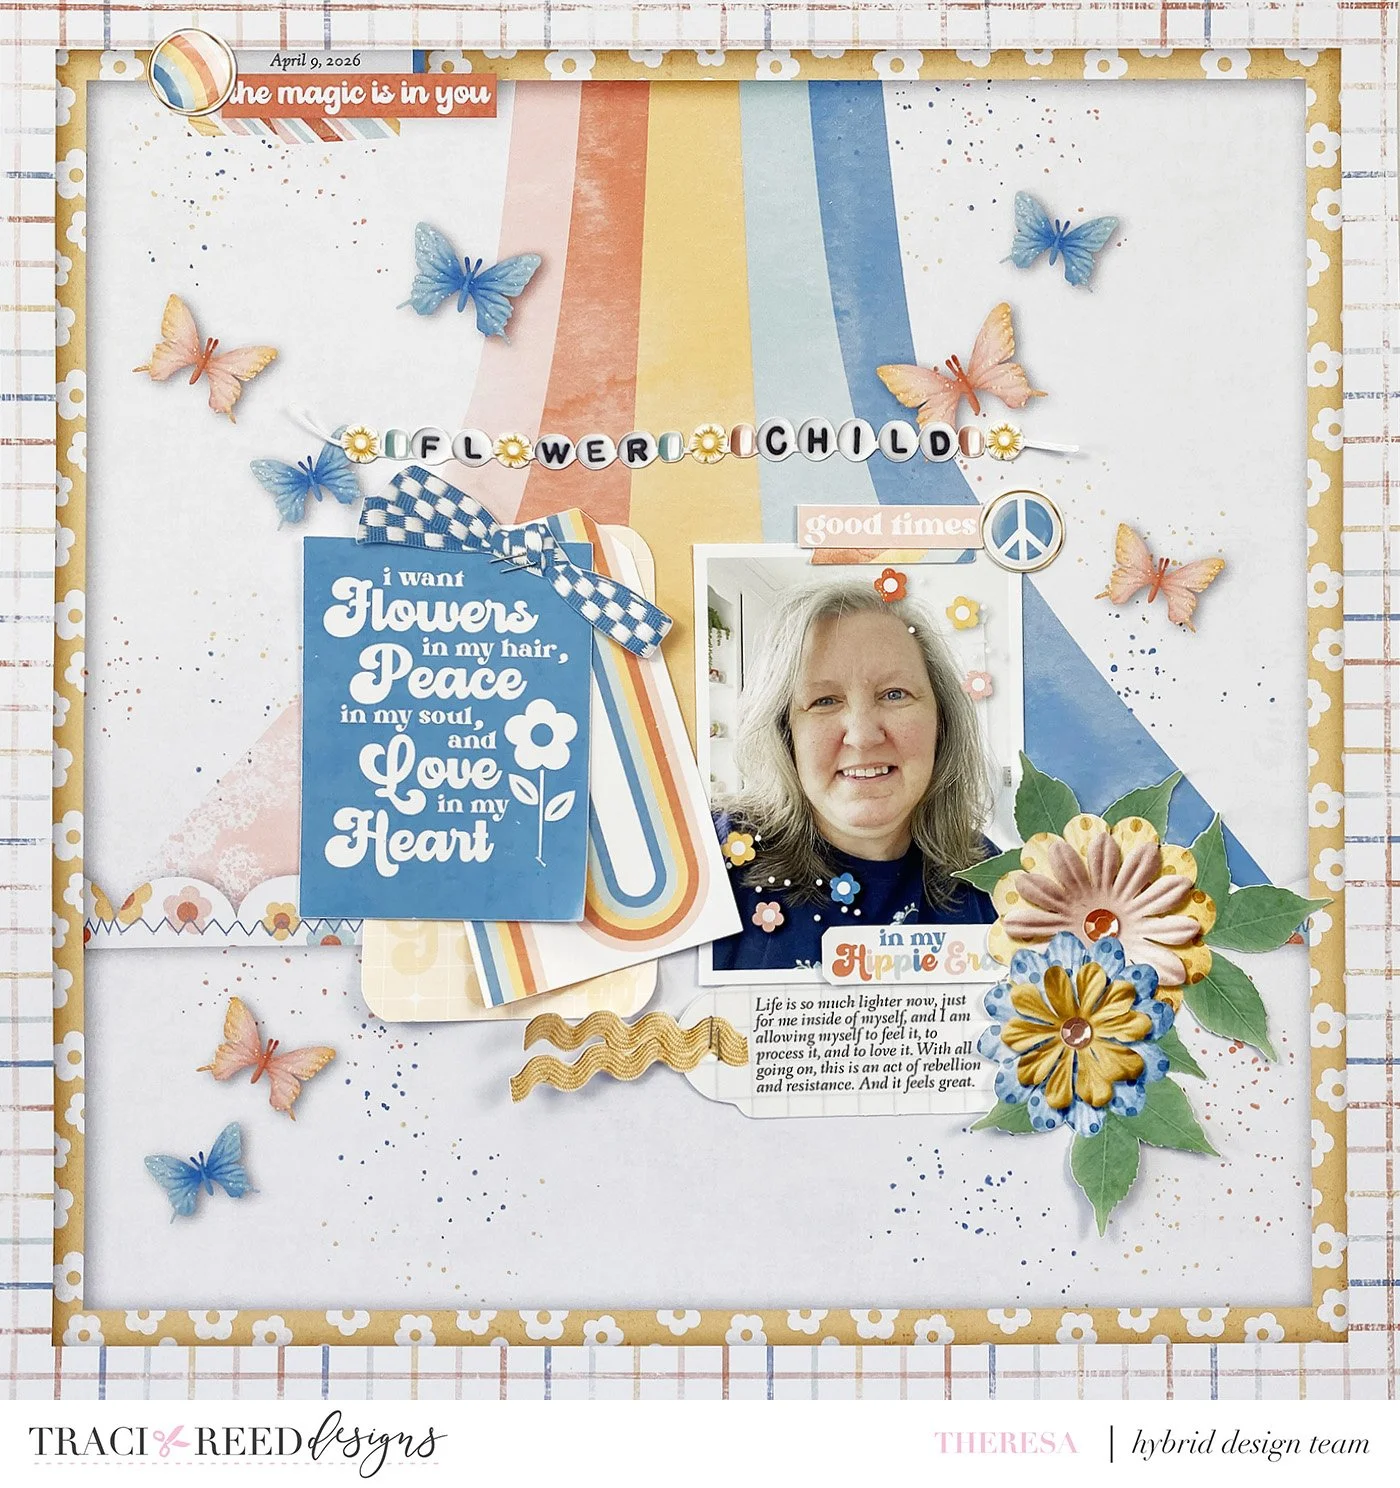
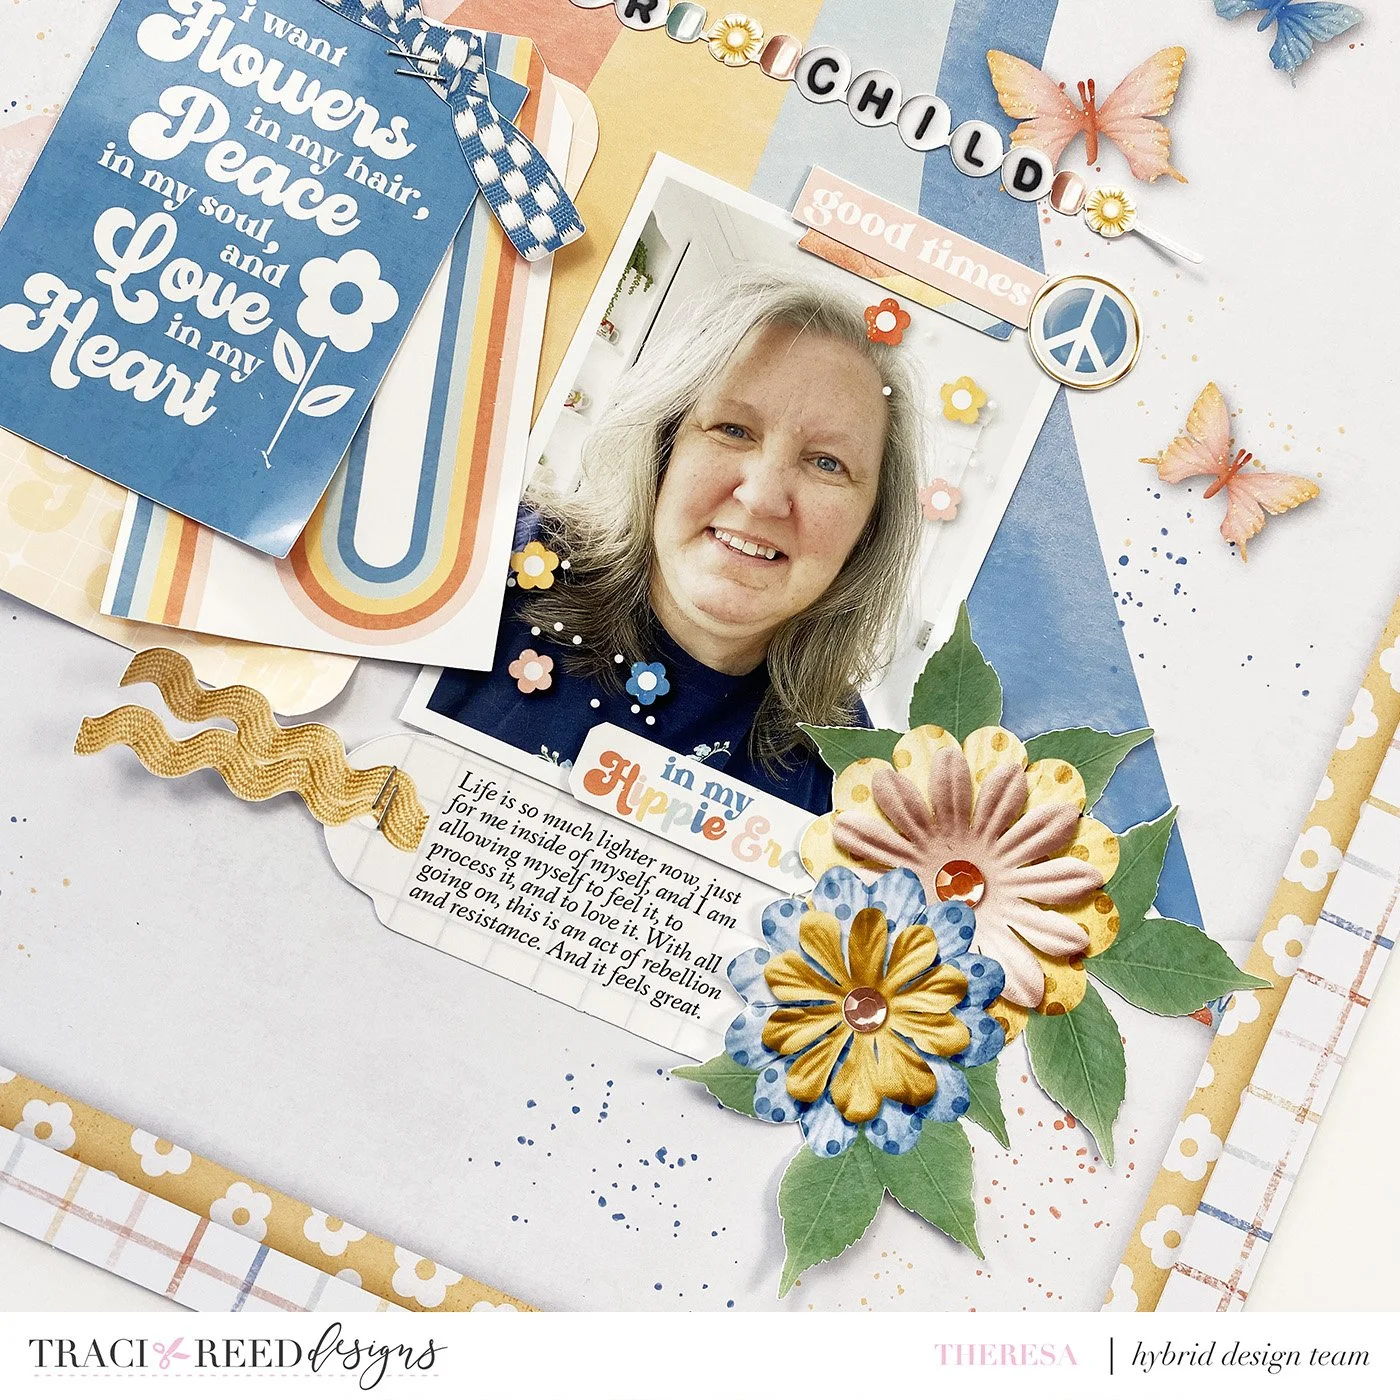
Another technique is to adding Drop Shadows. Now, Drop Shadows are an entire rabbit trail all on their own and I encourage you to play around! They are located in the Layers menu box at the bottom when you click on the FX button. I leave the Blend Mode on Linear Burn, and then adjust the Opacity, Angle, Distance, and Size. Also, I encourage you to follow our brilliant digital scrapbookers to see how they add Drop Shadows to their elements. They really do add a great punch to your dimension! On my Layout I have added Drop Shadows to the scallop border, the butterflies, and the label and washi tape at the top of the page.
I’ve also added Drop Shadows to the patterned paper frames, which are also really easy to create in Layers in Photoshop. First open your patterned paper and release the Locked Background Layer by double clicking on the Layer. Add a new Layer and reorder it to the bottom. Using your Rectangular Marquee, select a rectangle directly onto your Patterned Paper Layer. Then Right Click and Select Layer Via Cut. Photoshop will cut out the center rectangle, which you can then delete and you are left with your gorgeous patterned paper frame! I’ve done this with two patterned papers for a lovely double frame.
One last little touch was to add those darling flowers and white pearls to my photo. Don’t forget to add mixed media elements to your photos too!
Thank you so much for joining me today! I hope you are inspired to dive into your Layers and create an awesome dimensional layout today!
The full tutorial and process video for this layout can be seen here:
See you again soon!
Theresa