Finish That Album: Set Yourself Up For Success with Melinda!
Is there anyone else out there just like me that starts some sort of super fun scrappy project, gets part way through and then nothing?? If yes, then this post is for you!! If not then I do hope you enjoy the scrappy goodness coming at you!

So, if you’ve been following along for a while you may remember when the “Weekender” collection launched. Such a fun collection that I simply could not wait to use to scrap, at the time, a recent day trip I’d taken with my family.
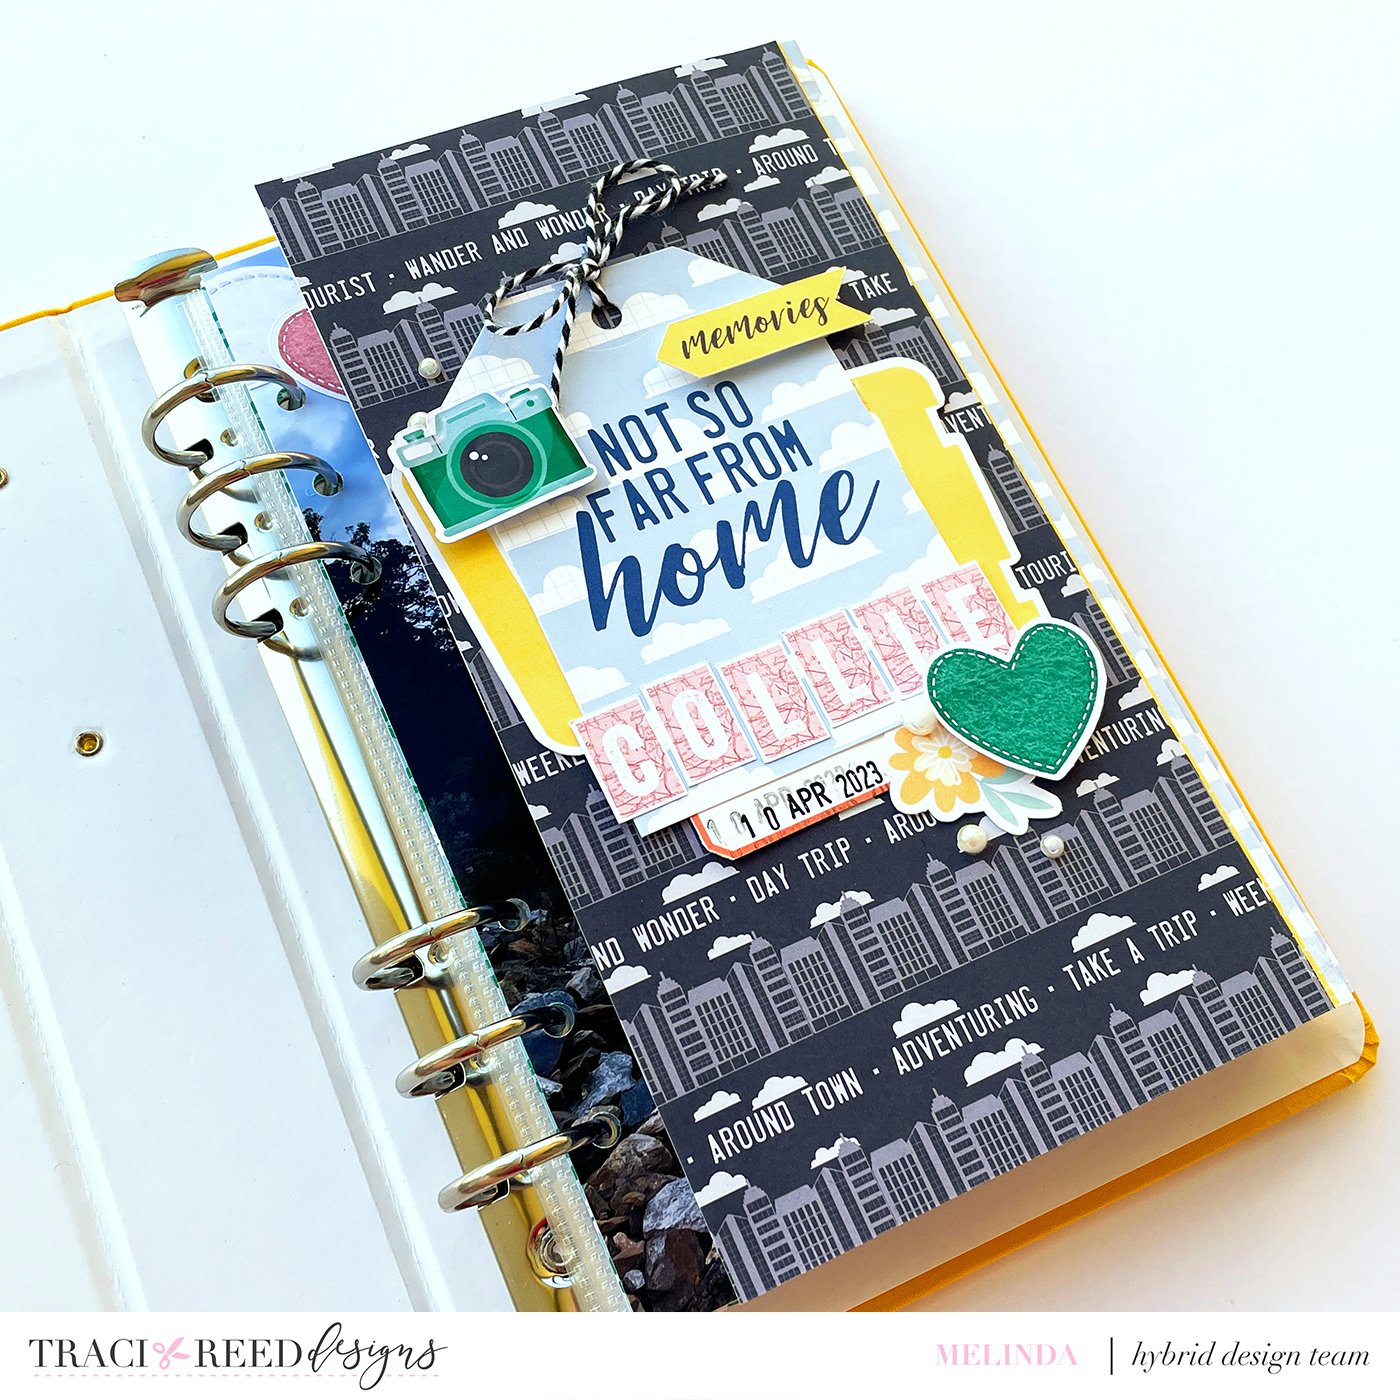

I created a few pages in our 2023 family Traveler’s Notebook album and then life happened.
Well, more to the point, it just kept going and then the pages I had mapped out fell to the wayside and have waited patiently for me to pick them up again ever since!
Wait no more! And thanks to the small amount of planning I had done THEN I will be able to get all of these pages together and into our album NOW!

So, if you gave me a resounding YES right at the beginning these tips are specifically for YOU!!
Step One: Choose the stories you want to tell
Step Two: Choose the photos to go with said stories and print these or get them printed at the sizes you want
Step Three: Using some scrap paper/a notebook/a sketchbook, whatever you have on hand that will work for YOU, map out said stories and photos
For this step I actually grabbed some normal printer paper (it was scraps I had to bin).
Knowing which photos I was working with and at what size I was able to use my scrap paper to dummy up a sketch to the correct size. Then I simply grabbed a pen and scribbled the relevant information that I would need to work on that page – so photo and story and anything that I knew I wanted to use or would want to make sure I remembered when I got to that page

Step Four: Now the FUN part!! Here is where you choose your papers, cards, embellishments and get creating!
If I hadn’t made my dummy sketch I would have had NO IDEA what I had intended to scrap on each page or what story I wanted to tell with each photo. But because I did have all of that (and all of the things in a tray, safe to one side) I was able to pick up my tray and jump straight back in with only a couple of minutes flicking through the photos and the dummy pages to refresh me!

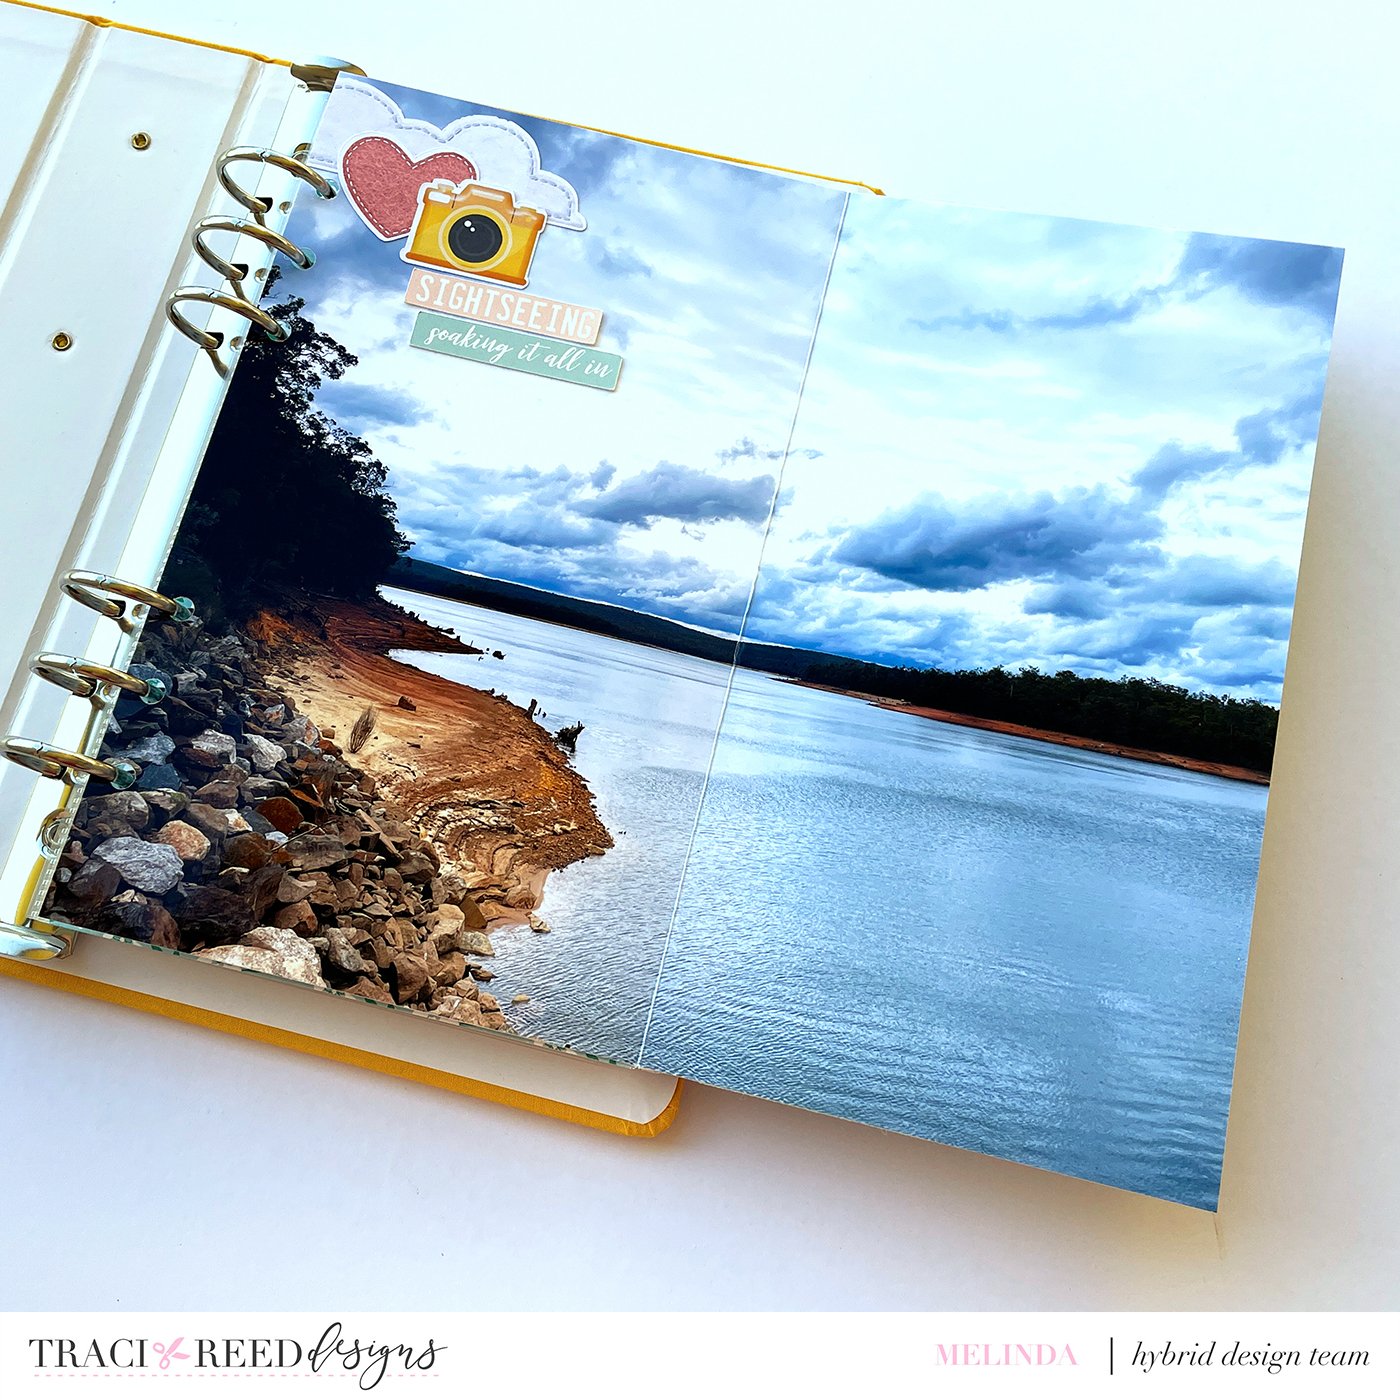
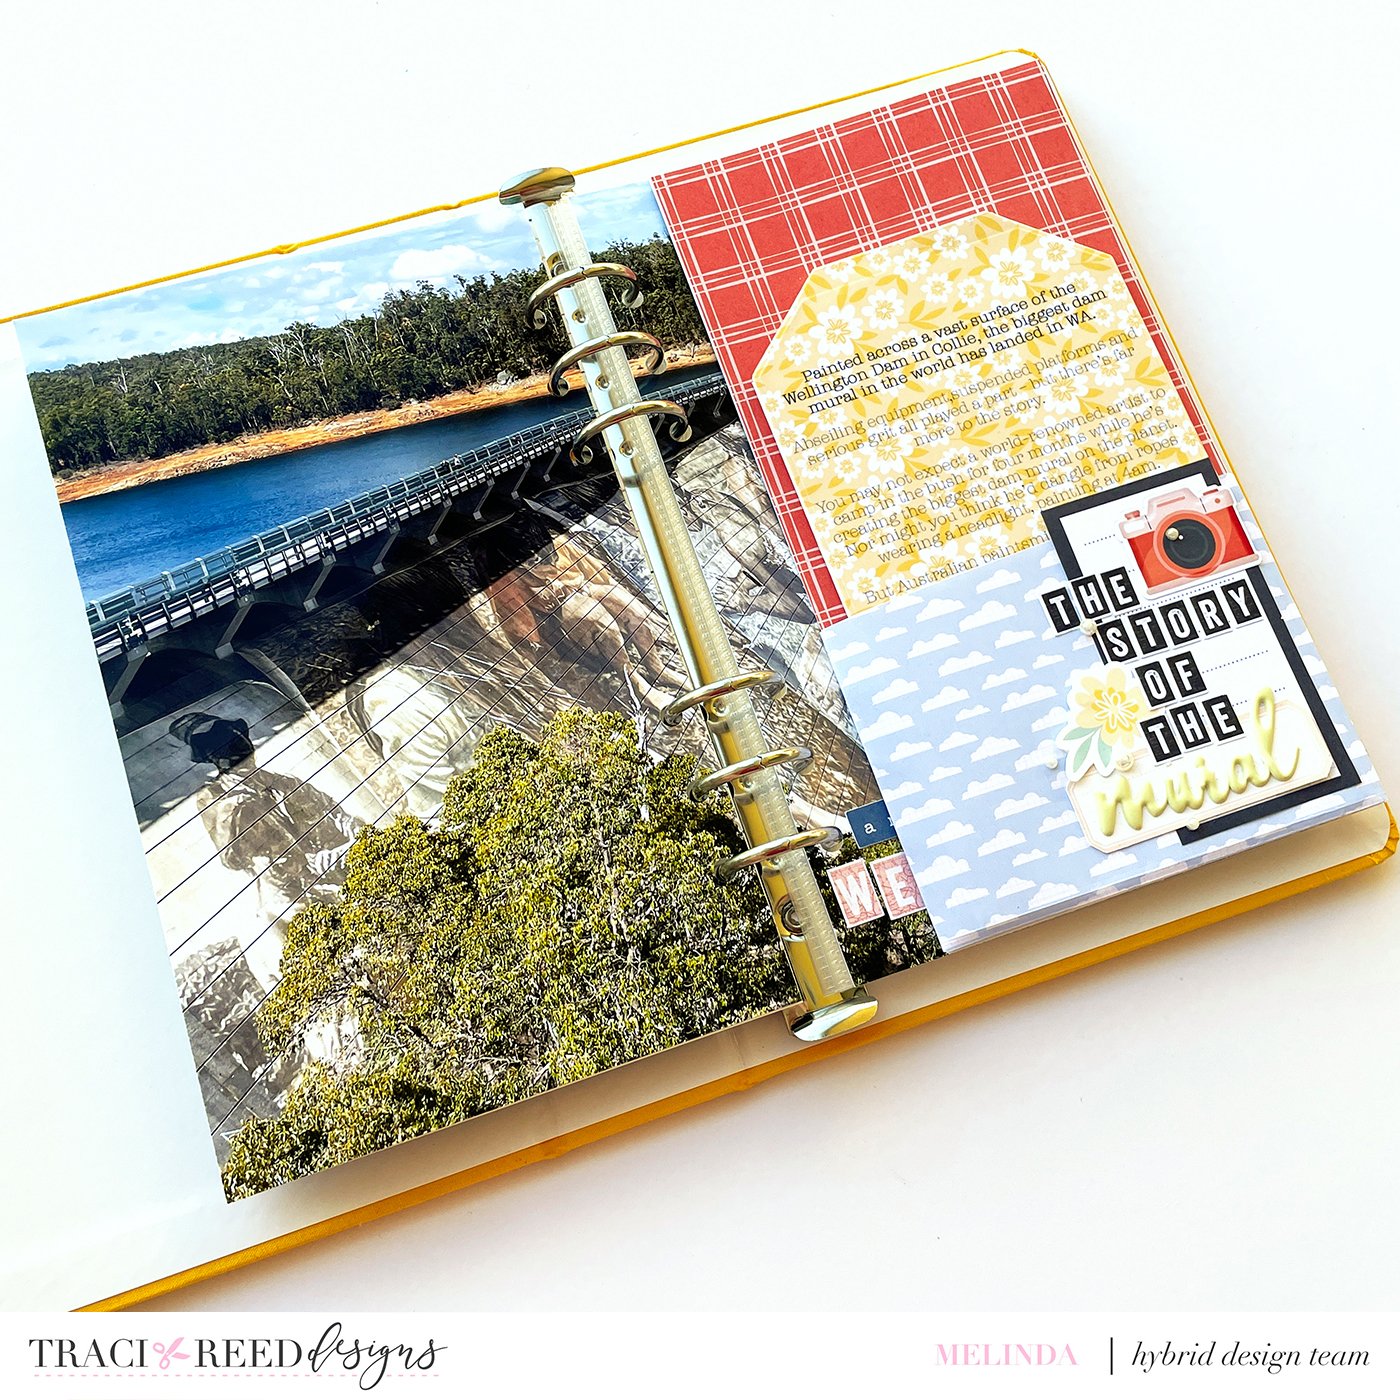
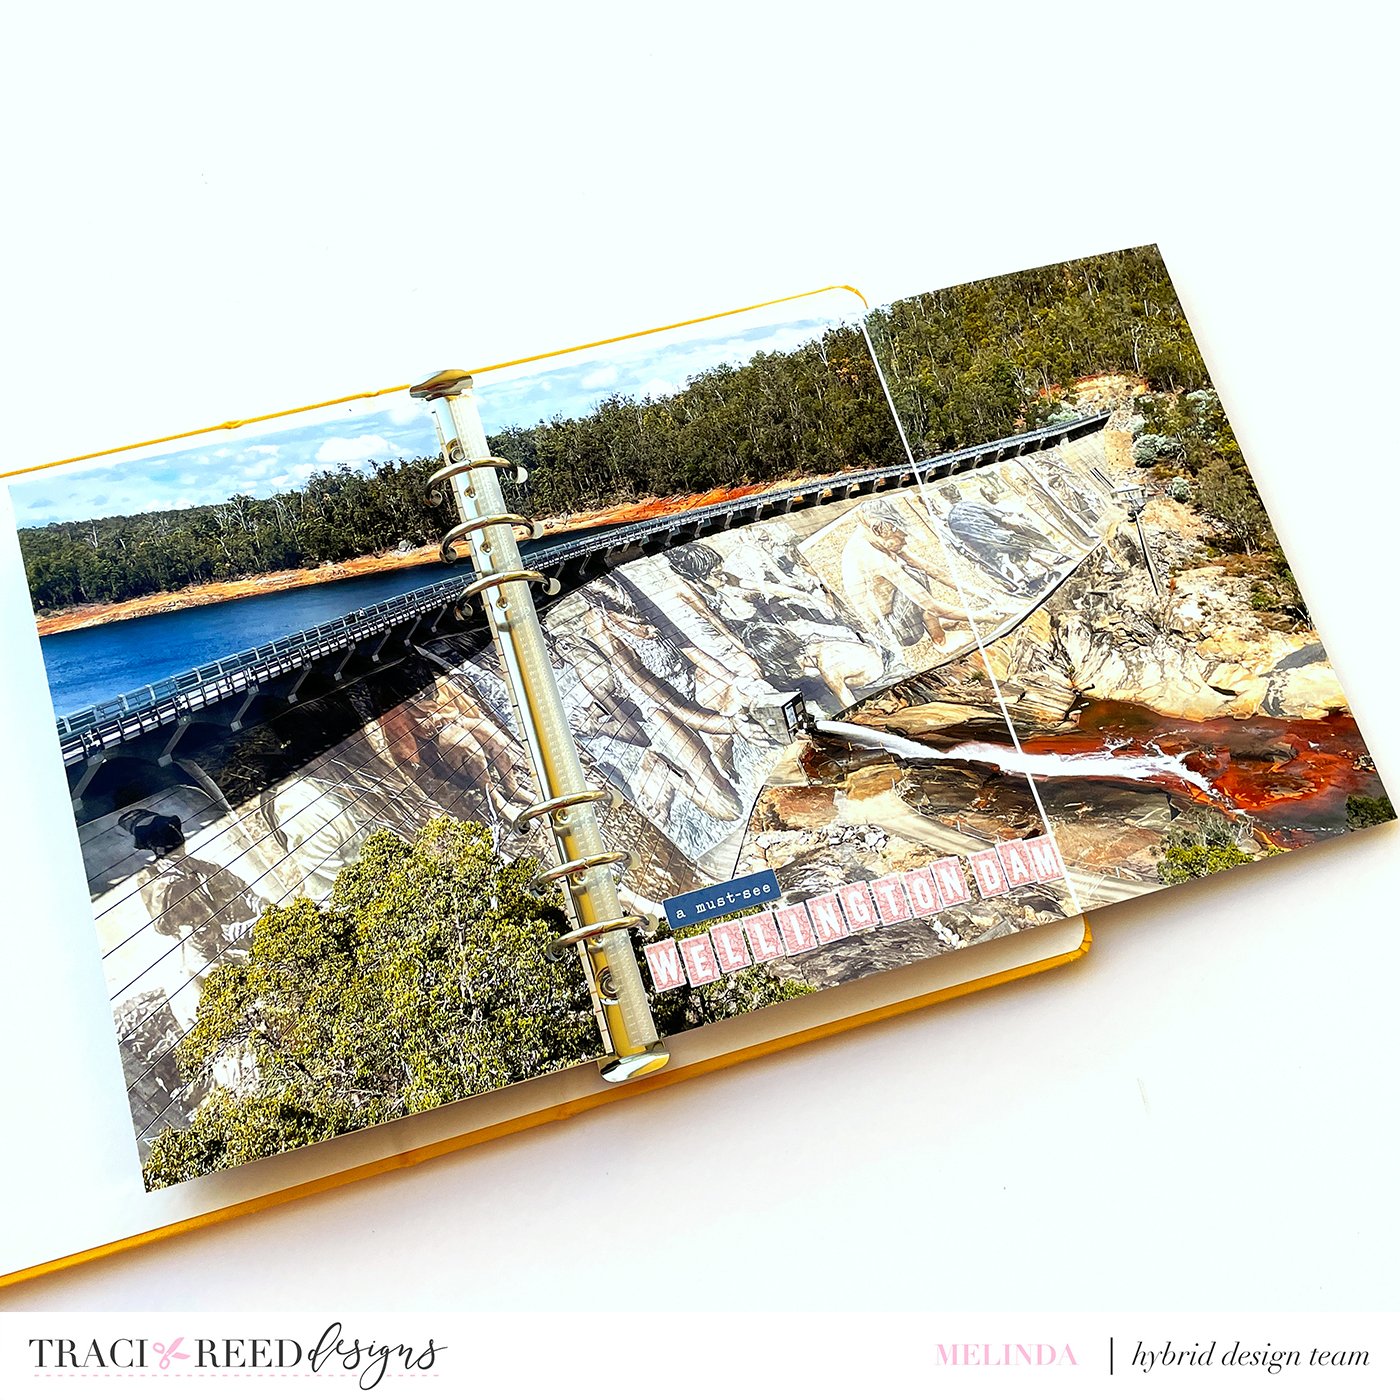
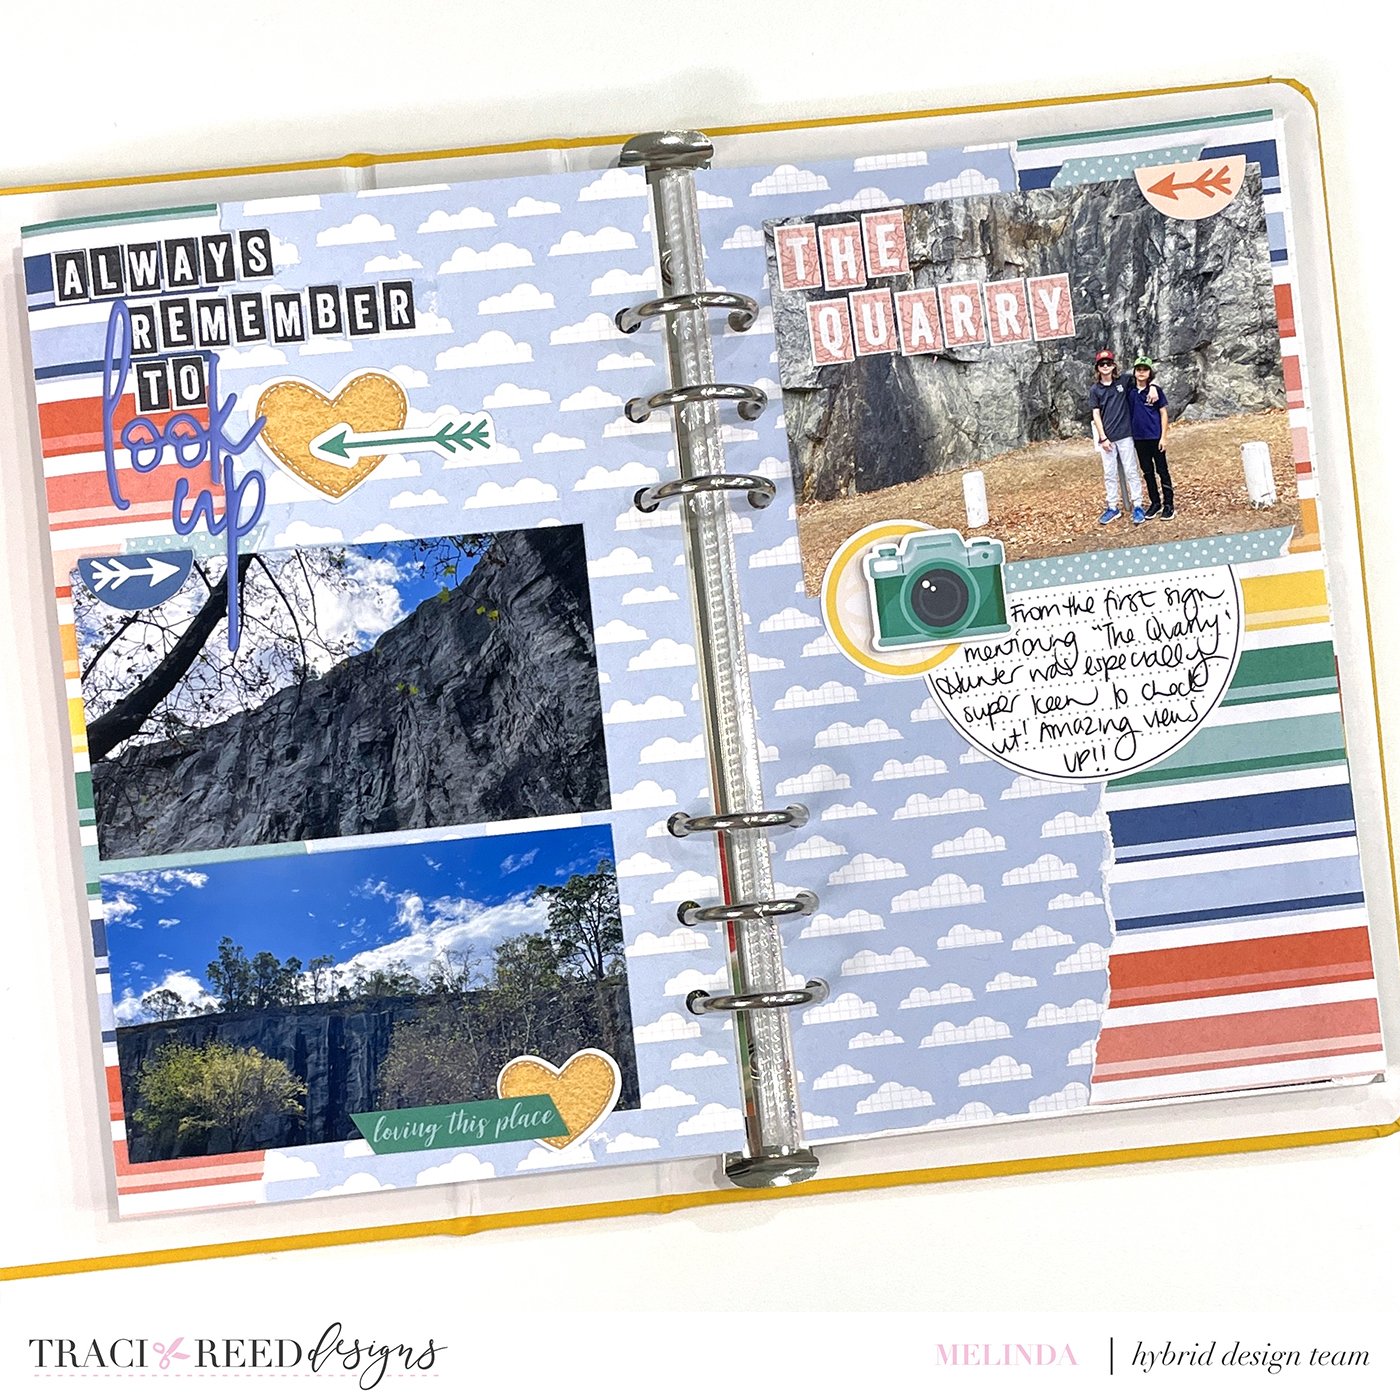
So, here is my newest double page spread, which also includes a pocket page with 2 3x4 photos in between!


Apart from the couple of hiccups I had because I didn’t double check sizing (check out my process video below - you can see exactly what happened lol!) my page came together relatively quickly and easily and now I have another story in this little collection!
I really only have 2 more stories to create pages for and knowing that all of my supplies are together and my pages mapped out it will be easy for me jump straight back in again and finish these off!
And of course, I will share updates when I do!
In the mean time, I hope that if you are just like me these tips have helped and if you are a super scrapper that doesn’t get distracted I’d love to know some of your tips!!
Until next time friends, happy scrapping!
Melinda
Process Video
TRD Products Used in This Post:
