Simple Binding, Beautiful Memory Keeping: My Bountiful Mini Album by Ana
Apart from scrapbooking, I love making mini albums of different shapes and sizes, but I always make one that’s 5 x 6.5 inches for every collection I get to work with so that they all look nice when stored on the shelves. So here it is — my very first mini album with TRD using the Bountiful collection.

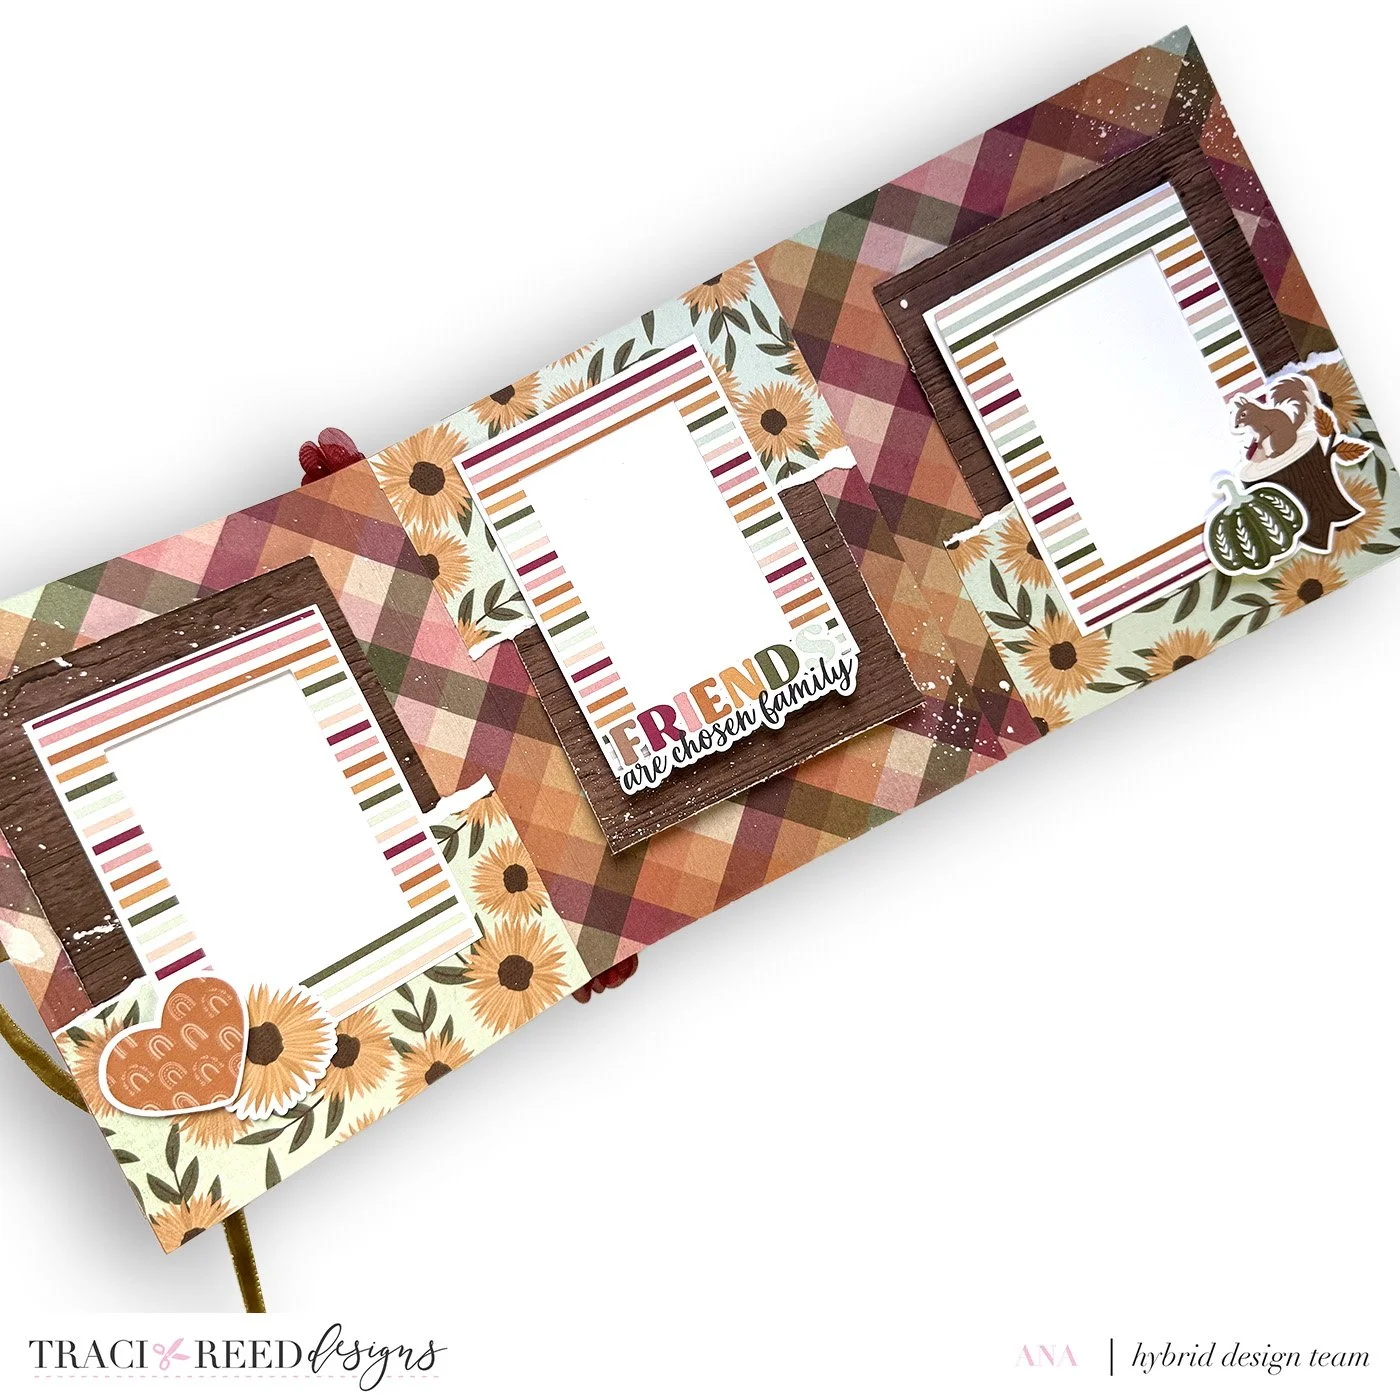
This album can store at least 12 3x4 photos and has lots of inserts for journaling and “capturing every moment,” especially in this “season of counting blessings.” On each page and some of the inserts, I splattered white acrylic paint for added texture, and I also added flowers and trims on the spine to make the cover extra special.

I love this type of album because it’s the easiest when it comes to binding! Not so many scoring needed and very easy to glue together, plus it’s perfect for printables especially those printed in regular A4 sized papers!
For this album, you will need five different patterned papers. Avoid choosing very busy designs, as the pages can look overwhelming once you add your frames and embellishments.
For the pages, trim your papers to 10.5 x 6.5 inches and score at 5 and 5.5 inches along the 10.5-inch side. Repeat this for the three patterned papers you selected.
For the cover, cut two pieces of cardboard measuring 5 x 6.5 inches and two pieces of your chosen patterned paper in the same size. Glue the pattern paper to the cardboard pieces.


Cut white cardstock to 3 1/8 x 4 1/8 inches and layer each one with 3 x 4-inch patterned paper frames, leaving a 1/8-inch border. You can make these manually with a cutter, a We R Memory Keepers Frame Punch Board, or your cutting machine. One A4 sheet can make six pieces, and I usually cut two sheets which yields twelve frames for me to use. I just keep any extras for future projects. Make sure to glue only the bottom edge of each frame to the white cardstock. This allows you to easily insert your photos between the frame and matting.

Design each page however you like, starting by placing the frames across each spread. Embellish with sentiments and die cuts, using foam tape to add dimension. There is a half-inch gap between each page, so feel free to add layered die cuts, flowers, pockets, journaling cards, and as many embellishments as you like.


For the middle pages, create an extra flap by cutting a double-sided patterned paper to 6 x 6.5 inches and scoring it at 5 and 5.5 inches along the 6-inch side. Glue this flap to the right side of the page.


Once you’ve finished designing all three papers (for a total of six pages), it’s time to assemble your album. Glue the right side of the first paper to the back of the left side of the second paper. Then glue the middle section of the second paper(the one with the flap) to the left side of the third paper.
After all pages are attached, glue a ribbon across the front and back covers to serve as a closure for your album.
Next, adhere the cardboard covers to the front and back of your album.
Finish by gluing trims or lace along the spine and decorating the front cover as desired.


