Think Outside The 12x12: Scrapbooking 12x12 Layouts with 8.5x11 (or smaller!) Printables: Lesson Eight!
No 12x12 Printer? No Problem! In our “Think Outside the 12x12” series, we’re showing you how to scrap 12x12 layouts with TRD printables, even if you don’t have a 12x12 printer!
When it comes to scrapbooking, using smaller pieces of paper can present a creative challenge, and one bar to printables I often see presented by my customers. But fear not! In this blog series, we'll explore an techniques for using non-12x12 papers on your 12x12 layouts that still have that POP that you want for your large layouts!
Lesson Eight: On The Border!
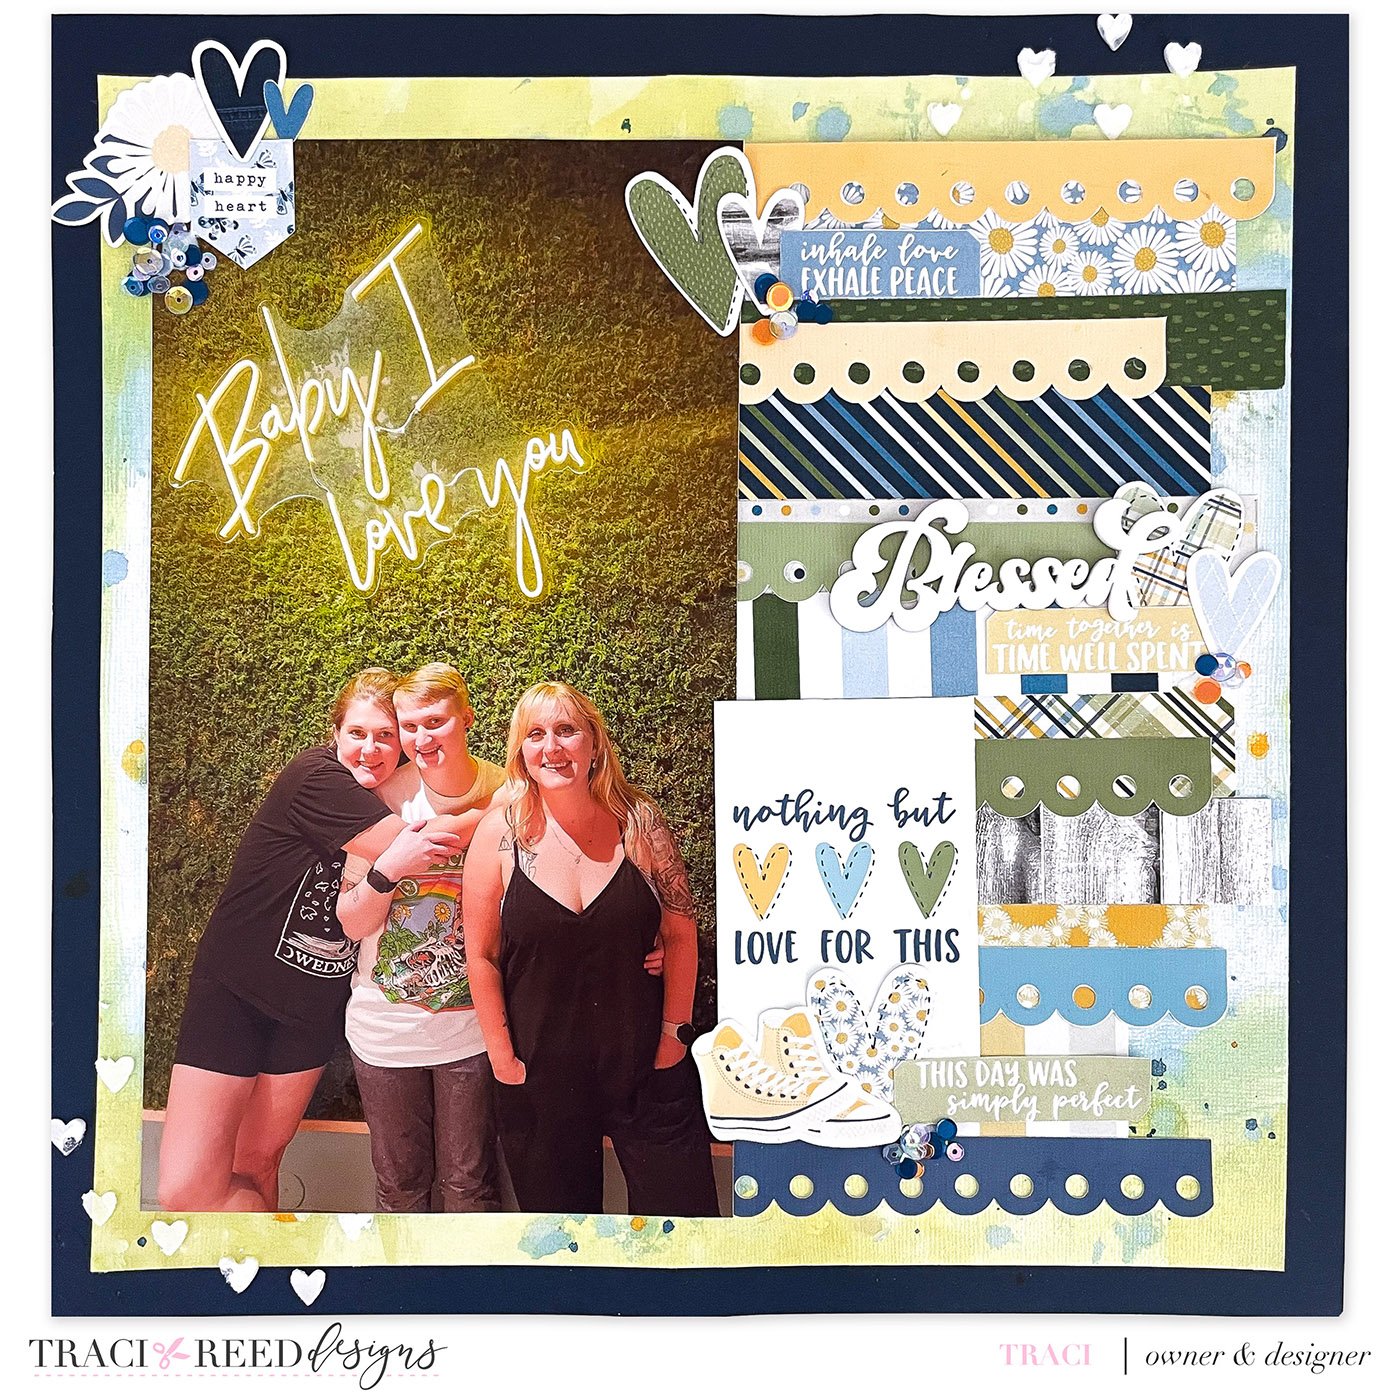
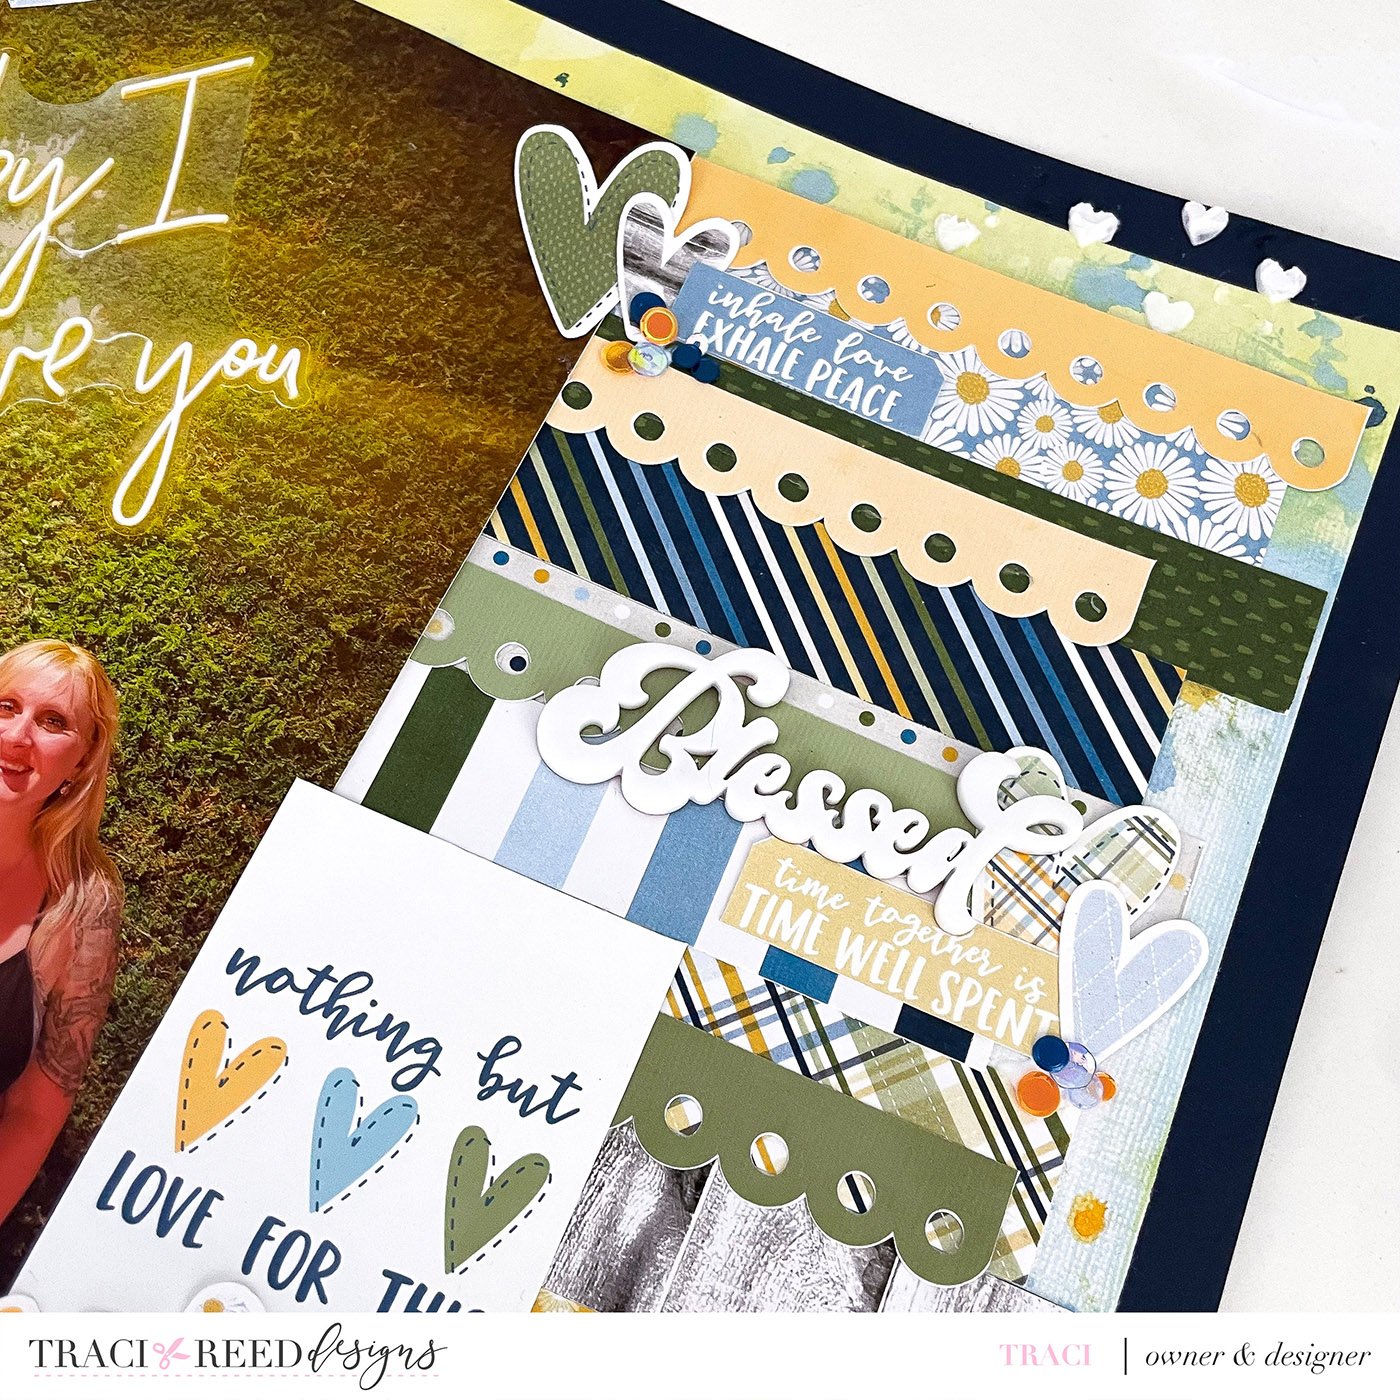
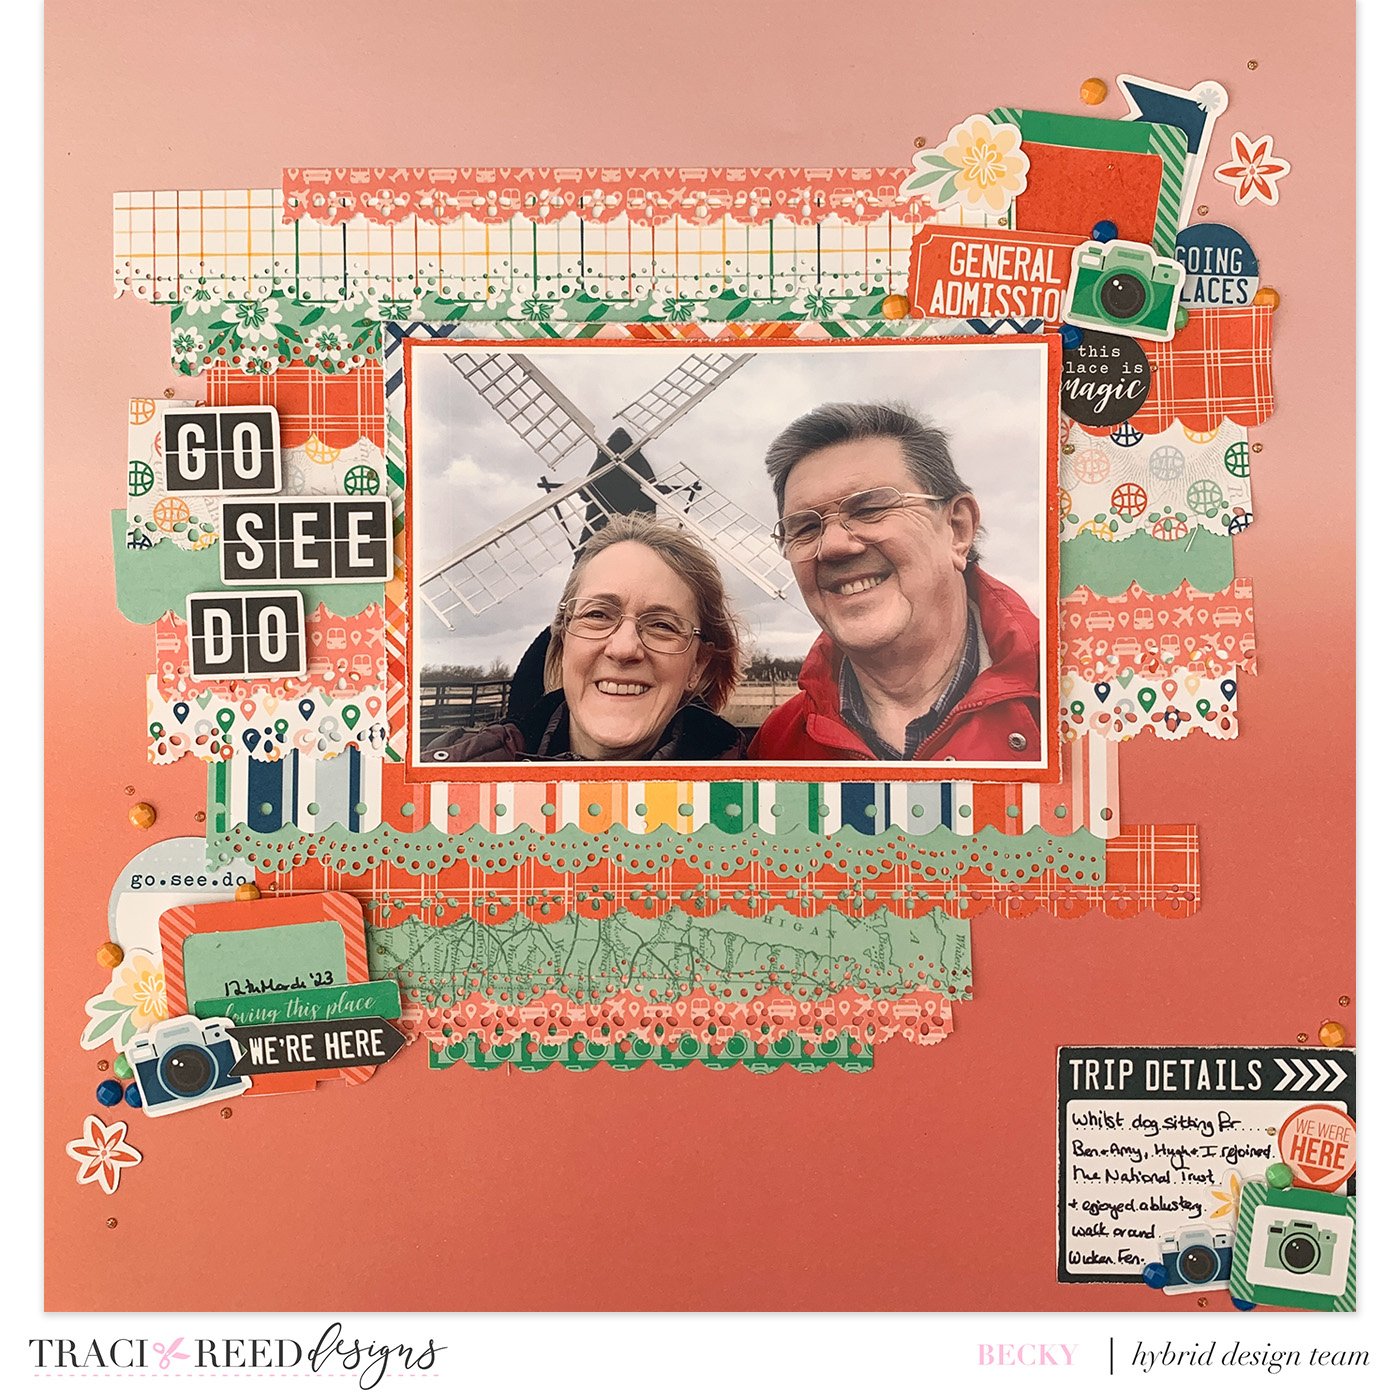
Welcome back to another exciting episode of Think Outside the 12x12 Series! In Episode 8, we're back at it again showing you how to turn traveler's notebook size papers into captivating borders for a unique 12x12 layout. Get ready to add flair to your scrapbooking by embracing various shapes, from scallops to fringe. Let's dive into the wonderful world of borders and create something truly special.
Step 1: Embrace the Beauty of the Size of Traveler's Notebook Papers
Traveler's notebook papers are a hidden treasure trove for creating captivating borders. Their smaller size allows for innovative design opportunities. Gather a collection of these papers in different patterns, colors, and textures to infuse personality into your project.
Step 2: Choosing Border Shapes
The heart of this technique lies in exploring different border shapes. Say goodbye to straight-edged strips and welcome scallops, fringes, waves, and more! The goal is to add visual interest and movement to your layout by playing with these unconventional shapes.
Step 3: Measuring and Cutting
Measure and cut the traveler's notebook papers to the desired width of your layout. Keep in mind that these unique shapes will be the foundation of your design, so allow yourself to experiment and have fun with sizes.

Step 4: Assembling the Borders
Arrange your cut borders under your photos or embellishments. Feel free to mix and match different shapes and patterns to create a dynamic and eye-catching composition. This is where your creativity truly shines!
Step 5: Layering and Depth
To enhance the visual appeal, layer some of the borders on top of each other. This adds depth and dimension to your layout, making it even more engaging. Play with the placement until you achieve the perfect balance.
Step 6: Incorporating Photos and Embellishments
Now that your borders are in place, it's time to incorporate your photos and embellishments. Position your photos within the borders or overlap them for a playful effect. Embellishments can be nestled between the borders to create an integrated and harmonious look.
Step 7: Titles and Journaling
Don't forget to include your title and journaling! Choose fonts and stickers that complement the theme and vibe of your layout. These elements provide context and help tell your story.

Embrace the versatility of traveler's notebook sized papers to breathe new life into your 12x12 layouts, even with a standard printer. Creating patterned borders or fringe accents allows you to infuse your pages with unique textures, patterns, and dimensions. The beauty of scrapbooking lies in pushing the boundaries of creativity, and this innovative approach is a testament to that. So, the next time you embark on a scrapbooking project, consider these traveler's notebook papers as your secret weapon to making your layouts truly extraordinary. Happy crafting!
Process Video
Team Examples With Embellishment Bases:
Blog Posts:
TRD Products Used In This Post

Other Products Used In This Post: