Create An Easy But Gorgeous Fall Paper Bunting with Caroline!

Hi everyone,
I’m really excited to bring you a little different today as my guest post here on Traci’s blog. I am IN LOVE with the new Equinox collection - the colours are just gorgeous, and the icons and sentiments are perfect for this time of year.
In fact, I loved it so much that I wanted to KEEP looking at it – which is what gave me my idea for today’s walkthrough tutorial ... Equinox home décor bunting for my craft room!!
I’ve put together some simple steps in the walkthrough below but you can definitely make this look very different to mine depending on which papers you choose to combine, what shape you decide to make your bunting, what die cuts you use etc. The possibilities are endless ... but I can guarantee it will be gorgeous!!
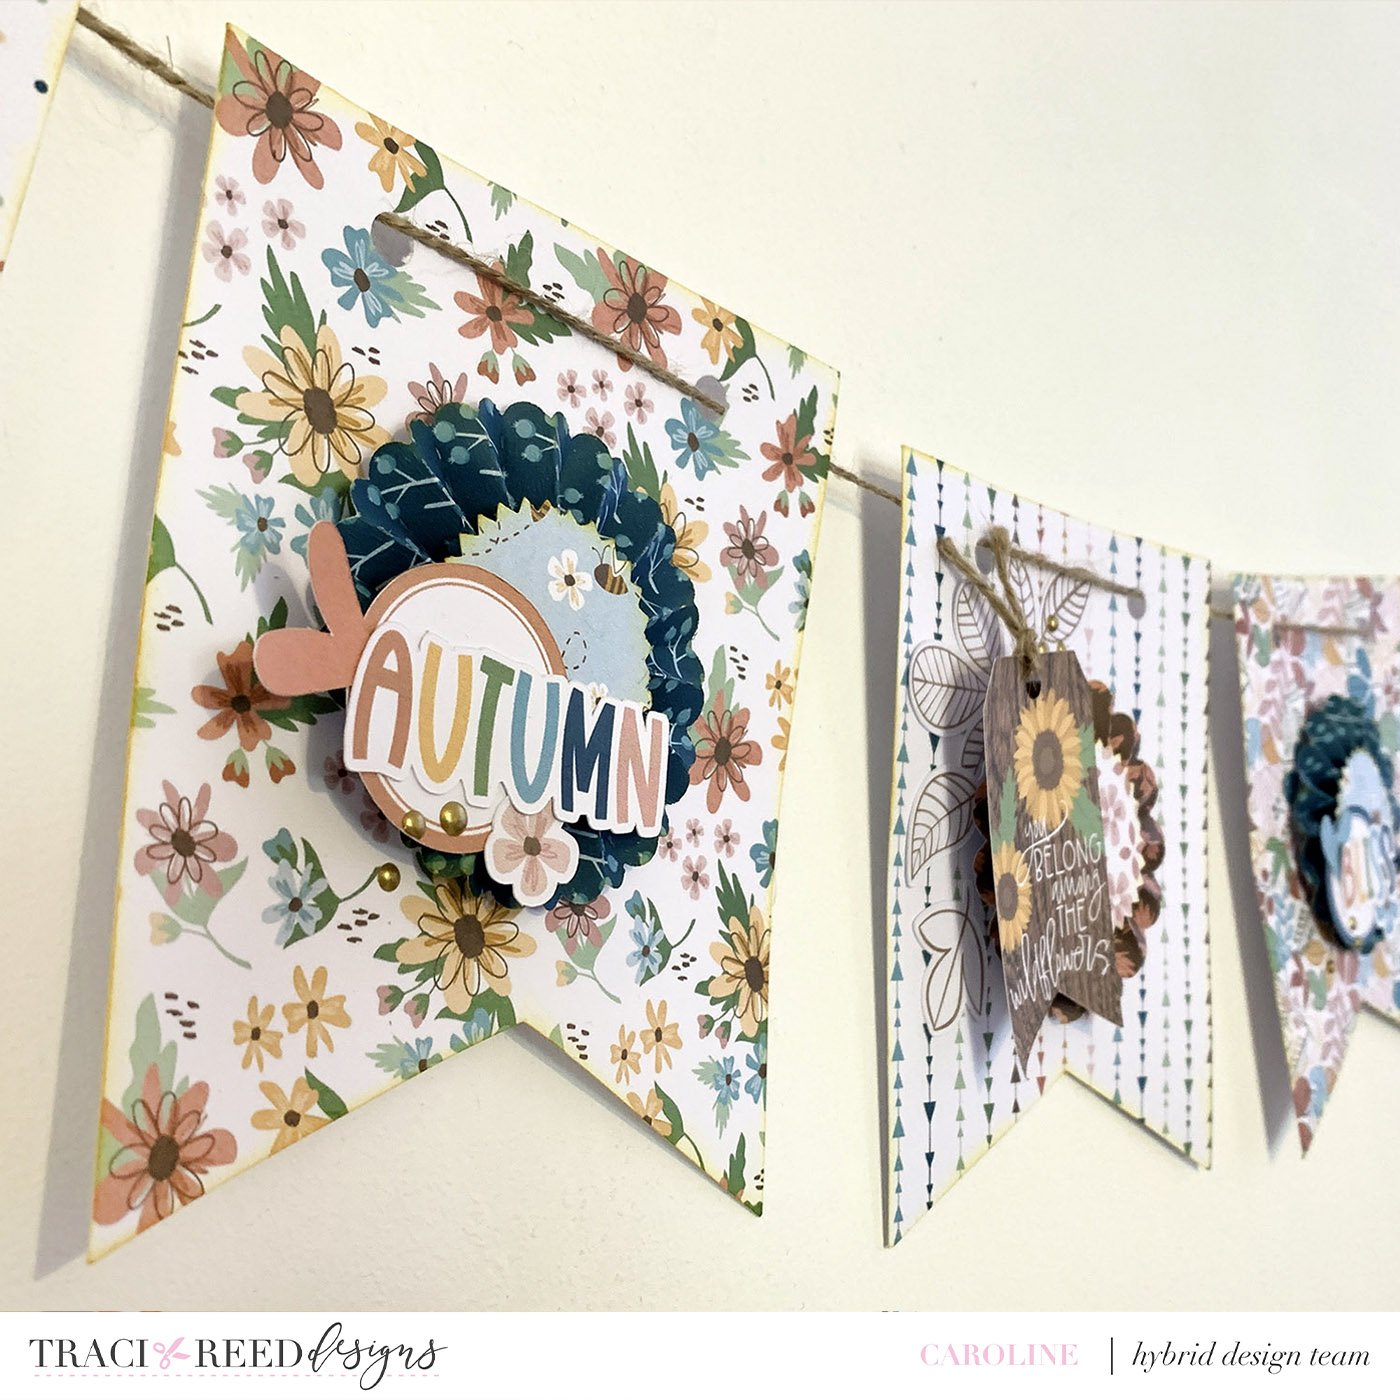
Step One – Assemble the papers!
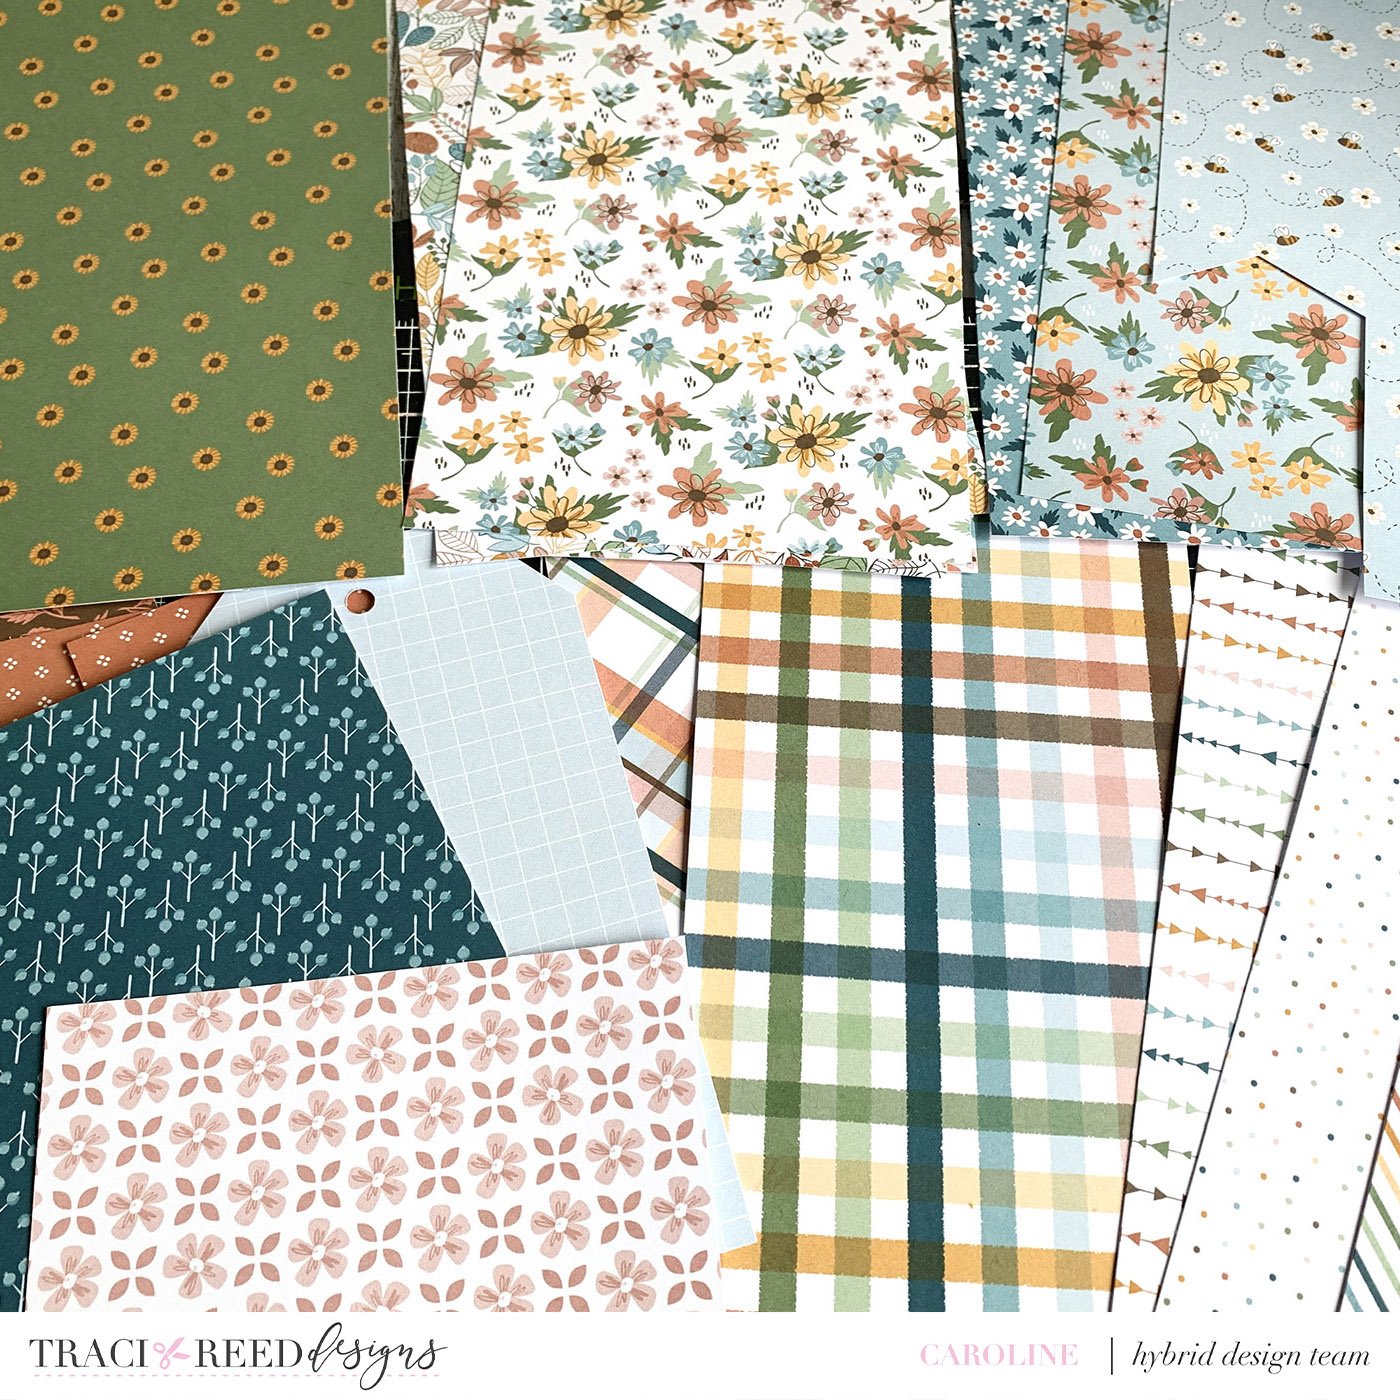
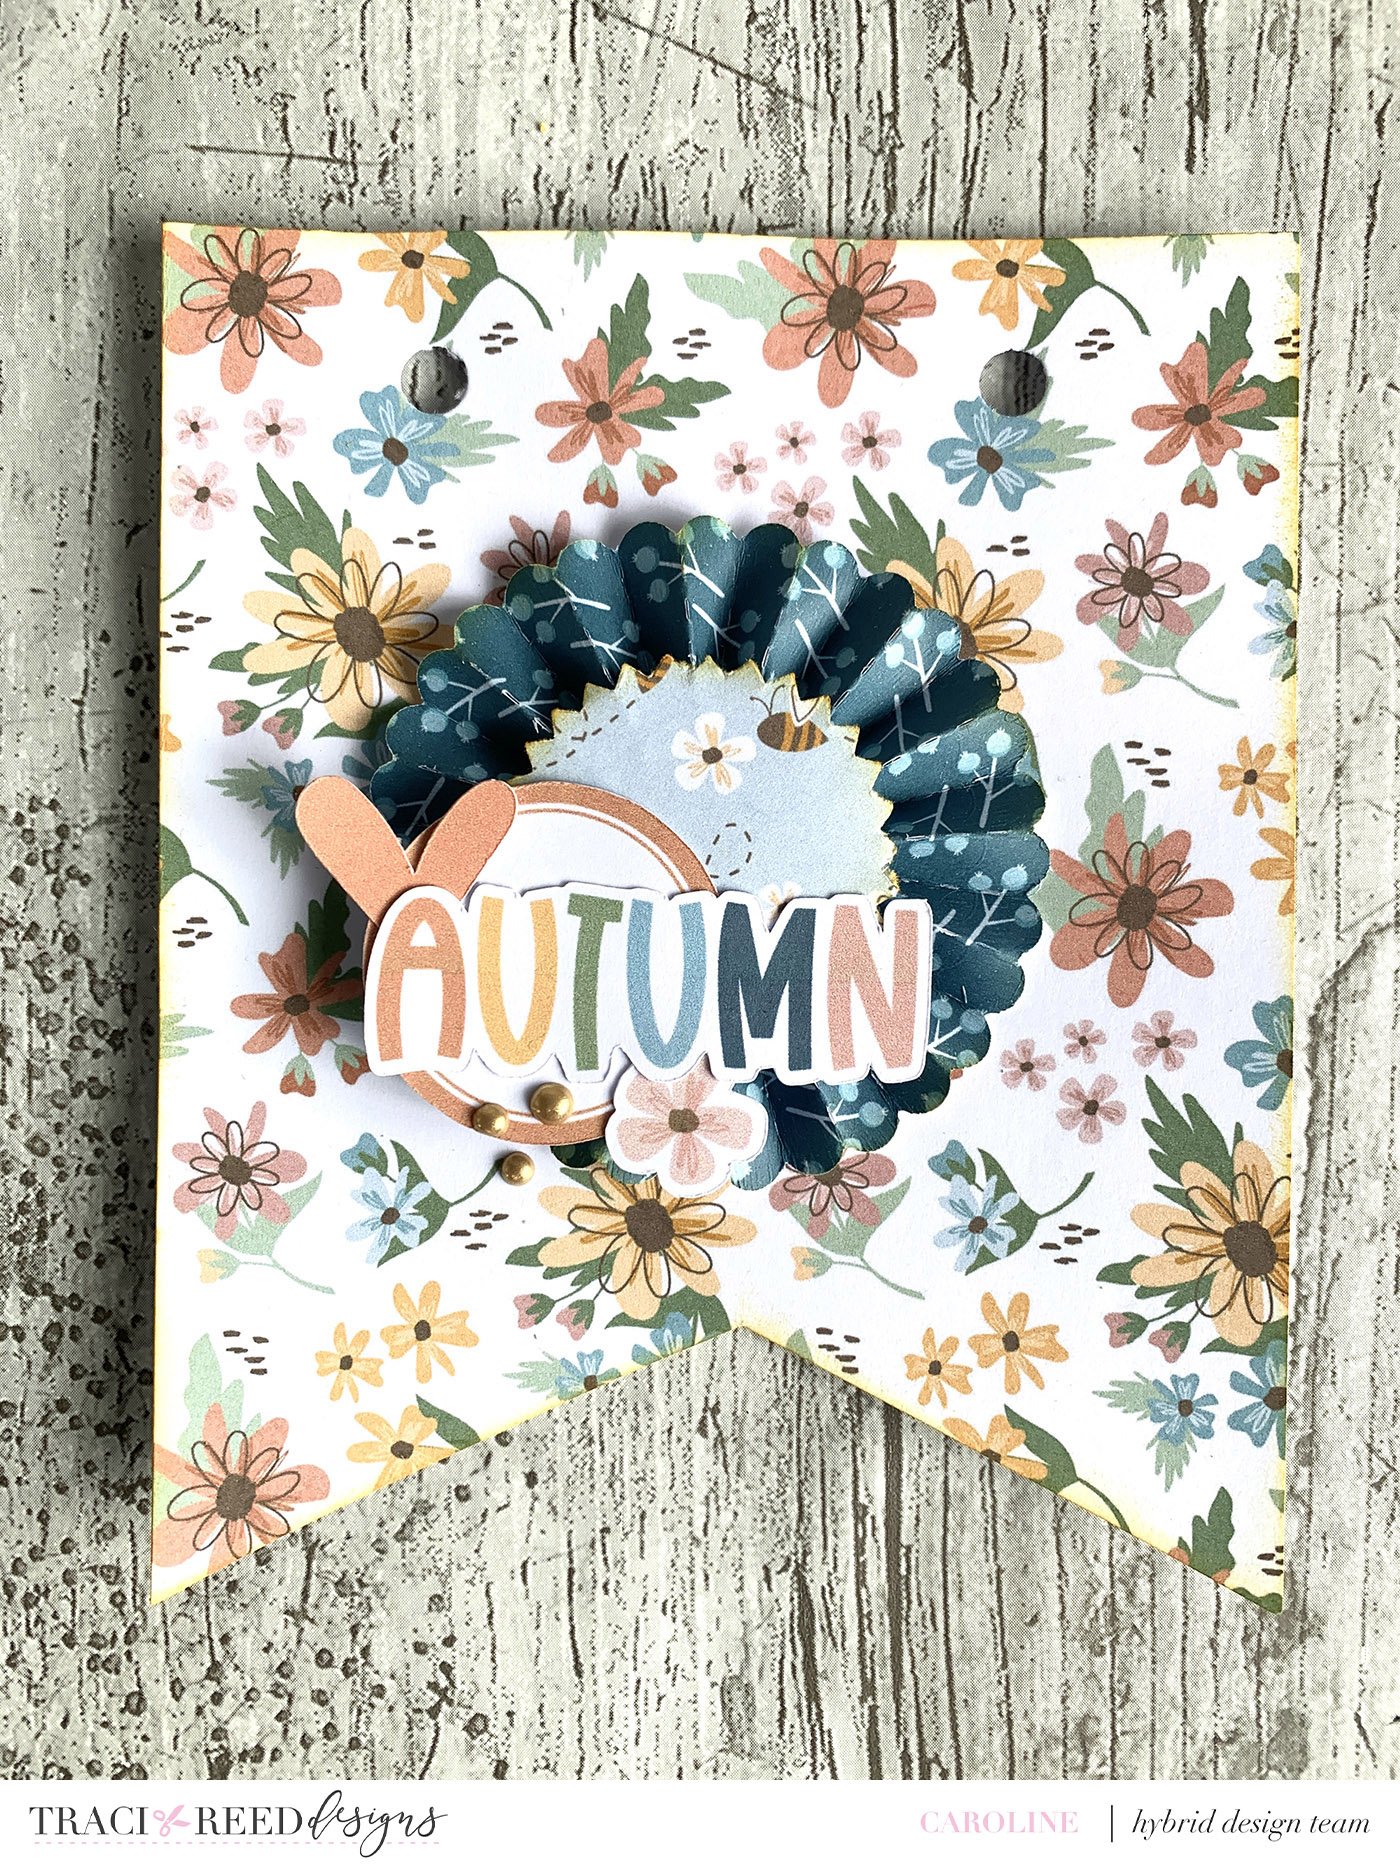
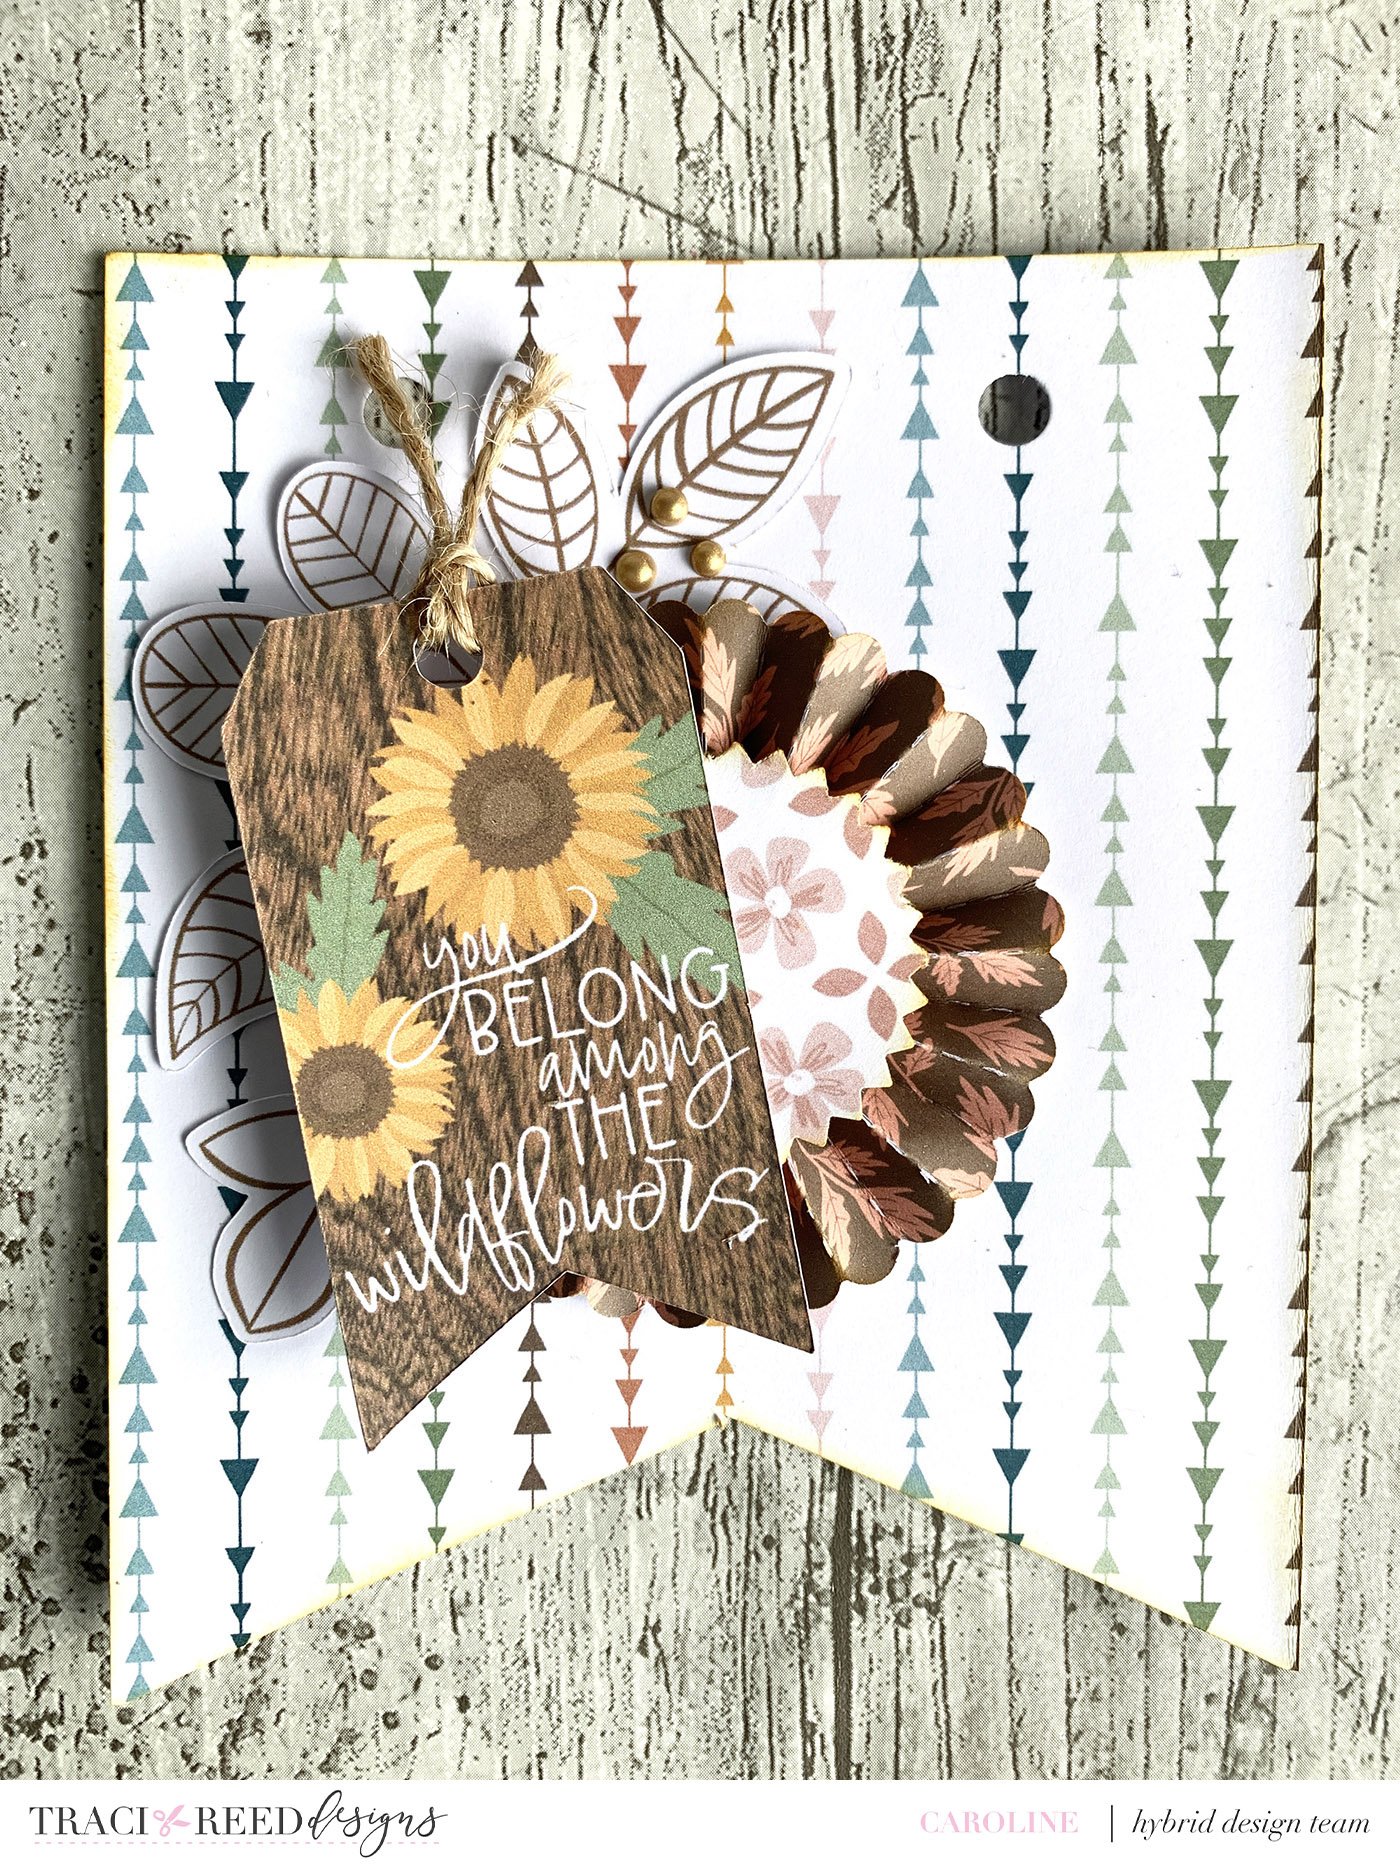
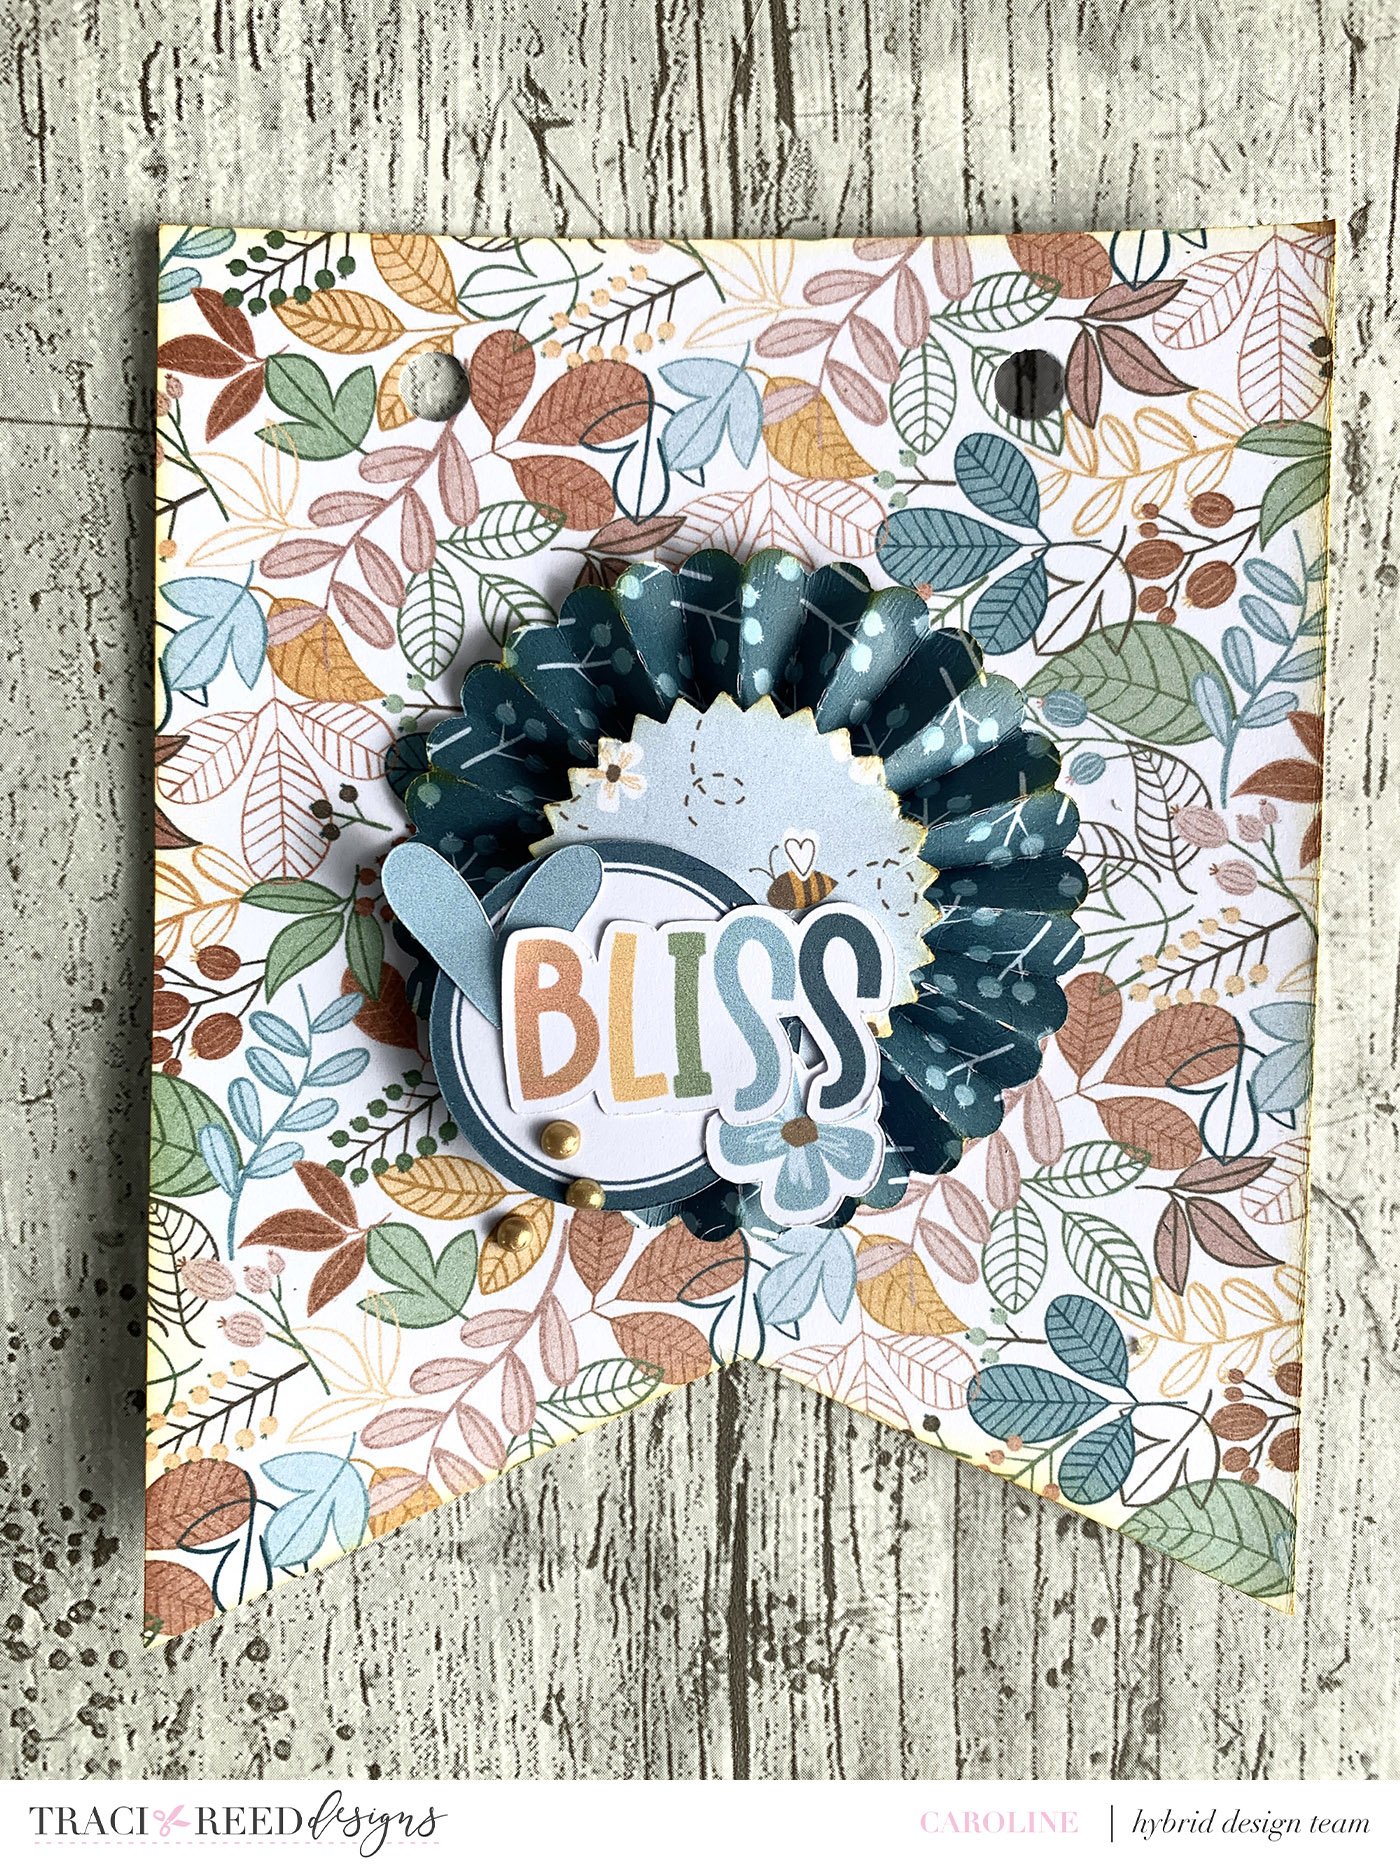
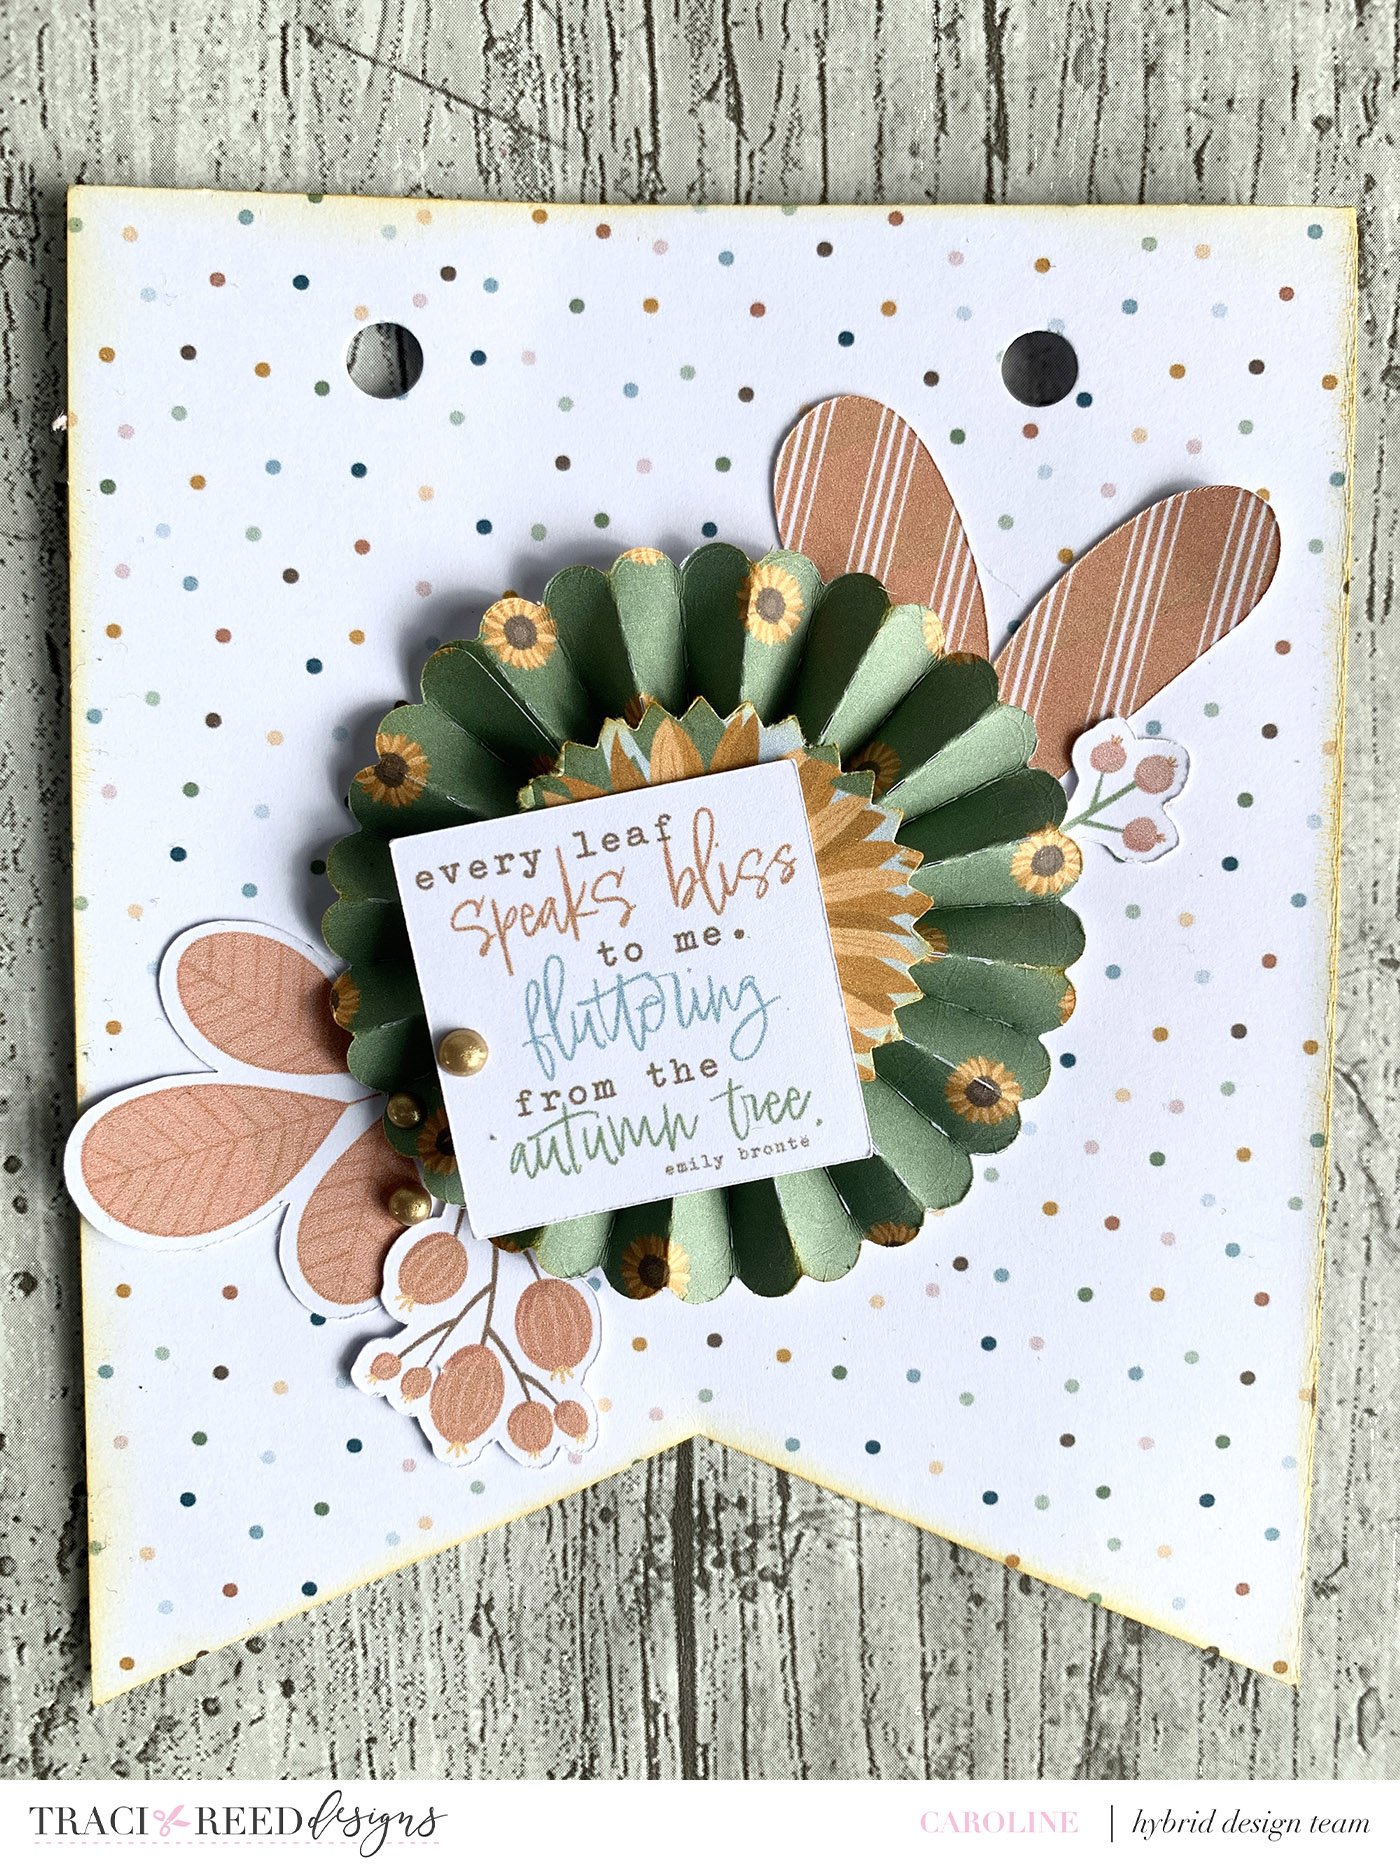
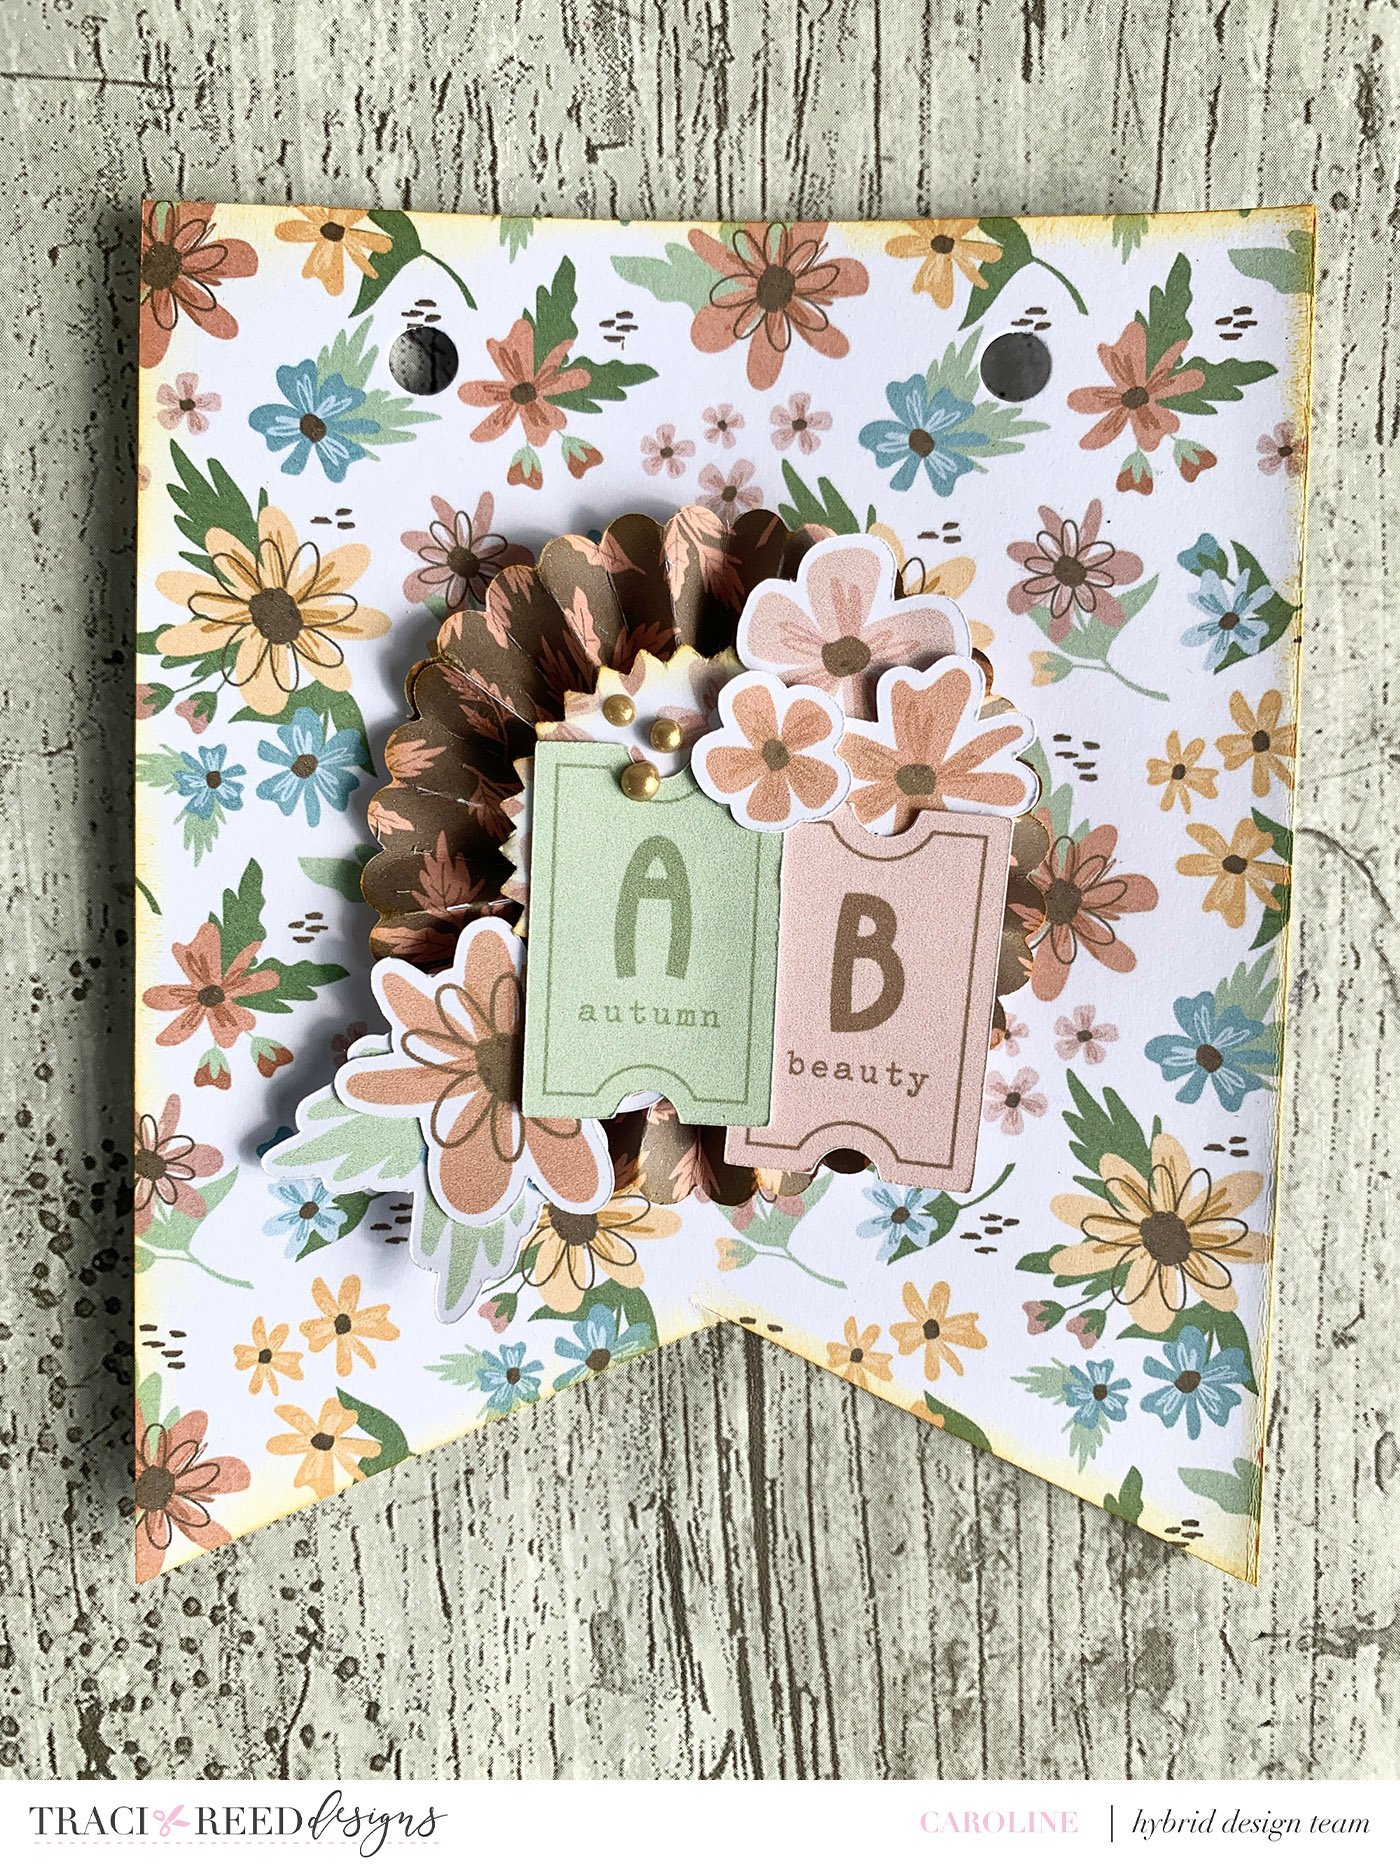
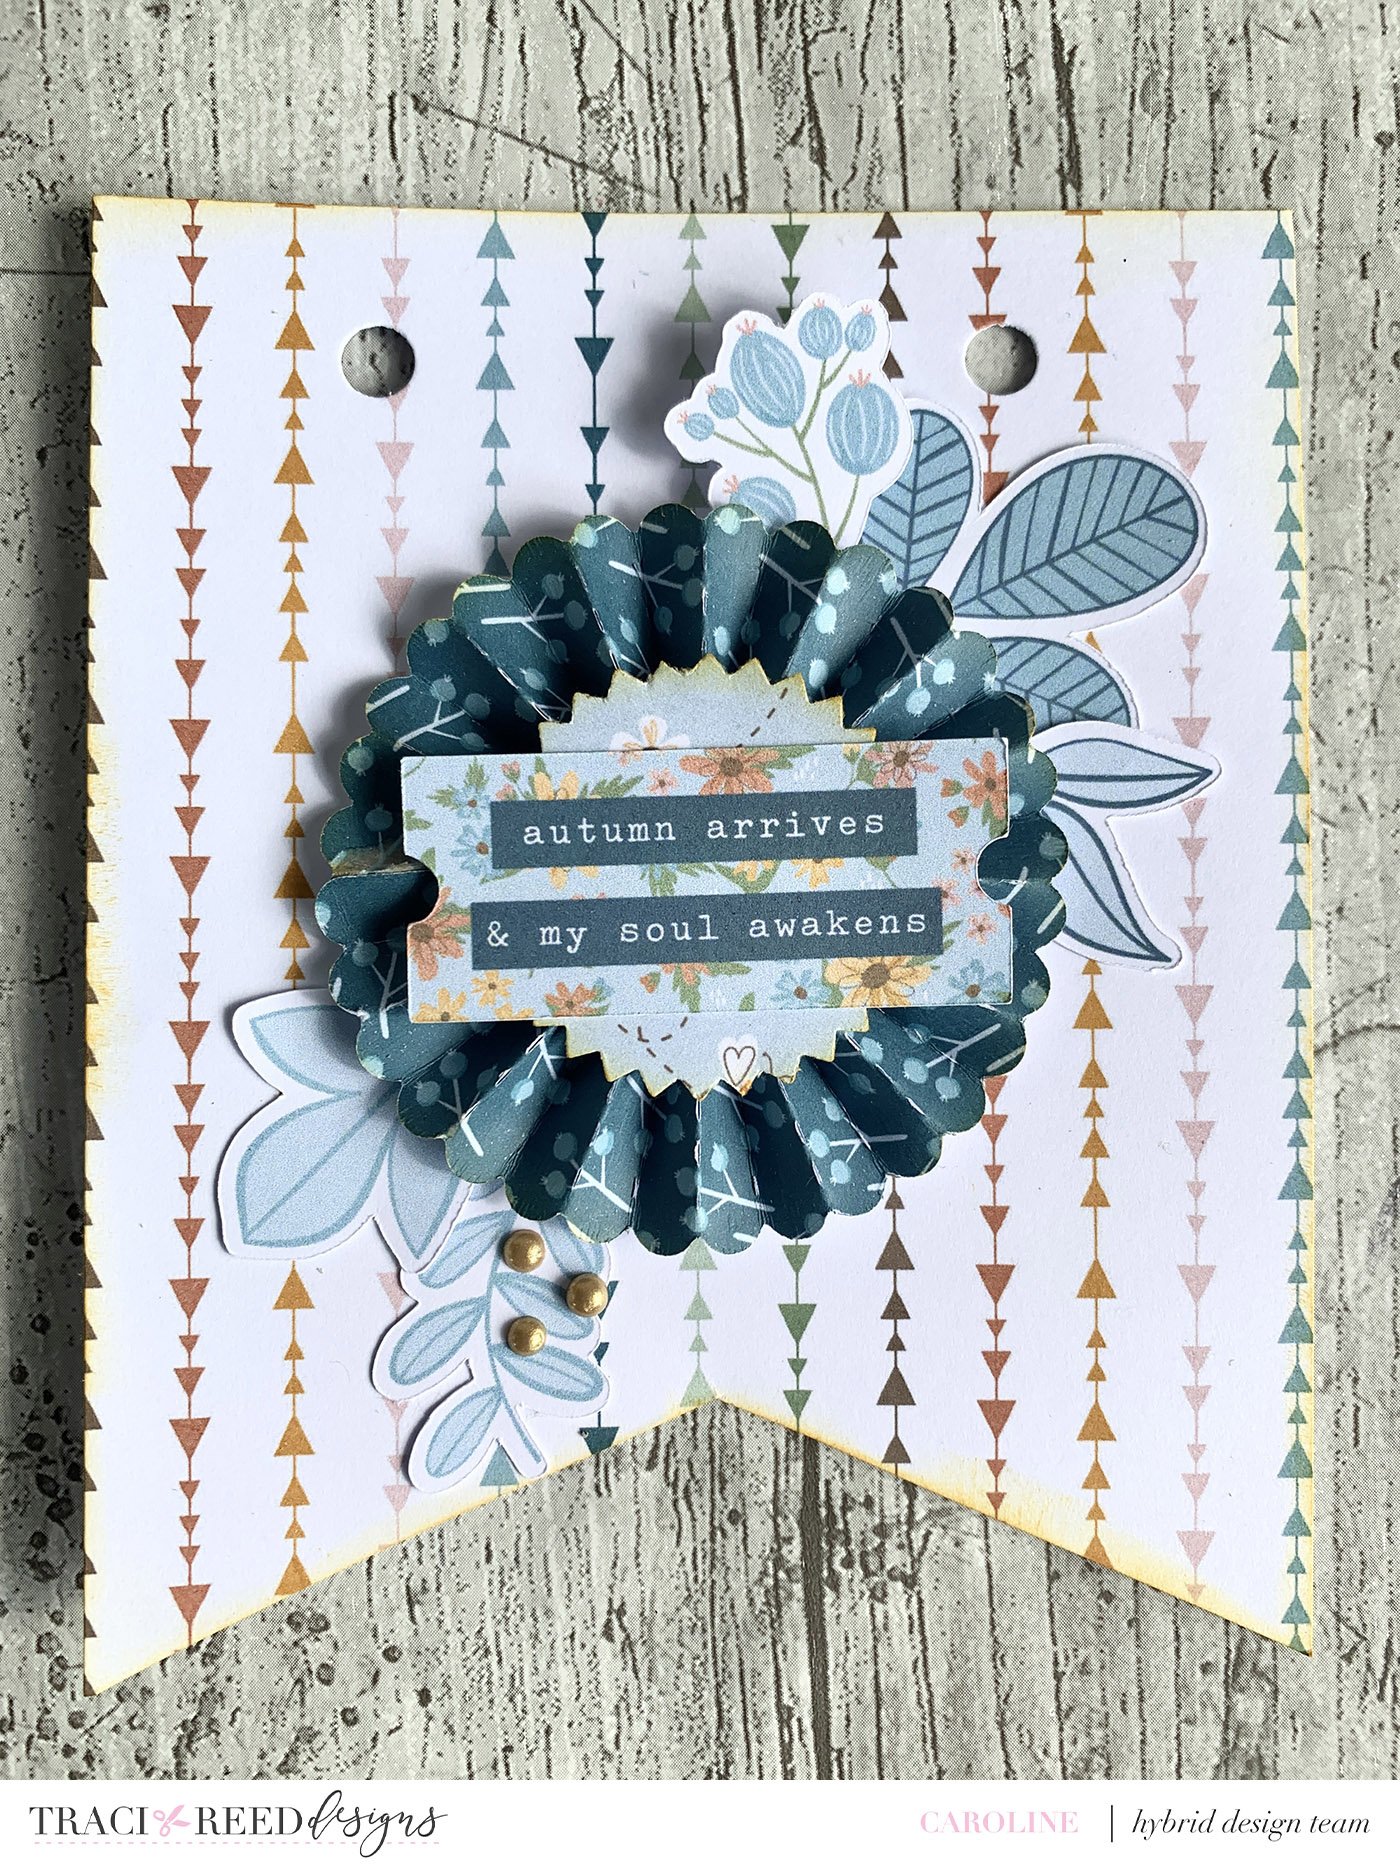
I decided I wanted to showcase my favourite papers as the backgrounds of my bunting ... those florals! I opted to add in some of the small repeating patterns as a break for the eye and to enable me to bring in some bolder patterns for my rosettes. I then decided to go with some more solid colour patterns for the majority of my rosettes and the centre pieces of those – just to help them pop.
Step Two – Cut the bunting
Once I had decided on my papers I made a template for my bunting background. I decided on a flag design rather than the usual downward triangle. I have made paper bunting before and both shapes look great.
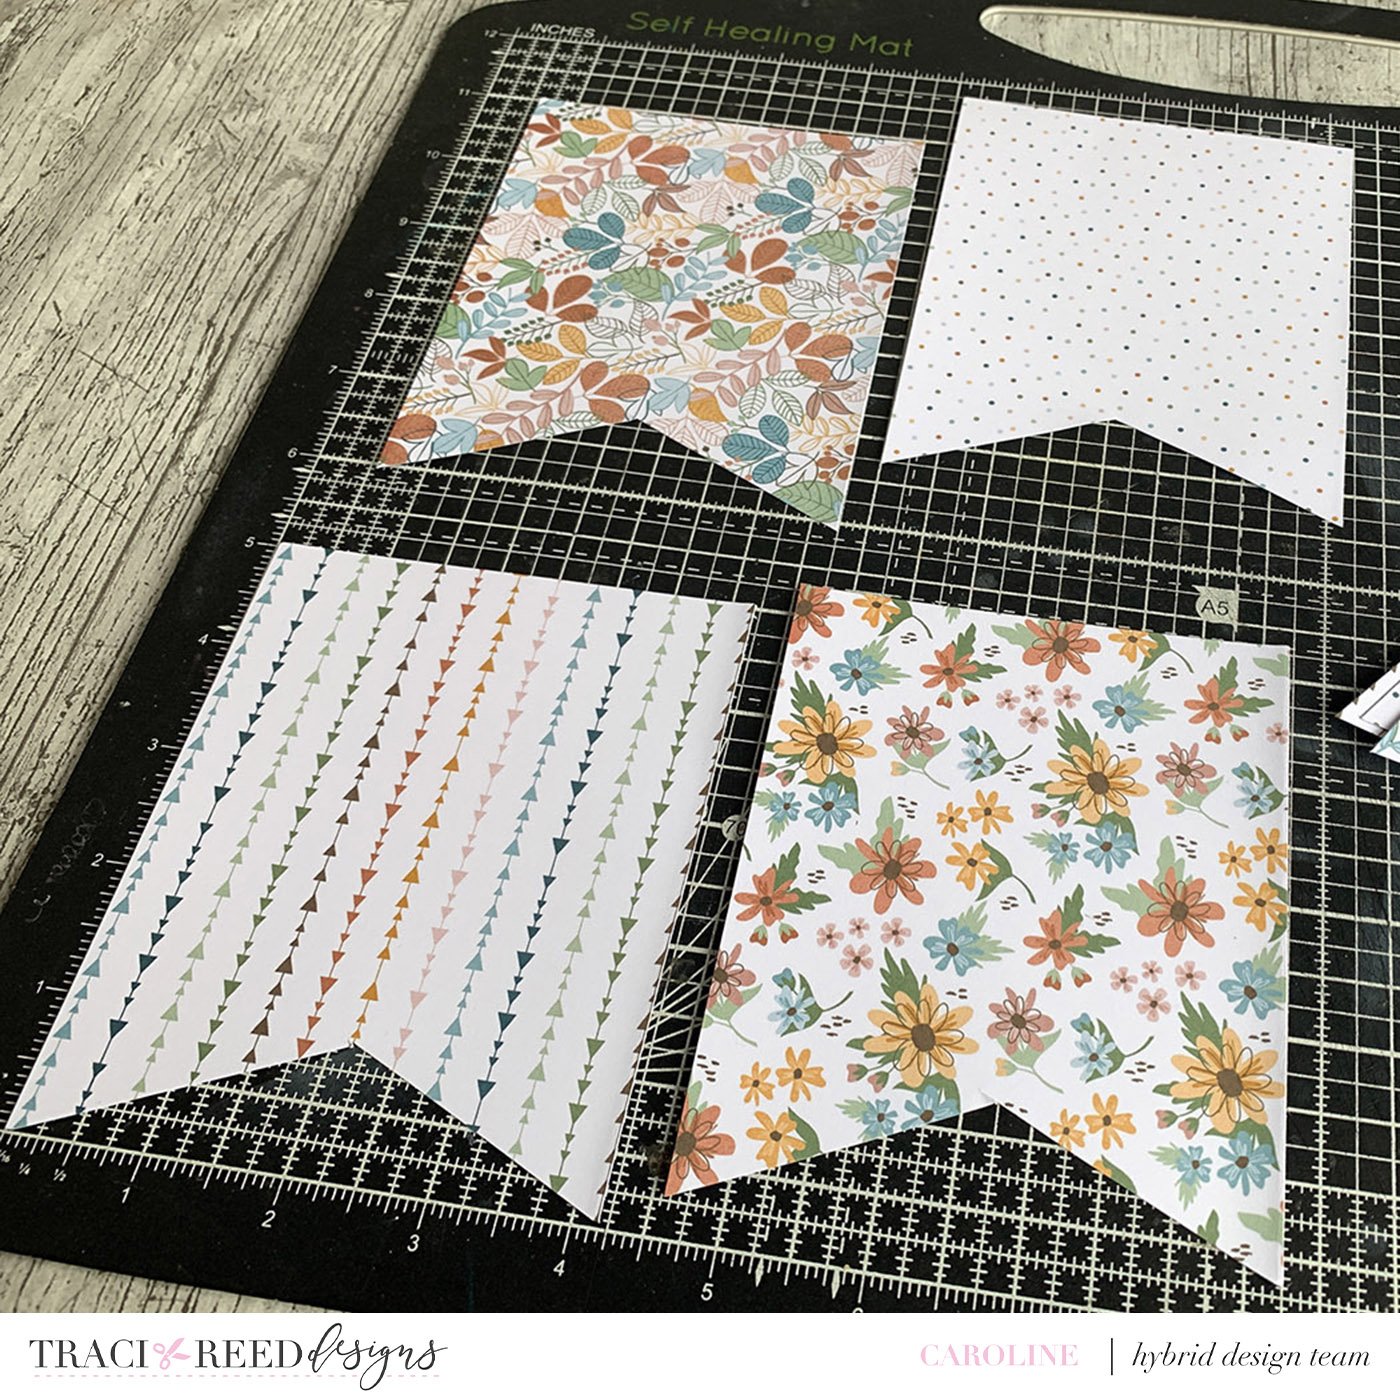
The main thing at this stage is to decide where your bunting will hang so that the size of each piece of bunting works for that space (mine is actually quite small as it is for behind my craft desk).
Each flag is around 4 inches wide by 4.25 tall.
I decided to ink the edges of my flags with ink for a finished look. I can really recommend Distress Ink in “Wild Honey” as a great pair for the Equinox collection!
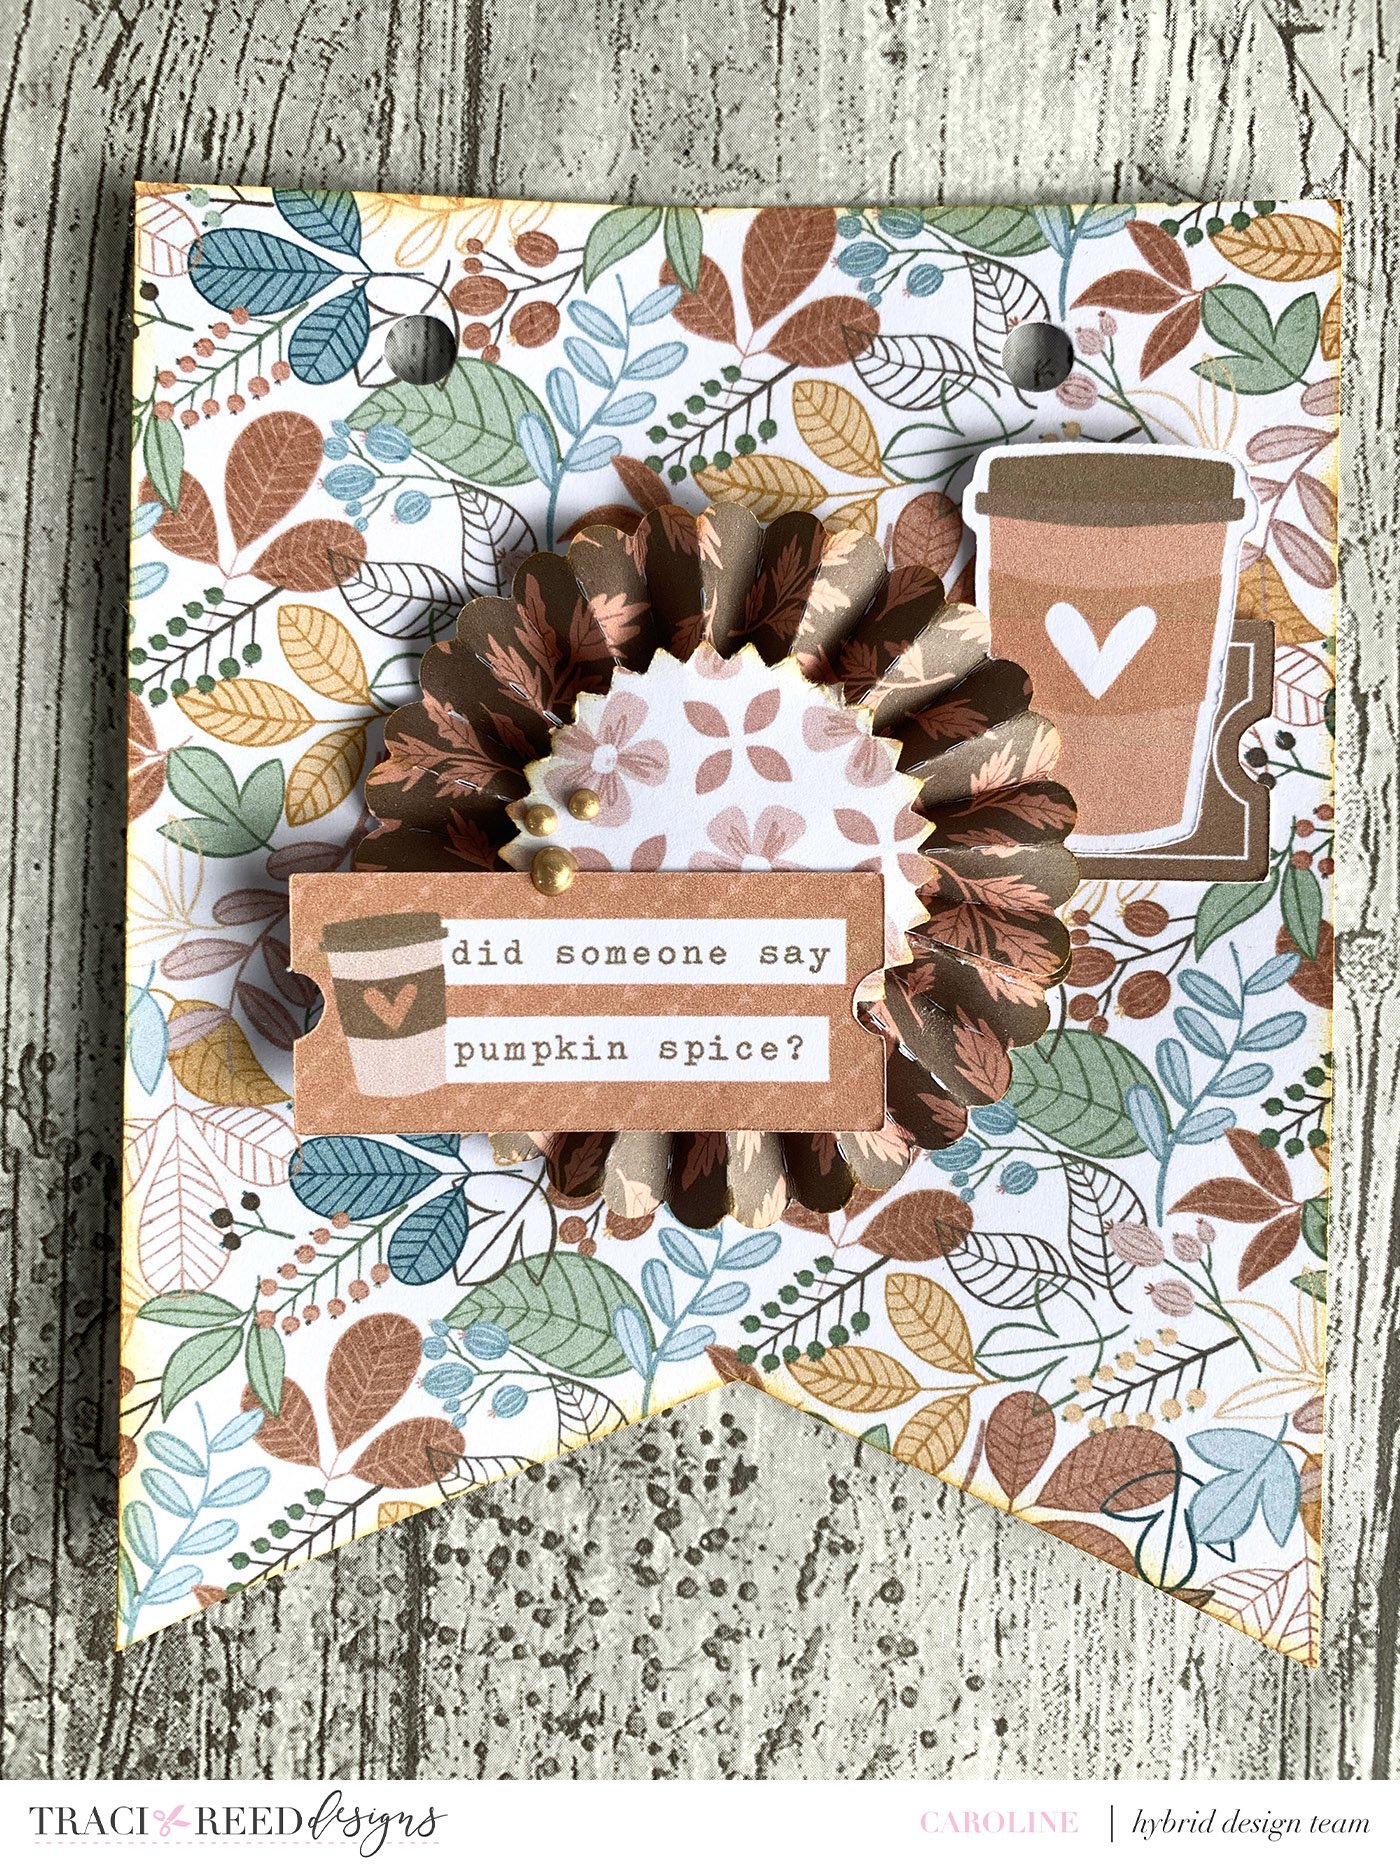
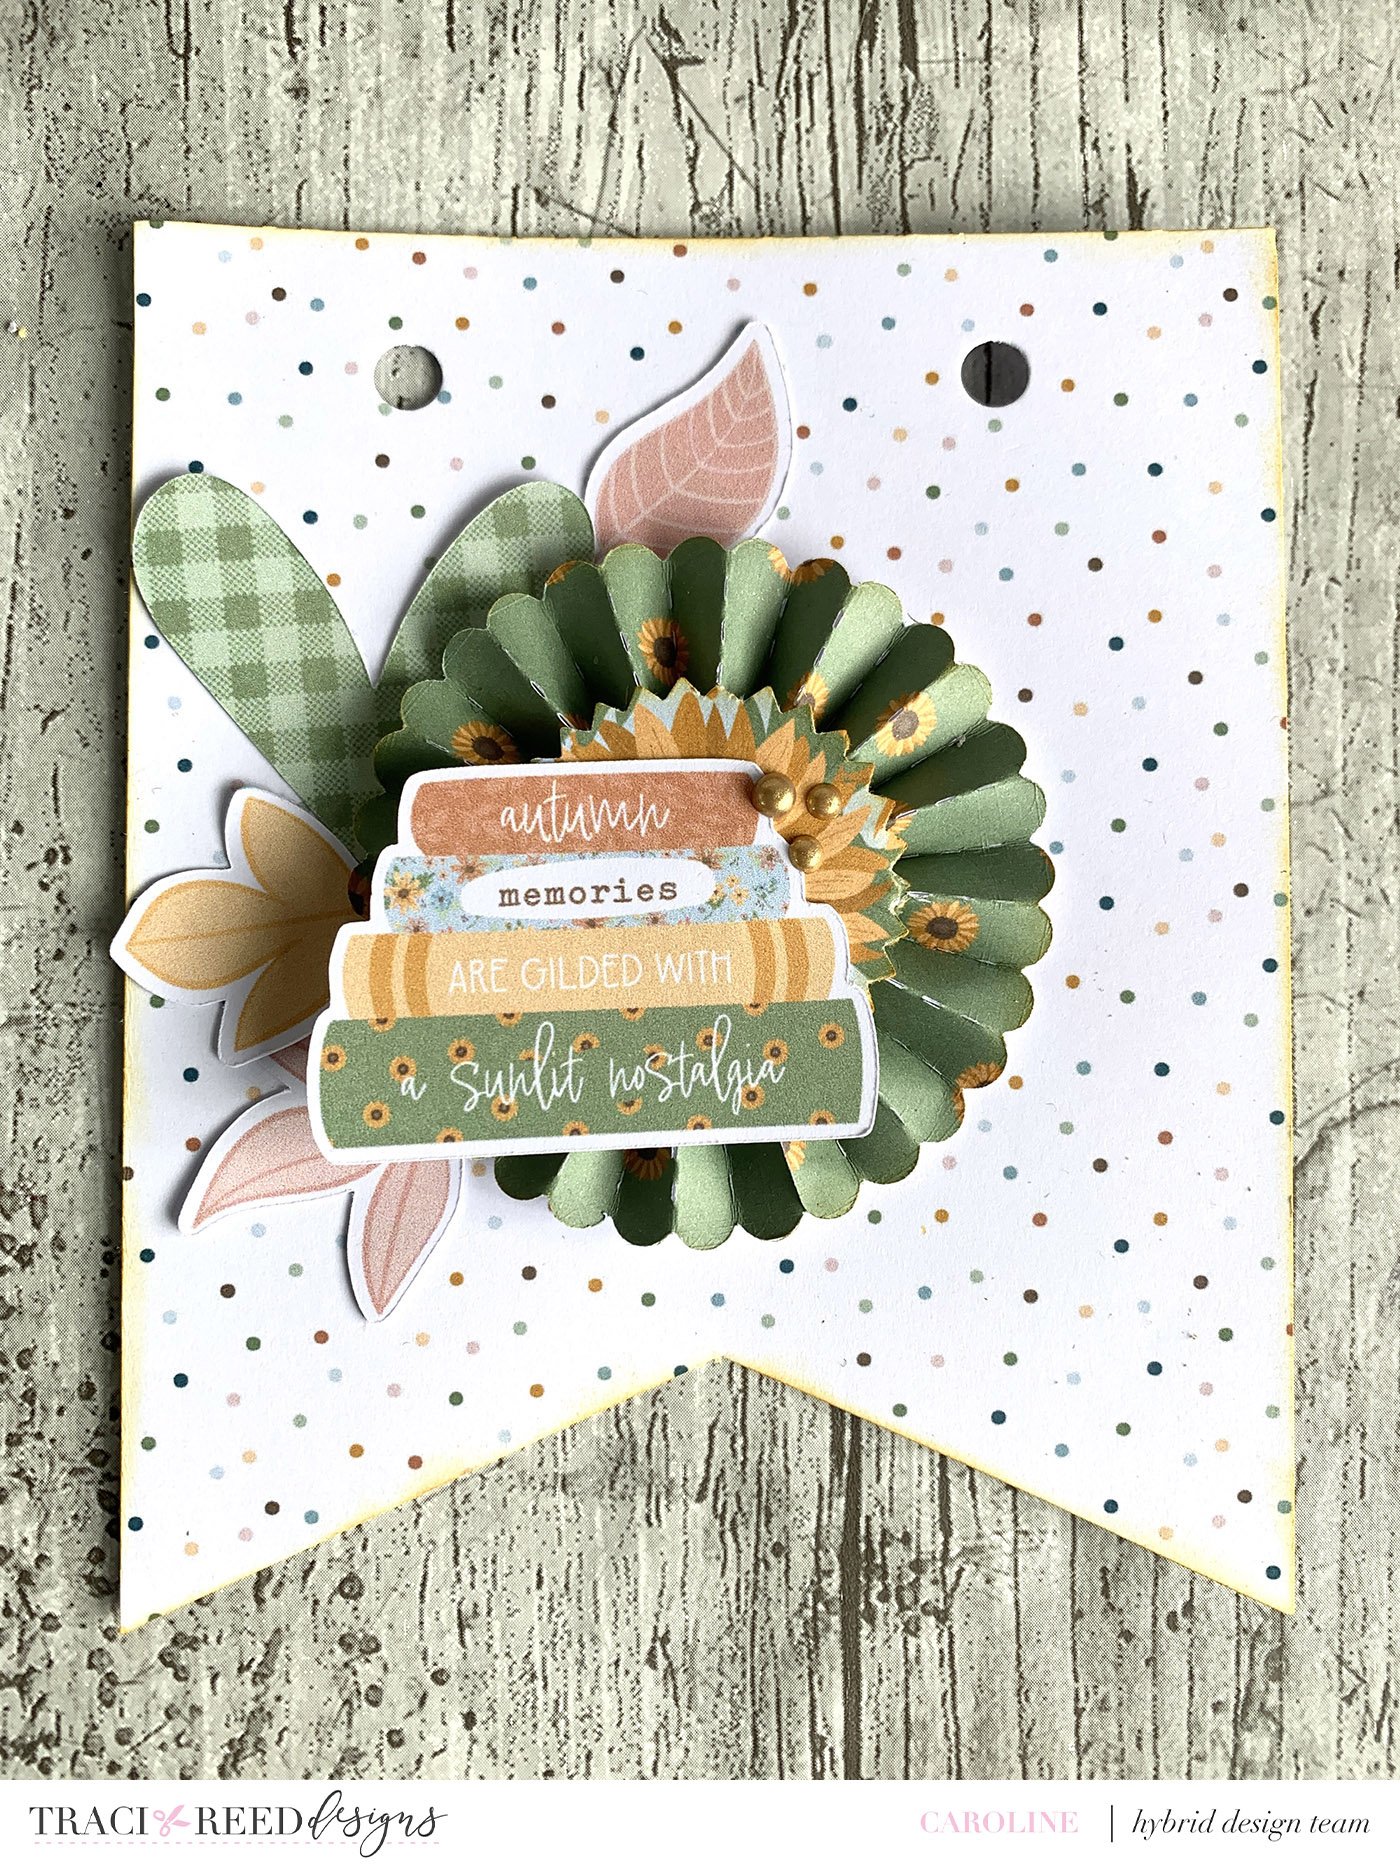
Step Three – Create your centre pieces
I love the look of the rosette in the centre of bunting so I decided to go with the same base design for each flag but mix things up with the papers that I used and the die cuts I embellished with later.


I have a die that I can run through my Big Shot to create rosettes but these are easily made with a 1inch strip of paper that you tightly fold back and forth in a fan. You adhere the ends together, flatten and add a circle on the top (I like a pinked circle) and then adhere down (with lots of strong adhesive) to the flag.
***TIP*** It is good to create your rosette out of a contrasting colour to your bunting background so that it really pops.
Step Four – Pair things together
Next I laid out my bunting in the order I wanted it to hang. I paired each flag with a rosette (without adhering anything so I could change my mind as I built my embellishments).
Next, my favourite part – going through my remaining stickers and adding the ones that I wanted to each flag as a little pile. I didn’t want to print and cut more – a little challenge I had set for myself, but you an TOTALLY print more if you want icons to repeat or match!!

At this point I still hadn’t adhered anything to the flags so that I could move the florals and leaves around if I wanted. I so enjoyed this stage of the creative fun. Each flag was coming a mini work of art!
Once I had things laid down in combinations I loved, I adhered everything down - layering for interest.
Step 5 – Finishing touches


I added in some gold Nuvo drops to each flag for a different texture and some sparkle. I also added in some twine to a tag I had used on one flag. I left the flags to dry overnight as I have learned the hard lesson of rushing Nuvo drops!! I love the extra interest these give to the bunting and it is a way of having that look of a pearl or enamel dot without using up loads on the bunting!
Step 6 – String together, hang and enjoy!


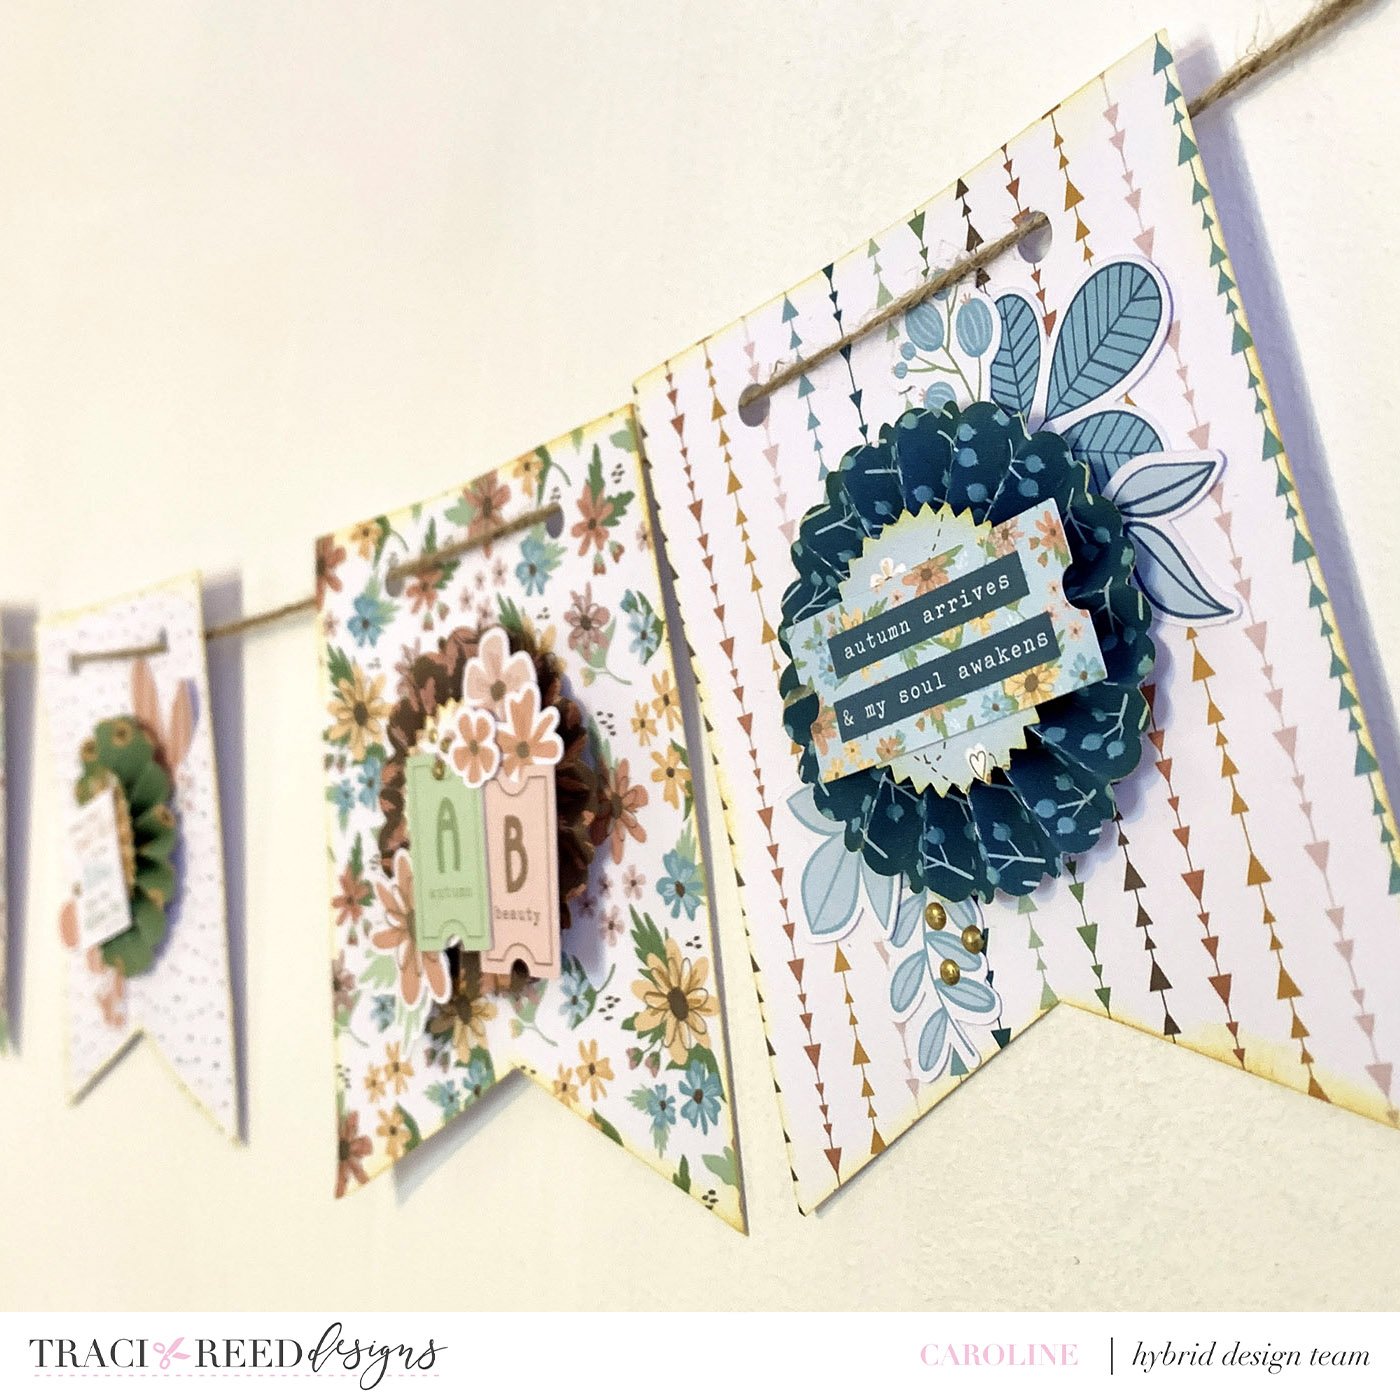
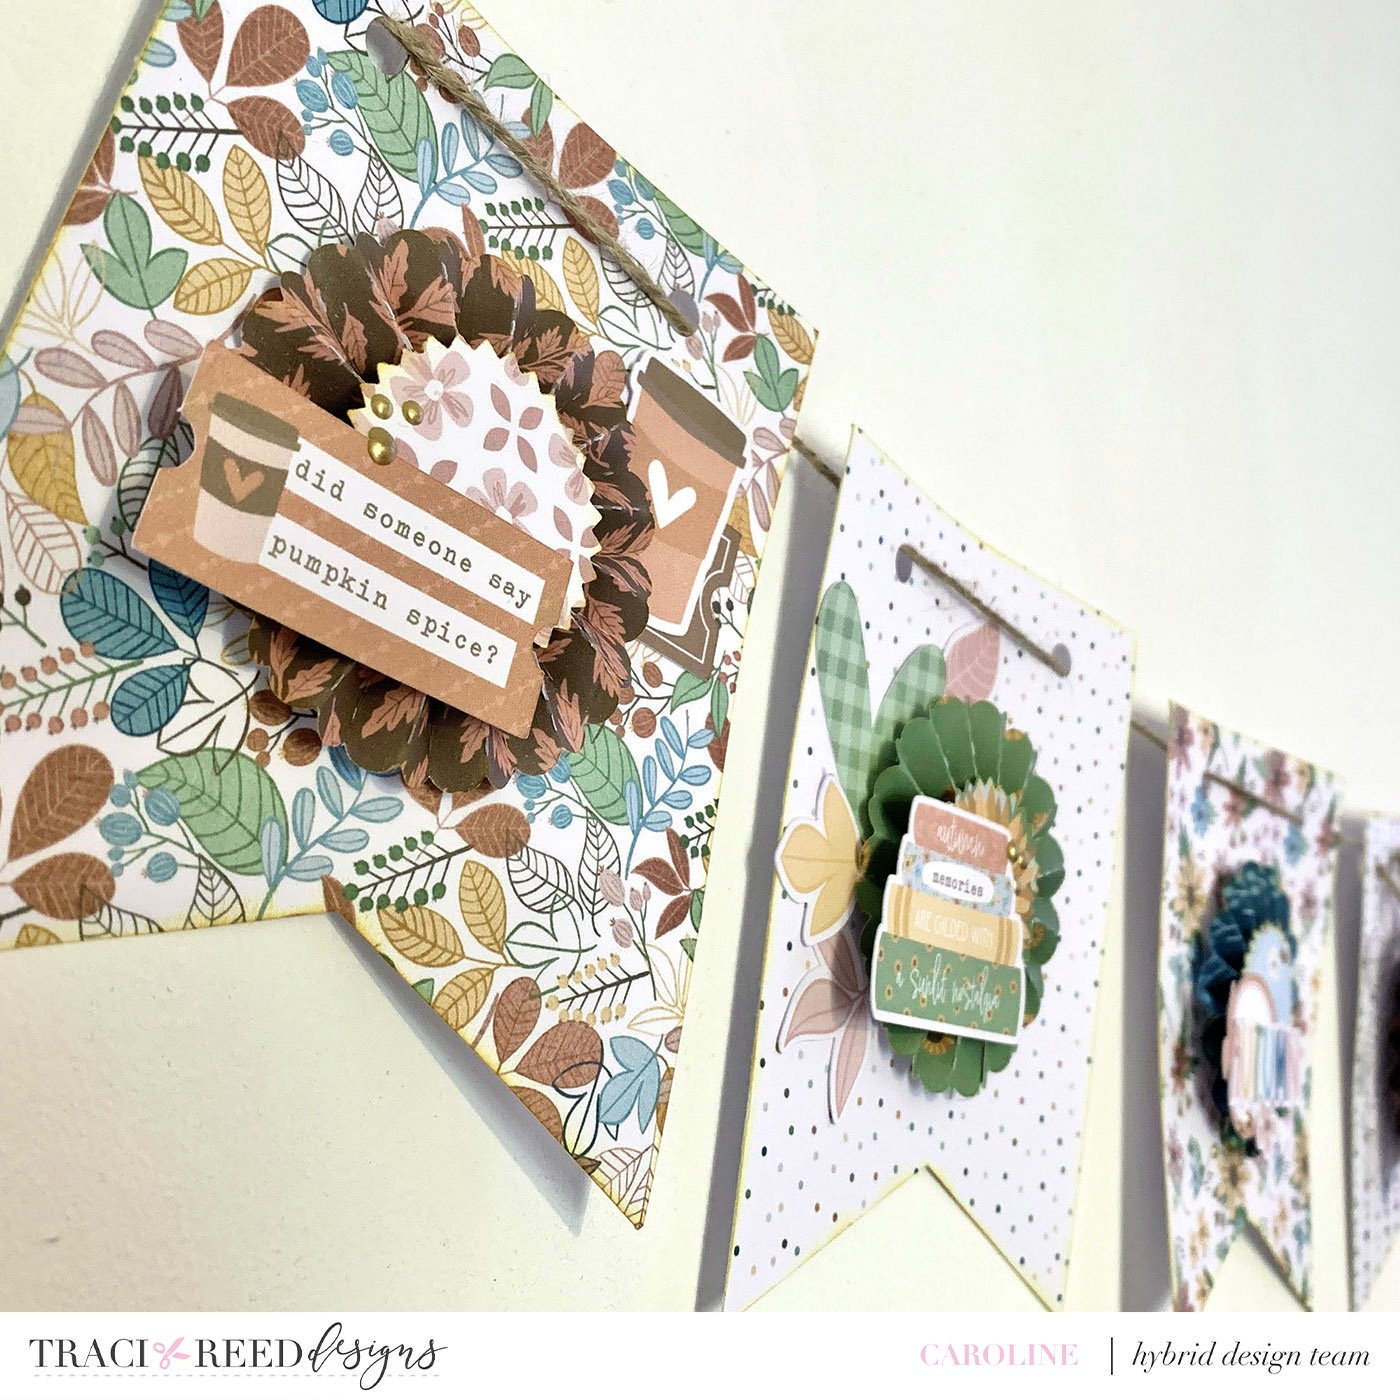
I am so pleased I thought to create this bunting and it makes my heart so happy to have this wonderful, seasonal décor hanging above my craft desk for me to see each time I look up. I love it so much that I think I may create some Halloween bunting when we get into October!
I really hope you have a go at creating your own paper bunting. It is so easy to do with a printable collection as you can print the papers as many times as you want and Traci’s collections always come with an AMAZING amount of die cuts so you will be spoiled for choice!!
TRD Products Used in this Post
